How to Replace Power Switch on Nintendo Home Console – Super Nintendo Repair Guide
Duration: 45 minutes
Steps: 4 Steps
Get ready to breathe new life into your device! This step-by-step guide from Salvation Repair will walk you through the process of removing the power switch connected to the motherboard. Don’t worry, it’s easier than you think! And if you’re feeling extra handy, you can even use these steps in reverse to install a brand new power switch. Let’s get started!
Step 1

– Grab your Gamebit 4.5mm screwdriver and take out the six screws chilling on the underside of the system. Easy peasy, right?
Tools Used

Step 2


– Gently turn the device back to its original position.
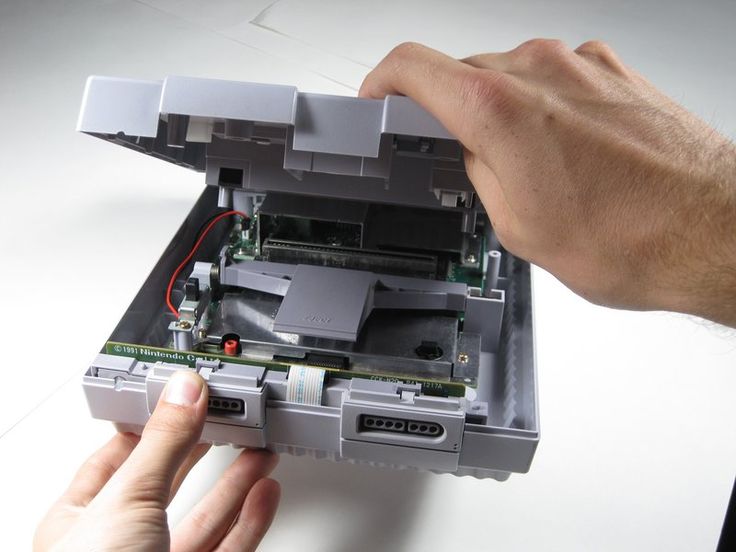
– Find the seam where the two halves meet. Carefully lift and part the upper section from the lower section of the case.
Step 3

– Time to get started! Remove the two 11.7 mm Phillips #2 screws that hold the power switch in place on the motherboard.
Step 4


Don’t yank the connector by the wires. You could mess up the wires or the socket.
The power button hangs out with the motherboard, cozying up near the top left corner of the console.
– Now that you’ve got everything back in place, just reverse these steps to wrap things up!
– Didn’t quite finish? No worries, you can always schedule a repair if you need a hand.
– Remember, if things get tricky or you need a bit of extra help, schedule a repair anytime!
Success!