How To Replace Samsung Galaxy A32 5G Battery: Step-by-Step Guide
Duration: 45 minutes
Steps: 24 Steps
Just a friendly reminder: make sure to drain your battery to below 25% before diving into the disassembly of your phone. Safety first, and we got your back!
Get ready to swap out that tired or lifeless battery in your Samsung Galaxy A32 5G! Before you dive in, make sure to drain that battery to below 25%. It’s a smart move to keep things safe and sound in case we have a little mishap during the repair. And if your battery looks like a balloon, be sure to take extra care. Don’t forget, you’ll need some replacement adhesive to stick everything back together when you’re done. If you need help, you can always schedule a repair.
Step 1

You can use a hair dryer, heat gun, or hot plate to warm things up a bit, but keep an eye on the temperature! Overheating your phone can lead to some serious trouble for the display and internal battery, which are both heat-sensitive. If you need help, you can always schedule a repair.
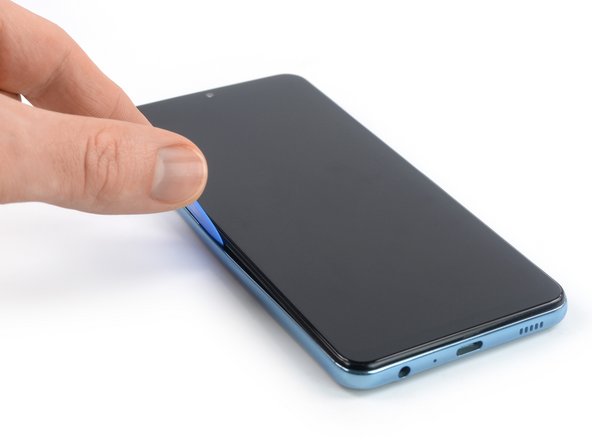
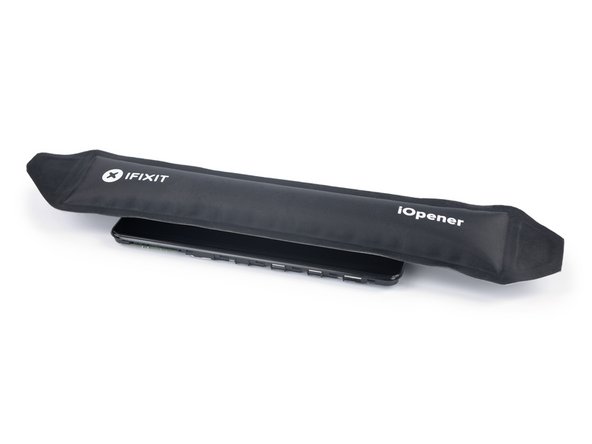
– Grab your trusty iOpener and give it a cozy hug on the back cover for a solid two minutes. This will help soften the adhesive hiding underneath, making your repair journey smoother!


Step 2


If the back cover is a bit cracked, the suction handle might not stick as well as you’d like. Give it a go with some strong tape, or for a more permanent solution, superglue that suction handle down and let it set so you’re ready to roll!
Having a tough time making a gap? No worries! Just apply a bit more heat to soften the adhesive further. Remember to follow the iOpener instructions to keep things from getting too hot to handle!
– Grab a suction handle and stick it to the bottom edge of the back cover—aim for the edge, it’s a prime spot!
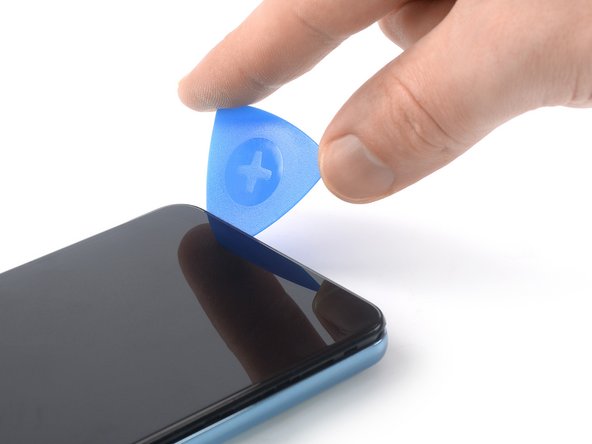
– Gently pull the back cover using the suction handle to create a tiny gap between it and the frame. You got this!
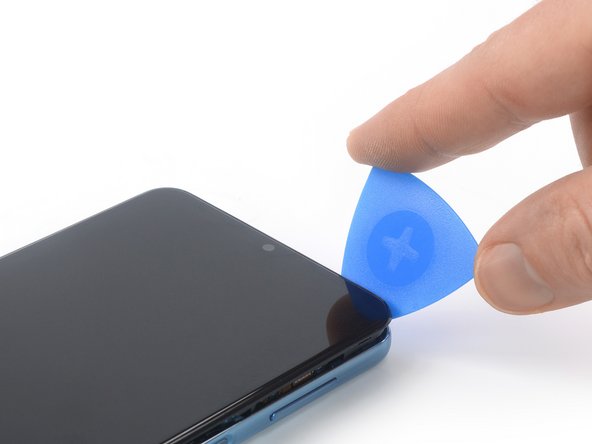
– Slide an opening pick into that gap you just made. Time to get creative!
– Carefully glide the opening pick down to the bottom right corner to slice through that stubborn adhesive.
– Leave the opening pick right where it is to keep that adhesive from playing hard to get again.
Tools Used

Step 3


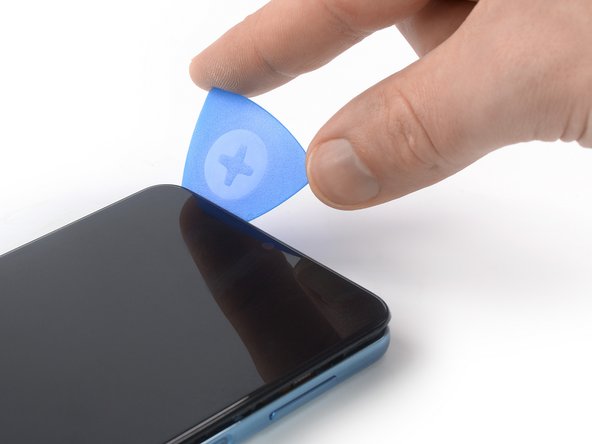
– Grab a second opening pick and gently slide it into the bottom edge of your phone.
– Now, glide that pick over to the bottom left corner to cut through the adhesive like a pro.
– Keep those opening picks where they are to stop the adhesive from sticking back together.
Step 4


If the adhesive is giving you a tough time and feels hard to slice through, it probably just needs a little warmth. Grab your iOpener and give it a cozy one to two minutes to heat things up.
– Pop in a third opening pick right at the bottom left corner of your phone.
– Gently glide that opening pick along the left edge to cut through the adhesive like a boss.
– Keep the opening pick stuck in the top left corner—this little buddy will stop the adhesive from sealing up again.
Tools Used
Step 5


– Slide in a fourth opening pick right under the top left corner of your device.
– Gently glide that pick along the top edge to cut through the adhesive like a pro.
– Keep the pick wedged in the top right corner to stop the adhesive from sticking back.
Step 6


– Pop in a fifth opening pick right underneath that top right corner and get ready to rock!
– Gently slide that pick along the right edge of the back cover to cut through the rest of that pesky adhesive. You’re doing great!
Step 7


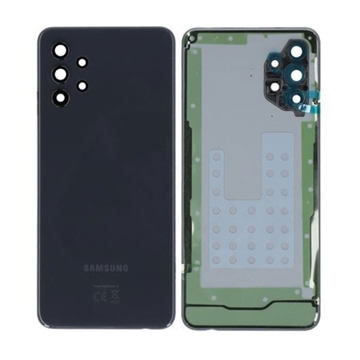
– Pop off that back cover like a pro!
– Once you’ve got the cover off, grab some isopropyl alcohol (>90%) and clean up the areas that need fresh adhesive. A little tidying goes a long way!
– Now, it’s time to secure that new back cover! Use some pre-cut adhesive or double-sided tape to hold it in place. After you’ve got it all nice and snug, give your phone a good squeeze for a few minutes. A stack of heavy books works wonders for this—it’s like giving your phone a supportive hug!
Step 8


– Grab your trusty SIM card eject tool, a SIM eject bit, or even a straightened paper clip. Now, locate that little hole on the SIM tray on the left edge of your phone and insert your tool of choice!
– Give it a gentle push into the hole to pop out the SIM card tray. You’ve got this!
– Now, carefully pull out the SIM card tray. Easy peasy!
Tools Used

Step 9


– Grab your trusty Phillips screwdriver and get ready to tackle those sixteen 4.1 mm screws holding the midframe in place. You’ve got this!
Step 10


– Grab your trusty spudger and gently work it under the power and volume button flex cable. With a little bit of finesse, pry the connector straight up from its socket and disconnect it. You’ve got this!
Tools Used

Step 11


The midframe of the Samsung Galaxy A32 5G is snugly secured by some clever little plastic clips. Just a friendly reminder to take care when handling them!
– Grab your trusty opening pick and gently slide it between the midframe and front panel assembly on the left side of the phone, right where the SIM tray makes its grand appearance.
Step 12


The plastic clips of the midframe are snugly in position. You might need to give them a little extra oomph to pop them loose!
– Gently glide the opening pick down the left side of the phone to pop those plastic clips free.
Step 13


– Gently slide the opening pick around the bottom left corner, just like you’re giving your device a friendly hug.
– Now, glide that opening pick along the bottom edge of the phone to pop those plastic clips free like they’re doing a little dance!
Step 14


– Gently glide the opening pick around that bottom right corner like you mean it!
– Now, slide that pick along the right edge of your phone to pop those plastic clips loose. You’ve got this!
Step 15

– Gently glide that opening pick around the top right corner like you’re on a little adventure!
– Keep that pick moving along the top edge of your device to pop off those last stubborn plastic clips. You’re doing great!


Step 19
Hey there! Just a friendly reminder: avoid zapping your battery with direct heat, as it could lead to a safety boo-boo. Stay safe and keep things cool! If you need help, you can always schedule a repair.
Feel free to grab a hair dryer, heat gun, or hot plate to help out, just make sure you don’t turn your device into a little puddle of goo with too much heat!
Step 20

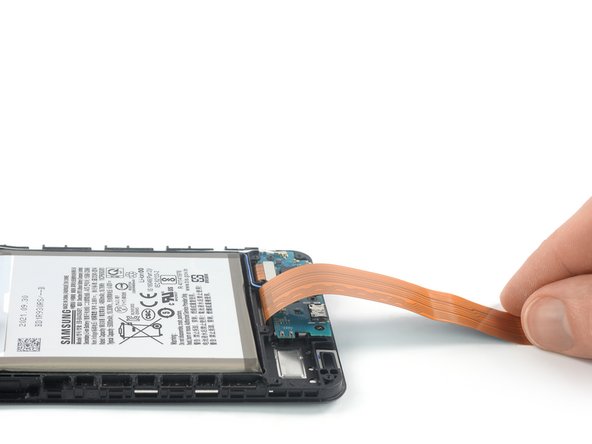
As you tackle the next step, remember to keep it cool with the cable! No sharp folds—just a gentle bend to keep things safe and sound.
Consider using a little piece of tape to gently hold the cable down on your workspace. This way, you can keep it safe and sound while you tackle that battery removal like a pro!
– Gently fold the display flex cable toward the charging port to clear the way for accessing the battery.
Step 21


Be super careful not to poke or twist that battery with your tool—doing so could lead to a leak of some not-so-friendly chemicals or even start a fire!
The battery adhesive on your Samsung Galaxy A32 5G is pretty sturdy. If the trusty iOpener isn’t doing the trick alone, consider adding a few drops of high-concentration isopropyl alcohol (over 90%) in the little gaps between the battery and the midframe to help loosen things up.
For this step, slide your opening pick into the edge where there’s a wider gap between the midframe and the battery. This will give you a bit more room to maneuver and some solid leverage to work with.
– Slide an opening pick into the tiny gap between the battery and the frame. It’s like a little dance move for your tools!
– If you’re using isopropyl alcohol, give it a moment to work its magic. Let that alcohol soak into the battery adhesive for about two to three minutes before you gently pry the battery out.
Tools Used


Step 23

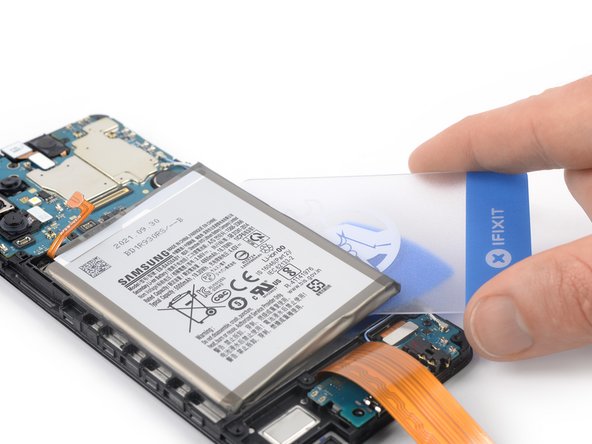

– Grab a trusty plastic card and slide it into the edge where your opening pick has already worked its magic.
– Gently guide that plastic card underneath the battery like a pro.
– Now, use your plastic card to carefully cut through the adhesive under the battery and lift it up with ease.
Step 24


Reinstalling a battery that’s damaged or misshapen? That’s a no-go, my friend! It’s a safety risk just waiting to happen. If you need help, you can always schedule a repair.
– Gently peel away the battery from the sticky stuff still hanging on.
– Take out the old battery.
– Grab that new battery and secure it in place using the pre-cut adhesive or some double-sided tape. Make sure to stick the adhesive where the old stuff was, not directly on the battery. Give that new battery a firm push to settle it in nicely.
– As you put everything back together, reconnect the battery to the motherboard temporarily to help it align just right. Once it’s snug, feel free to disconnect it again.