How to Replace Samsung Galaxy A40 Charging Problems
Duration: 45 minutes
Steps: 6 Steps
Get ready to tackle your Samsung Galaxy A70, A50, and A20 with this handy guide! It’s not just for these models, either—other Samsung devices might just find some love here too. Let’s dive in and get your tech back on track. And remember, if you need help, you can always schedule a repair!
Step 1


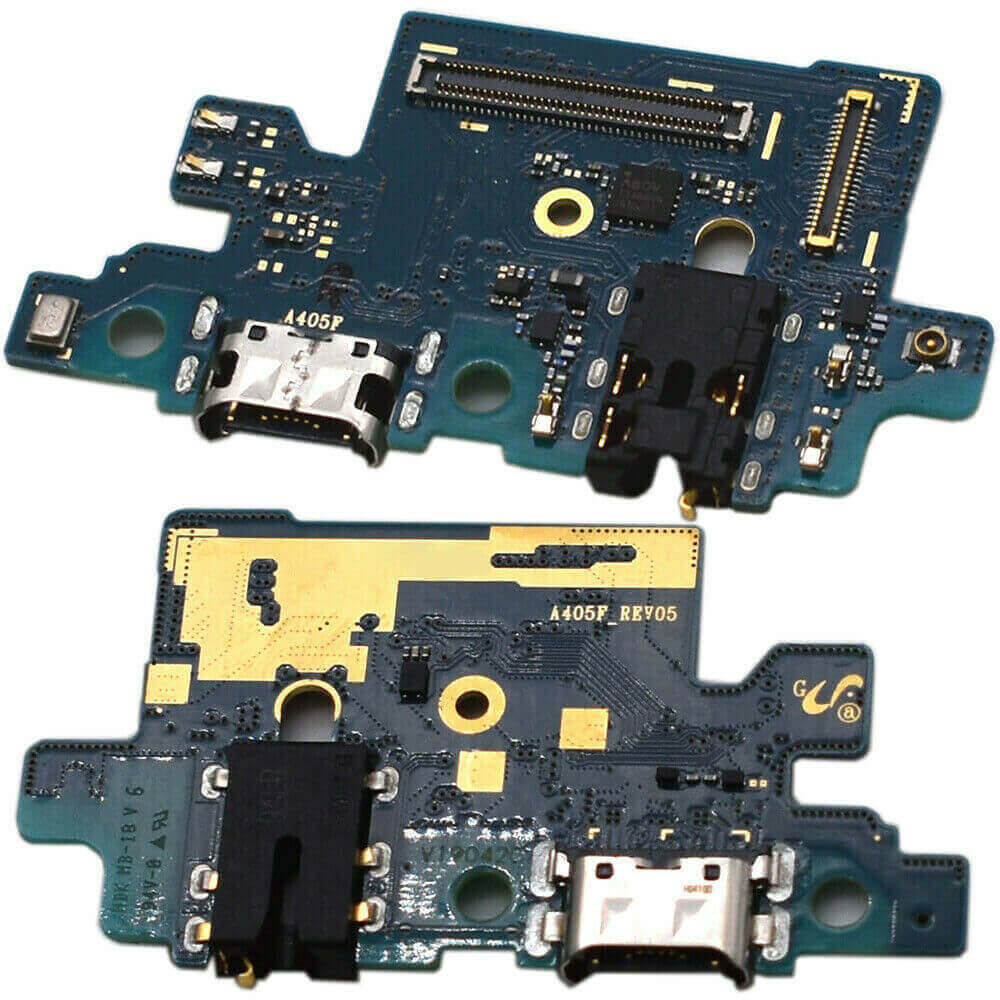
– This is the +5V line from the Charging port to the Motherboard. This line is the power connection. Make sure it’s all plugged in and ready to rock!
Step 2


– Warm things up a bit to make the adhesive more forgiving.
– Grab a suction cup, some plastic tools, and a bit of isopropyl alcohol to make things smoother.
– Unscrew those silver Phillips screws holding the device’s frame together.
Step 3


– First things first, let’s pop off that plastic cap from the Fingerprint flex cable connector and disconnect the cable. We’re just getting started!
– Next up, it’s time to remove the SIM Tray. Out it goes!
Step 4


First things first, let’s disconnect that battery. It’s a good idea to give your device a little break, and disconnecting the battery will make sure things stay safe while we work on it. If you need help, you can always schedule a repair.
– Grab a plastic tool and gently pry the back cover away from the frame, starting at the SIM tray hole. You’ve got this!
Step 5


– First things first, unplug that main flex cable and plug in the charger. Let’s get some power flowing!
– Grab your trusty multimeter and check out the voltages at the big end pins of the FPC connector on the charging board. (Check out the second image for a visual aid!)
– Now, reattach the main flex cable and take a look at those large end pins on the Main flex FPC connector – see pic.3 for reference.
– If the numbers look good, you’re all set to move on! If not, it might be time to swap out the Main flex cable.
– If the reading is just right (around 5V), keep up the great work and proceed to the next step! If not, it’s time to consider changing out the Charging board.
Step 6


– Start by carefully peeling away the adhesive rubber that’s hugging the main flex connector on the logic board. Take your time and make sure it comes off nicely!
– Next up, grab some flux and your trusty soldering iron. It’s time to re-solder the first pin of the motherboard FPC. You’ve got this!