How to Replace Samsung Galaxy A5 (2016) Battery: Step-by-Step Guide
Duration: 45 minutes
Steps: 10 Steps
Hey there! Before we start taking things apart, let’s give that battery a little rest. Make sure it’s discharged to below 25% before you get started. We don’t want any accidental sparks flying around, right? If you’re feeling nervous about doing this yourself, you can always schedule a repair with us. We’re happy to help!
Got a Galaxy A5 that’s struggling to hold a charge? Don’t worry, we’ve got you covered. If your battery is looking a bit swollen, be sure to take the necessary precautions. This step-by-step guide from Salvation Repair will walk you through replacing the worn-out battery. You’ll need to remove the rear glass cover and mid frame, and don’t forget to pick up some replacement adhesive to get the back cover securely reattached. Before you start disassembling, make sure to discharge the battery to below 25% to minimize the risk of it catching fire or exploding. If you need help along the way, you can always schedule a repair.
Step 1


Alright, champ, first things first: Power down that phone!
– First, grab your trusty iOpener and use it to heat up and loosen the glue that’s holding the back cover in place.
– Next, use a suction handle to carefully lift the back cover, and then slide an opening pick into the gap – you’re making great progress! If you need help, you can always schedule a repair
Tools Used

Step 2


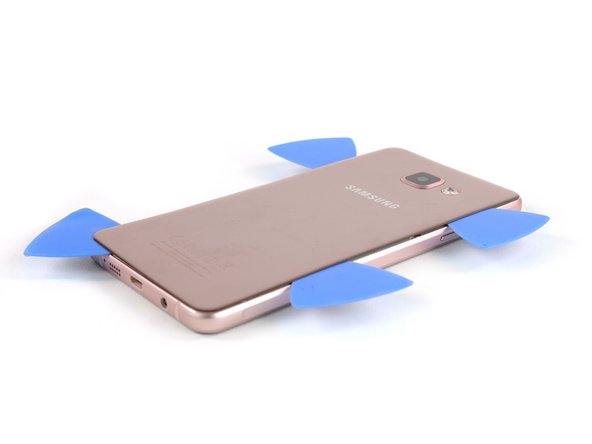
– Gently slide the pick towards the center to pop that back cover off the frame like a pro.
– Now, grab a second opening pick and glide it around the right corner, down along the bottom, and then around the left corner. You’re doing great!
Step 3


– Grab another opening pick and keep moving toward that top corner, you’re almost there!
– Now it’s time to bring in one more pick to tackle that last bit at the top. You’ve got this!


Step 5


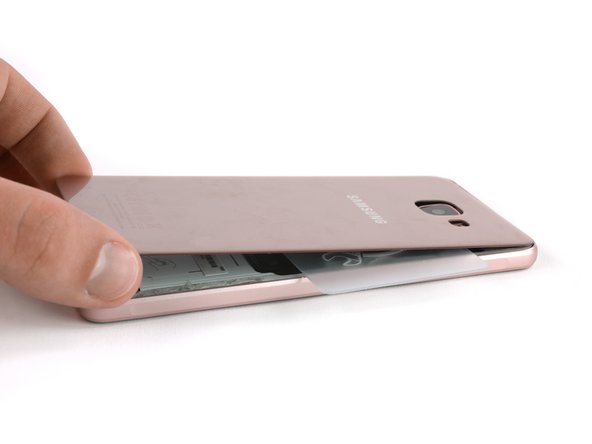
Before you dive in, take a sneak peek under the back cover to avoid messing up any crucial parts like the NFC antenna.
– Get that back cover nice and toasty again. Slide your trusty plastic card towards the top, like you’re giving it a little high five.
– Keep on movin’ that card until you hit the camera bump. Now gently lift the back cover up, just like you’re revealing a big surprise. Then give it a full-on removal.
– Make sure to clean up any leftover glue before you put everything back together. And hey, if you need a fresh layer of adhesive, we’ve got you covered. If you need help, you can always schedule a repair


Step 7


– Gently push the exposed part of the battery away from the midframe – this will help you separate the components and get started on the repair.
– Don’t forget to transfer the IMEI sticker from your old battery to the new one, you’ll need it to keep your phone identified. If you need help along the way, you can always schedule a repair


Step 9

– Next, carefully pry up the battery and slip the tip of an opening pick into the left side – you’re making great progress!
– Now it’s time to bring in some extra help – grab a second opening pick and slide it into the right side. Just be sure not to insert it too far, or you might accidentally damage the LCD screen underneath. If you need help, you can always schedule a repair
Step 10


– Gently slide your opening picks upwards to release the battery from its sticky adhesive. You’re making great progress!
– Now that the battery is free, you can safely remove it. If you need help, you can always schedule a repair