How to Replace Samsung Galaxy A51 Screen Guide
Duration: 45 minutes
Steps: 26 Steps
Heads up!
Ready to tackle that cracked screen on your Samsung Galaxy A51? Awesome! Just a heads-up: after you swap out the screen, the fingerprint sensor might take a little vacation. Also, if you’ve got security updates from after September 2020, they won’t be on board with this repair. If your phone’s frame is looking a bit bent, it’s a good idea to replace it to ensure your shiny new screen fits just right and stays safe from any awkward pressure. Before you dive in, make sure your battery is below 25%. Puncturing a battery can be a recipe for disaster, but discharging it first makes things way safer. This guide is all about replacing the screen while keeping the original frame and motherboard intact. However, if your replacement screen comes with a new frame (or chassis, as the cool kids say), you’ll need to follow a different route. Double-check that you’ve got the right part before you get started! And don’t forget, you’ll need some replacement adhesive to put everything back together nicely. If you need help, you can always schedule a repair.
Step 1


When you’re putting the cards back in, just remember to slide them in with the right side up in the tray. You’ve got this!
– Grab a SIM card eject tool, a SIM eject bit, or even a straightened paper clip, and poke it into the hole on the SIM tray located on the left side of your phone.
– Give it a good push to pop that tray out.
– Take out the SIM card tray.
Tools Used

Step 2

Hey, be careful not to turn your phone into a hot potato! The display and battery are sensitive to heat. If you need help, you can always schedule a repair.
Alright, let’s kick things off! First and foremost, make sure your phone is completely powered down before diving in.
Now, a little heads up: the adhesive on the Samsung Galaxy A51 is quite tenacious. If you find it tough to pry open the device with the iOpener, don’t sweat it—grab a hair dryer or a heat gun to give it a warm welcome!
– Grab your iOpener and get it nice and toasty. Then, apply it to the back cover. This will help loosen up the adhesive so you can easily get things going.
Tools Used

Step 3


– Let’s get started by inserting the tip of an opening pick between the frame and the back cover at the bottom of the phone, near the USB-C port. Take your time and be gentle.
– Having trouble getting the opening pick in? Don’t worry, it’s tougher than it looks. If you’re struggling to get between the back cover and midframe, try using a suction handle or some strong tape to pull up the back cover and create a gap. You got this!
– Now, carefully slide the opening pick to the bottom right corner and leave it there. You’re making great progress, and if you need help along the way, you can always schedule a repair with Salvation Repair.
Tools Used

Step 4


– Grab a second opening pick and gently slide it from the bottom right corner all the way to the bottom left corner to slice through that pesky adhesive.
– Keep those opening picks in place to stop the adhesive from sealing up again.
Step 5


If you’re having a tough time, don’t sweat it! Just add a bit more heat to help loosen that adhesive up. Remember to keep an eye on the iOpener instructions to avoid turning things into a sauna.
– Slide a third opening pick under the bottom left corner of the back cover, just like tucking in a cozy blanket.
– Gently glide the opening pick along the left edge of the phone, as if you’re painting a masterpiece.
– Keep that opening pick in the top left corner to stop the adhesive from playing tricks and resealing.
Tools Used
Step 6


– Slide a fourth opening pick into the top left corner of the back cover, right by the camera. It’s like giving your phone a gentle nudge!
– Now, glide the tip of that pick along the top edge of your phone all the way to the right corner to break the adhesive’s grip. Smooth moves!
– Keep that opening pick in the top right corner to hold the adhesive at bay, so it doesn’t try to seal things up again. You’ve got this!
Step 7


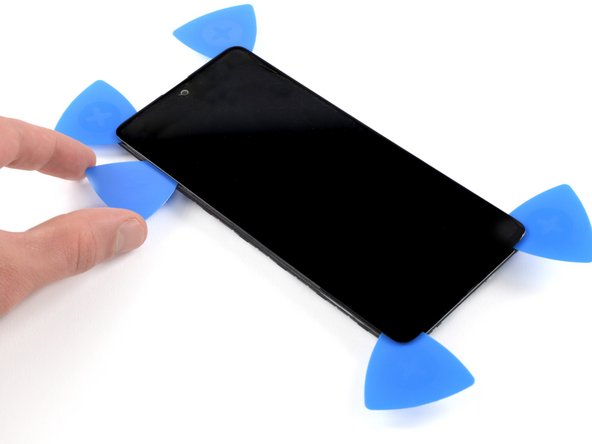
– Grab your trusty opening picks and slide them into all four corners. Now, for the grand finale, take a fifth pick and gently slide it under the top right corner of the back cover.
– Now, let’s get that adhesive out of the way! Glide the tip of your opening pick along the right edge of the phone all the way down to the bottom right corner. You got this!
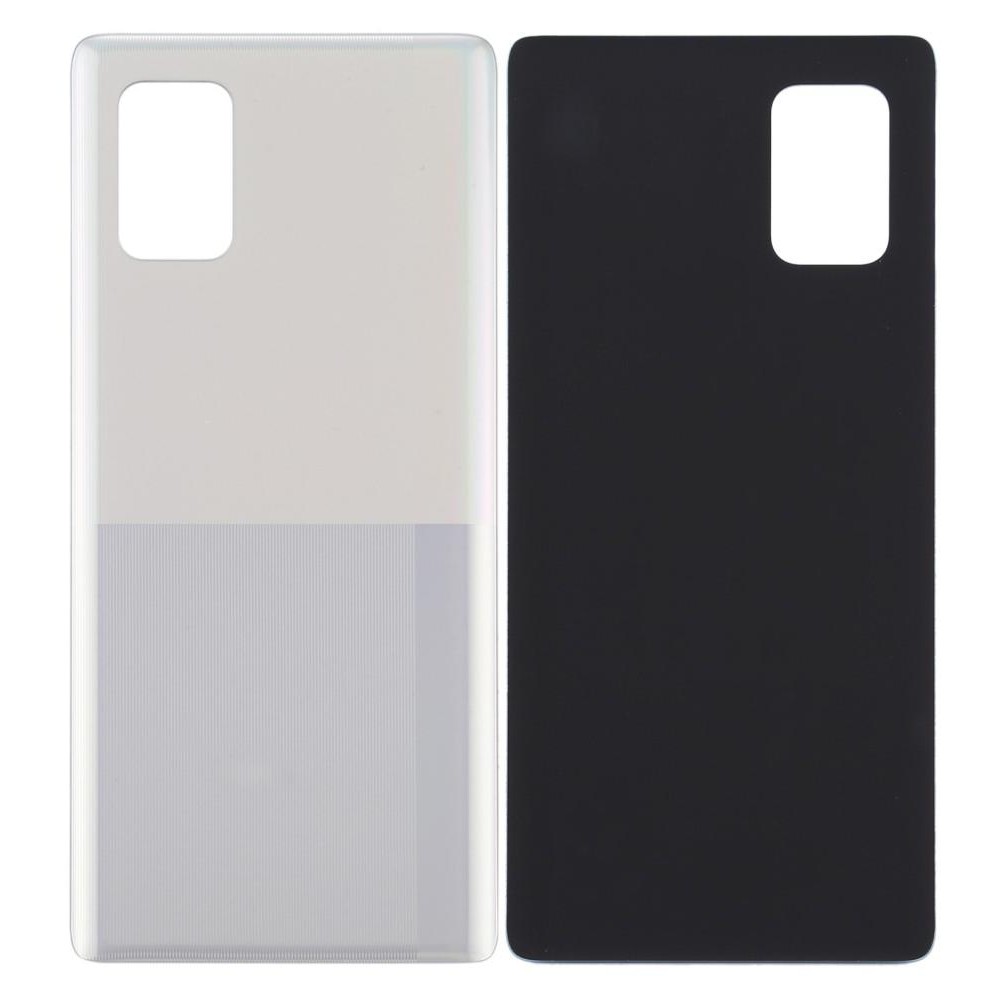
Step 8

– Pop off the back cover like a pro!
– Once you’ve got that back cover snugly in place, give your phone a little love by applying firm, steady pressure for a few minutes. A stack of heavy books can be your best buddy here to help the adhesive stick like it means it!
Step 9

– Unscrew those thirteen 3 mm Phillips #00 screws holding the midframe in place. You’ve got this!
Step 10


The midframe is securely fastened by plastic clips, so let’s take a look at how to carefully release them. If you need help, you can always schedule a repair
– Let’s get started by inserting an opening pick between the midframe and front panel assembly at the bottom of your phone, near the charge port. This is where the magic begins!
– Now, gently slide that opening pick to the left bottom corner. You’re making great progress – those plastic clips should start to release.
– Almost there! Slide the opening pick to the bottom right corner to release the remaining plastic clips. If you need help, you can always schedule a repair
Step 11


– Keep gliding that opening pick along the right edge of your phone until you’ve popped out all the plastic clips on that side.
Step 12


– Now it’s time to get this repair started – slide the opening pick along the top edge to release those top plastic clips and let’s get this device opened up. If you need help, you can always schedule a repair
Step 13


– Gently glide the opening pick from the top left corner down to the bottom left corner to pop those plastic clips loose on the left side!


Step 16
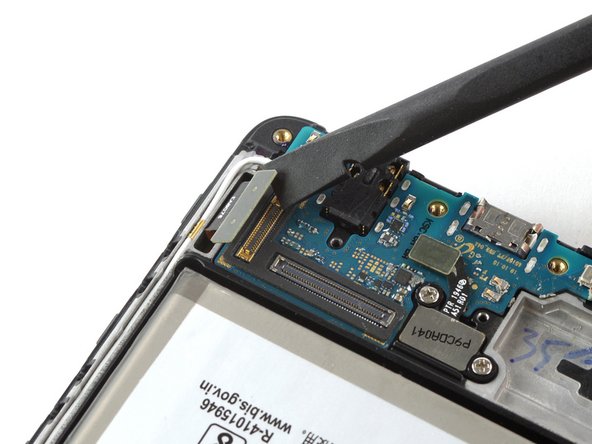

– Grab your trusty spudger and gently slide the flat end under the display flex cable at the bottom of the phone. Give it a little prying action to disconnect it. You’re doing great!
Tools Used
Step 17

To tackle that stubborn adhesive, you might want to give the iOpener a few rounds of warmth and love. Just remember to follow the iOpener instructions so you don’t end up with an overcooked device. You’ve got this!
– Grab your trusty iOpener and give it a warm hug against the display for a solid two minutes. This will help loosen up that stubborn adhesive hiding underneath.
Tools Used
Step 18


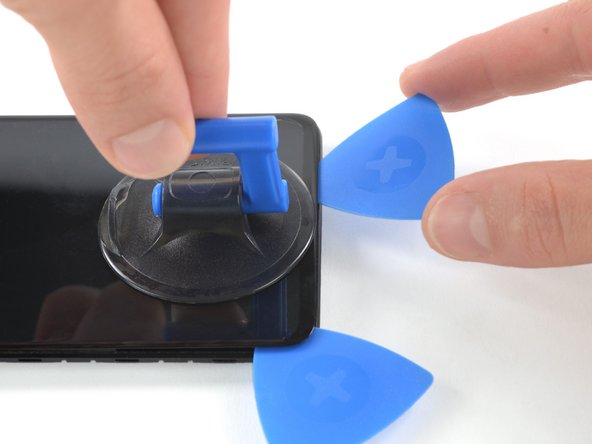
If your screen is cracked, the suction cup might not want to stick around. No worries! You can give it a lift with some strong tape, or if you’re feeling crafty, superglue that suction cup in place and let it set. Once it’s ready, you’re all set to move forward!
– First things first, let’s warm up that screen a bit until it’s cozy to the touch. Once it’s ready, grab a suction cup and stick it to the top edge of your phone.
– Now, take an opening pick and gently slide it into the gap. Start working your way up to the top right corner while slicing through that stubborn adhesive like a pro.
Step 19

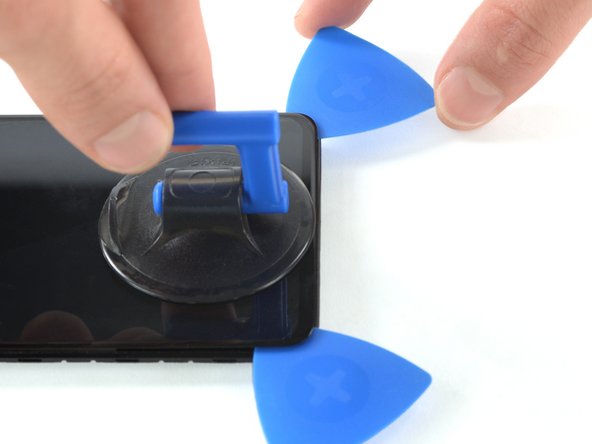
– Slide in a second opening pick and glide it over to the top left corner like a pro.
– Keep those opening picks in place to make sure the adhesive doesn’t decide to play hide and seek.
Step 20


– Pop in a third opening pick and glide it along the left edge to slice through that adhesive like a pro.
– Keep the opening pick tucked in the bottom left corner to stop that adhesive from getting clingy again.
Step 21


– Now it’s time to bring in the fourth opening pick – slide it from the bottom left corner all the way to the bottom right corner, nice and smooth.
– Leave that pick right where it is, so the adhesive doesn’t try to sneak back into place. If you need help, you can always schedule a repair
Step 22


– Pop in a fifth opening pick and glide it along the left edge of your phone to slice through that stubborn adhesive like a pro!
Step 23


– Warm up that trusty iOpener and give your screen a little love to help loosen the adhesive underneath. It’s a cozy moment for your device!
– While you’re letting the heat work its magic, take a peek at the rectangular-shaped adhesive chillin’ under the screen. It’s good to know what you’re dealing with!
Tools Used
Step 24


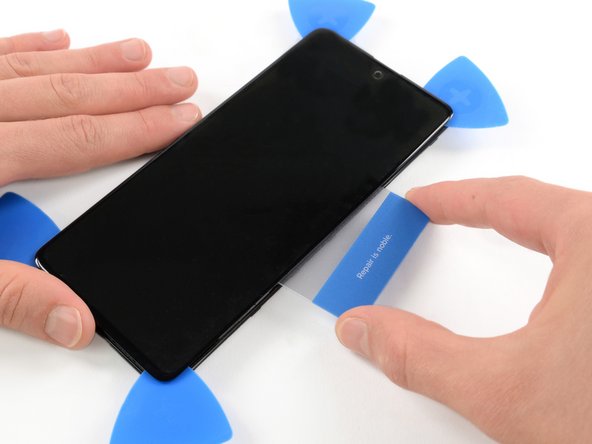
– Slide a trusty plastic card into the gap on the left side where the display meets the phone. You’re on the right track!
– Give that card a gentle press and shimmy it back and forth until you’ve waved goodbye to all that sticky adhesive.
– Once you’ve successfully vanquished the adhesive, go ahead and remove those four opening picks from the corners like a pro!


Step 26


– Let’s get started by removing the screen. This is the first step in our repair process, and it’s easier than you think. Just take your time and gently pry it off.