How to Replace Samsung Galaxy Note Motherboard: DIY Guide
Duration: 45 minutes
Steps: 21 Steps
Ready to get your hands dirty? Follow this guide to skillfully replace your motherboard and give your device a fresh start. Remember, if you need help, you can always schedule a repair.
Step 1


– Let’s give that stylus cap the boot! Grab it by the top and gently pull it free from its home in the midframe. You got this!
Step 2


– Alright, let’s get this party started! Find that little divot next to the rear-facing camera, near the volume rocker. Use a plastic opening tool, or even your fingernail, to gently pry it open. We’re going to be best friends with that divot soon!
Step 3


– Let’s get started by carefully lifting and removing the rear case from your phone. This is the first step in giving your device a brand new lease on life. If you need help, you can always schedule a repair


Step 5


– Grab your trusty spudger or just your fingernail and give that microSD card a gentle nudge deeper into its cozy slot until you hear a satisfying click.
– Once you hear that click, let go of the card and watch it pop out like it’s ready for a break.
– When it’s time to put everything back together, simply slide the microSD card back into its slot until you hear it click into place.
Tools Used

Step 6

– Take out the microSD card from its cozy spot in the midframe. If you need help, you can always schedule a repair
Step 7


– Grab a plastic opening tool or just your trusty fingernail, and gently nudge that SIM card out of its cozy little home.
Step 8


– Gently push the SIM card out of its slot with your thumb, and then completely remove it from your device. If you need help, you can always schedule a repair
Step 9

– Let’s get started by removing the nine 3.4 mm Phillips #00 screws that hold the midframe in place on the display assembly. If you need help, you can always schedule a repair
Step 10

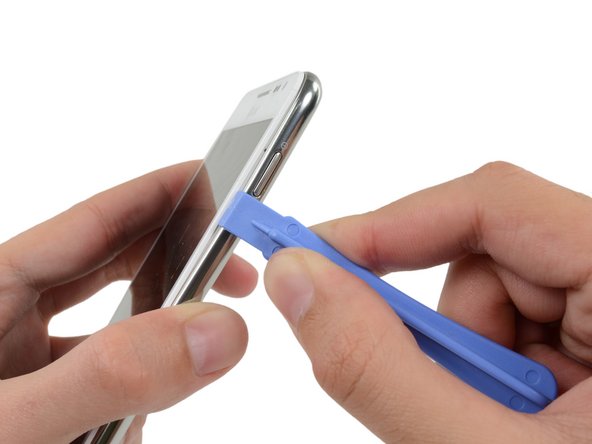
– Time to get started. Insert your trusty plastic opening tool to the left of the power button, slipping it between the midframe and the front panel assembly. Now, gently pry the two apart.
Step 11


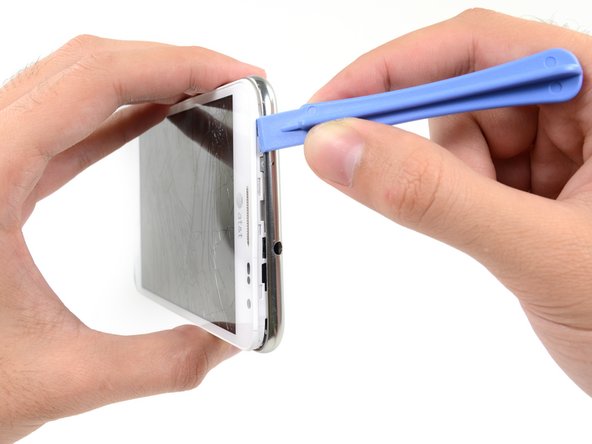
– Slide the plastic opening tool down the seam. It’s like a little dance, see how the tool glides right along?
Step 12
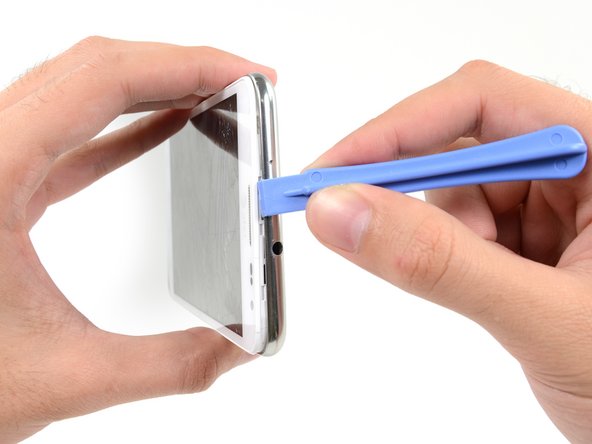

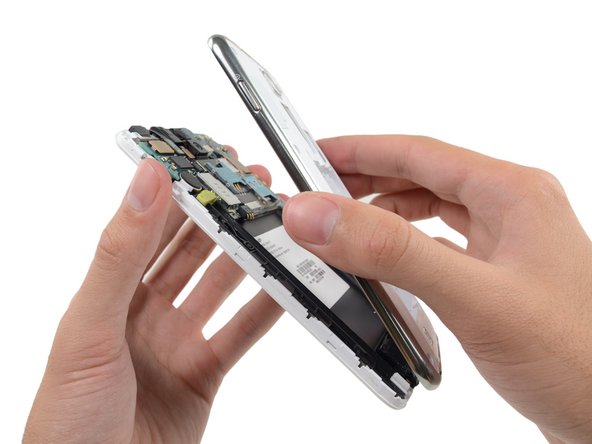
– Let’s start by getting that midframe and display apart! Carefully insert your plastic opening tool to the left of the headphone jack, right between the midframe and the display assembly.
– Now, slide that opening tool along the top edge of your phone, feeling the separation.
– Keep on going, buddy! Run the plastic opening tool all the way around the phone’s perimeter until the midframe is happily separated. If you need help, you can always schedule a repair

Step 14


– Alright, now it’s time to gently unplug that display cable. Use the flat end of your trusty spudger tool and carefully disconnect it. Just give it a little wiggle and it should pop right off. If you need help, you can always schedule a repair.
Tools Used
Step 15


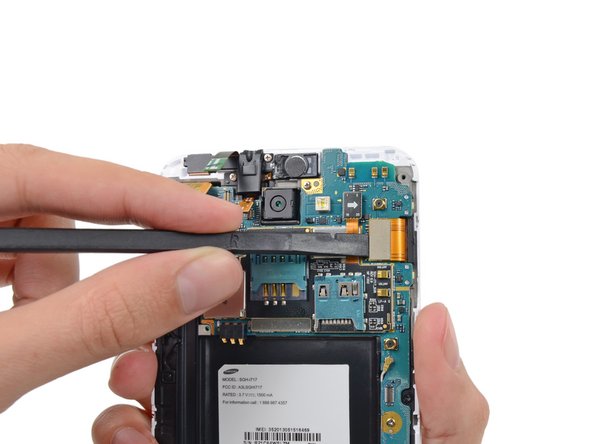
– Let’s get started by using a spudger to carefully disconnect the front-facing camera assembly cable connector.
– Next, locate the headphone jack/earpiece speaker assembly cable connector and gently disconnect it.
– Now, move on to the digitizer cable connector and disconnect that as well. If you need help, you can always schedule a repair
Tools Used
Step 16
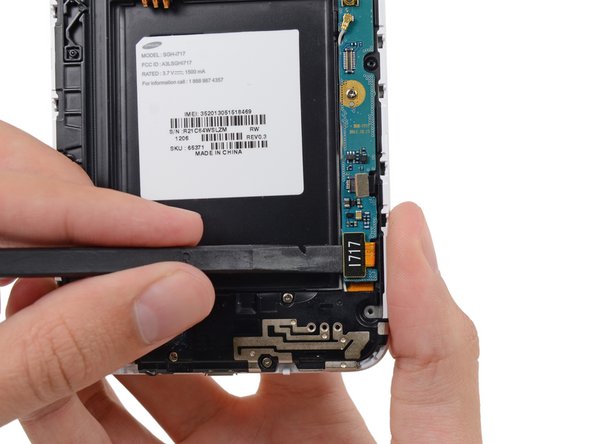

– Let’s get started by carefully disconnecting the soft button cable connector using the flat end of a spudger – it’s an easy first step.
– Next, use your trusty spudger to gently disconnect the USB board cable connector.
– Now, go ahead and disconnect the antenna cable connector. If you need help, you can always schedule a repair
Tools Used
Step 17

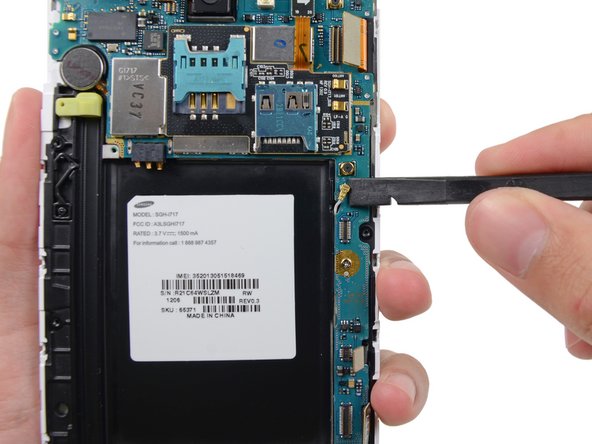
– Alright, time to loosen those screws! Grab your trusty Phillips #00 screwdriver and give those two 3.4 mm screws securing the motherboard to the display assembly a gentle twist. You got this!
Step 18


– Let’s get our motherboard movin’! Disassemble, have some fun, and let’s take that baby out so we can tackle what’s next in this epic adventure of fixing your device. Remember, if you need help, you can always schedule a repair and we’ll be there in a jiffy!
Step 19

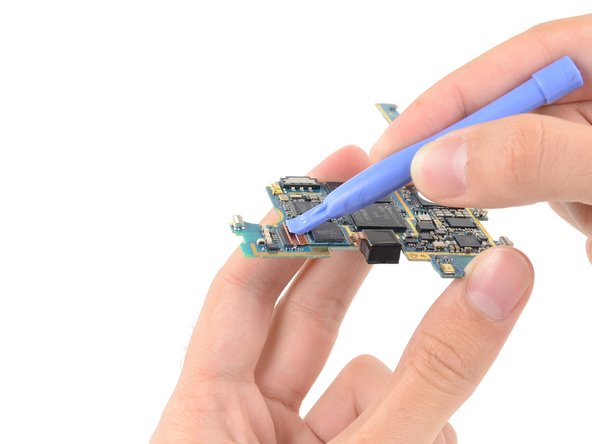
Be gentle and only pry on the tab, avoiding the connector itself to prevent any damage.
– Grab your trusty plastic opening tool and give that release tab on the rear-facing camera cable ZIF connector a little flip. You got this!
Step 20
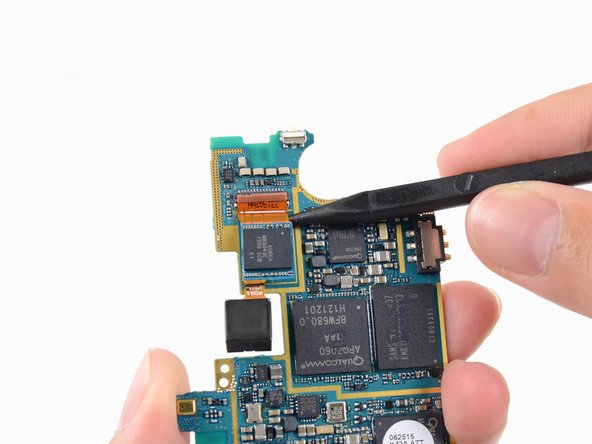

– Now it’s time to gently coax the rear-facing camera cable out of its ZIF connector. Use the tip of a spudger to carefully slide it out and release it from the light adhesive. If you need help, you can always schedule a repair
Tools Used
Step 21

– Let’s get started by removing the rear-facing camera. This is a crucial step, so take your time and make sure it’s done correctly. If you need help, you can always schedule a repair