How to Replace Samsung Galaxy Note10 Vibration Motor: Step-by-Step Guide
Duration: 45 minutes
Steps: 22 Steps
Ready to give your Samsung Galaxy Note10 a little shake-up? This guide will help you take on the challenge of replacing or removing the vibration motor. It’s a bit like a mini-adventure, but don’t worry, we’ll be with you every step of the way! And if you need a little extra help, you can always schedule a repair.
Step 1

Before you start taking things apart, make sure your phone is completely powered off. Let’s get started with your repair! If you need help, you can always schedule a repair
When using heat to loosen things up, be careful not to get too carried away – a hair dryer, heat gun, or hot plate can be handy, but overheating can damage your phone’s display and internal battery. If you need help, you can always schedule a repair
– Grab your trusty iOpener and give it a warm hug on the left edge of the back panel for a solid minute. You’re doing great!
Tools Used

Step 2


If the back glass is super cracked, a layer of clear packing tape might help the suction cup stick. You could also use strong tape instead of the suction cup. If that doesn’t work, you can superglue the suction cup to the broken panel. Don’t worry, it happens!
Depending on the age of your phone, this could be a little tricky. If you’re struggling, just apply more heat to the edge and give it another go. You got this!
– Let’s get this back panel off! First, use a suction cup on the heated edge of the back panel. Stick it close to the edge for a super grip.
– Now, give that suction cup a good pull, like you’re opening a super-secret treasure chest. You’ll feel that gap between the panel and the frame.
– Go ahead and slide an opening pick into that gap. It’s like giving your phone a little nudge, but with a tool that’s got the right shape for the job!
Step 3


Keep that opening pick nice and gentle! Don’t push it in more than halfway or you might tickle some internal parts that prefer to be left alone.
– Gently glide the opening pick down the left edge, making your way to the bottom left corner to cut through the adhesive like a pro.
– Keep that pick snugly in the bottom left corner to stop the adhesive from making a comeback.
Step 4


– Slide a second opening pick along the left side, making your way to the top left corner to tackle that pesky adhesive!
– Keep that pick in place at the top left corner to stop the adhesive from re-sealing. You’ve got this!
Step 5

– Grab your trusty iOpener and pop it on the top edge of the phone for a solid minute. You’ve got this!
Tools Used
Step 6


– Let’s get this phone open! Carefully slide a third opening pick into the gap on the top edge of the phone.
– Now, slide the opening pick towards the top right corner like you’re slicing through butter.
– Keep that pick in place in the top right corner, because we don’t want that adhesive getting cozy again!
Step 7

– Get your trusty iOpener ready and cozy it up against the right edge of the phone for a solid minute.
Tools Used
Step 8


As you work your way down the phone, watch the back panel start to say ‘see ya later!’ It’s gonna start coming off. You got this!
– Pop in a fourth and final opening pick on the right side of the phone and slide it down toward the bottom right corner to slice through that pesky adhesive. You’re almost there!
– Now, take that trusty opening pick and gently slide it back and forth around the entire edge of the phone to release any adhesive that might have escaped your earlier efforts. If you encounter any stubborn spots, a little heat can work wonders!
Step 9


– Time to get started – carefully lift up and remove the back panel to begin your repair journey.
Step 10

– Grab your trusty Phillips screwdriver and get ready to tackle those five 4 mm screws holding the wireless charging coil in place. You’ve got this!
Step 11


– Time to get a little handy – use a pair of tweezers to carefully lift up and flip back the metal shield covering the battery connector. If you need help, you can always schedule a repair
Tools Used

Step 12


– Now it’s time to disconnect the battery – carefully hold the metal shield out of the way, then use the pointed end of a spudger to gently pry up the battery connector. If you need help, you can always schedule a repair
Tools Used

Step 13


– Grab your trusty spudger and use its pointed end to gently unplug the wireless charging coil connector from the motherboard. You’ve got this!
Tools Used
Step 14


This wireless charging coil is glued down with a light adhesive. It’s like a little hug, but for your phone’s charging coil!
– Give that metal shield a little lift and tilt it up so you can get a good grip with your fingers.
– Now, gently peel that wireless charging coil right off the device.
– Time to give that wireless charging coil the boot! Take it off and set it aside.
Step 15

– Grab your trusty Phillips screwdriver and give those five 4 mm screws holding the loudspeaker in place a little twist. They’ll come right out! If you need help, you can always schedule a repair


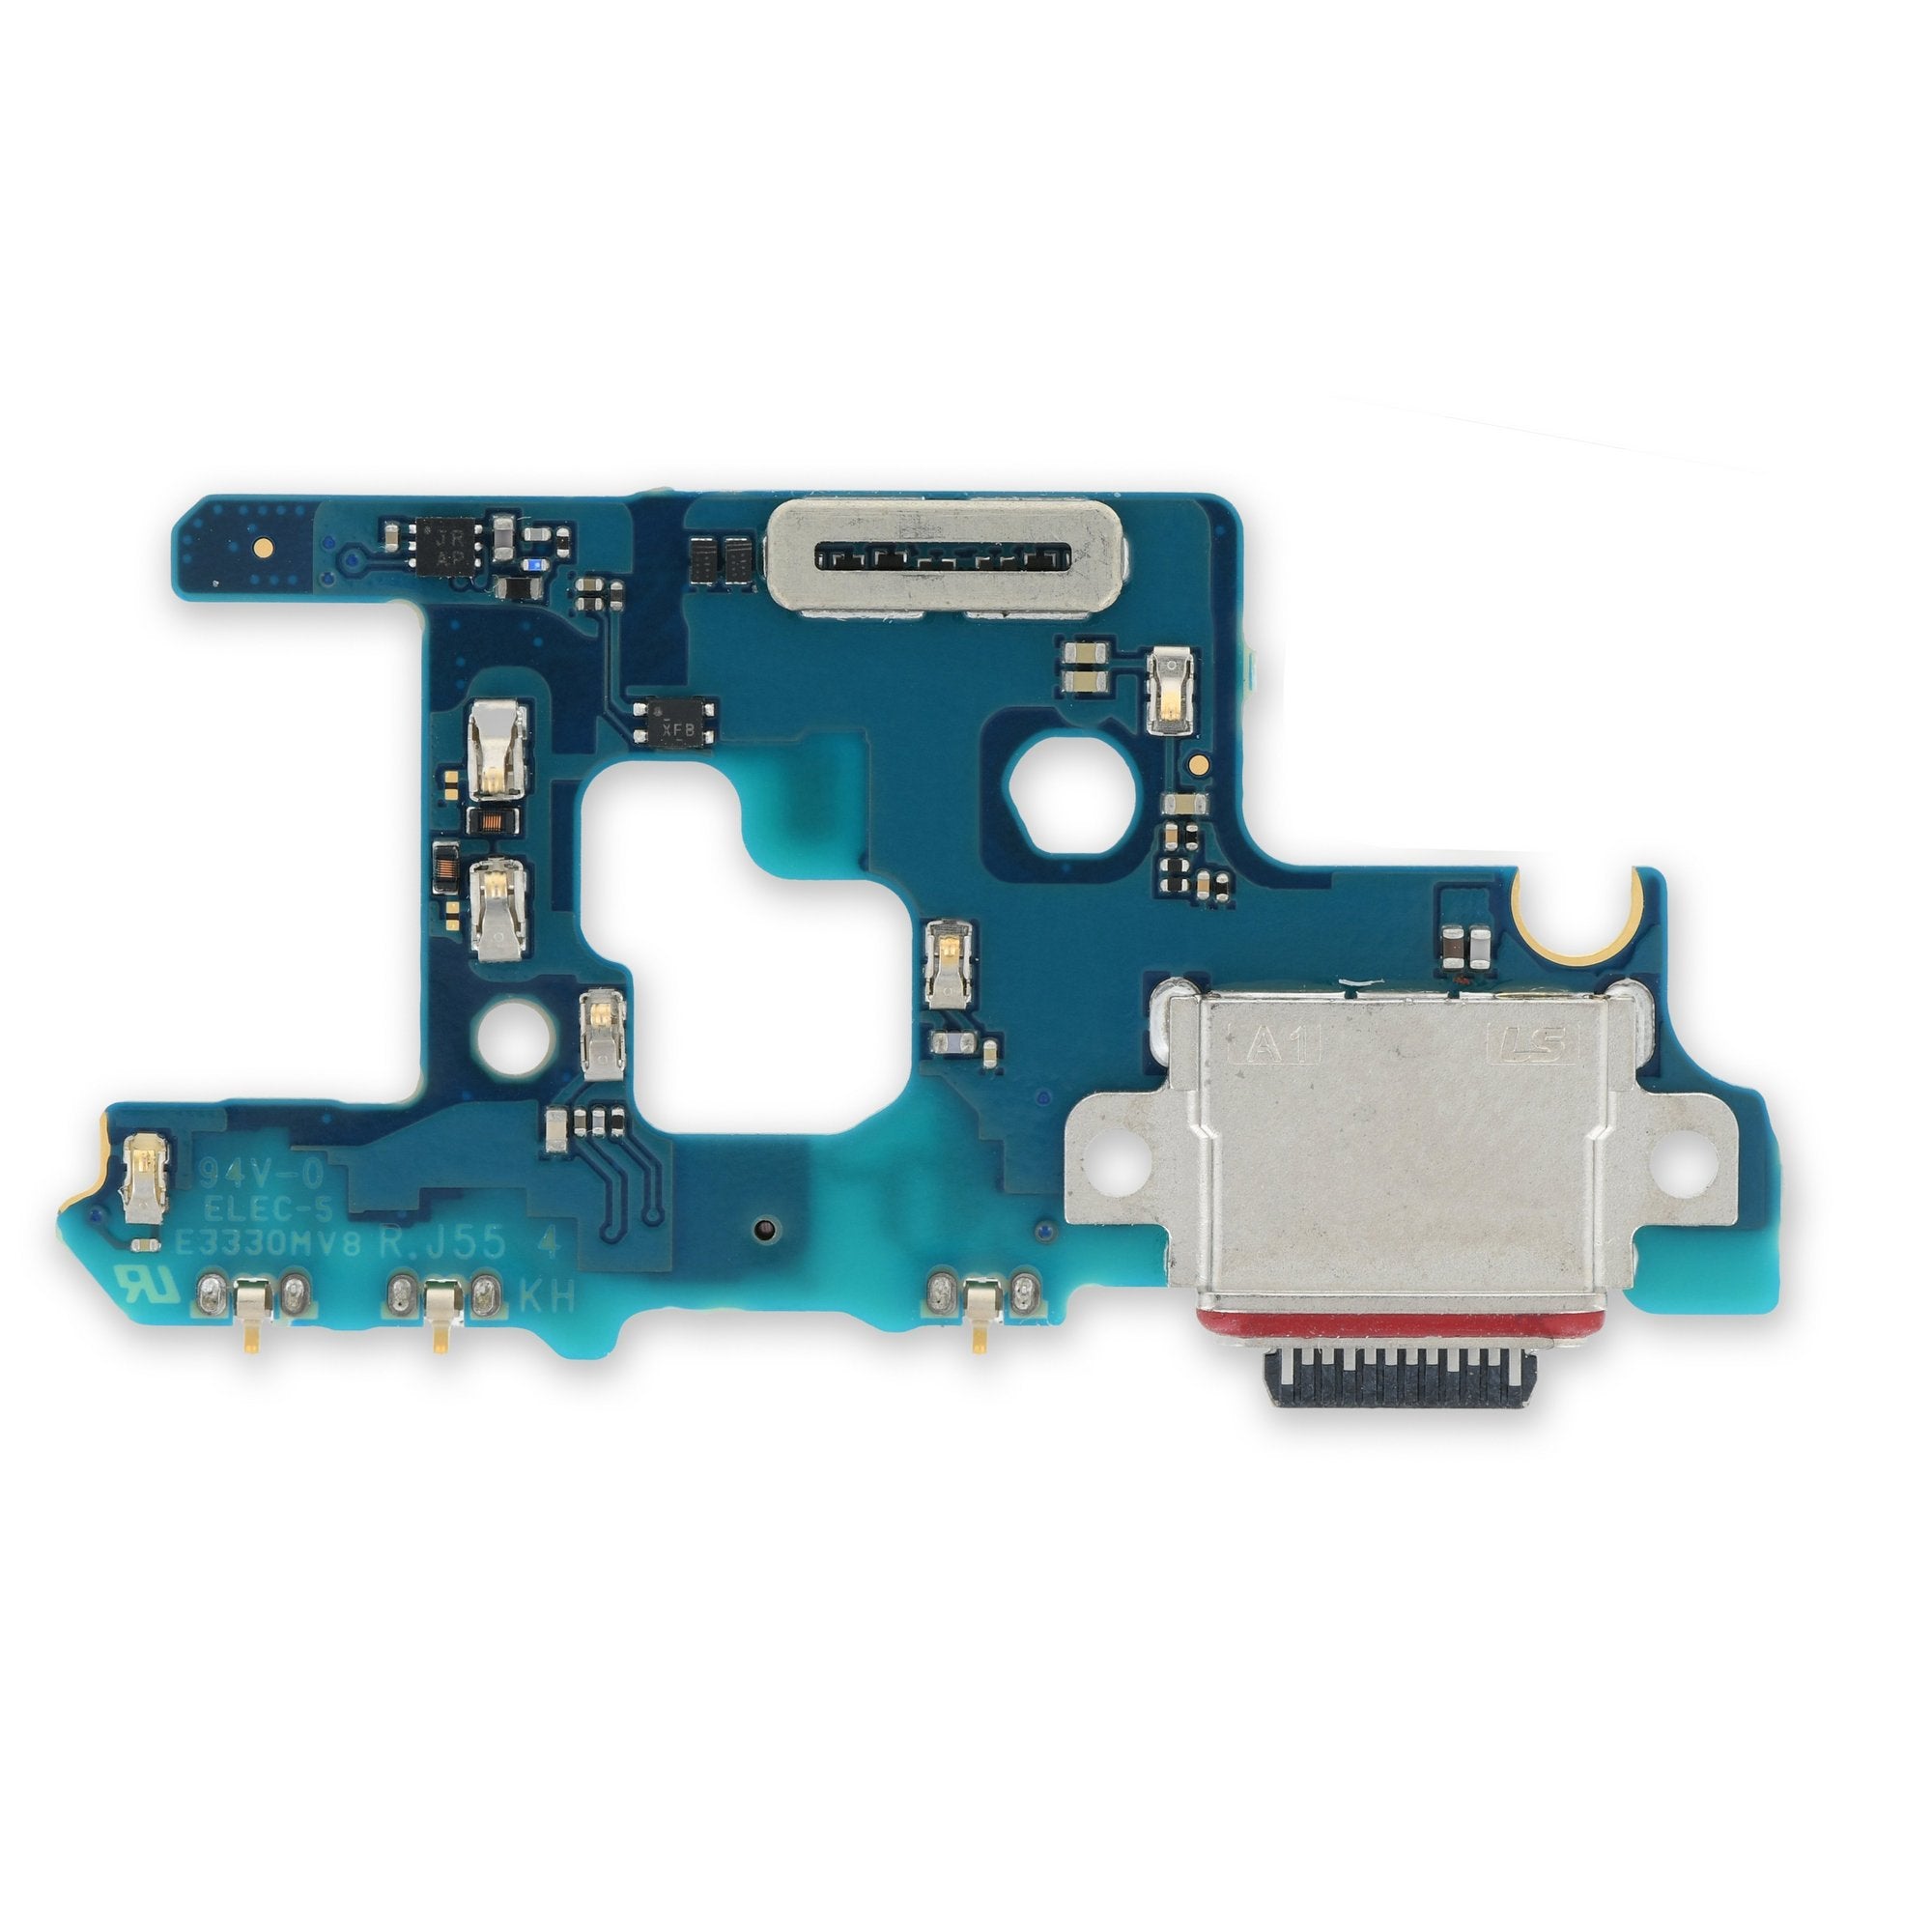
Step 17
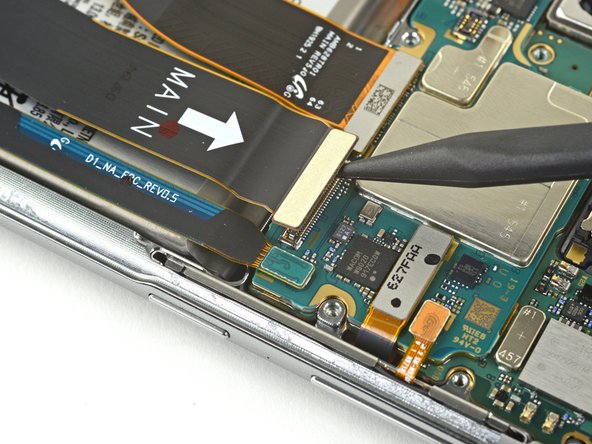


– Grab your trusty spudger and gently use the pointed end to unplug the main interconnect cable from the motherboard. You’ve got this!
– Next up, it’s time to disconnect the secondary interconnect cable from the motherboard. Just a little tug and you’re on your way!
Tools Used


Step 19


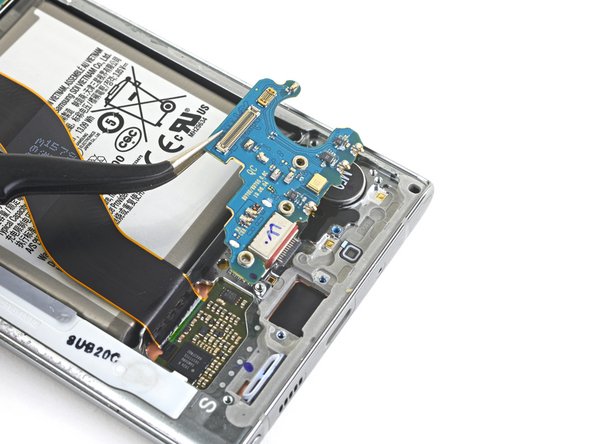
– Disconnect both interconnect cables and set them aside, you’ve got this!
Step 20

– Alright, let’s get this show on the road! Grab your trusty Phillips screwdriver and loosen those three 4 mm screws holding the charging assembly in place. You got this! If you need help, you can always schedule a repair

Step 22
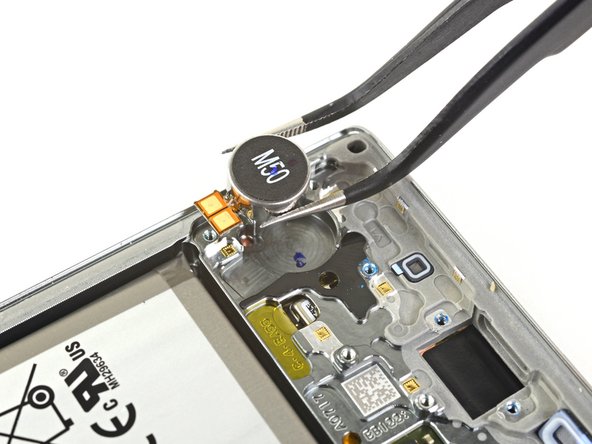


Be careful when using tweezers around the battery – we don’t want any accidental punctures. If you’re not feeling confident, you can always schedule a repair
– Let’s give this vibration motor a little wiggle room! Use one side of a pair of tweezers to slide underneath the motor using the gap in the frame near the bottom right corner of the battery.
– With the tweezers under the motor’s edge, give it a gentle tug straight up and out of its little home. It’ll pop right out!
– You did it! The vibration motor is free. Now, if you need help with the rest, you can always schedule a repair
Tools Used