How to Replace Samsung Galaxy S One Front Camera
Duration: 45 minutes
Steps: 14 Steps
Hey there, awesome fixer! Just a heads-up, make sure you have all the right tools and parts ready before you dive into the repair. If you hit a snag, remember, help is just a click away at schedule a repair. Let’s make this gadget feel brand new!
Follow this fabulous guide to swap out the front-facing camera on your Samsung Galaxy S4. Get ready to bring your selfie game back to its former glory!
Step 1
– Use a plastic opening tool or even your trusty fingernail to pry into the small gap to the left of the rear-facing camera, near the power button. It’s like unlocking a treasure chest, but what you get is the chance to fix your own gadget!
Step 2
– Hoist the back cover off by the corner near the little notch and wave it goodbye—it’s off the phone now!
Step 3
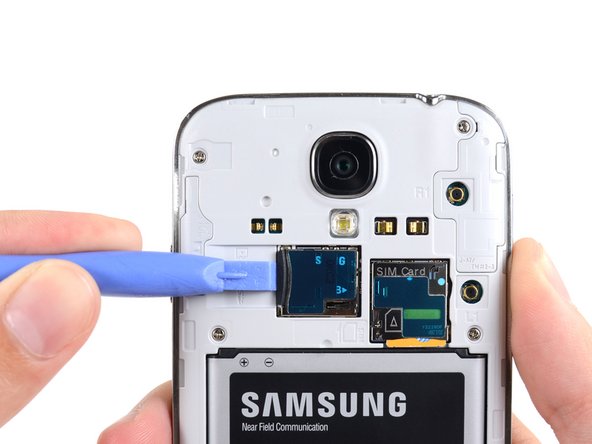
– Grab a spudger or use your handy fingernail to nudge the microSD card a tad deeper into its cozy slot until it clicks like a soft high-five.
– Once you hear that satisfying click, let go! The card will leap out a bit, ready to be freed.
– Gently pluck the microSD card from its nest.
– When putting it back together, just press the microSD card down into its home until you hear that familiar click to lock it in place.
Step 4
– Gently wiggle a plastic opening tool, or use your magic fingers, to find the sweet spot in the battery compartment’s notch and coax the battery upwards.
– Liberate the battery from its phone abode!
Step 5
– Grab a plastic opening tool or just use your fingernail to gently push the SIM card deeper into its slot until you hear a satisfying click.
– Once you hear that click, let go of the card, and it will magically pop out of its slot.
– Go ahead and remove the SIM card.
– When putting it back together, just push the SIM card back into the slot until you hear that reassuring click again.
Step 6
– Unscrew the nine 4.0 mm Phillips #00 screws that are holding the midframe cozy against the display assembly.
Step 7
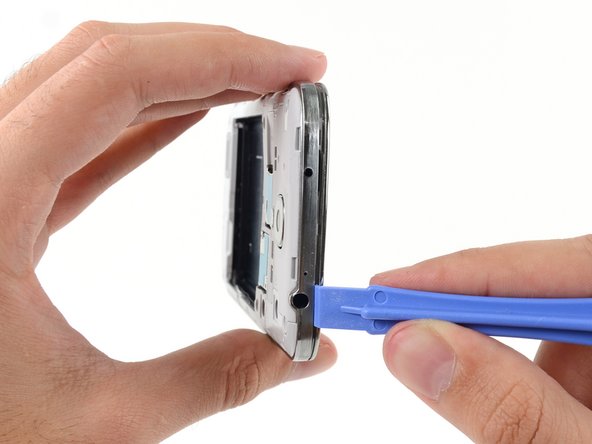
– Begin on the side of the phone with the volume buttons. Insert your plastic opening tool between the chrome bezel surrounding the display glass and the larger chrome border. Look for the seam joining the two components.
– Gently slide the opening tool along the seam to detach the plastic clips as you progress.
Handle with care! Gently pry to avoid a snap, crackle, or pop—those midframe bezel points are as delicate as a leaf on the wind. Keep it cool, keep it light, and those clips will thank you!
The midframe is snugly held in place by a bunch of plastic clips tucked behind the chrome bezel. Get ready to unleash your inner repair guru as we guide you through popping these clips to liberate the midframe!
Step 8
– Keep the party going by prying around the corner of the phone.
– Glide your opening tool along the seam between the midframe and display across the bottom of the device, popping open those sneaky plastic clips.
Step 9
– Continue prying near the corner, make your way towards the power button side like a ninja.
– Glide your opening tool along the seam like you’re skating on ice.
Step 10
Now might be a good time to give that plastic opening tool another whirl around your device’s edges to ensure all those sneaky plastic clips have totally let go.
– Keep cruising with your opening tool around the top edge of your phone, popping off those last stubborn clips and liberating the midframe from the clutches of the display assembly. You’re doing great!
Step 13
– Grab your spudger and gently unplug the front-facing camera cable connector. It’s like disconnecting a tiny, electronic high-five!
Step 14
– Time to give the front-facing camera a little break from its selfie duties! Gently remove it from the device.


