How to Replace Samsung Galaxy S10e Fingerprint Sensor Guide
Duration: 45 minutes
Steps: 43 Steps
Whoa there, partner! This step’s a bit tricky and involves removing the screen, which means bye-bye screen. Make sure you have a backup screen ready before you embark on this adventure. If you need help, you can always schedule a repair.
Ready to dive into the world of phone repair? This guide will walk you through the process of removing and replacing the fingerprint sensor on your Samsung Galaxy S10e. Just a heads up, it’s a bit of a journey since you’ll need to take off the screen, which means it won’t survive the adventure. So, make sure you have a shiny new replacement screen ready to go! If you need help, you can always schedule a repair.
Step 1

Opening your phone will mess with its waterproof seals. Make sure you have replacement adhesive on hand before you dive in, or be super careful to avoid any liquid exposure if you’re putting your phone back together without new adhesive. If you need help, you can always schedule a repair.
– Hey there, tech lover! Time for some phone repair magic? No problemo! First, definitely make sure your phone’s totally powered down. Next, buddy up with that trusty iOpener, and let it work its heat-wonder on the back of your phone, right along the right edge for two minutes. This won’t just be a warm-up, it’ll help bring the adhesive to its softest dance party mode! So, are you feeling all challenged up and ready to rock this repair action? If you need help, you can always schedule a repair! Phun stuff ahead!
Tools Used

Step 2


Check out the first image to see how the adhesive is laid out on the inside of the cover after it’s been removed. If you need help, you can always schedule a repair.
– Next up, it’s time to tackle the adhesive holding the back cover in place. Let’s get that cover off so we can see what’s inside!
Step 3


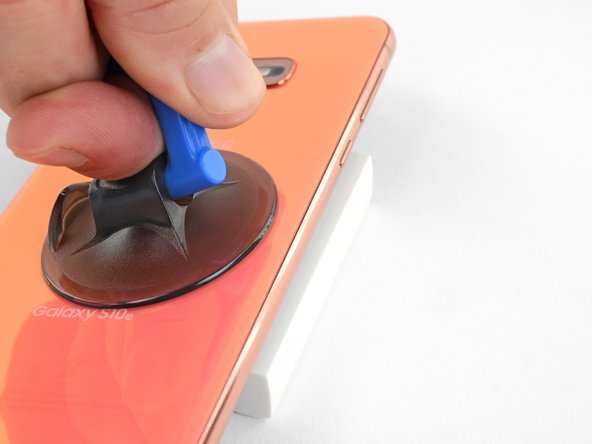
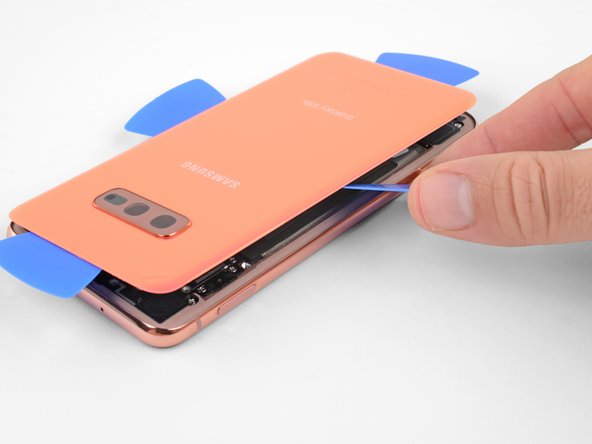
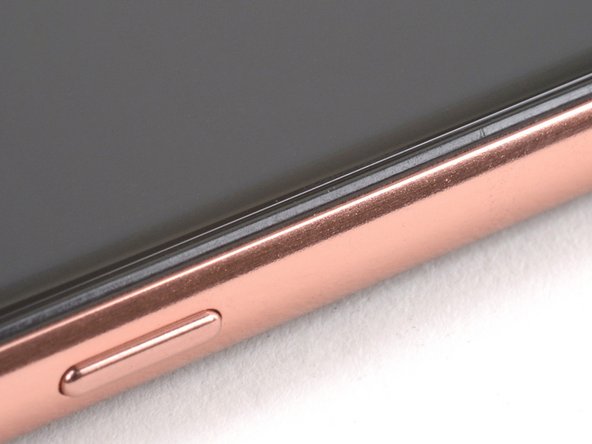
– Grab a suction cup and stick it onto the back cover, aiming for that heated edge just below the Bixby button where the glue is feeling a bit shy.
Step 4

Too much force or metal tools can shatter the rear glass. Keep it chill, and you’ll be just fine!
– Prop up the warm edge of your phone on something that’s around 0.5 inches (13 mm) thick. This nifty little trick will give your phone a perfect tilt, making it way easier to slide in that opening tool.
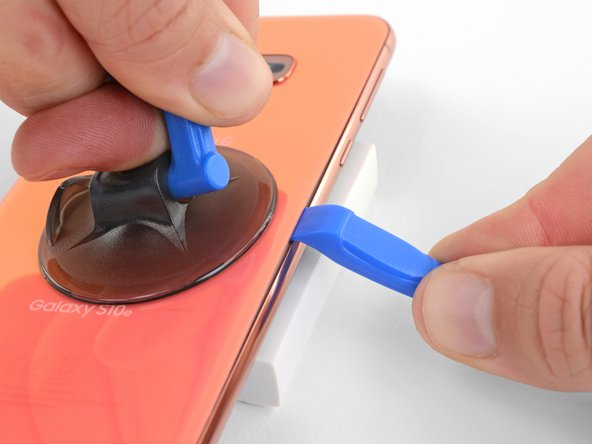
– With your trusty suction cup, gently lift the right edge of the back cover to create a tiny gap between the cover and the frame. Just a little lift will do the trick!
– Now, take your opening tool and press it into that lovely little gap you’ve created.
Step 5


– Glide the handy tool down the right side of your device with ease to swiftly cut through the adhesive holding the back cover in place.
Step 6


– Slide an opening pick into the edge near the opening tool. Keep the pick in place to stop that sneaky glue from sticking back together.
Step 7

– Get ready to heat things up! Warm up a cool iOpener and gently apply it to the top edge of the phone for two awesome minutes.
Tools Used
Step 8


– Gently slide an opening pick into the top right corner of your phone and glide it around the bend, then across the top edge like a pro.
– Keep that opening pick in place to give the adhesive a little break and prevent it from sticking back together.
Step 9

– Get cozy and warm up a heated iOpener on the left side of your device for a couple of minutes.
Tools Used
Step 10


– Slide a shiny new opening pick into the top left corner and gently glide it along the left edge of your phone like you’re painting a masterpiece.
– Keep that opening pick snugly in place along the left edge to make sure the adhesive doesn’t decide to play hide and seek.
Step 11

– Heat up that iOpener and give the bottom edge of your phone a cozy two-minute hug!
Tools Used
Step 12


– Time to work some magic! Grab an opening pick and let’s start near the bottom corner of your phone. Gently slide it along the bottom edge to work its adhesive-separating charm.
Step 13


– Grab your trusty opening picks and gently nudge the back cover up—let’s give it a little lift!
– Once you’ve got a good grip, go ahead and remove the back cover. You’re doing great!
Step 14

Want to skip the sticky mess? You can pop that back cover back on without fussing with new adhesive. Just make sure to remove any chunky bits that could stop the cover from sitting right. Once it’s on, give it some heat and a little pressure to keep it in place. It might not be waterproof, but the leftover adhesive will have your back! Need help? You can always schedule a repair.
– Alright, team! Let’s get that back cover back in place and stick it with some fresh adhesive. If you need help, you can always schedule a repair.
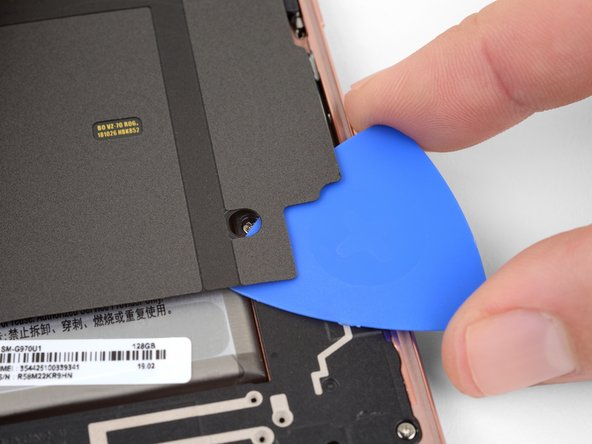
Step 15

– Unscrew those eight 3.9 mm Phillips screws that are holding the upper midframe to your phone. You’ve got this!
Step 16

– Gently slide a trusty opening pick under the bottom right corner of the upper midframe to gracefully separate the adhesive that’s holding it down to the lower midframe.
Step 17


– Let’s get started! Gently slide the tip of your spudger into that nifty little cutout on the right edge of the plastic section of the upper midframe, right by the Bixby button.
– Now, use the spudger’s pointy end to carefully lift the midframe away from the phone’s chassis. You’ve got this!
Tools Used


Step 19


– Gently pop the battery connector out of its socket using the flat end of a spudger. If you need help, you can always schedule a repair.
Tools Used
Step 20

– Let’s loosen up with some fun and DIY spirit! Time to unscrew that loudspeaker with a sweet Phillips driver – we’re talkin’ seven 3.9 mm screws. Once you’ve got those bad boys removed, you’ve done an awesome job and we’re one step closer to a good-as-new device! And hey, if you need help, you can always schedule a repair!


Step 22


– Gently lift the loudspeaker up and take it out with care.
– When you’re putting it back together, just press down on the edges of the loudspeaker until you hear that satisfying snap!
Step 23

When re-attaching press connectors, think of it like a gentle hug – align one side, give it a little press until it happily clicks, then repeat on the other side. Just remember, no middle squeezing! If it’s a tad off, those pins might get bent out of shape. Let’s keep it all in place!
– Time to show that screen connector who’s boss! Grab your trusty spudger and gently pry up to disconnect it from the motherboard socket like a pro.
Tools Used
Step 24


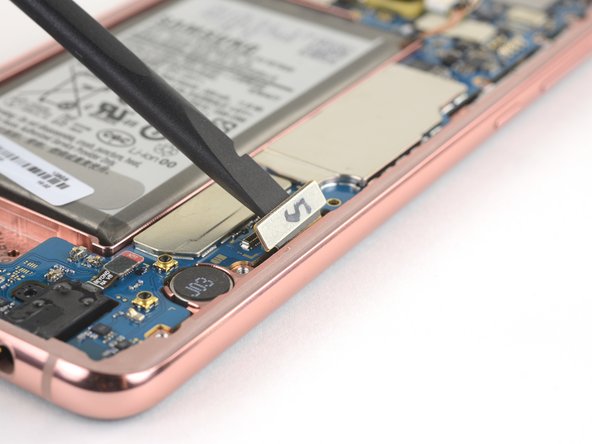
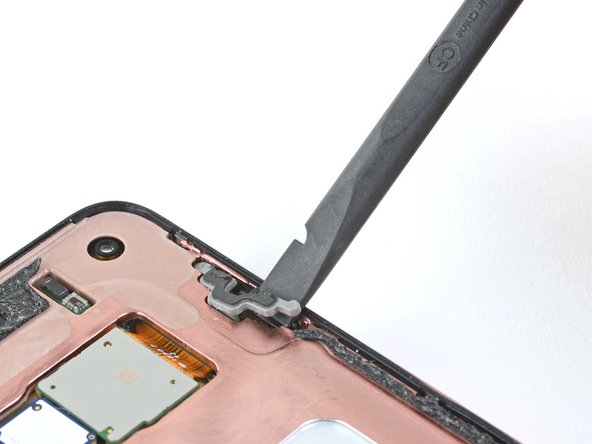
– Gently use the tip of a spudger to lift and detach the fingerprint sensor connector from its cozy spot on the motherboard.
Tools Used
Step 25

– Grab your trusty Phillips driver and unscrew those two 4 mm screws holding the fingerprint sensor bracket in place. You’ve got this!
Step 26

– Give that fingerprint sensor bracket a warm hug with a heated iOpener for about a minute. This will help loosen up the adhesive like a cozy blanket on a chilly day.
Tools Used
Step 27
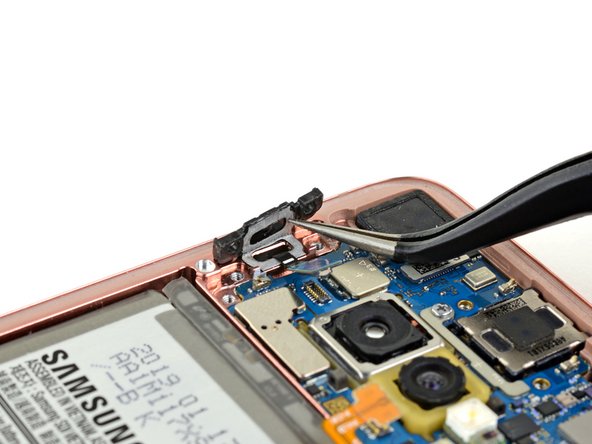
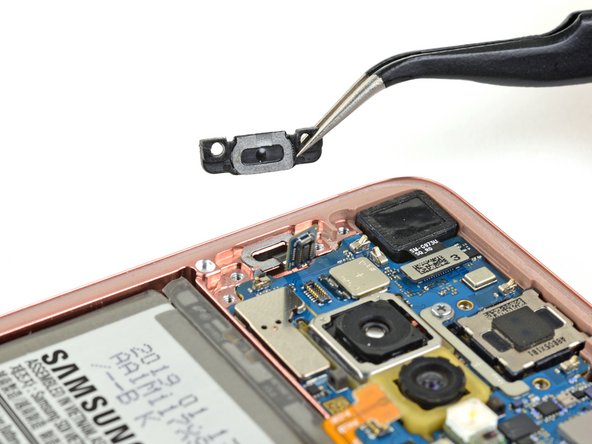

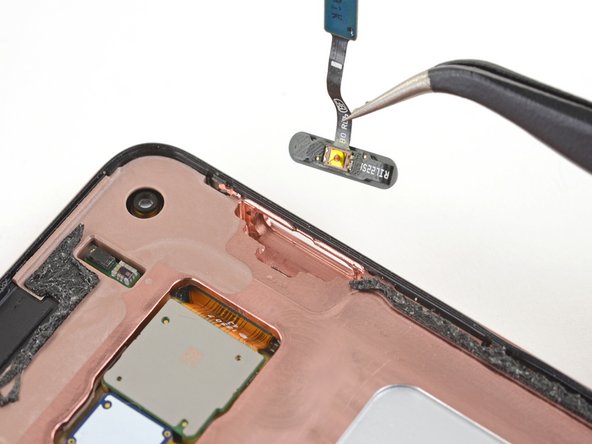
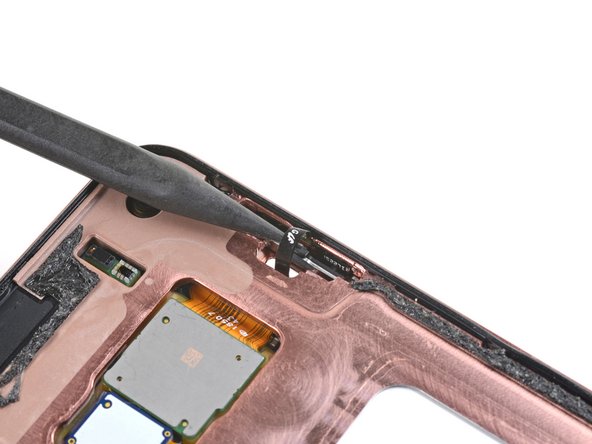
– Time to work your magic with those tweezers: gently lift the fingerprint sensor bracket.
– Say goodbye to the fingerprint sensor bracket – it’s time for a change!
Hey there! Got a stubborn fingerprint sensor bracket? No worries! It’s held in place with some seriously sticky adhesive, but don’t let that stop you. We’ve got your back. Just follow our step-by-step guide, and you’ll have that bad boy off in no time! If you need help, you can always schedule a repair.
Tools Used

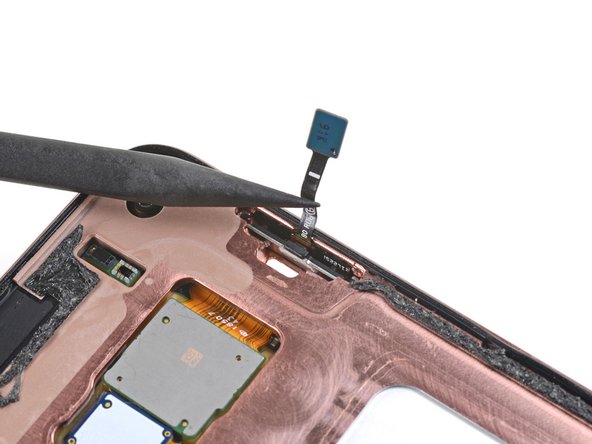
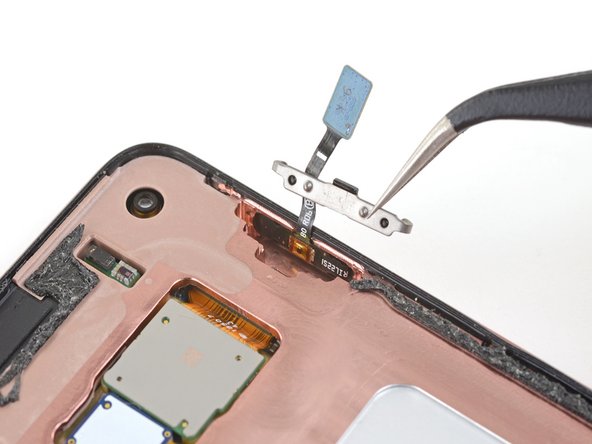
Step 28


– Grab a pair of tweezers and gently wiggle that fingerprint sensor cable free from the adhesive gasket. If you need help, you can always schedule a repair.
Tools Used
Step 29


While you hang tight, take a moment to check out these seams:
– Alrighty, let’s flip this device over so you can see the screen, crystal clear and bright! Now, warm up your iOpener and get ready to apply some heat to that right edge of the display. Remember, keep the heat on for about two minutes. If you need help, you can always schedule a repair!
Tools Used
Step 30


– Start by placing a suction cup on the warmed edge of the display. Let’s get that thing open!
– Give the suction cup a good, steady pull to create a little gap. Don’t be shy, we’re on a mission!
– Now, take the tip of an opening pick and gently insert it into that gap you just made. You’re doing great!
Step 31


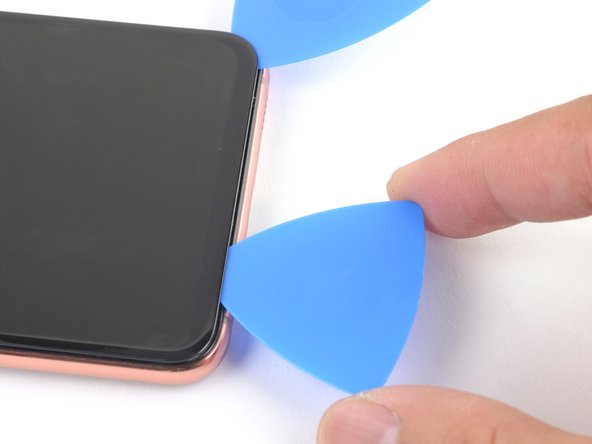
– Gently glide the opening pick along the right edge to cut through that adhesive like a pro.
– Keep the opening pick in the corner to ensure that sneaky adhesive doesn’t seal back up on you.

Step 33

– Hey, have some fun with this! Begin with a gentle slide of your pick along the bottom edge, cutting through that adhesive like a pro!
– Whoa, almost done! Leave that pick in place so you can celebrate when this is all over. How about treating yourself to that repair we mentioned? schedule a repair


Step 35


Hey there, the OLED panel is usually tightly sealed against this glass panel. Once it’s exposed to air, the panel might not function properly. But fret not, we’ve got the know-how to fix it and get your device back in top shape! If you need help, you can always schedule a repair.
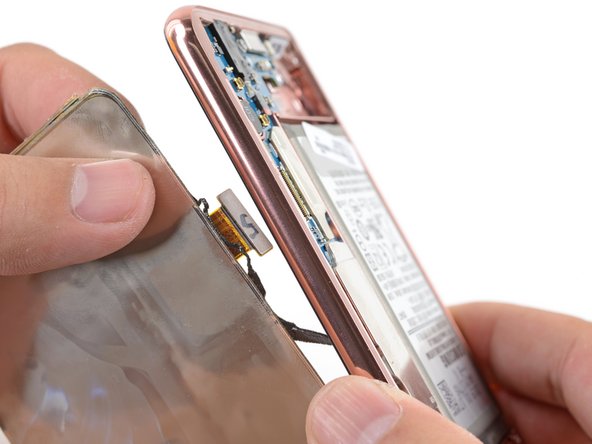
– Lift up and remove the display glass! Keep those hands steady and let’s get this repair going. If you need help, you can always schedule a repair.
Step 36

– Warm up that iOpener and get it cozy with the OLED panel for about a minute to loosen the adhesive. If you need help, you can always schedule a repair
Tools Used


Step 39


– First off, gently lift off the display panel!
– Are you rocking a custom-cut adhesive? Check out this guide to gracefully peel away the old adhesive and get that fresh replacement screen on there.
– Using Tesa tape to stick the screen back on? No worries, just follow this guide for a smooth reattachment.


Step 41

– Gently use the tip of a spudger to coax that fingerprint sensor cable out through its snug little frame cutout. You’ve got this!
Tools Used
Step 42

– Grab a pair of tweezers like a pro and carefully lift out the power button support bracket from its cozy spot.
– When putting things back together, make sure the bracket is chilling with its indents facing away from the button and the center tab waving up high.
Tools Used