How to Replace Samsung Galaxy S20 Ultra Screen DIY Guide
Duration: 45 minutes
Steps: 38 Steps
Heads up!
While tinkering away, keep in mind that there’s a good chance of accidentally parting ways with the delicate display panel. Better safe than sorry!
Ready to give your Samsung Galaxy S20 Ultra a fresh new look? Let’s dive into replacing that screen assembly! Your display glass, OLED panel, and digitizer are all part of this crew and they’ll be getting a makeover together. Quick heads up: some replacement screens come snug in a new frame (also known as a chassis), which means you’ll be switching over all your phone’s insides and possibly pop in a new battery too. Double-check that you’ve got the right part before you jump in. Just a note, the display panel can be delicate and prone to breaking, so handle it with care during the process! If you’re planning to reuse your old screen assembly, make sure to apply some heat and take it easy while prying it out. Oh, and don’t forget the replacement adhesive to finish off the job! You’re all set to get to work—let’s make that phone shine again!
Step 1

First things first, give your phone a little break—unplug it and power it down before diving in.
– Get your iOpener nice and toasty, then gently press it onto the lower edge of the back cover for a solid two minutes.
Tools Used

Step 2


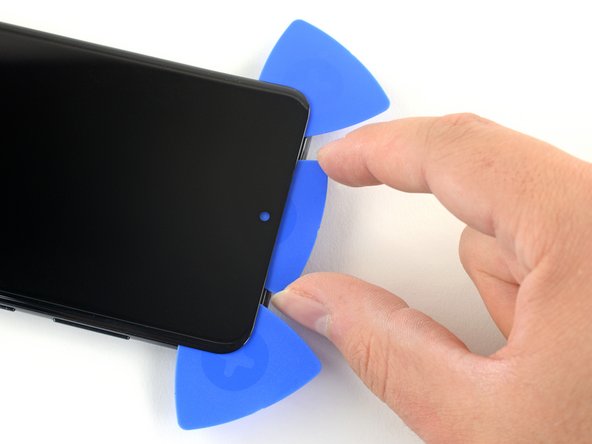
– Grab a suction cup and stick it on the back of your phone, aiming for the center of the bottom edge.
– Give that suction cup a firm tug with steady pressure to create a little opening between the back cover and the frame.
– Now, take the tip of an opening pick and gently slide it into that gap you’ve just made.
Step 3


– Gently glide the pick back and forth along the bottom edge to cut through that sticky adhesive like a pro.
– Keep your opening pick snugly in the seam to stop the adhesive from sealing up again.
Step 4

– Warm up the left edge of the back cover with a heated iOpener for a cozy two minutes. Get ready to make some magic happen!
Tools Used
Step 5


This might feel tricky initially, but trust us – you’ve got this! What doesn’t chip away eventually?
– Place a suction cup on the back of your phone, aiming for the sweet spot near the center of the left edge.
– Give that suction cup a good, steady pull to open up a little gap between the back cover and the frame.
– Now, slide the tip of your opening pick into that gap and get ready to work some magic!
Step 6


– Ready to jazz up your repair game? Glide that pick under the glass’s edge. Give it a little tilt and slide it in further to break that back cover’s adhesive seal!
Step 7


– Gently glide the pick downwards along the phone’s lower edge to release the adhesive securing the back cover.
– Keep the pick snug under the left side of the glass near the lower part of the device to prevent the adhesive from sticking back.
Step 8


– Let’s spice things up! Place another pick right under the center of the left edge of the back cover.
– Gently slide the pick upwards towards the top of the device to loosen the adhesive on the back cover.
– Keep your cool and slip the pick beneath the left edge of the glass near the top of the device to make sure the adhesive doesn’t stick back.
Step 9

– Warm up a heated iOpener and gently press it against the right edge of the back cover for a cozy two minutes.
Tools Used
Step 10


– Stick a suction cup firmly to the back of your device, aiming for the center of the right edge.
– Give that suction cup a confident tug to create some space between the back cover and the frame.
– Slide a trusty opening pick into the gap you’ve made.
Step 11


– Gently slide the pick down towards the bottom edge of the phone to break free the back cover’s sticky grip.
– Keep your pick tucked under the right edge of the glass near the bottom of the device to stop that adhesive from making a comeback.
Step 12


– Slide another pick under the center of the right edge of the back cover, just like tucking in a cozy blanket.
– Gently glide the pick towards the top of the device to break free the back cover’s adhesive, as if you’re unwrapping a present!
Step 13

– Alrighty, grab your heated iOpener buddy and apply it to the top edge of that back cover for exactly two minutes. No rush, no rush. You got this! Remember, if you need help, you can always schedule a repair and we’ll make it as smooth as butter!
Tools Used
Step 14


The glass around the corners of the back cover has a bit of a curve and is quite prone to cracking. So, take it easy during this step to keep your back cover safe and sound!
– Gently glide the pick from the right edge of your device, making your way around the top right corner like a pro.
– Keep slicing along the top edge to completely free the back cover from its adhesive grip.
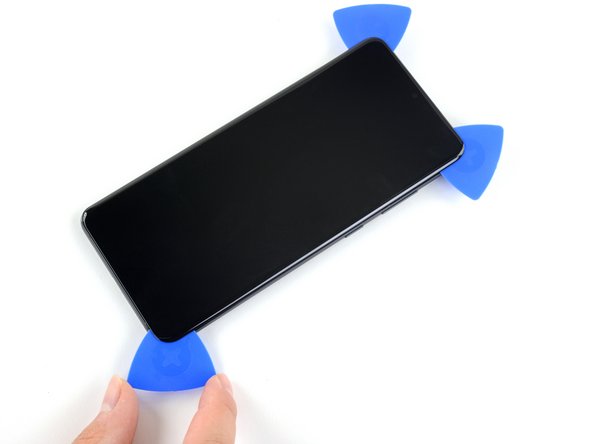
Step 15


– Rise and shine, let’s peel back that cover! Use those opening picks to make quick work of any stubborn adhesive.
– Take a break and let the cover rest. It’s earned some time off after all that lifting, am I right?
– Friends don’t let friends reassemble without these tips!
Step 16


– Grab your trusty spudger and gently wiggle it to lift up and disconnect that wireless charging coil connector. You’ve got this!
Tools Used

Step 17


– Grab a trusty pair of tweezers and delicately lift off the wireless charging coil from your device.
– Bid farewell to the wireless charging coil.
– When putting things back together, make sure to reconnect the wireless charging coil connector first to get it in the right spot, then give the rest of the coil a good press to stick it down.
Tools Used

Step 18

– Grab your trusty Phillips #00 screwdriver and let’s get those five 3.9 mm-long screws out of the way to free the motherboard bracket. You’ve got this!
Tools Used

Step 19

– Get ready to show that motherboard bracket who’s boss! Grab a pair of tweezers and gently unclip and remove it.
Tools Used


Step 21

– Grab your trusty Phillips #00 screwdriver and get ready to tackle those five 3.9 mm-long screws holding the loudspeaker and lower midframe in place. You’ve got this!
Tools Used
Step 22


– Get ready to show that midframe who’s boss! Grab a spudger or a trusty pair of tweezers and aim for the notch in the top left corner. Give it a gentle nudge to unclip it from its cozy spot.
– Next up, it’s time for the loudspeaker and lower midframe to take a break. Give them a proper goodbye and detach them from their duties.


Step 24

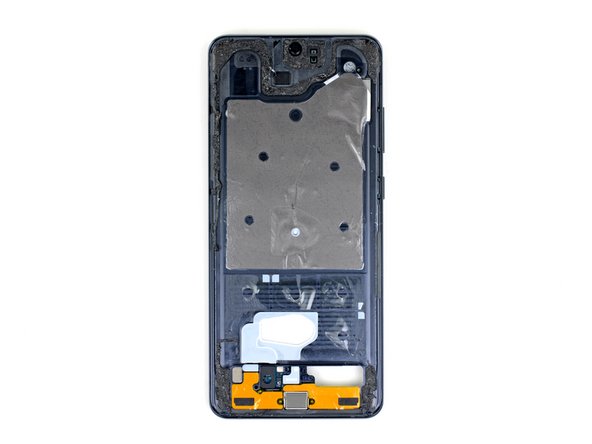
In the upcoming steps, we’ll warm things up and carefully peel away the black adhesive that hugs the edges of your device.
– The adhesive along the long edges of your device is pretty slim, so just slide your pick in about 5 mm to get things started.
– Keep in mind that the adhesive at the top edge of the phone is a bit more clingy and extends further from the edge. You’ll need to push your pick in a little deeper here to completely break that bond.

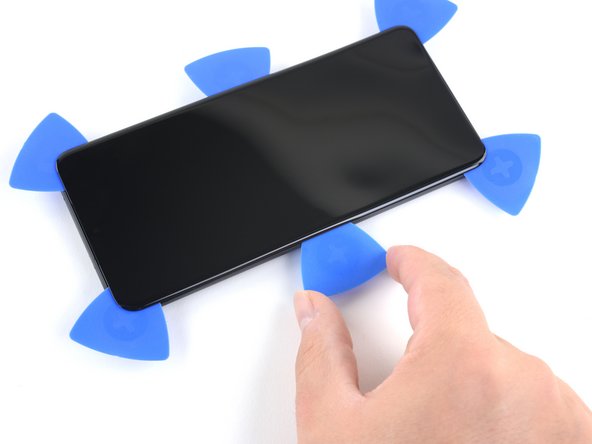
Step 26


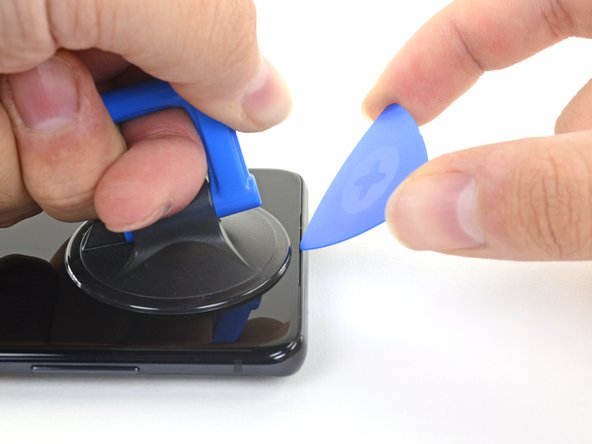
– Alrighty guys! Let’s get this phone back in action 👍. First, grab a friend to help you by applying a suction cup to the display glass. Make sure it’s right in the center at the top edge. Then, ask your pal to pull with some serious gusto! This should make a gap appear between the frame and the glass. Now, get your trusty opening pick and slide it into that gap near the earpiece speaker notch. Move it downwards a bit, and voilà! Stopping the adhesive from resealing is as easy as leaving your pick in the seam. If you need help, you can always schedule a repair! 📱🤠
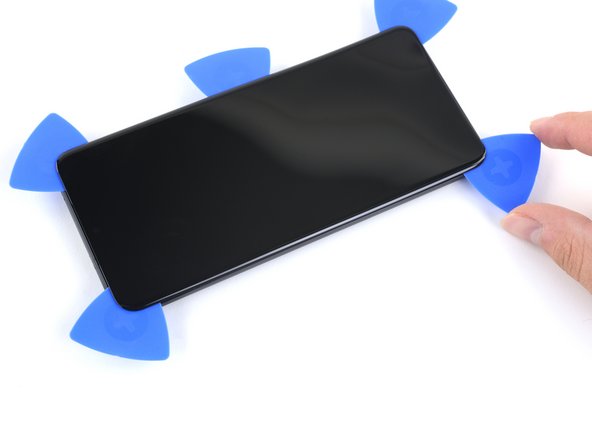
Step 27

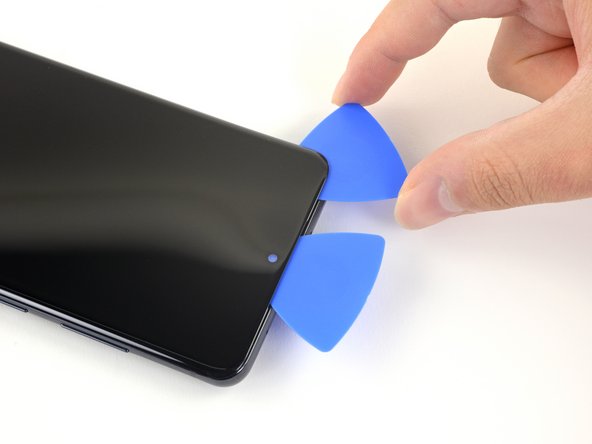
– Pop in a second pick right into that same gap and glide it up to the top left corner of the display to cut through the adhesive like a pro.
– Keep that opening pick snug in the seam to stop the adhesive from getting all clingy again.

Step 29

– Gently slide the center pick deeper into the top edge of your device to cut through the adhesive holding the earpiece and front-facing camera in place. You’ve got this!
– Now, go ahead and remove the center pick.

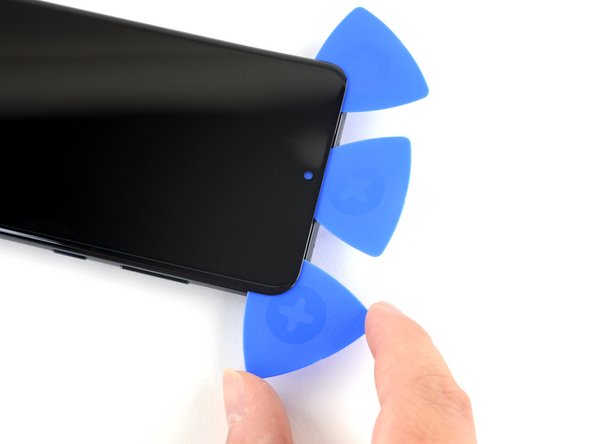
Step 31


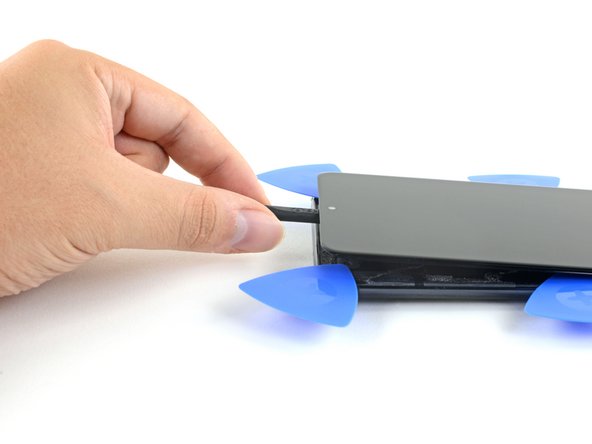
– Slide an opening pick into the little gap at the top right corner of your display. You’ve got this!
– Gently glide that pick down to the bottom right corner to slice through the adhesive like a pro.
– Now, sneak a pick underneath the center of the screen’s right edge to keep that adhesive from sticking back together. You’re doing great!
Step 32

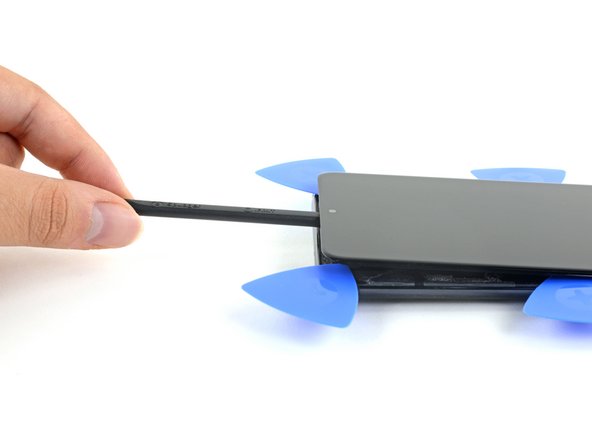
– As you carefully slice through the adhesive around the edge of your device, keep an eye out for those delicate spots near the USB-C port. We want to keep everything safe and sound!

Step 34

Step 35


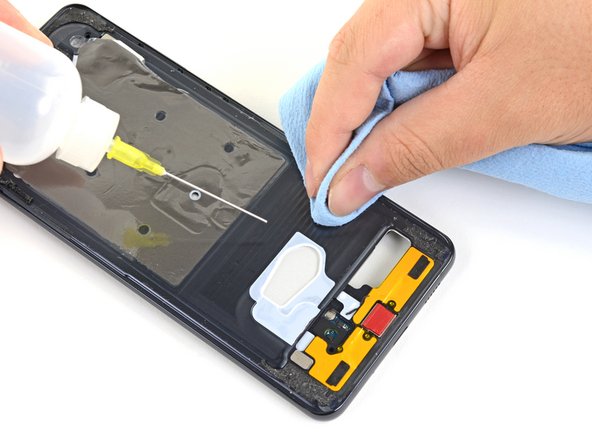
– Grab some high concentration isopropyl alcohol (over 90% is the magic number) and gently apply it behind the display, getting as close to that clear adhesive (you’ll spot it marked in red) as you can.
– Give your device a little tilt while you apply the alcohol; this helps it sneak under the adhesive at the bottom of the display.
– Once you’ve applied the alcohol, keep that bottom tilted down for about two to three minutes. This will let the alcohol work its way in even deeper!
Tools Used


Step 37

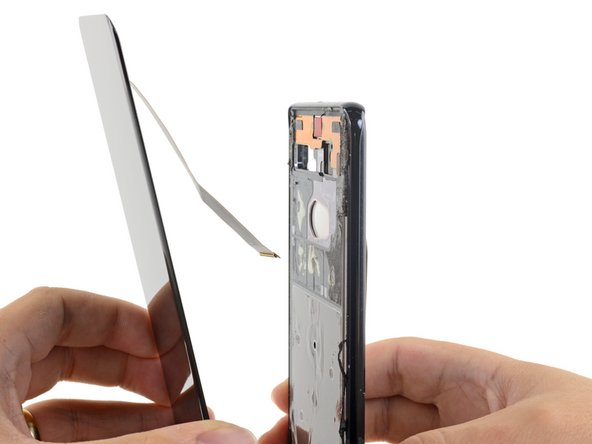

– Take a moment to gently detach the display from the frame. You’ve got this!
– When it’s time to put everything back together, remember to thread the display cable through the frame cutout before pressing that display back in place. Just a heads up—hold off on inserting the display cable until after you’ve applied the new screen adhesive. You’re doing great!
Step 38
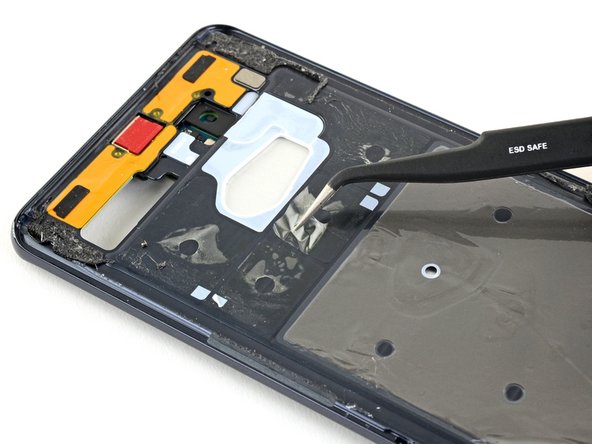

– Grab your trusty tweezers and gently pry away any leftover adhesive from the frame. We’re making progress!
– Next up, it’s time to give that frame a good scrub! Use some isopropyl alcohol and a lint-free cloth to make the surface shine. Remember to wipe in one direction to keep things neat and tidy.
– When it’s time to put everything back together, just follow this guide to install the custom-cut adhesives for your device. You’re doing great!
Tools Used


