How to replace Samsung Galaxy S21 5G primary interconnect cable – Step-by-Step Tutorial Guide
Duration: 45 minutes
Steps: 28 Steps
For your own peace of mind, make sure the battery is below 25% before diving into your phone disassembly adventure!
Helping you safely fix your Samsung Galaxy S21! Discharge that battery to below 25% before you dive into disassembling, and watch out for any puffy batteries. We’ve got your back with friendly, step-by-step support at schedule a repair if you need it!
Step 1

Hey there! Give your phone a quick rest mode refresh before we start. It’s like a little power nap that’ll set us up for success on this fix!
– Warm up your iOpener and give the bottom edge of the back cover a cozy two-minute hug.
Tools Used

Step 2


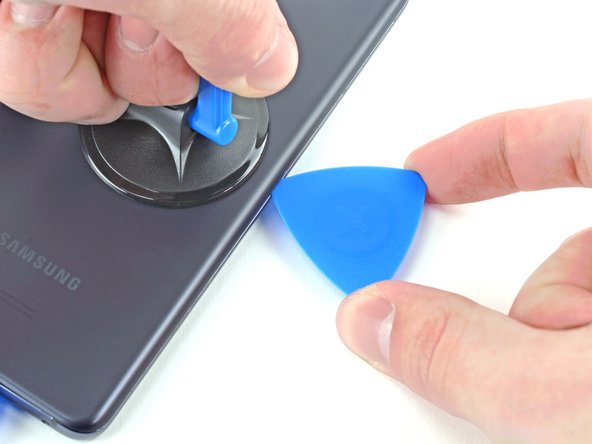
– Grab a suction cup and stick it on the back of your phone, aiming for the center of the bottom edge. You’re doing great!
– Give that suction cup a solid pull with steady force. This will help create a little gap between the back cover and the frame. Nice job!
– Now, slide an opening pick into that gap. You’re almost there!


Step 4

– Get the party started by applying a heated iOpener to the back cover’s left edge for a couple of minutes.
Tools Used
Step 5


– Alrighty, let’s get your device back in action! First, find yourself a trusty ol’ suction cup near the center of your phone’s left edge. Now, give it a mighty yank to crack that back cover. And lastly, slip in that opening pick, my friend. If you feel like you might need a helping hand, don’t hesitate and schedule a repair!
Step 6


– Gently glide an opening pick down the left edge and towards that bottom left corner to slice through the adhesive like a pro.
– Keep that pick in place to stop the adhesive from getting all clingy again.
Step 7

– Time to give the back cover’s right edge a cozy treatment with a heated iOpener for a quick two-minute session!
Tools Used
Step 8


– Grab a suction cup and firmly place it on the back of the phone, aiming for the sweet spot near the center of the right edge.
– With a steady hand, pull up on that suction cup like you’re trying to lift a secret door—this will create a nice little gap between the back cover and the frame.
– Now, slide an opening pick into that gap and get ready to make some progress!
Step 9


– Gently wiggle an opening pick along the right edge of the back cover to loosen up the adhesive.
– Keep the pick in place to avoid the adhesive from sticking back.
Step 10


You can tackle this process on each corner, but remember to steer clear of the top-left one where the rear-facing camera hangs out.
– Swing that right-edge opening pick around the top-right corner of your phone with finesse!
Step 11


– Gently slide that trusty opening pick right up against the camera shell. You’re doing great!
– Now, give some love to the left-edge pick and repeat the same move. Keep it up!
Step 12

– Get the camera shell feeling toasty by giving it a warm blanket of the iOpener for a couple of minutes.
Tools Used
Step 13


If this step doesn’t do the trick, hop over to the next step for an alternative route. Otherwise, no need to skip ahead!
– Twist the back cover in the opposite direction to make a space between the camera shell and the frame.
– Gently slide in an opening pick into the space.
Step 14


Although this method can be a bit tricky, don’t worry – you’ve got this! Just be super gentle when handling the plastic back cover, and you’ll be good to go. Need a hand? No worries, you can always schedule a repair with us!
– Carefully slide those two picks right under the corners of the back cover next to the camera shell, just like tucking in your favorite blanket.
– Now, gently wiggle the picks back and forth along the seam between the back cover and the camera shell until you create a little opening between the camera shell and the frame. You’ve got this!
Step 15


– Gently slip an opening pick between the camera shell and the frame to free up that stubborn adhesive.
Step 16


Watch out for that sneaky plate on the back cover around your phone’s flash! Your pick might just decide to play hide and seek with it.
– You’ll want to slice through the extra adhesive located to the right of the camera. Happy cutting!
Step 17


– Align the opening pick’s tip with your phone’s flash
– Gently insert the pick, ensuring you steer clear of the flash’s panel.
– Carefully cut the adhesive to the right of the camera.


Step 19

As you dive into this repair adventure, be sure to keep an eye on those little screws! They each have their own special spot, so let’s make sure they find their way back home when you’re all done.
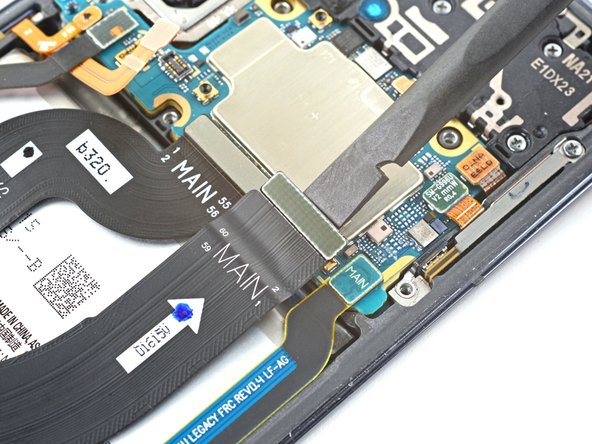
– Grab your trusty Phillips screwdriver and let’s tackle those five 4 mm-long screws that are holding the motherboard bracket snugly to the frame. You’ve got this!
Step 20


Hold your horses! Don’t go yanking that bracket off just yet—it’s still holding onto the wireless charging coil like a loyal friend.
– Get ready to show that motherboard bracket who’s boss! Grab a trusty pair of tweezers, give it a gentle tug, and watch it pop off like a champ from the frame.
Tools Used

Step 21


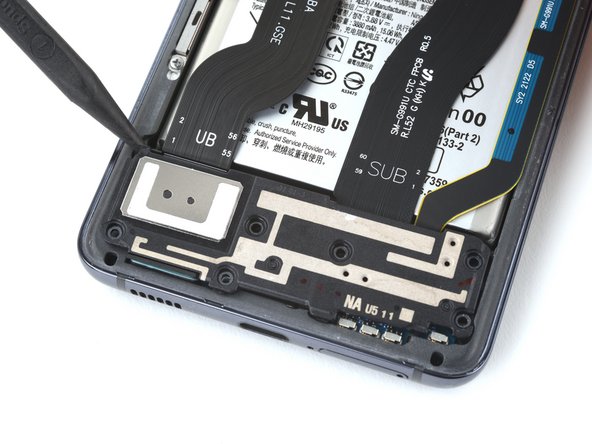
– Whoa, almost got it! While holding that motherboard bracket outta the way, just use that spudger to gently lift the battery press connector. Nice! And when puttin’ it back together, make sure you snap that bad boy into place! If it’s misaligned, don’t stress; just schedule a repair and we’re here to help!

Step 22


– While keeping the motherboard bracket safely out of the way, grab your trusty spudger and gently pry up to disconnect the wireless charging coil’s press connector. You’ve got this!
Tools Used
Step 23


– Gently coax the wireless charging coil away from the phone using your fingers. Think of it as a friendly little hug goodbye!
– When putting everything back together, start by securing those motherboard bracket screws first. This will help line up the charging coil perfectly. After that, give the rest of the coil a good press down to make sure it sticks nicely.
Get ready to peel off the adhesive gently holding the wireless charging coil in place on your device. It’s a light grip, so you’ll have no trouble freeing it up. Remember, a little patience goes a long way in repair work. If you need a hand, don’t hesitate to schedule a repair with Salvation Repair!
Step 24

– Grab your trusty Phillips screwdriver and gently unscrew the six 4 mm screws that are holding the loudspeaker snugly to the frame. You’ve got this!