How to Replace Samsung Galaxy S4 Motherboard DIY Guide
Duration: 45 minutes
Steps: 17 Steps
Heads up, tech pal! Make sure you’ve got your tools ready and your workspace clear. Let’s keep it smooth and steady!
Ready to jazz up your tech skills? Follow this fabulous guide to swap out the motherboard in your Samsung Galaxy S4 and make it feel brand new! If you need help, you can always schedule a repair.
Step 1


– Grab a plastic opening tool, or unleash your inner superhero with your fingernail, and gently pry in the little notch just left of the rear camera, near the power button. It’s like tickling your device open!
Step 2


– Grab the rear case by the corner near the divot and whisk it away from the phone like you’re unveiling a magic trick!
Step 3


– Nudge the microSD card a tad deeper into its cozy slot using the flat end of a spudger or your handy fingernail until you hear a satisfying click.
– Once you hear that click, let go of the card and watch it spring out of its slot like a toast from a toaster.
– Go ahead and remove the microSD card.
– When putting it back together, just push the microSD card back into the slot until it clicks into place like a seatbelt.
Tools Used

Step 4


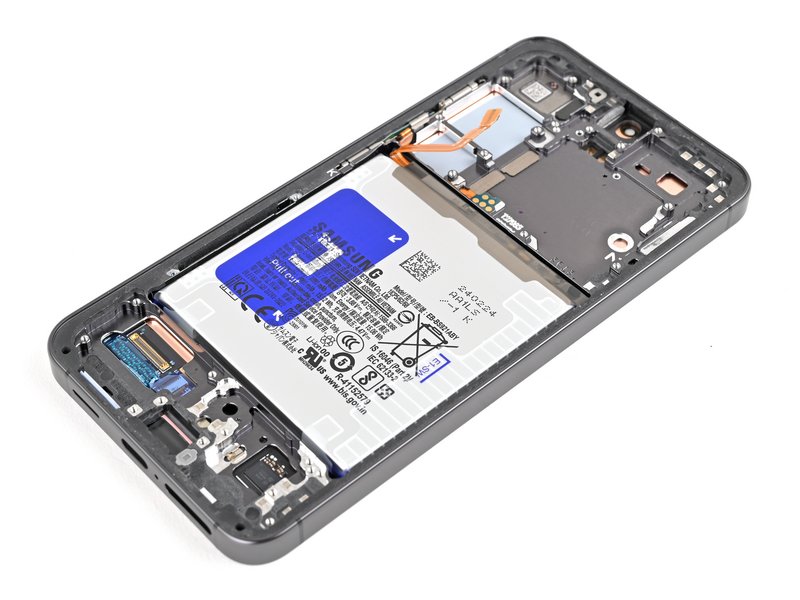
– Pop in a plastic opening tool, or even just a finger, into the groove of the battery compartment and give the battery a gentle nudge upwards.
– Slide that old battery out of your phone, and voila!
Step 5


– Grab a plastic opening tool or your trusty fingernail and gently nudge that SIM card a little deeper into its cozy slot until you hear a satisfying click.
– Once you hear that click, let go of the card and watch it pop out like it’s ready for a break.
– Go ahead and take out the SIM card.
– When it’s time to put everything back together, just push the SIM card back into its slot until you hear it click into place.
Step 6

– Unscrew the nine 4.0 mm Phillips #00 screws that are keeping the midframe attached to the display assembly. You got this!
Step 7


– Kicking off on the volume button side, slide your plastic opening tool between the chrome bezel around the display glass and the larger chrome border. Spot that seam between the two.
– Slide the opening tool along the seam, popping those plastic clips as you go.
Take it easy on the prying, champ! Just a gentle nudge is enough to let those plastic clips know who’s boss. Remember, the midframe bezel is like that one skinny friend who can’t handle rough housing—too much bending and snap! Crackage could ensue.
The midframe is snugly held in place by a bunch of plastic clips tucked behind the chrome bezel. Let’s pop those clips and set the midframe free! Just follow these next steps to navigate through the clip-separating adventure.
Step 8


– Keep working your magic around the corner of the phone.
– Gently glide your opening tool along the seam between the midframe and display at the bottom of the device to pop open those pesky plastic clips.
Step 9


– Alright, let’s get that corner sorted out, especially on the power button side!
– Gently glide the opening tool along the seam like you’re buttering toast.
Step 10


Now might be a good time to take another victory lap with your plastic opening tool around the device’s border, just to ensure all those sneaky clips are totally unclipped.
– Keep grooving with the opening tool around the top of your phone, busting those last pesky clips loose and letting the midframe break free from the display assembly. Almost there, champ!
Step 11


– Time to wiggle the midframe away from the display assembly! You’re doing great—keep up the good vibes!
Step 12


– Grab your spudger and gently pop off the USB board connector. Easy does it!
– Next up, unhook that front-facing camera cable connector like a pro.
– Finally, detach the earpiece speaker assembly cable connector. You’re doing great!
Tools Used
Step 13


– Unplug the headphone jack assembly cable connector like a boss.
– Disconnect the display/digitizer cable connector with style.
– Unhook the antenna cable connector with a smooth move.
Step 14

– Whip out your Phillips #00 screwdriver and unscrew that tiny 2.4 mm scamp from the motherboard assembly!
Step 15


Grip the edges of the motherboard to keep those pesky static shocks at bay! As you lift it out, watch out for sneaky cables that might catch it. It’s like Operation, but you’re the surgeon!
– Carefully coax the motherboard out of its cozy home.

Step 17


– With a gentle touch, use tweezers or your fingers to carefully slide the rear-facing camera out of its cozy spot in the motherboard.
Tools Used