How to Replace Samsung Galaxy S5 Mini Rear Facing Camera Tutorial
Duration: 45 minutes
Steps: 15 Steps
Before you start, make sure you’ve got the right tools for the job. If you need help, you can always schedule a repair
Get ready to take on the challenge of swapping out the rear-facing camera on your trusty Samsung Galaxy S5 mini. It’s time to show that camera who’s boss and give your device a new lease on life. You’ve got this! If you need a helping hand, feel free to schedule a repair with Salvation Repair.
Step 1


You’ll hear a snazzy pop as those plastic snaps come undone!
– Wedge your fingernail or a snazzy plastic opening tool into the groove right above the power button.
– With a gentle tug, free the panel from the back of your trusty phone.
Step 2


– Slip your fingernail or a plastic opening tool into the notch at the base of the battery.
– Carefully lever the battery out of its housing in the phone.
– To insert the replacement battery, align the contacts correctly and gently press into place. Remember, the battery can seem to fit in more than one way, so avoid using force.
Step 3


– Lay your phone flat with its back smiling up at you.
– Grab a spudger or a plastic opening tool to gently lift the home button cable connector—just pop it off like a pro!
– When putting it all back together, thread the home button cable connector through the slot in the display assembly like a needle through thread.
– Heat things up a bit with an iOpener to soften the stubborn adhesive under the display. It’s like melting butter!


Step 4


Whoa there, tiger! Only nudge the opening pick a tiny bit—like 1/8 inch tops. There’s some delicate tech inside that doesn’t play well with others.
– Turn that phone over and let it chill on its back.
– Wedge a plastic opening tool or a pick into the nook between the screen and the frame. Glide it along the right side to persuade the adhesive to loosen up.
– Carefully coax the display assembly away from the frame just enough to see a slight gap. Park that first opening pick right next to the home button at the bottom right corner.
– Pop in a second opening pick and usher it up to the top left corner, easing the adhesive under the display as you go.
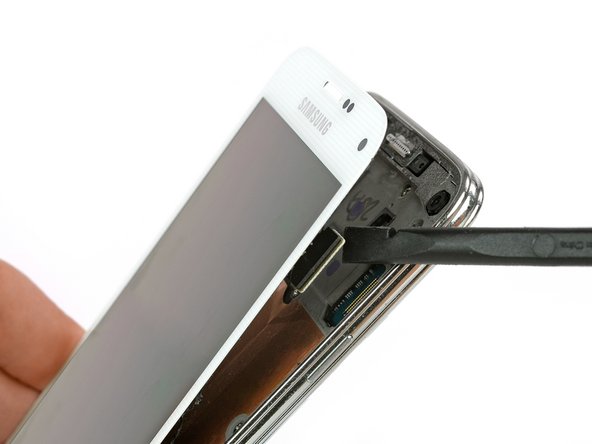
Step 5


– Warm up the screen of your phone with the iOpener. Focus on the top and left side of the front.
– Insert a third opening pick and slide it gently to the top left corner of the phone. Watch out for the front camera and the loudspeaker!
Tools Used
Step 6


Hey there, don’t you dare take out that display assembly just yet! It’s still buddy-buddy with its cable, so keep them together for now.
– Now it’s time to bring in the fourth opening pick – slide it into the lower left corner, right next to your home button. You’re making great progress!
– Give the opening pick in the top right corner a little flip to loosen the display. If it’s still being stubborn, don’t worry – just move those four opening picks around the frame like you did before to find any remaining adhesive. If you need help, you can always schedule a repair

Step 8


– Grab your trusty suction handle to hoist the display right off your phone. Make sure the home button cable connector sneaks through that sneaky little gap in the mid frame. Not cooperating? Snag a tweezer and give it a gentle nudge.
– Gently pull the display assembly away from the phone’s embrace to remove it.
Step 9

– Unscrew those twelve 4 mm Phillips #00 screws from the midframe. It’s like a treasure hunt, but for tech enthusiasts!
Step 10

– Turn your phone face down on a smooth, level surface with the back facing you.
– Take out the 4 mm Phillips #00 screw near the battery compartment.
Step 11

Try this fun dance routine: circle your midframe 10 to 30 times while your trusty blowdryer plays DJ. Keep grooving until the adhesive starts to loosen up. If you need help, you can always schedule a repair!
– Give the midframe a warm hug with a blow dryer or an iOpener to gently loosen the adhesive that’s holding it tight.
Tools Used
Step 12


Make sure to distribute the pressure evenly to keep that midframe happy and healthy! We wouldn’t want it to feel any unnecessary bending or damage, now would we? It’s all about showing love and care to your device as you work your magic. If you need assistance, don’t hesitate to schedule a repair!
Step 13


– Pop that sleek 3 mm Phillips #00 screw out like a boss; it’s holding the daughterboard to the motherboard assembly.
– Use a trusty plastic opening tool or spudger to gently free the daughterboard from its cozy socket.
– Grab your tweezers and carefully disconnect those cables linking the daughterboard to the motherboard. You’ve got this!
Tools Used
Step 14


– Unscrew the 3 mm Phillips #00 screw that’s keeping the motherboard snug in the frame. Let’s set it free!
– Gently lift the motherboard out of the frame and place it down on a flat surface. You’re doing great!
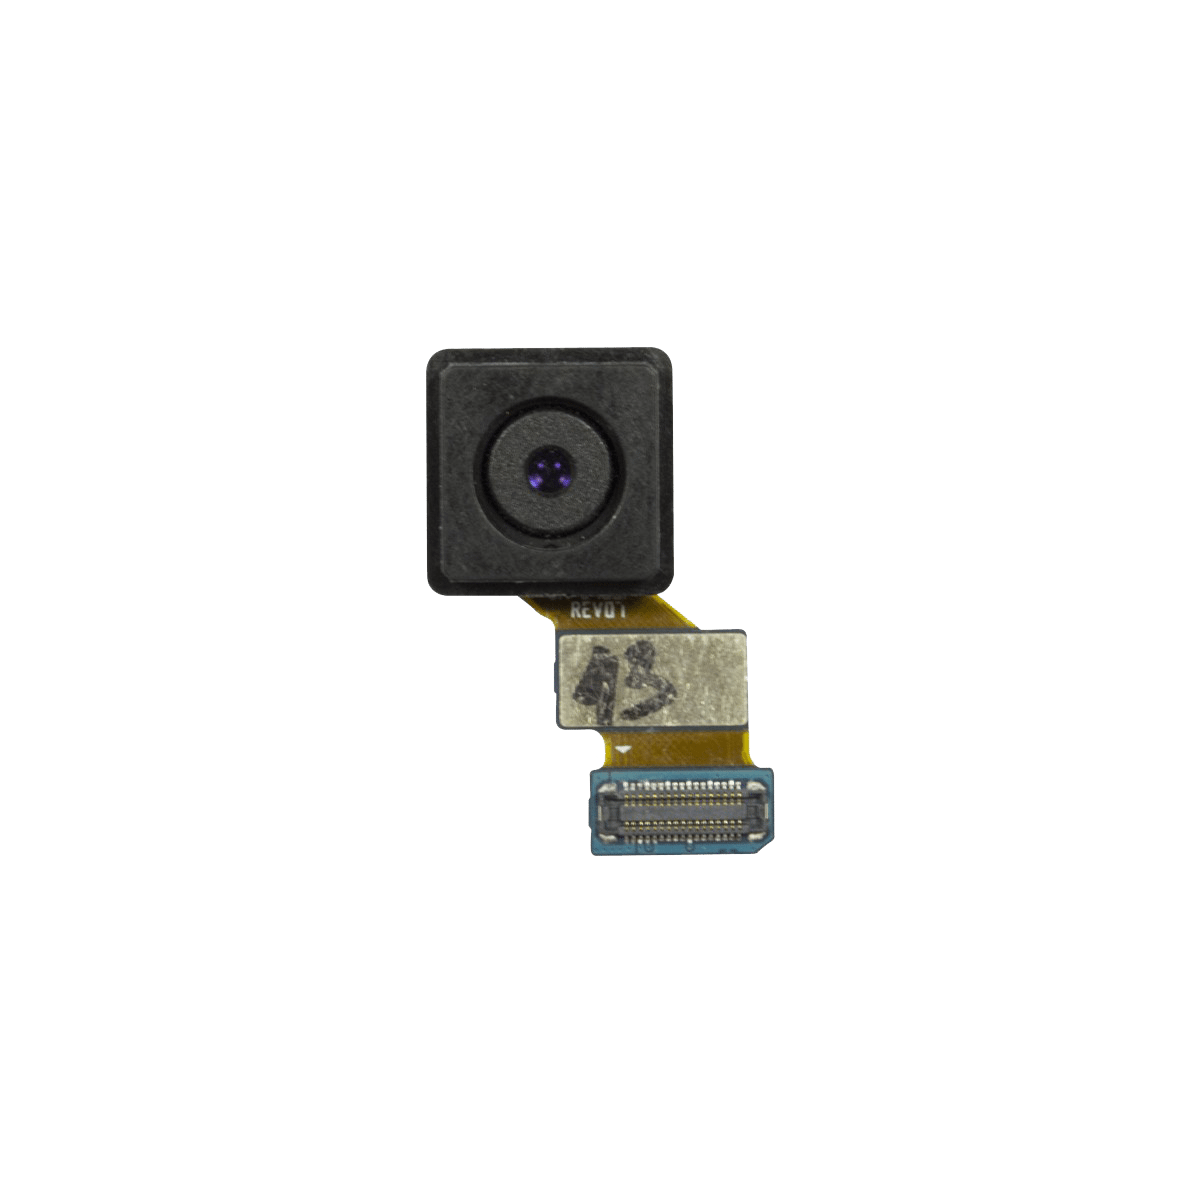
Step 15


– Grab a plastic opening tool or spudger and gently work your magic to pop off the rear-facing camera from the motherboard. You’re doing great!
Tools Used