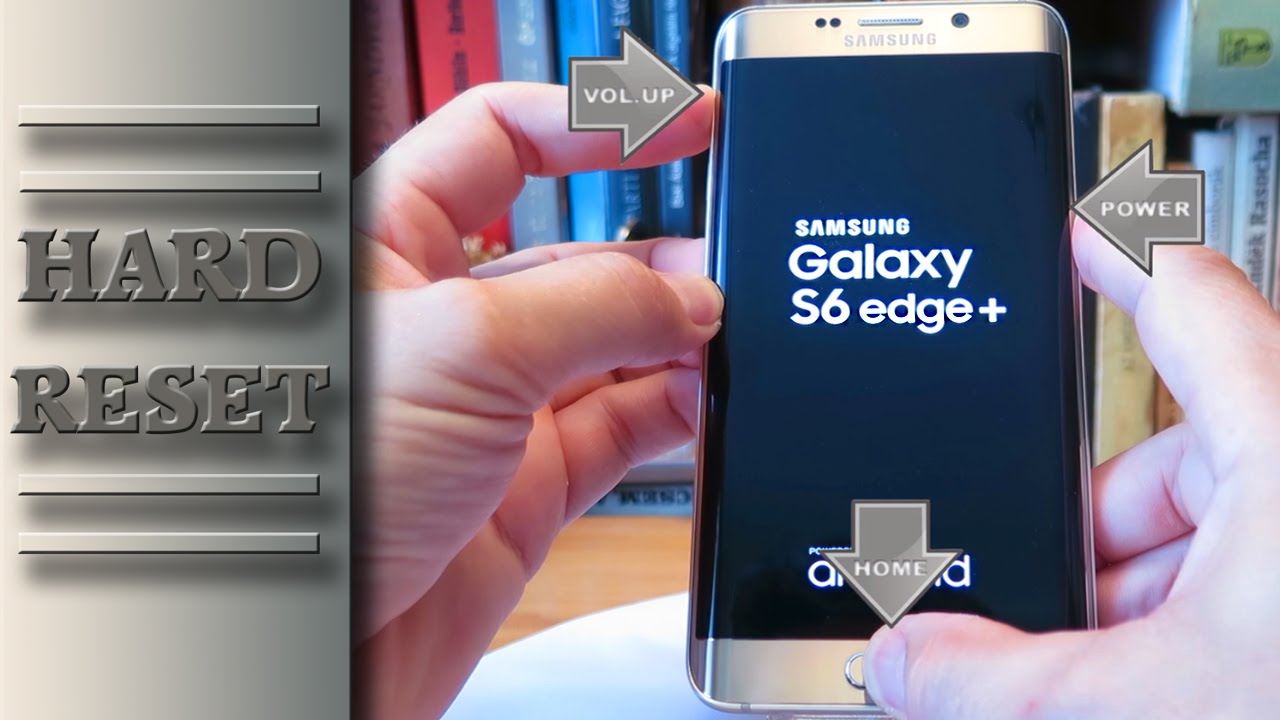
How to Replace Samsung Galaxy S6 Edge+ Display Step-by-Step Guide
Duration: 45 minutes
Steps: 31 Steps
Heads Up
If the frame looks like it’s taken a hit or isn’t straight anymore
Ready to give your Samsung Galaxy S6 Edge+ a fresh new look? This guide will walk you through replacing just the display while keeping the original frame, logic board, and battery intact. A quick heads-up: some replacement screens come with a new frame (also known as a chassis), which means you’ll need to move all your phone’s internals and swap in a new battery. That’s a whole different ballgame, so double-check you have the right part before diving in! If your frame is looking a bit worse for wear or has any bends, it’s best to replace it. Otherwise, your shiny new screen might not fit right and could get damaged from uneven pressure. Just a note: separating the display from the frame usually means the display won’t survive, so only follow this guide if you’re set on replacing it. Also, removing the rear glass will mess up the adhesive holding it in place, so make sure to replace that adhesive before putting the rear glass back on. If you need help, you can always schedule a repair.
Step 1


Keep that tool away from the microphone hole, or you might end up with a little extra ‘static’ in your life! Instead, focus on finding the outline of the SIM tray.
– Grab a paper clip or your trusty SIM card eject tool and gently insert it into the little hole on the SIM card slot located on the side of the volume button. You’ve got this!
– Give it a gentle press to pop that SIM card tray right out. Easy peasy!
– Now, carefully pull the SIM card tray out of the phone. Look at you go!
Tools Used

Step 2

You can use a hair dryer, heat gun, or hot plate to help out, but watch out for overheating your phone! The OLED display and internal battery are both a bit sensitive to heat, so keep it cool and steady.
You might just find yourself giving the iOpener a little extra love by reheating and reapplying it a few times to warm up your phone just right. Make sure to follow those iOpener instructions closely to keep things from getting too toasty.
– Warm up that iOpener and gently press it against the volume button side of your phone for a solid two minutes. You’re doing great!
Tools Used

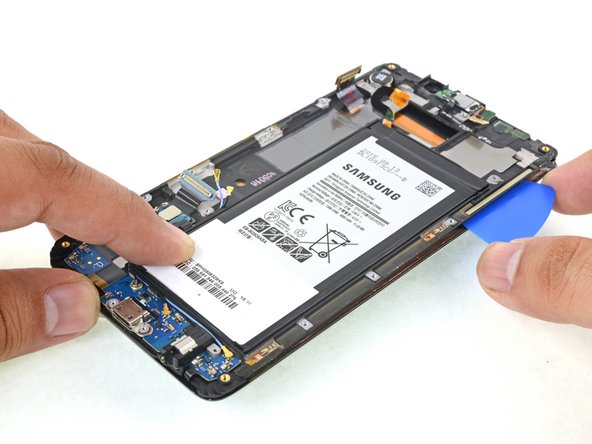
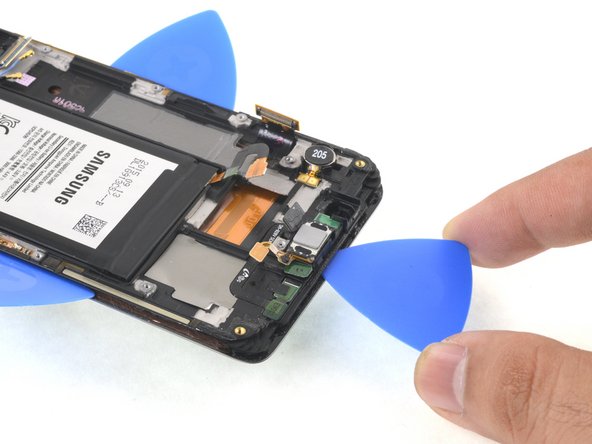
Step 3


– When the back panel is feeling warm and cozy, grab a suction cup and place it right in the center of your phone, as close to the edge as you can get.
– Gently pull up on the suction cup to create a tiny opening under the rear glass, then slide an opening pick into that little gap.
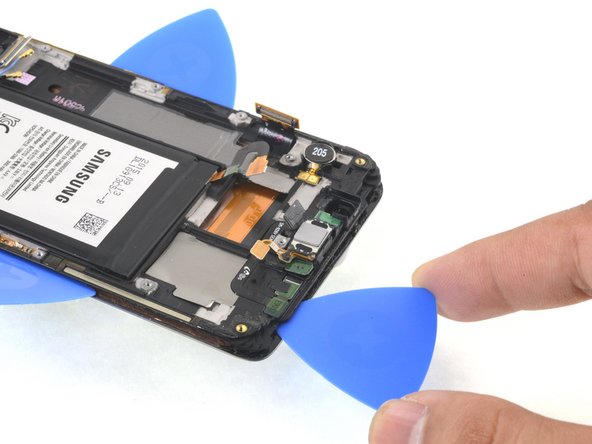
Step 4


Take it nice and easy to keep the pick snug in the seam. If it gets tough to cut, give the iOpener a reheat and try again. If you need help, you can always schedule a repair.
– Gently glide that pick along the edge of your phone to slice through the adhesive holding the rear panel in place. You’ve got this!
Tools Used
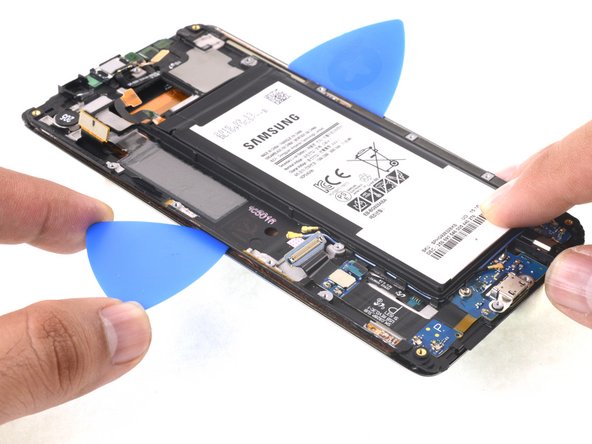
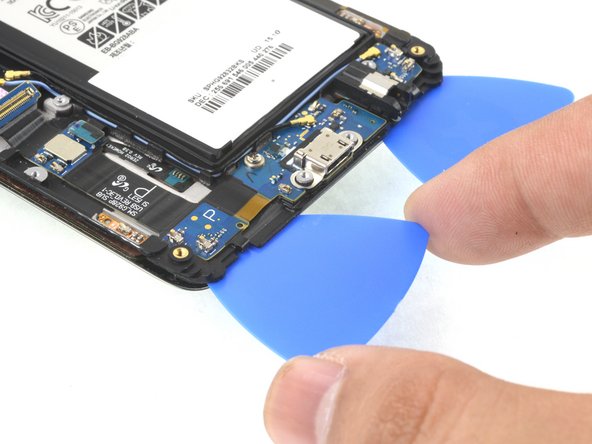
Step 5


– Work your way around the other three sides of the phone with the heating and cutting steps.
– Keep an opening pick under each edge to stop the adhesive from sticking back down.
Step 6


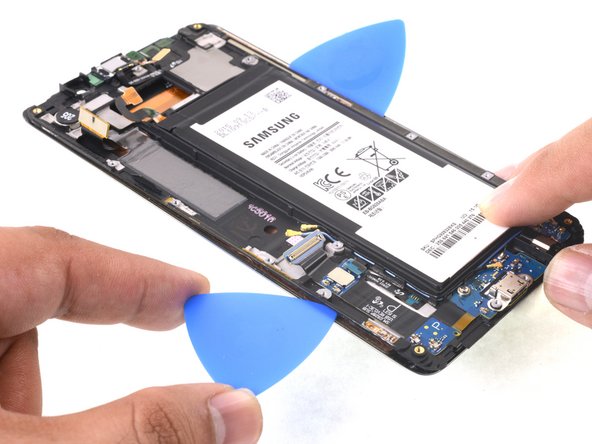
– Grab your trusty opening pick and gently slice through any stubborn adhesive that’s hanging on. You’re almost there!
– Carefully lift off the rear glass and reveal the inner workings of your device.
Step 7

Feel free to pop that back cover on without worrying about replacing the adhesive! Just make sure to clear away any big chunks of adhesive that might keep it from fitting snugly. Once it’s back on, give it a little heat and some gentle pressure to secure it. It may not be waterproof, but trust us, the glue is usually more than capable of holding things together.
– Ready to get that back cover back on? Let’s do this! First, grab your trusty tweezers and gently peel away any leftover adhesive from both the back cover and your phone’s chassis. We want a clean start!
– Next up, it’s time for a little spring cleaning! Use some high concentration isopropyl alcohol (at least 90%) along with a lint-free cloth. Just make sure to swipe in one direction only—no back-and-forth shenanigans. This will prep the surface for the new adhesive like a pro.
– Before you dive into the sticky stuff, don’t forget to power on your phone and test your repair. It’s always wise to check your handiwork before sealing it all up.
– Now, let’s talk about that replacement adhesive! It comes in a pre-cut sheet that fits the back cover’s curves perfectly. Just remember, this sheet is asymmetrical, so align those screw holes with the frame’s screws before you apply it.
– Once you’ve got that rear cover back in place, apply some strong, steady pressure for a few minutes. You can even place it under a stack of heavy books to help the adhesive bond like a champ.
Tools Used


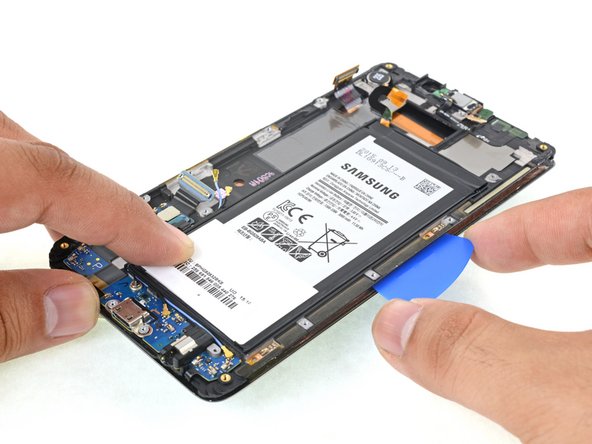
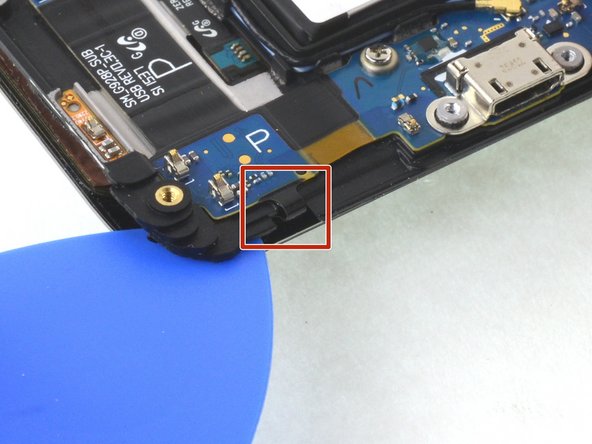
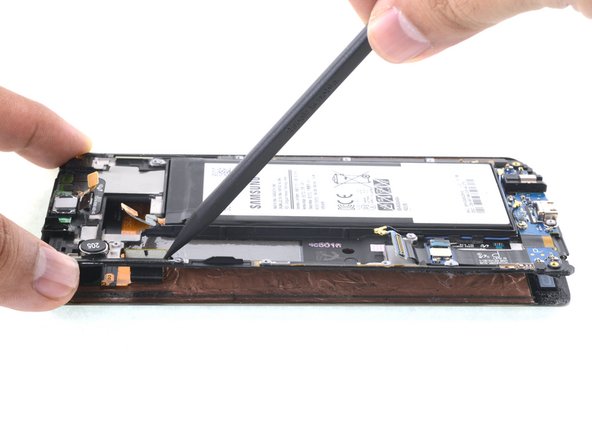
Step 9
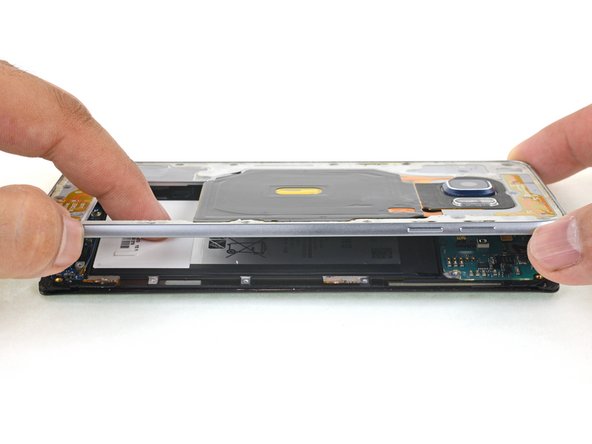


– Push down on the back of the battery and lift up on the midframe edges to pop it away from the rest of the phone. If you need help, you can always schedule a repair
Step 10


– To gracefully part ways, use the flat end of a spudger to disconnect the battery ribbon cable from the motherboard.
Tools Used

Step 11
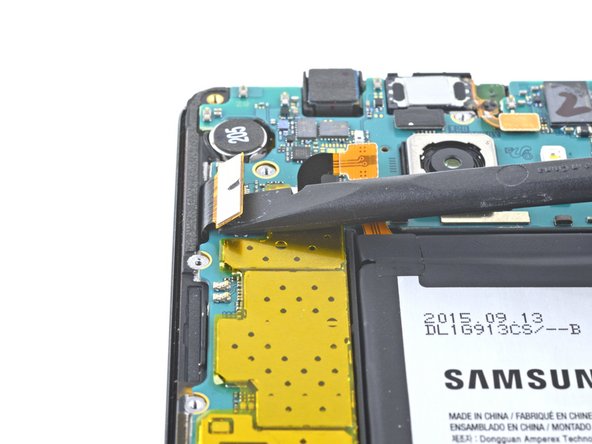

– Grab your trusty spudger and gently slide the flat end underneath the display cable connector. Give it a little pry and pop that connector straight out of its socket. Piece of cake!
– Once you’ve tested the new display and given it a thumbs up, go ahead and unplug both the battery and the replacement display. Then, keep cruising through the guide like a pro!
Tools Used
Step 12

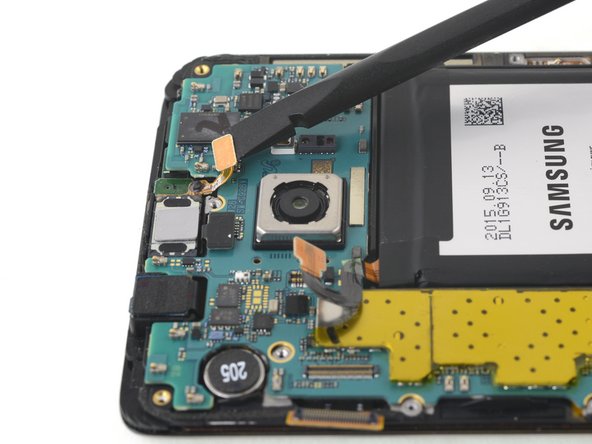
– Grab your trusty spudger and gently use the flat end to disconnect that front-facing camera ribbon cable. You’ve got this!
Tools Used
Step 13


– Grab your trusty spudger and gently pry up the front-facing sensor array ribbon cable from its socket. It’s like giving it a little lift-off!
Tools Used


Step 15


Hey, don’t yank that motherboard out just yet! The daughterboard ribbon cable is hiding underneath and needs to be disconnected first.
– Grab the edges of the motherboard and give it a gentle lift, just a smidge.
– Take the pointy end of a spudger and carefully nudge the battery and sensor assembly ribbon cables away from the motherboard’s edges.
– Now that the cables are out of the way, hinge the motherboard upwards and away from the display, but be a pal and don’t stress that daughterboard ribbon cable too much!
Tools Used
Step 16

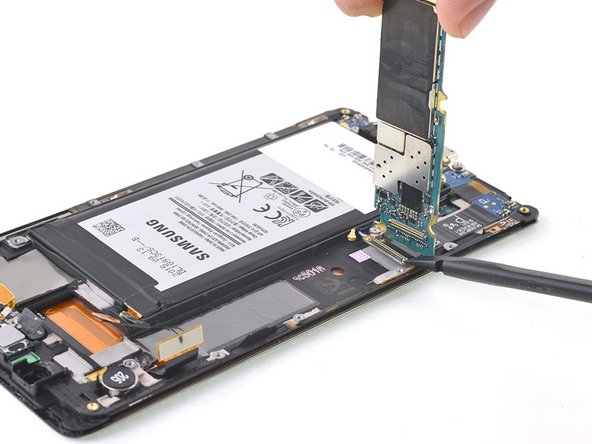
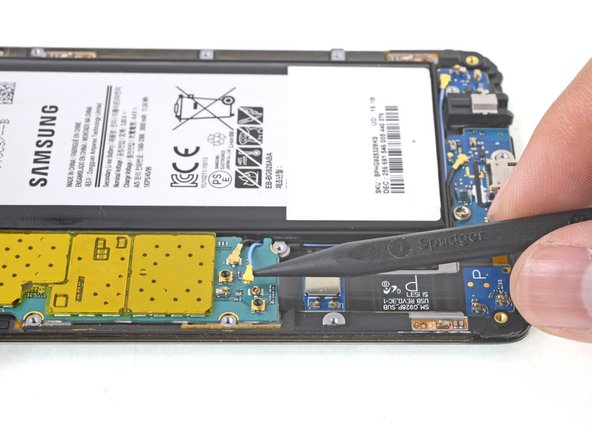
– Grab that trusty spudger and gently nudge the daughterboard ribbon cable away from the motherboard’s underside. You’ve got this!
– Now, it’s time to say goodbye to the motherboard. Carefully lift it out and keep on moving!
Tools Used
Step 17

While the adhesive is doing its thing, jump ahead to the next step to see where you should be prying.
Reheat and reapply the iOpener a few times if needed to get the phone warm enough. Stick to the iOpener instructions to avoid any overheating issues.
– Got a seriously cracked display? No worries! Just tape over that glass to keep those stray bits at bay and make prying a breeze.
– Ready to bring the heat? Grab an iOpener, give it a warm-up, and gently apply it to the left edge of your display for a cozy two minutes.
Tools Used
Step 18

In the upcoming steps, let’s tread carefully in certain spots to keep your phone safe and sound!
You’re swapping the OLED panel and display cable for fresh ones, but you gotta keep those capacitive buttons intact. Be gentle with them!
Step 19


Hold up there! Before that pick reaches the daughterboard at the bottom of your phone, remember that there are some sensitive capacitive buttons stuck to the display just beneath it. They’re a bit fragile, so let’s avoid any accidental damage.
– Hey there! Time to jazz it up a bit. Stick that opening pick right in that small gap between the display and the display frame, near the middle of the battery-side edge of the display.
– Now, slide that pick along the whole edge of the display, gently but firmly separating the adhesive like a pro.
– And hey, when you pop in that pick, remember to place it on top of the pink shield layer of the display to slice through that adhesive like a champ.
Step 20

If struggling with cutting, simply warm up and reapply the iOpener.
– Slide that pick in as deep as it can go while keeping a solid grip on it.
– Gently glide the pick back up along the edge of the display to break free the last bit of adhesive.
– Once you’ve sliced through the adhesive, leave the pick tucked in the side of the display to stop it from sticking back to the frame.
Tools Used
Step 21


Oh no! If you happen to break any of the capacitive buttons or ribbon cables, fear not! You can easily swap out the daughterboard assembly, which conveniently comes with brand new capacitive buttons ready to go.
– Gently place an opening pick no more than 0.25 inches (~6 mm) into the friendly battery-side corner of the display, near the cool top of the daughterboard.
– Take a slide around the corner of the display, but pause just before you hit the “recent” button ribbon cable.
Step 22


Keep the pick away from those tiny ribbon cables on the bottom edge of the display. These cables are for capacitive buttons that are stuck to the display and can tear easily. If you need help, you can always schedule a repair.
– Warm up and gently place an iOpener on the bottom of your display to get things cozy.
– Carefully slide an opening pick into the lower edge of the display, right by the headphone port—just don’t go deeper than 0.25 inches (~6 mm), or you might tickle the home button and that’s not fun.
– Now, glide that pick along the bottom edge, easing apart the adhesive. Just be sure to stop before you reach the ribbon cable for the ‘back’ button—let’s keep things intact!
Tools Used
Step 23

Like with the first edge, make sure that pick slides right into the gap over the pink shield layer. If you need help, you can always schedule a repair
– Warm up that iOpener and give some love to the display cable side of the screen.
– Slide an opening pick into the little gap along the edge of the display cable, just beneath it.
– Gently glide the pick down the edge of the display, but stop before you bump into the daughterboard.
Tools Used
Step 24


If you’re having a tough time cutting, give the iOpener a little reheating and try again. It loves a good warm-up!
Watch out for that display cable! It runs through this side of the phone and could get in the way if your opening pick dives in too deep. Keep it gentle!
– Push the pick in as far as you can with a solid grip.
– Slide the pick back up the edge of the display, slicing the remaining adhesive.
– After cutting the adhesive, leave the pick in the side of the display to prevent it from sticking back onto the frame. If you need help, you can always schedule a repair.
Tools Used
Step 25


– Gently slide an opening pick, no thicker than 0.25 inches (~6 mm), into the bottom corner of the display on the side where the display cable is, just above the daughterboard.
– Carefully maneuver the pick around the corner of the display, but make sure to stop before you hit the ‘back’ button ribbon cable.
Step 26

Be careful not to push the pick in too deep, or you might accidentally give your front-facing camera or earpiece speaker an unwanted vacation!
– Gently slide an opening pick into the little gap at the top edge of your display, making sure it doesn’t go deeper than 0.25 inches (~6 mm).
– Now, glide that pick along the top edge like you’re spreading butter, slicing through the adhesive with ease.
– Keep the pick right there at the top to stop that pesky adhesive from sticking back together!
Step 27


Keep an eye on the button’s ribbon cable when you insert the pick. It’s super fragile and easy to tear. If the pick’s tough to insert or the cable starts to stretch, just heat it up a bit more.
– Warm up your trusty iOpener and give that bottom edge of the display a cozy minute of heat. It’s like a spa day for your device!
– With a gentle touch, slide an opening pick between the display and the ‘recent’ button, going no deeper than 0.5 inches (that’s about 12 mm) so we don’t accidentally tickle any sensitive parts.
– Once you’ve got that pick in place, leave it there to keep the button from making any unexpected reunions with the display.
Tools Used
Step 28

– Slide an opening pick between the ‘back’ capacitive button and the display.
– Keep the pick under the display to stop the button from sticking back to the display.


Step 30

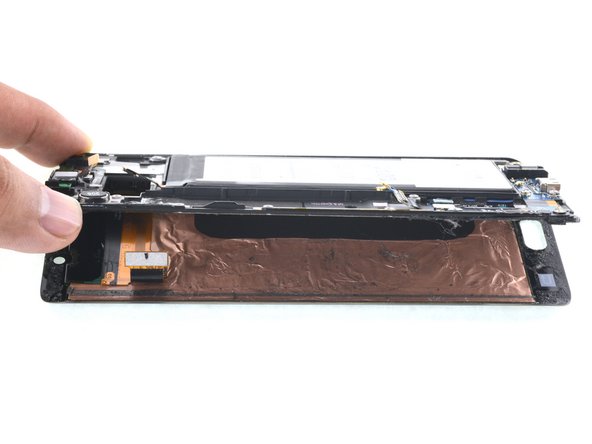
– Gently lift the display frame away from the display, taking your time to avoid any mishaps.
– Grab a spudger and carefully nudge the display cable connector away from the edges of the hole in the display frame, then gently thread that cable through the opening.
– Now that the display cable connector is safely through the display frame, go ahead and fully separate the display from the frame. You’ve got this!
Tools Used
Step 31

– Before you dive into installing that shiny new display, make sure you clear away every last bit of the old adhesive from the frame. Oh, and don’t forget to be gentle with those pesky little glass shards!
– Once you’ve banished all the glue and glass remnants, give those adhesion spots a good scrub with 90% (or higher) isopropyl alcohol and a lint-free cloth or coffee filter. Just remember to swipe in one direction—no back and forth shenanigans!
– For the ultimate hold on your new screen, grab some custom-cut double-sided tape. Stick it to the back of your screen, and then carefully guide the display cable through the frame. Line everything up and press it down snugly into place. You’ve got this!