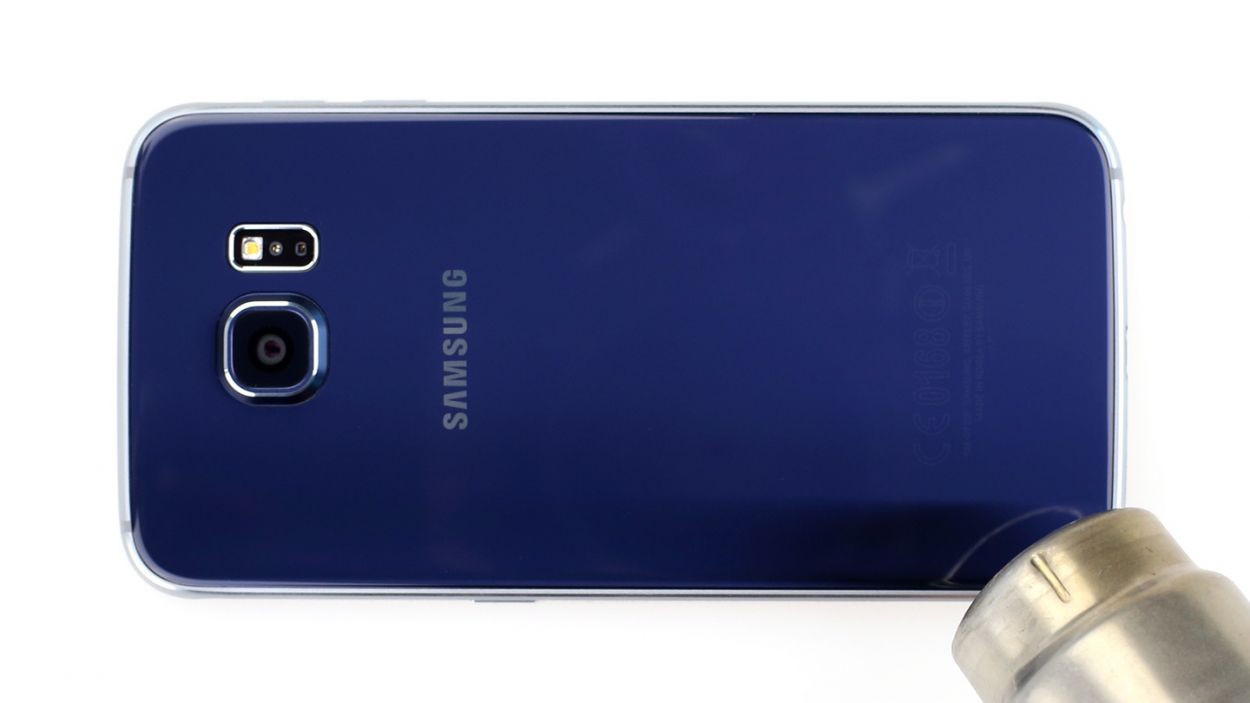
How to Replace Samsung Galaxy S6 Home Button DIY Guide
Duration: 45 minutes
Steps: 43 Steps
Hey there, tech repair enthusiast! Just a heads-up: be careful while you’re tinkering around. It’s super easy to accidentally damage something or lose a tiny part. If you find yourself in a pickle, don’t hesitate to reach out for help. You can always schedule a repair and let the pros take over!
Ready to swap out the home button on your Samsung Galaxy S6? You’re in the right place! This guide will show you how to remove the rear glass (heads up, this process will wreck the adhesive). But don’t worry, we’ll also guide you through reinstalling that rear glass like a pro. If you need help, you can always schedule a repair.
Step 1


– Pop a paper clip or SIM eject tool into the tiny, little hole located in the SIM card slot on the side where the power button hangs out.
– Give it a gentle push to pop out the fancy SIM card tray.
Step 2

– Pop that SIM card tray out of your phone like a pro!
Step 3


It’s a good idea to give your microwave a little scrub before diving in. Any leftover gunk on the bottom might just hitch a ride on the iOpener!
– Pop the iOpener in the center of the microwave.
Tools Used

Step 4

Keep an eye on the iOpener during your repair adventure! Overheating is a no-go and could lead to a burst of excitement that we definitely don’t want. Aim to keep it under 100˚C (212˚F).
If the iOpener looks like it’s been hitting the gym and is swollen, steer clear! Safety first, friends.
If the iOpener feels like a hot potato in the middle, just hang tight and let it cool down a bit longer before you reheat it. A well-heated iOpener is your trusty sidekick and should stay warm for up to 10 minutes!
– Warm up the iOpener for thirty seconds.
– As you go through the repair, if the iOpener cools off, give it another thirty-second zap in the microwave to heat it back up.
Tools Used
Step 5

Careful there! The iOpener can get a bit toasty, so handle it with care. An oven mitt might just be your new best friend.
– Take the iOpener out of the microwave, gripping one of the two flat ends to dodge the hot center. If you need help, you can always schedule a repair.
Tools Used
Step 6


If you find yourself without a microwave, just follow this awesome step to warm up your iOpener in boiling water.
– Get a pot or pan and fill it up with just enough water to fully dunk an iOpener.
– Let the water get nice and hot, even to a boil. Once it’s hot enough, turn off the heat.
– Drop that iOpener into the steaming water and let it soak for 2-3 minutes. Make sure it’s totally submerged.
– Using tongs, fish out the iOpener that’s now nice and warm from the hot water.
– Give that iOpener a good dry down with a towel.
– Your iOpener is all set for action now! If you ever need to warm it up again, just heat the water till it boils, then switch off the heat, and pop the iOpener back in for another 2-3 minutes.
Tools Used
Step 7


You can use a hair dryer, heat gun, or hot plate for some warmth, but be sure to keep an eye on the heat—your phone’s OLED display and internal battery are like sensitive little flowers when it comes to temperature. Let’s not overdo it!
Remember, opening your device might compromise its waterproof seals. Make sure you have replacement adhesive ready to go, or take extra caution to keep it dry if you put it back together without a new seal.
Got a shattered screen? No worries! Just slap some packing tape over the whole thing to keep it intact while you work on it.
– Place the warmed-up iOpener on the rear panel for a couple of minutes to soften the adhesive around the glass edges.
– Move the iOpener to warm up the remaining part of the panel for another two minutes.
Tools Used
Step 8


If you’ve got the pick in place, a few drops of isopropyl alcohol in the gap can work wonders to loosen the adhesive for the next steps. Need a hand? You can always schedule a repair.
– Get that rear glass nice and toasty by applying some heat to it. Once it’s warm to the touch, slap that suction cup right near the bottom edge of the glass.
– Give that suction cup a good lift to create a tiny gap under the rear glass. Then, slide in an opening pick like a boss. You’re on your way to a smooth repair job!
Step 9


Next, keep the pick in place and grab another one to move to the next step. Keeping the pick inserted will stop the glue you just separated from sticking again.
Reheat the back glass if needed to stop the glue from cooling and hardening.
– Glide the nifty tool along the lower edge of the device to effortlessly cut through the sticky stuff keeping the back glass in place.
Step 10


– Give those remaining three sides of your phone some love by repeating the heating and cutting routine. You got this!
– Slide an opening pick under each edge to keep that pesky adhesive from sticking back together. You’re on the right track!
Step 11


– Grab your trusty opening pick and gently slice through any stubborn adhesive that’s still hanging on.
– Now, it’s time to carefully remove the rear glass. You’ve got this!
Step 12


– Ready to give your device a fresh new look? Let’s dive in:
– Whether you’re sticking with your classic rear glass or going for a new vibe, we’ve got you covered. Check out this easy guide to get started.
Step 13

– Get ready to unleash your inner repair ninja by removing the thirteen 3.5mm Phillips #00 screws that are holding the midframe tightly to the phone!
Step 14


Before proceeding with this step, ensure you’ve gracefully escorted the SIM card tray out.
– Grab hold of that midframe assembly like you’re about to do a magic trick!
– Gently lift the midframe assembly while giving the battery a little push down to help separate it from the rest of your phone.
– If that midframe doesn’t want to budge, don’t sweat it! A little heat from an iOpener on the edges of the display can help soften that pesky adhesive.
Tools Used
Step 15

– Gently lift the midframe assembly to free it from the rest of the phone. You’ve got this!
Step 16


– Time to work some magic! Grab the flat end of the spudger and gently disconnect the battery connector from its socket on the motherboard.
Tools Used

Step 17


– Grab your trusty spudger and use its pointed edge to gently wiggle those Bluetooth and Wi-Fi antenna cable connectors free from their cozy spots on the motherboard. You’re doing great!
Tools Used
Step 18


– Grab your trusty spudger and gently use its flat end to unplug the home button connector. You’ve got this!
Tools Used
Step 19


– Grab your trusty spudger and gently pry away the display assembly cable from the motherboard. You’ve got this!
Tools Used


Step 21


Hold off on pulling out the motherboard completely—it’s still linked to the daughterboard with a ribbon cable underneath.
– Gently lift the camera side of the motherboard to separate it from the display frame. If you need help, you can always schedule a repair.
Step 22


– It’s time to show that daughterboard who’s boss! Grab your trusty spudger and delicately disconnect the ribbon cable connector from its socket on the underside of the motherboard. Go on, you got this!
Tools Used
Step 23


– Got a display that’s more cracked than a joke at a comedy show? No worries! Just tape over those shards to keep them in check and make your prying a whole lot easier.
– Time to give your iOpener a little warmth! Reheat it for the best results.
– Now, place that warm iOpener across your S6 display like it’s a cozy blanket. After two minutes, switch it up and lay it on the other half of the screen. You’re doing great!
Tools Used
Step 24


– Slide the opening pick into the battery-side edge of your phone, between the frame and the screen, at an upward angle.
Step 25


If you’re finding it tough to cut through, no worries! Just give the iOpener another heat-up and stick it back on.
– Glide the pick along the edge of the display to part ways with the adhesive sneaking below.
– Once you’ve sliced through the adhesive, tuck the pick snugly into the display’s side to keep it from cozying back up to the frame.
Tools Used
Step 26


– Glide the pick smoothly from the headphone hangout to the lively charging zone at the bottom edge of your device.
Step 27


If you happen to accidentally damage those capacitive buttons or ribbon cables, no worries! You can simply swap out the daughterboard assembly, which comes with fresh capacitive buttons. And remember, if you need help, you can always schedule a repair.
– Slide an opening pick about half an inch (around 12mm) under the bottom corner of the display, just by the headphone jack.
– Keep that pick in place to stop the button from sticking back to the display while you work your magic!
Step 28


– Slide an opening pick about 0.5 inches (~12mm) under the opposite bottom corner of the screen.
– Keep the pick in place to stop the button from sticking back to the screen.
Step 29


– Gently glide an opening pick along the side of the phone that’s away from the battery to break free the sticky stuff holding it down.
– Once you’ve sliced through that adhesive, keep the pick snug in the display’s side to stop it from re-sticking to the frame. You’re doing great!
Step 30


– Glide a pick along the top of the phone and head toward the vibrator.
Step 31


Hang tight! Don’t go yanking that display off just yet—it’s still got a cable holding onto the frame like a friendly hug.
– Grab an opening pick and gently ease the battery side of the frame away from the display.
– If the display and frame won’t budge, use the opening pick to slice through any leftover adhesive. If cutting gets tough, reheat and reapply an iOpener.
Tools Used
Step 32


– Carefully guide the display’s flex cable through its designated hole in the frame to completely detach the right edge of the display.
Step 33

If your frame is bent or has any leftover glue or glass bits, your new display won’t fit right and might get damaged. If needed, swap out the frame. If you need help, you can always schedule a repair
– Hey there! Before you pop in your shiny new display, let’s make sure we wipe away every last bit of that old sticky stuff from the frame. And oh, watch out for those tiny glass bits!
– Once you’ve banished all traces of glue and glass, give those sticky spots a good cleanup with some 90% (or higher) isopropyl alcohol and a lint-free cloth or a trusty coffee filter. Remember, just swipe in one direction!
– To keep that new screen snug as a bug, grab some custom-cut double-sided tape. Stick it on the back of the screen, then gently thread the display cable through the frame. Line up the screen, give it a good press, and you’re good to go!
Step 34

– Gently unscrew the lone 3.0mm Phillips #00 screw that’s keeping the daughterboard snugly attached to the display frame. You’re doing great!
Step 35


Alright, let’s flip that display frame over so the home button is smiling back at ya!
– Slide the spudger’s pointed edge into the groove next to the right soft button LED cable.
– Carefully raise the LED cable from the display frame.
Tools Used


Step 37


Now let’s flip the frame over once again and gently lift up the daughterboard to carefully peel it off the display frame.
Step 38


Get your repair groove on by positioning the display frame with the home button connector facing towards you.
– Get groovy with the pointed edge of the spudger to wiggle out the home button ribbon cable from the display frame.
Tools Used
Step 39


– Grab your trusty spudger and gently nudge that home button cable through the display frame with its pointed end. You’ve got this!
Tools Used
Step 40
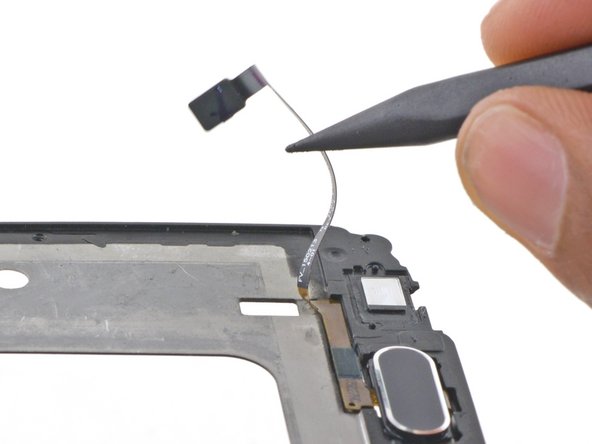
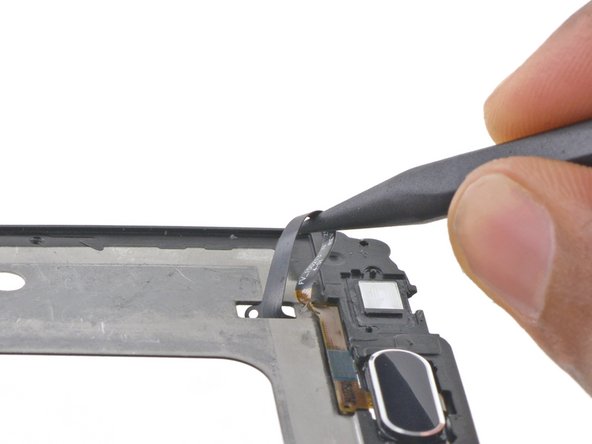

– Turn over the screen frame and delicately guide the home button cable through the designated hole using the sharp end of a spudger.
Tools Used
Step 41


– Slip the spudger under the cable to keep separating it from the frame. If you need help, you can always schedule a repair
Tools Used
Step 42
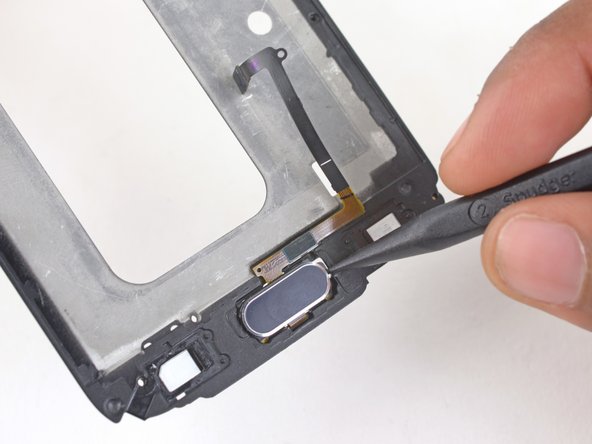


The button is snugly held by tabs on either side. To set it free, you’ll need to nudge it enough to slip past the edge of the bracket.
– Once the cable is totally free from the frame, use a spudger to nudge the home button all the way to the left of its bracket.
– Use a spudger to gently pop the home button up and out of its bracket.
Tools Used