How to Replace Samsung Galaxy S7 Edge NFC Antenna and Charging Coil: Step-by-Step DIY Tutorial
Duration: 45 minutes
Steps: 10 Steps
Hey there!
Quick heads up:
Just a friendly reminder:
Hey there! Ready to swap out the NFC antenna and charging coil on your Samsung Galaxy S7 Edge? Let’s do it! But first, know that the curved edges and strong adhesive make this a bit tricky to kick off. Take your time, repeat those heat and pull sessions, and soon that sticky stuff will give way. And remember, if it’s feeling more challenge than fun, you can always schedule a repair for some professional help!
Step 1

Cracking open your phone will break its waterproof magic. So, have some fresh adhesive on hand or just be extra careful to keep it dry if you’re putting it back together without it! And remember, if things get tricky, you can always schedule a repair.
– Let’s get started by warming up that phone – apply a heated iOpener to a long edge for about two minutes. If you need help, you can always schedule a repair
Tools Used

Step 2

– When the back panel feels nice and toasty, grab a suction cup and place it as close to the warm edge of your phone as you can, steering clear of the curved part.
– Gently pull the suction cup up and slide an opening pick beneath the rear glass.

Step 4


Take your time; we don’t want that tip to escape the seam! If things get a bit tricky, just give it another round of heat and let the iOpener work its magic again.
– Gently slide your trusty opening pick along the phone’s side, gracefully parting ways with the adhesive.
– Keep the pick snug in its spot and invite a companion pick to join the fun in the next step. By leaving the pick snug, you’re ensuring the adhesive doesn’t try a sticky comeback dance.
Tools Used
Step 5


– Heat it up and slice away on the other three sides of your phone just like before. Keep a pick in place on each side to stop the adhesive from sticking back together.
– If you need help, you can always schedule a repair
Step 6


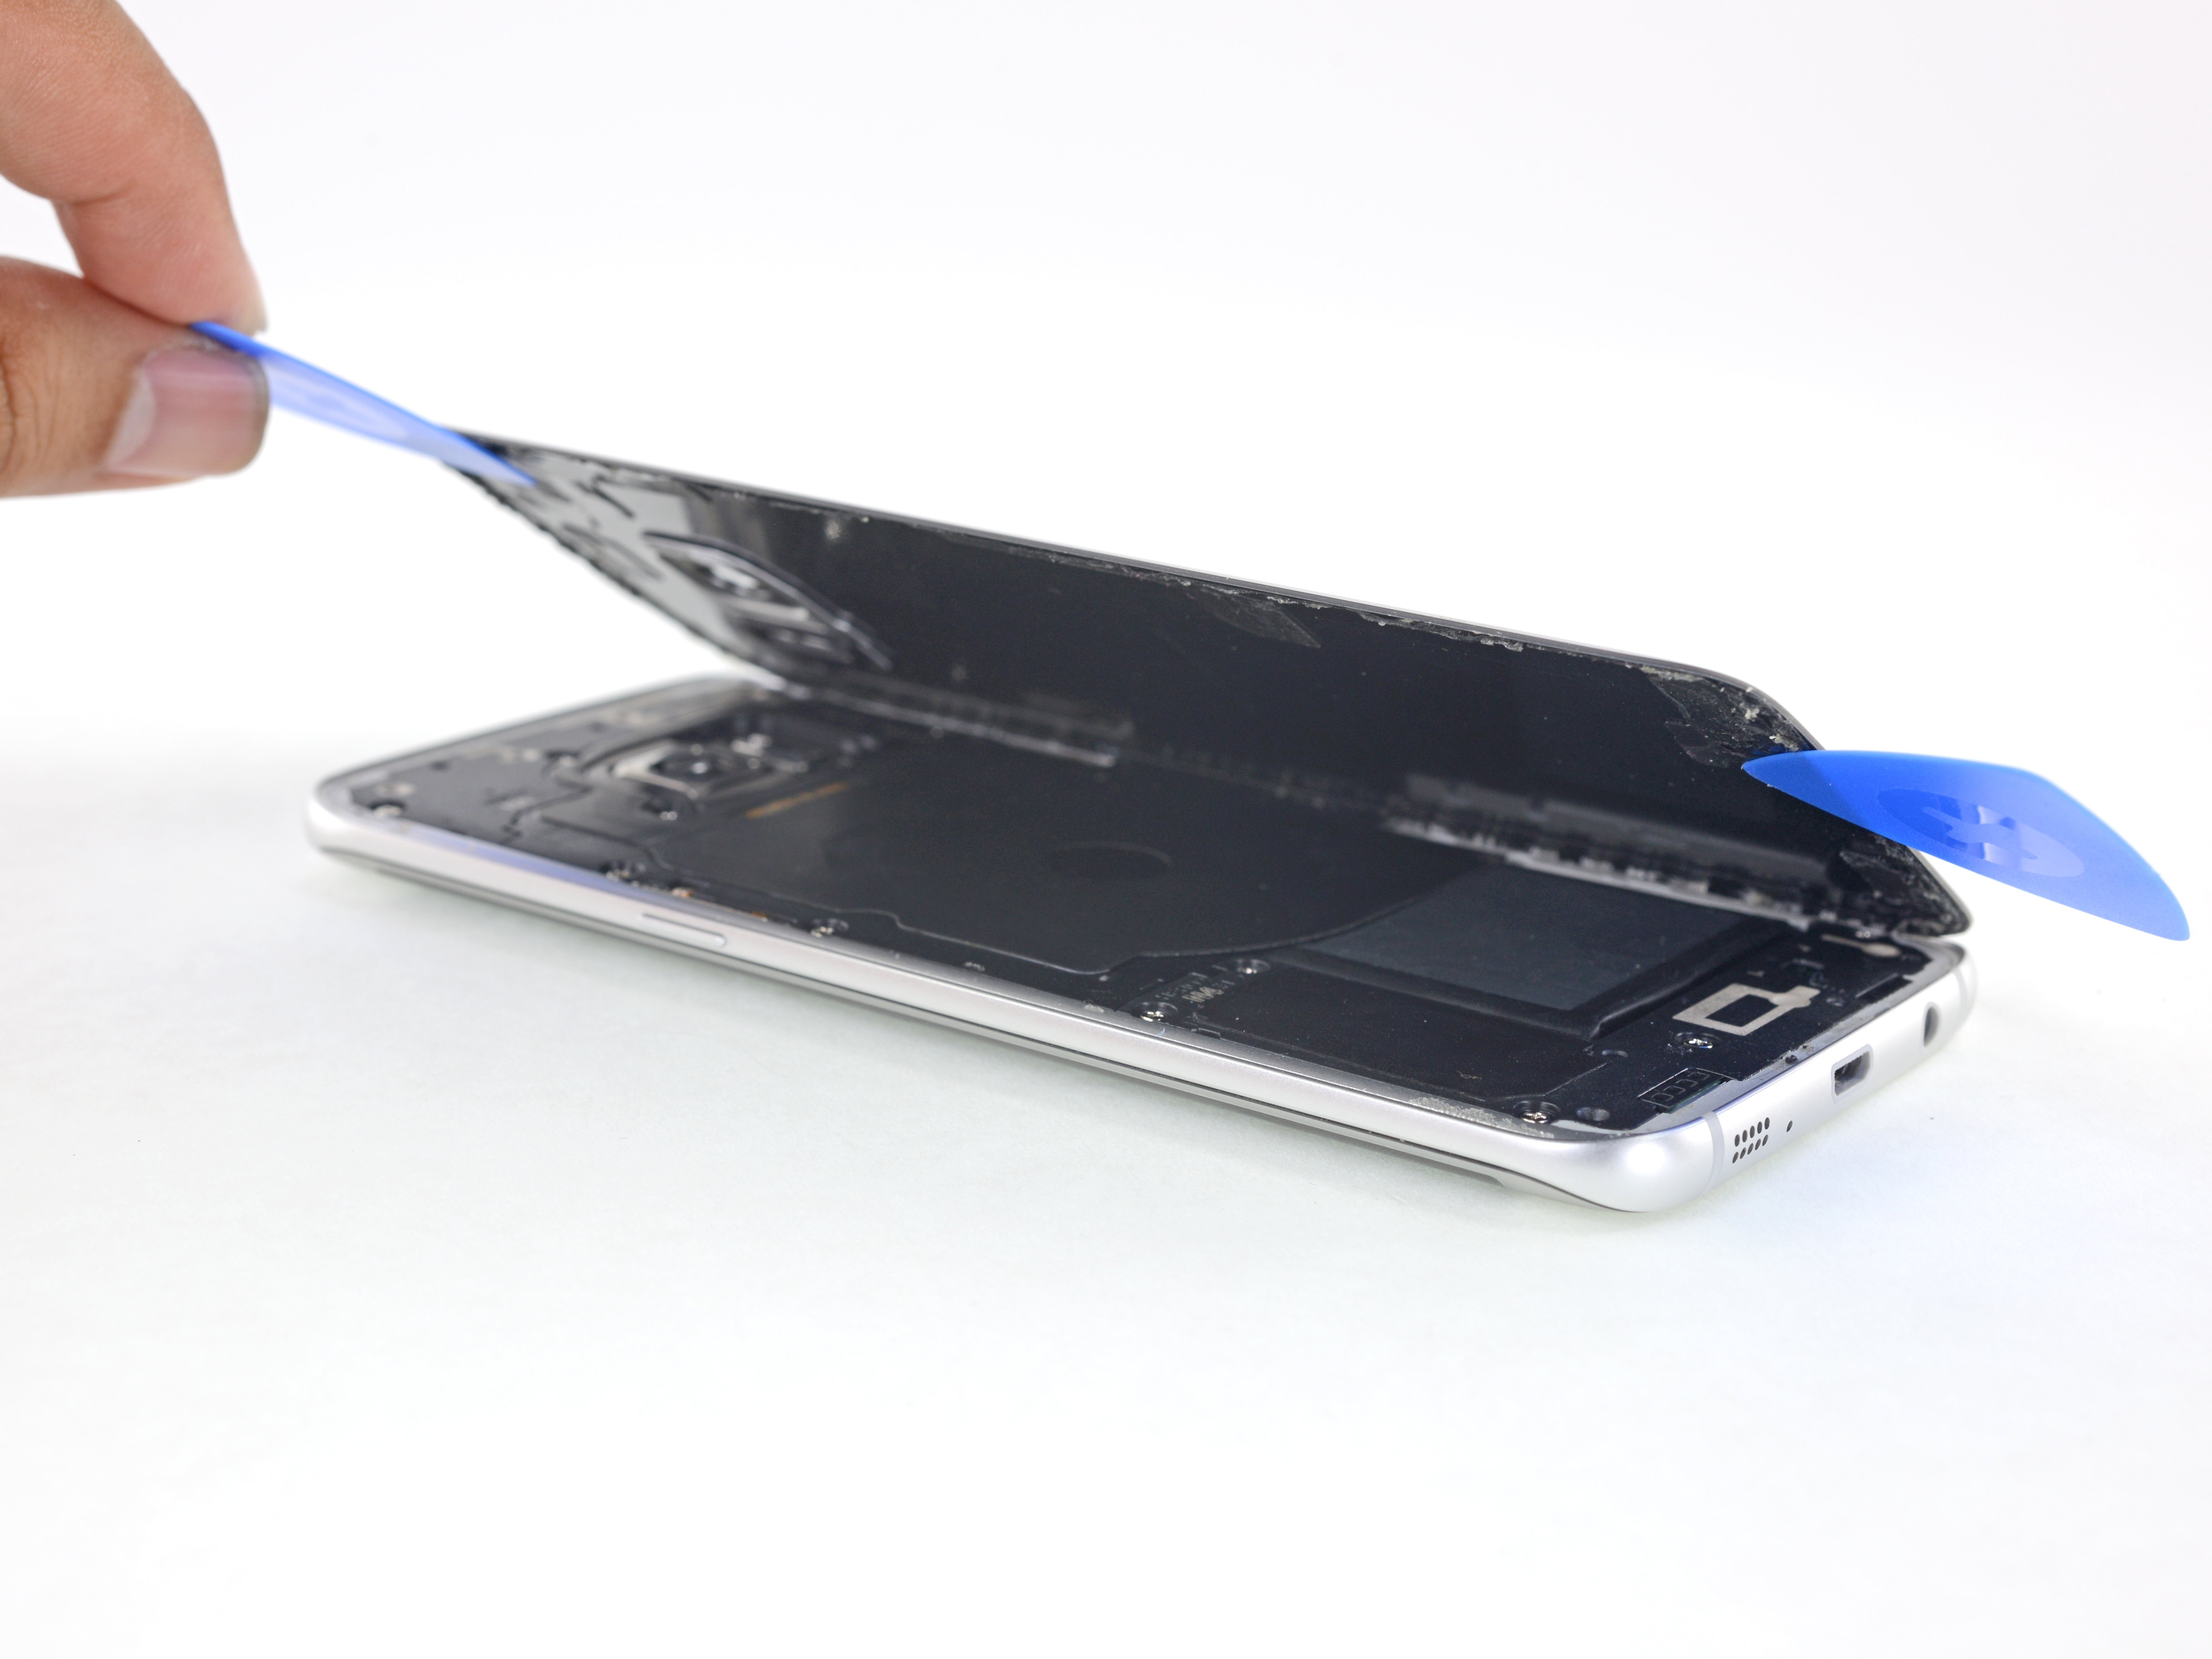
– Time to give that glass a lift and say goodbye to it on your phone!
Step 7


– Time to put on a fresh back cover:
– If you’re putting the old back cover back on, or you’re using a new back cover that doesn’t come with adhesive, just follow along with this guide. If you get stuck, you can always schedule a repair.
You can put the back cover on without replacing the adhesive if you want. Just get rid of any big chunks of adhesive so the cover sits nice and flush. Once it’s in place, give it some heat and apply pressure to secure it. It won’t be waterproof, but the glue is usually strong enough to hold. If you need help, you can always schedule a repair.
Step 8

– Let’s get this party started! Begin by unscrewing those seven 3.5 mm Phillips screws that are keeping the NFC antenna and charging coil assembly in place. You’ve got this!
Step 9


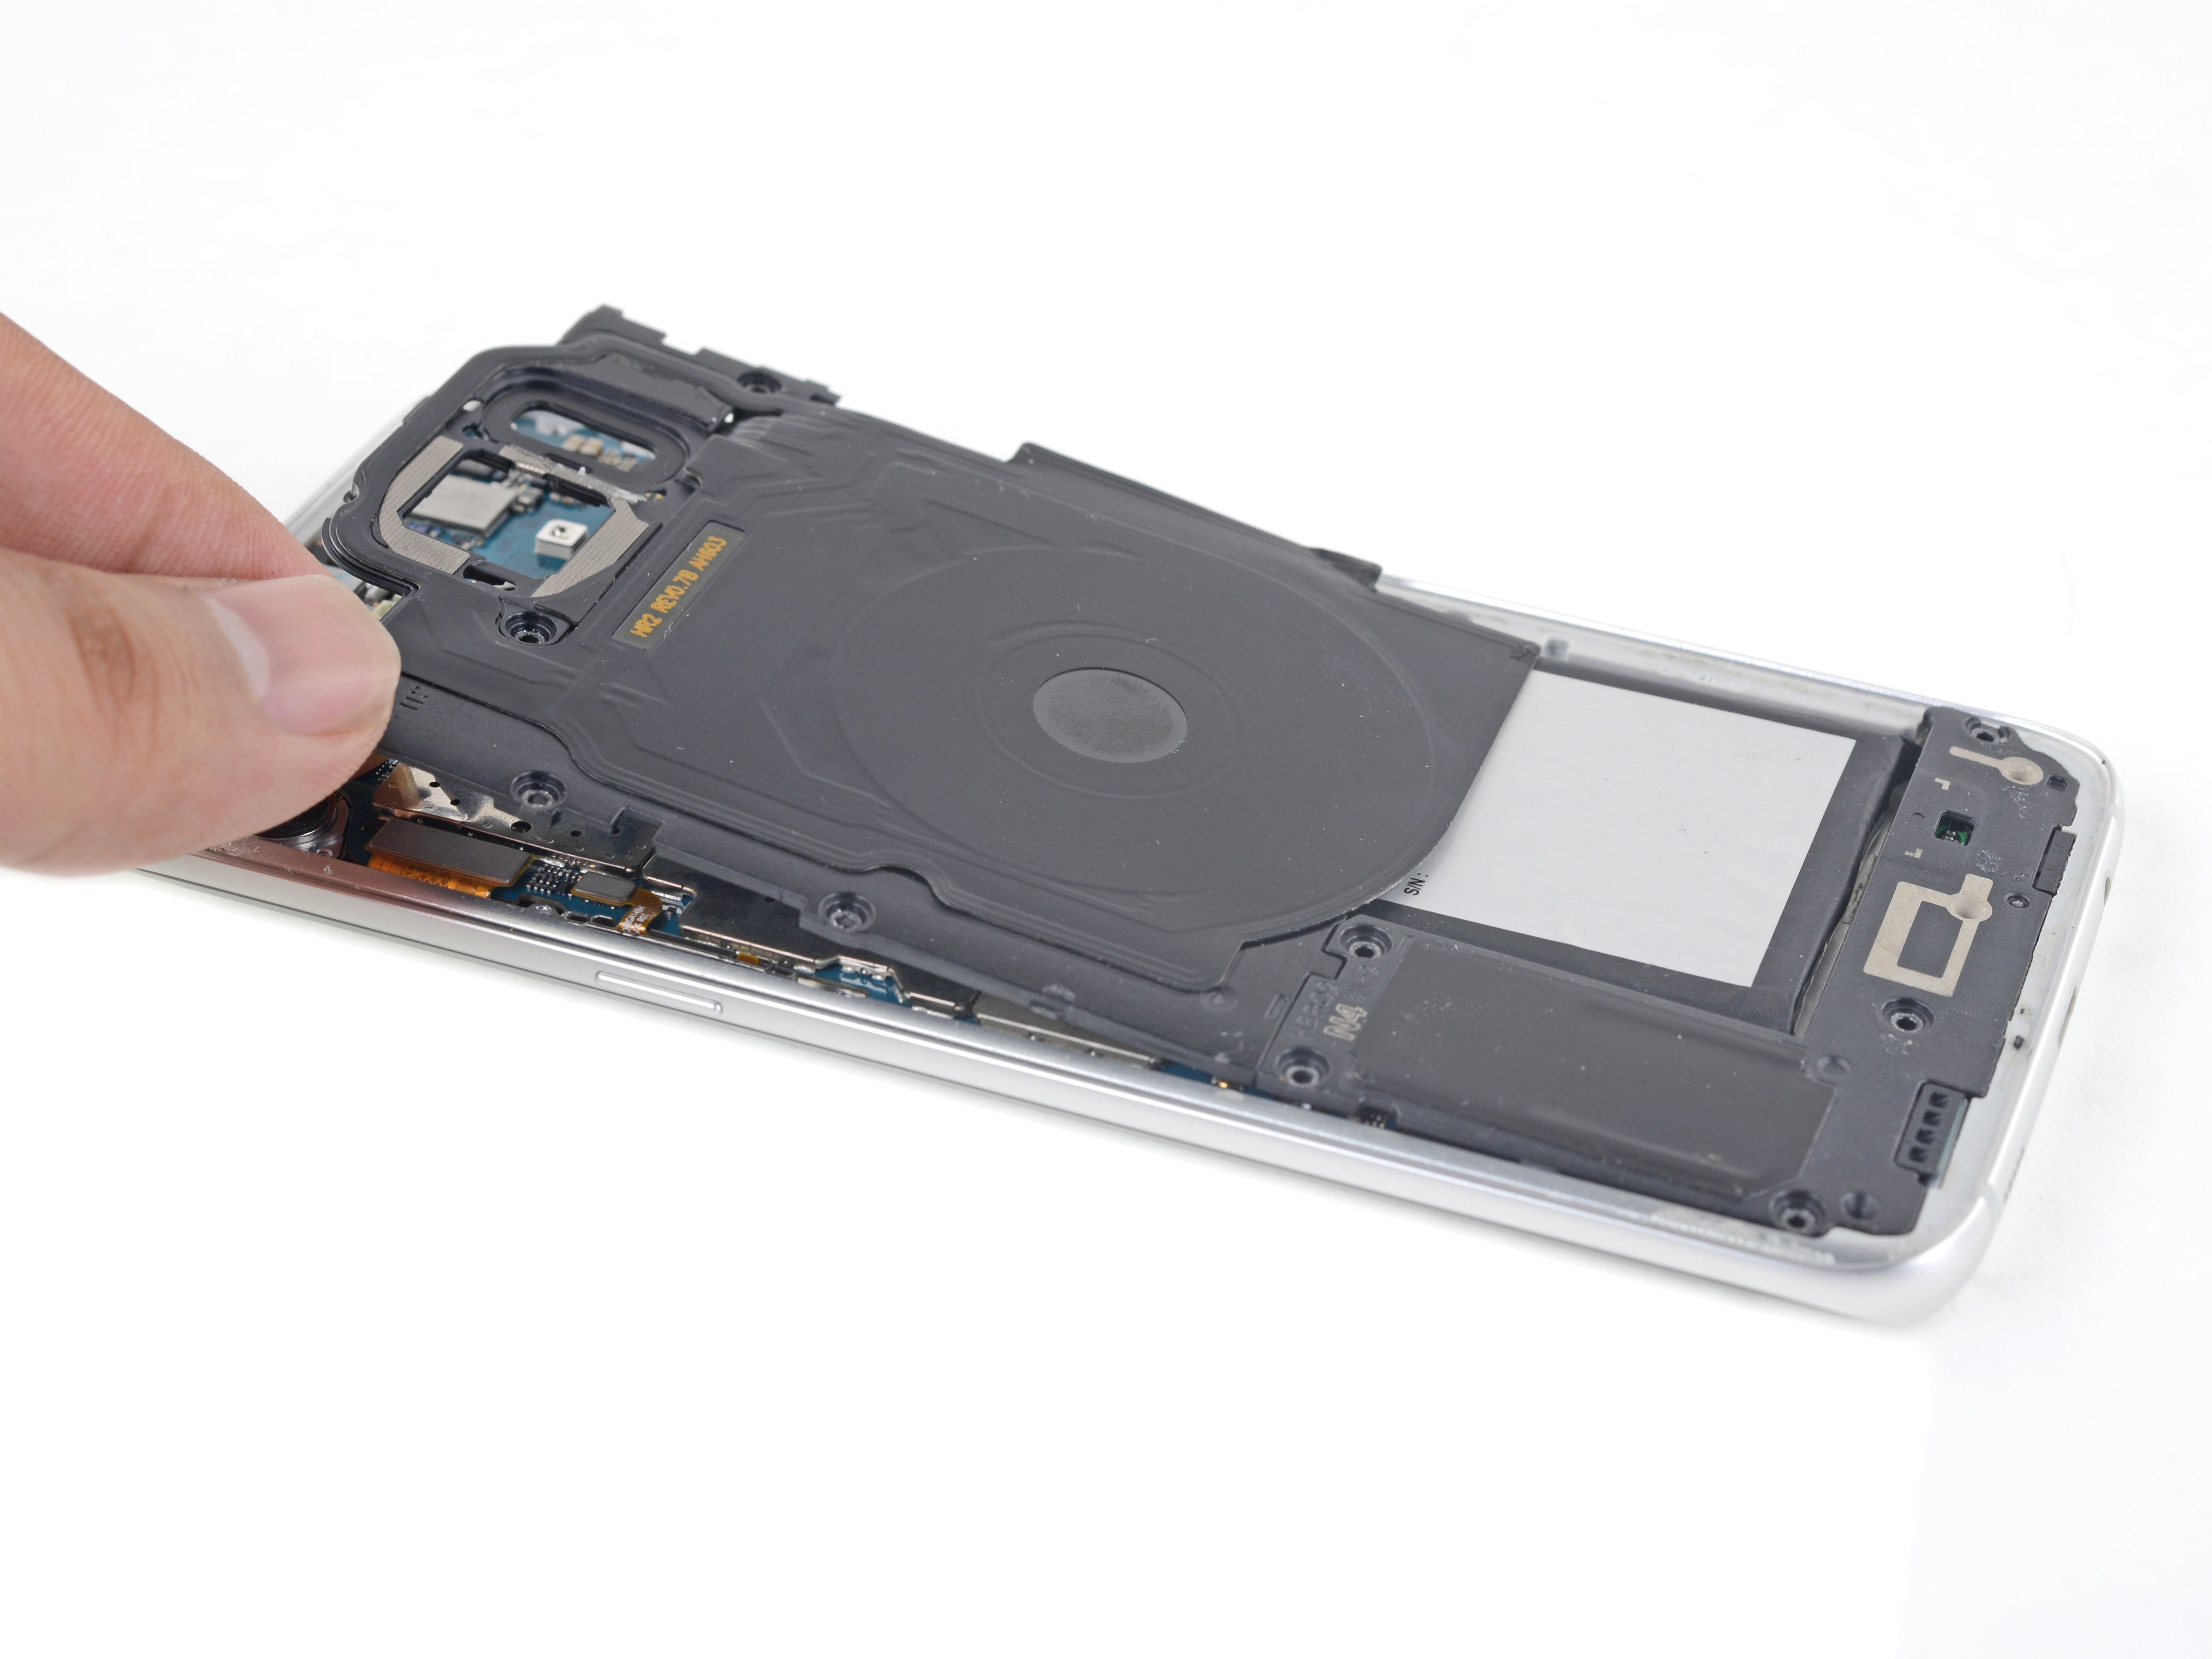
– Pop out the upper antenna using that nifty little notch on the lower left side. You’ve got this!
– Now, gently remove the upper antenna and give yourself a pat on the back!
Step 10

– Gently hoist up that wireless charging coil and set it aside from the phone. If you need help, you can always schedule a repair.