How to Replace Samsung Galaxy S8 Active Front Facing Camera DIY Guide
Duration: 45 minutes
Steps: 9 Steps
Hey there! Just a little heads up: be super careful while you’re working on your device. It’s easy to accidentally mess things up if you’re not paying attention. If you find yourself in a pickle, don’t hesitate to schedule a repair. We’ve got your back!
Ready to tackle your Samsung Galaxy S8 Active’s front-facing camera? This guide will walk you through the process of replacing or removing it with ease. Just a heads-up: you’ll need to take off the back cover, so make sure to have some replacement adhesive handy to stick it back on afterward. Before diving in, check that your battery is charged to below 25%. Keeping it under that threshold helps prevent any accidental fireworks—nobody wants a battery explosion! So, let’s get started and give your phone the TLC it deserves. And remember, if you need help, you can always schedule a repair.
Step 1


– Pop in the SIM card ejector tool (or even a trusty paperclip!) into the cute little hole on the left side of the top edge of your device.
– Give it a gentle nudge to gracefully coax out the SIM tray.
– Bid farewell to the SIM card tray as you remove it from your favorite device.
– Ready to reunite the SIM card tray with its beloved SIM? Make sure your gold contacts are facing up and the notch is snug in the bottom right corner. Secure the SIM card by delicately placing it back into its cozy SIM tray slot.
Step 2


Taking off the back cover of the S8 Active means saying goodbye to those nifty waterproof seals. Make sure to have some replacement adhesive ready to go before you dive in, or just keep it away from water if you decide not to replace the adhesive when you put everything back together. You’ve got this!
– Grab your trusty TR6 Torx Security Screwdriver and carefully remove those four black 3mm screws from the outer edges of the device that are keeping the rubber bumpers snugly in place.
– Next up, gently peel off the rubber bumpers from the top and bottom edges of your device. You’re doing great!
Tools Used

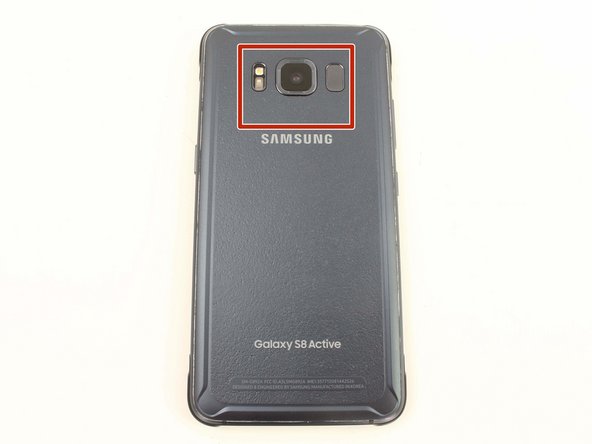
Step 3

Using a heat gun, hair dryer, or hot plate will make the metal frame pretty toasty, so handle it with care.
Watch out! Don’t overheat the device—the OLED display, battery, and other internal parts can get damaged from excessive heat. About one minute should do the trick to soften the adhesive.
You can also give those edges a warm hug with an iFixit iOpener, a trusty hair dryer, or a hot plate!
– Grab your heat gun and give the edges of the back cover a gentle warm-up. This will help loosen up that stubborn adhesive keeping the back cover snugly attached to the frame. You’re on your way to a successful repair!
Tools Used

Step 4


– Get ready to work your magic by sliding the Jimmy tool under that back cover edge.
– Once the Jimmy tool is snug under the cover edge, grab an opening pick and stick it in the seam. This will make sure things stay open even if the tool decides to take a break.
– Now, take it nice and easy as you move around the top part of your device. Watch out for those cables that bring life to your fingerprint sensor and camera. Be gentle up there to keep your fingerprint sensor happy.
– It’s time to let the Jimmy tool show off its skills as you slide it down the sides, saying goodbye to that pesky adhesive.
Tools Used

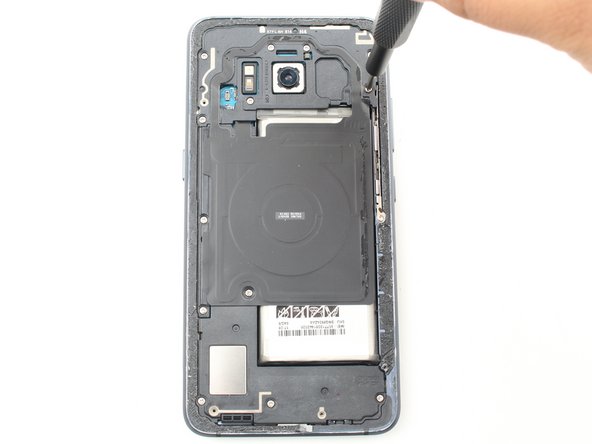
Step 5

The fingerprint sensor cable hangs out near the top of your phone, close to the front-facing camera. Handle with care and gently pop the back cover off to keep that cable safe. If you need help, you can always schedule a repair.
– Grab your opening pick and glide through any leftover adhesive. 🚀Now, open the back cover just enough to peek at the fingerprint sensor flex cable connector. If you need help, you can always schedule a repair!
Step 6


– Gently flip the cover over and place it on top of the device like a cozy blanket.
– Using the flat end of a spudger, carefully disconnect the fingerprint flex cable – no need to rush!
– Time to say goodbye to the back cover – let’s remove it!
– When you’re ready to reconnect the fingerprint sensor cable during reassembly, tilt the back cover just right until the flex cable aligns perfectly over its socket. Then, gently press down with the flat end of the spudger to snap that cable into place. You’ve got this!
Tools Used

Step 7


– Let’s get started by taking out those eleven pesky 3.5 mm screws with your trusty Phillips #00 Screwdriver. You’ve got this!
– Now, don’t forget to tackle those two little 2mm screws next, also with your Phillips #00 Screwdriver. Almost there!
Tools Used

Step 8


– Gently detach the NFC antenna and charging coil assembly with the smooth end of a spudger.
Tools Used
Step 9


– To kick off this repair party, disconnect the front-facing camera flex cable from the motherboard using the flat end of a spudger.
– Get groovy with it by using tweezers to gently lift the camera from its slot.