How to Replace Samsung Galaxy SIII Mini VE Front Camera DIY Guide
Duration: 45 minutes
Steps: 6 Steps
Heads up! Make sure you’re handling your device with care. Remember, a gentle touch goes a long way in keeping your tech happy and healthy!
Follow these fab steps to swap out the front camera on your Galaxy SIII Mini VE. It’s easier than taking a selfie!
Step 1


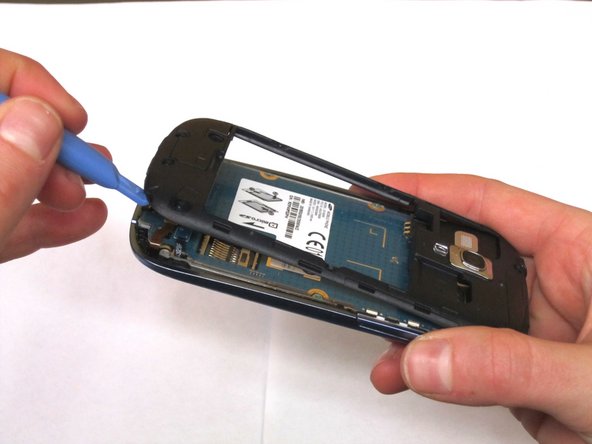
– Turn your phone around to its backside with a little flair.
– Up top, you’ll find a sneaky little notch. Give it a gentle poke with your finger or a slick opening tool to pop off the rear casing. Let the inside-out adventure begin!
Step 2


– Grab your tool or just use your fingers to gently wiggle that battery free from its cozy phone home!
Step 3

– Grab your Phillips #000 Screwdriver and let’s get those 10 pesky 4mm screws out of the plastic frame. It’s unscrewing time!
Step 4

– Grab your opening tool and let’s gently pop off that plastic framing like a pro. Keep it cool and easy, you’ve got this!
Step 5


– Pop off the two electrical connections at the bottom of the phone using your fingernail or a trusty spudger.
– Then, grab your spudger and tweezers to gently coax the speaker out from the top of the phone.
– Once you’ve freed those 3 pesky components, the circuit board should willingly part ways with the phone, save for a sneaky connection on its belly.
– Give that final connection a nudge with your spudger to completely free the board.


Step 6
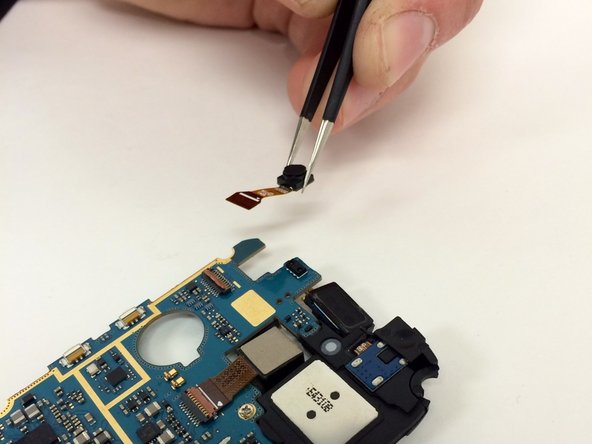

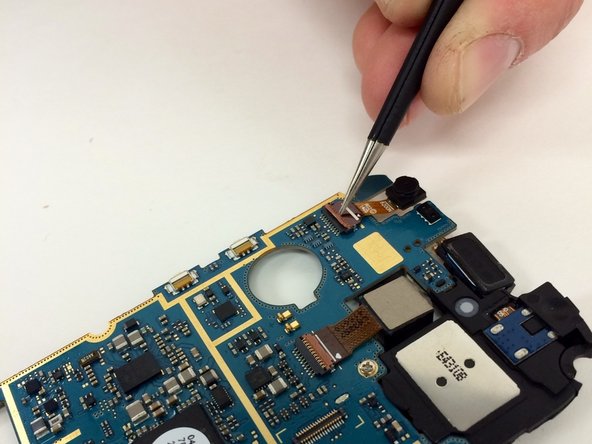
– Spot the front camera connector and give it a little wave hello!
– Grab your tweezers and gently lift the tab at the ribbon wire’s base like you’re lifting a slice of pizza.
– With the tweezers still in hand, coax the front camera out of its cozy home in the phone.
Tools Used
