How to replace Samsung Galaxy SIII Mini VE rear camera DIY guide
Duration: 45 minutes
Steps: 6 Steps
Heads up, champ! Make sure to keep track of all those tiny screws and delicate parts. It’s like a puzzle, and every piece is super important!
Ready to bring that Galaxy SIII Mini VE camera back to life? Follow these snazzy steps to swap out the rear camera like a boss!
Step 1


– Turn your phone around to the back side.
– Look for the small notch at the top and gently use your finger or a prying tool to pop off the back cover.


Step 3

– Grab your Phillips #000 Screwdriver and unscrew those 10 pesky, 4mm screws keeping the plastic frame snug as a bug. Let’s get crackin’!
Step 4

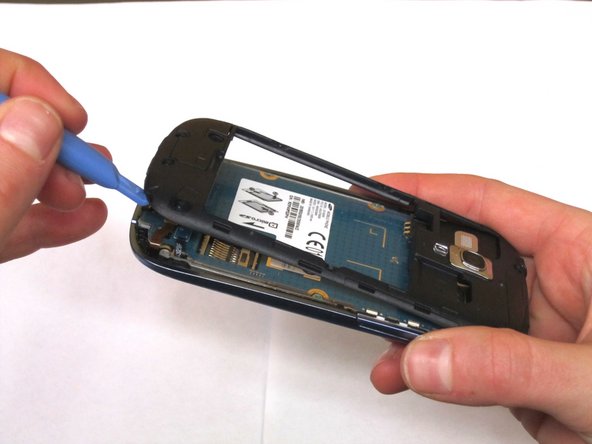
– Grab your opening tool and let’s gently pop off that plastic framing like a pro. Remember, gentle is the way to go—no need to Hulk out!
Step 5


– Pop off the two electrical connectors at the bottom of the phone using your fingernail or a trusty spudger.
– Grab your spudger and tweezers and gently coax the speaker out from the top of the phone.
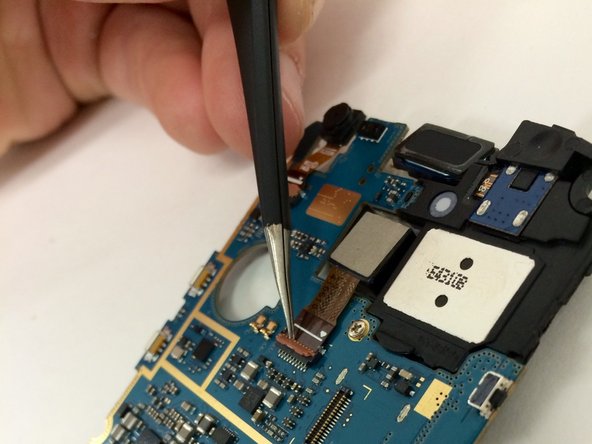
– With the 3 components free, the circuit board is nearly ready to come out, just one more connector holding a secret meeting underneath.
– Use the spudger to politely interrupt that meeting and detach the final connection.
Tools Used

Step 6

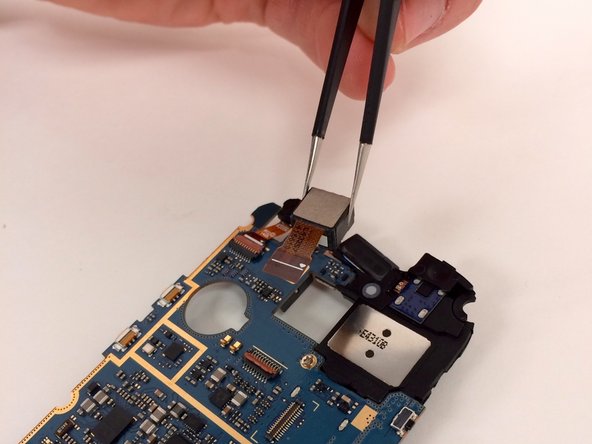
– Pop open the holding tab with a bit of flare!
– Carefully coax the rear camera away from the motherboard like they’re old friends parting ways.
