How to Replace Samsung Galaxy Tab 10.1 Front Camera: DIY Guide
Duration: 45 minutes
Steps: 8 Steps
In this guide, you’ll learn to swap out your front-facing camera on your Samsung Galaxy Tab 10.1. A busted front camera makes selfies and video calls a hassle. Let’s clear a couple of prerequisites first!
Step 1
For the GT-P7500 model, you’re in luck – this step doesn’t apply to you because this device doesn’t have those two screws. Keep going!
– Position the tablet with the bottom edge facing you.
– Unscrew the 4.1mm screws near the charging port using a Tri-Wing screwdriver.
– If you spot plastic tabs covering these screws, grab some pointed tweezers and carefully pop the tabs off.
Step 2
Handle with care! A little too much enthusiasm while prying could lead to a cracked screen. Keep it gentle, and you’ll be golden!
Slide some opening picks along the edge you’ve already popped open to keep the back panel from snapping back onto the device. It’s like saving your progress in a game—smart move!
– Starting in the middle of the left side, use a plastic opening tool to gently wedge between the rear and front panels.
– Carefully slide the plastic opening tool along the left and top edges to loosen the rear panel from the rest of the device.
Step 3
– Grab your plastic opening tools, glide them along the right and bottom edges like you’re painting a masterpiece, and gently lift the screen from the back panel.
Step 4
– Lift up the retaining flaps on the ZIF connectors that hold the three big ribbon cables in place.
– Gently pull the three ribbon cables out of their sockets on the motherboard.
Step 5
– Carefully take out the ten 3 mm Phillips #00 screws that are keeping the battery snug and secure. You’ve got this!
Step 6
– Gently lift up the edge of the battery with your finger or a spudger. You got this!
– Hold the motherboard in place while carefully lifting the battery. It’s a smooth move, just take it slow!
Tools Used
Step 8
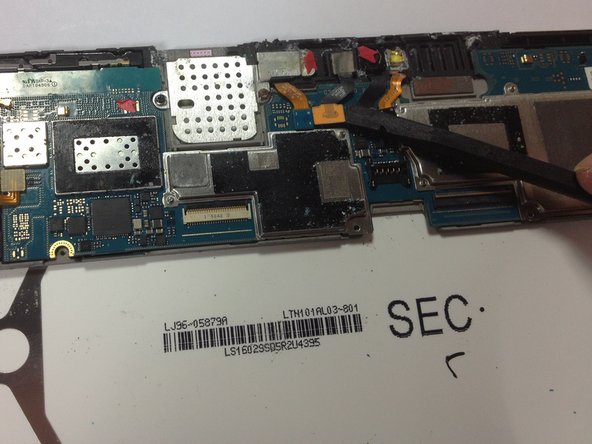
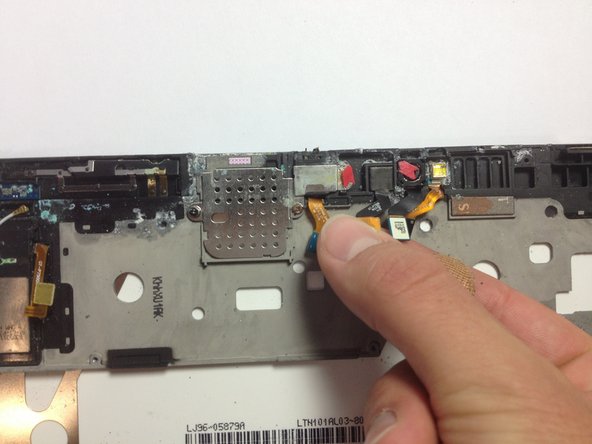
We’ve taken out the motherboard in these photos to give you a better view, but don’t worry—it’s not a must-do for this step!
– To put your device back together, just reverse these steps and you’ll be good to go.
– Not feeling it? No worries, you can leave it as is.
– Need backup? If it’s not coming together, you can always schedule a repair.
Success!


