How to Replace Samsung Galaxy Tab 2 10.1 Speakers – Step-by-Step Guide
Duration: 45 minutes
Steps: 15 Steps
Ready to swap out those tablet speakers? Let’s do this! Heads up: Some pictures show a metal spudger in action, but trust me, the heavy-duty spudger is your MVP here—keeps your circuits safe and sound. Need a quick 101 on connectors? Check out this handy guide.
Step 1
Be careful with that plastic opening tool – it might break on you! If it does, don’t worry, just grab your trusty heavy duty spudger and you’ll be back in business.
– Slide your trusty plastic opening tool between the glass screen and the back cover, making sure the curved end of the tool slides under the glass. Gently pop that back cover away from the glass screen—take it slow and steady!
– Make sure you’re lifting the whole display off the body, not just the glass from the display. You might need to reach a bit deeper for the right removal spot. Patience is key here!
– Keep working that plastic opening tool around the entire edge of the screen, prying as you go, until the back cover is completely free from the glass screen. You’re almost there!
Step 2
If the screen is playing hard to get and won’t budge from the back cover, give step 1 another go!
– Carefully nudge the screen upward using your finger—easy does it!
Step 3
– With a gentle touch, peel away the green tape that’s keeping the battery connector cozy. You’ve got this!
Step 4
– Slide the flat end of your trusty heavy-duty spudger between the wires and under the battery connector. Gently nudge and lift the black battery connector upward to free it from the motherboard. Take it slow and steady—you’re doing great!
Tools Used
Step 5
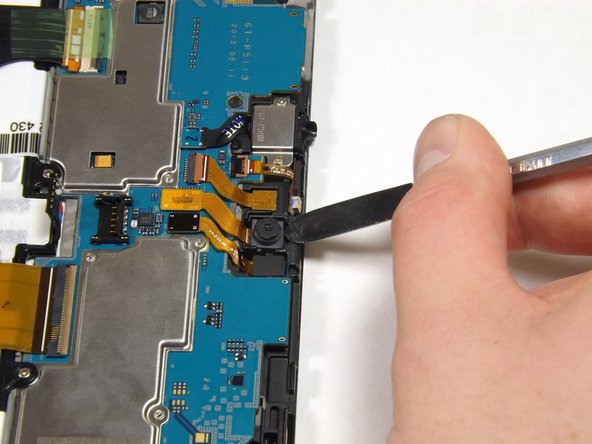
– Carefully use the flat end of the heavy-duty spudger to lift the camera out of its socket. Take your time, and don’t rush this part!
Tools Used
Step 6
– Carefully lift the gold cable connector using the flat end of your trusty heavy-duty spudger to disconnect it from the device. You’ve got this!
Tools Used
Step 7
– Gently peel off the green tape that’s keeping those three ribbon cables in place. A little wiggle and you’re good to go!
– Take the flat end of your trusty spudger and carefully lift the black tab holding the leftmost black ribbon cable. Do the same for the gold ribbon cable and the other black ribbon cable. Easy does it!
– With a gentle touch, slide each of the three cables straight out of their connectors. No force needed, just a smooth pull!
Tools Used
Step 8
– Grab your trusty Phillips #000 screwdriver and pop out those ten tiny 3mm screws holding the battery in place. Take it slow and steady—you’re doing great!
Tools Used
Step 10
– Grab the flat end of your heavy-duty spudger and gently lift the black ribbon lock to the left of the headphone jack on the black side.
– Once that’s done, slide the heavy-duty spudger under the gold ribbon and disconnect it with a smooth glide.
Tools Used
Step 11
The rear camera might just decide to take a little vacation from its cozy spot.
– Grab your trusty heavy-duty spudger and gently nudge that ribbon lock up from the brown side, right above the one you tackled earlier. You’ve got this!
– Once that lock is lifted, carefully slide out the gold ribbon using the heavy-duty spudger, just like you did before. Easy peasy!
Tools Used
Step 12
– Grab your trusty heavy-duty spudger and gently pry off all the connectors marked on the motherboard. Disconnecting them is a breeze, so go ahead and give it a shot!
Tools Used
Step 13
Sometimes this step can be a bit of a workout—don’t sweat it if you need to give it a couple of tries. The motherboard likes to play hard to get!
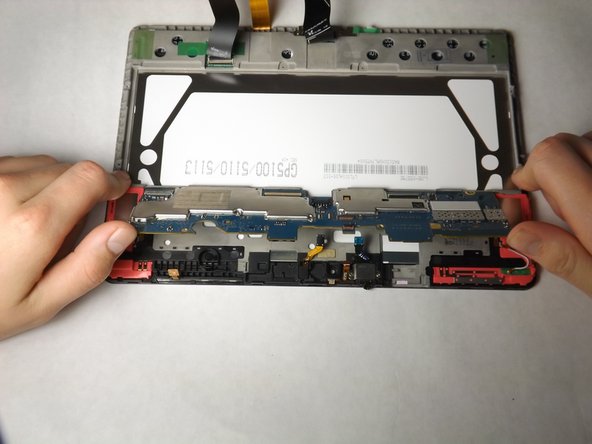
– Now it’s time to set that motherboard free! Gently push up on it with your thumbs to release it from the tabs holding it in place at the bottom. Then, carefully lift it out of the device. Remember to take your time and be patient – you’ve got this! If you’re feeling stuck, don’t worry, just take a deep breath and try again. And if you need help, you can always schedule a repair
Step 14
– Grab your trusty plastic opening tool and gently wiggle that left speaker out of its cozy little slot. Take it nice and slow, and voilà, it’s out!
Step 15
– Grab your trusty plastic opening tool and, with a bit of finesse, pop that right speaker out of its slot. Easy does it—no need to rush!
Success!


