How to Replace Samsung Galaxy Tab 3 7.0 Speaker: Step-by-Step Guide
Duration: 45 minutes
Steps: 8 Steps
Step 1


– Grab your trusty plastic opening tool and slide the prying end gently between the glass digitizer and the shiny silver frame from the front of your device. You’re doing great!
Step 2


– Take it slow and steady, working your way around the entire front of the device. The tiny plastic clips should pop free—if they don’t, give a gentle outward nudge until you hear them release.
Step 3


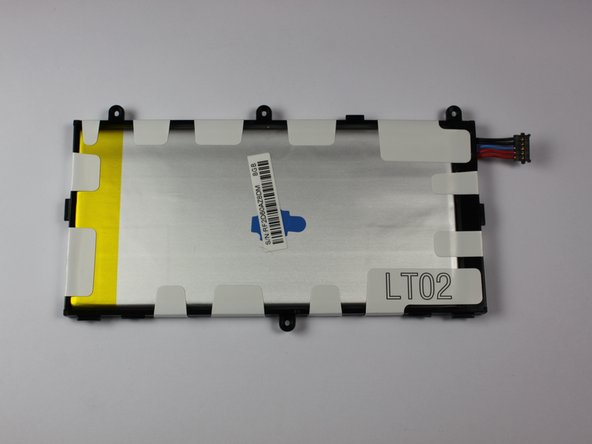
– Alright, let’s get that battery out! Start by grabbing your trusty screwdriver and unscrewing the four screws holding the battery in place.
– With the screws out, it’s time to pop the battery connector loose. Use the tip of your screwdriver or a pair of tweezers, and pull straight up. A little tug and voilà—it should pop out easily!
– Once the battery is out, take a glance—it should match the look in the third picture. Smooth work!
Step 4

– To swap out the battery, use the pad of your index finger or thumb to pull the old battery out of your device. Locate the battery connector, then push the plug back onto the device. You should hear a slight click. Now, take your new battery and attach it to the plug – it will snap into place. Place the new battery where the old one was, as shown in the picture. Pay attention to all cables, making sure they aren’t pinched or damaged. If you need help, you can always schedule a repair
Step 5


– Alright, let’s dive in and swap out that motherboard! First, you’ll need to detach all the little connections holding it in place—check out the first picture for reference.
– Grab your trusty spudger, tweezers, or a plastic opening tool and gently pop those connections out of their ports. No need to rush, just take it nice and easy!
– Once all the connections are free, flip your device over, and voila! It should now resemble the setup shown in the third picture. You’re doing great!
Tools Used

Step 6


– Alright, let’s get those connections unplugged! Once you’ve done that, it’s time to tackle the screws shown in those first two pictures. You got this!
– With all the screws out of the way, you’re ready to gently lift the motherboard out and swap it for a shiny new one. Easy peasy!
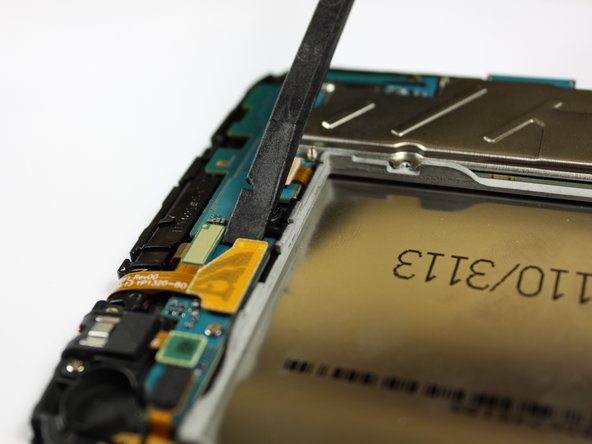
Step 7


– Gently pop off the right speaker’s connection using a trusty spudger or a pair of tweezers. Just lift the wire straight up until the glued-down wires come free. It’s like peeling off a sticker—satisfying, right?
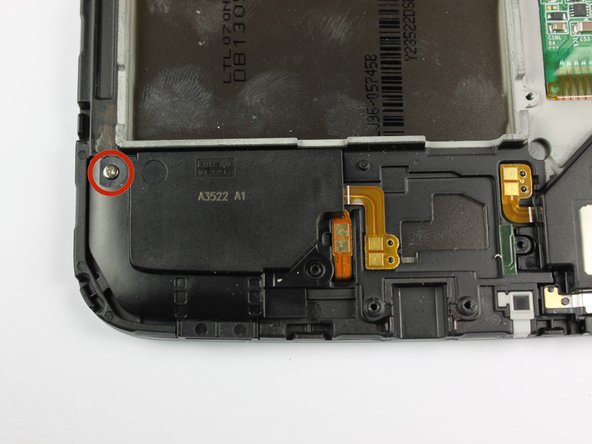
– With the connection out of the way, take out the single screw holding the speaker in place. It’s marked in the second picture, so you can’t miss it.
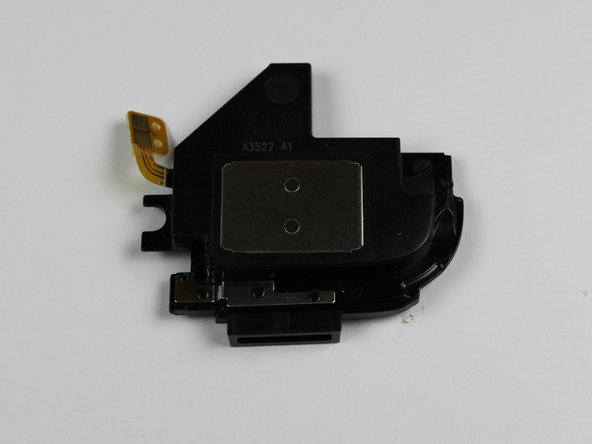
– Once you’ve got that screw out and the connection released, the right speaker is all yours to remove. Swap it out with a shiny new one, and you’re good to roll!
Tools Used
Step 8

– Reassemble your device by reversing these steps, and you’ll be good to go!
– If you didn’t quite finish the guide, no worries, just hit cancel and take a break.
– If you’re stuck or need a hand, you can always schedule a repair.
Tools Used
Success!