How to Replace Samsung Galaxy Tab 3 8.0 Rear Camera
Duration: 45 minutes
Steps: 10 Steps
Step 1


Handle the screen with care—it’s delicate, and a little too much muscle could cause some heartbreak.
– Kick things off by gently prying the screen away from the back cover with your trusty larger plastic opening tool. It’s like giving your device a little hug to help it open up!
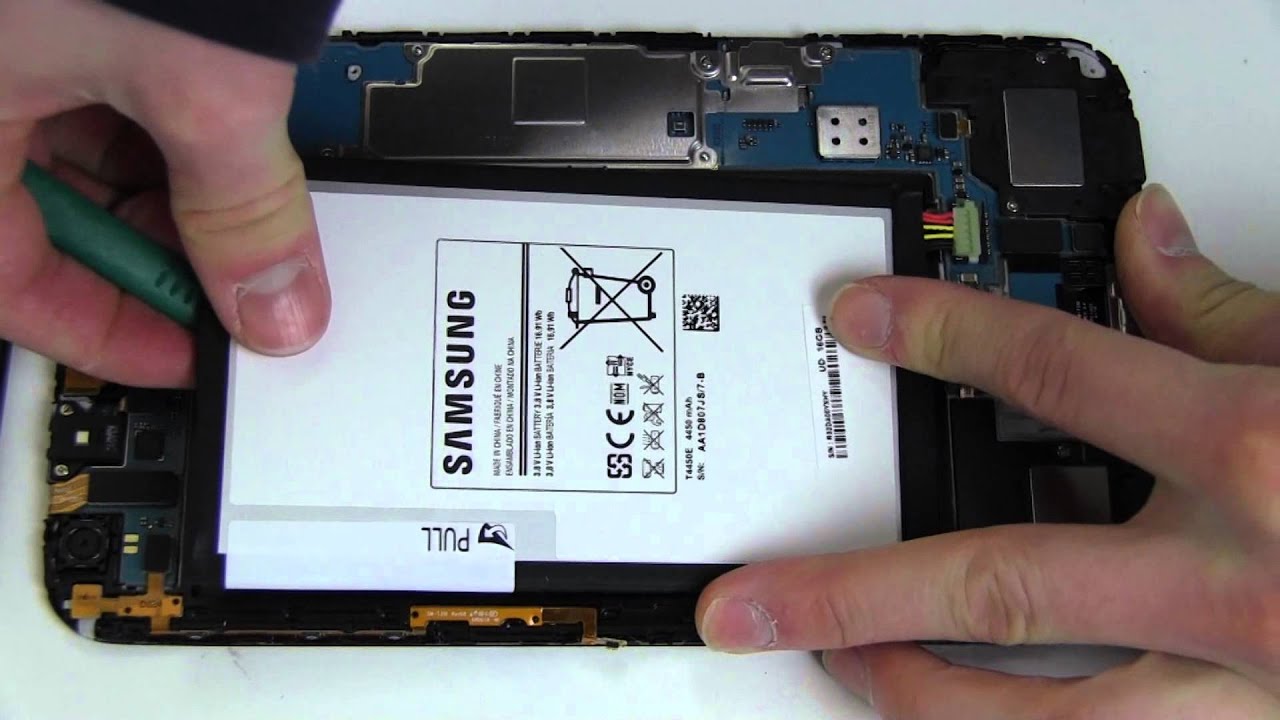
Step 2


– Once you’ve successfully pried every part of the screen away from the back cover, you should be able to lift it off completely using just your hands. Easy peasy!


Step 6


– Grab your trusty Phillips head #000 screwdriver and unscrew those 2.9mm screws from the speakers. Once they’re free, gently lift the speakers out of the device like you’re unveiling a surprise gift!
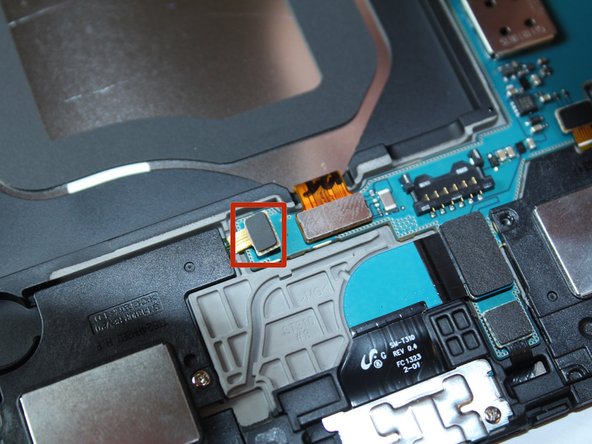
Step 7


– Grab your trusty plastic remover tool and gently pop off the four rectangular electric leads from the board. They’re like puzzle pieces: the first one’s the big boss, the second’s medium-sized, and the last two are the cute little ones.
– With your plastic remover tool in hand, ease out the square electric lead (the one rocking the orange highlight) from the board. Take it slow and steady!
– Now, for the trifecta: use the plastic remover tool to carefully unclip the small square lead along with the two rectangular leads (marked in yellow) from the board. You’ve got this!


Step 9


– Gently lift the board out of the device like you’re handling a newborn kitten.
Step 10


– To wrap things up, simply follow these steps in reverse and you’ll be all set!
– If you need help or have any questions, you can always schedule a repair with Salvation Repair.
– That’s it! You’ve completed the repair guide.
Tools Used
Success!