How to Replace Samsung Galaxy Tab S 10.5 Battery – Step-by-Step Guide
Duration: 45 minutes
Steps: 7 Steps
Ready to give your Samsung Galaxy Tab S 10.5 a new life? Follow these step-by-step instructions to remove and replace the existing battery. Let’s get started!
Step 1


– Get your trusty plastic opening tool and slide it into the SD card slot or charge port – it’s time to get this repair started!
– Gently pry the tool upward until you see a slight gap between the tablet and its back cover. You’re making progress!
Step 2

Getting that back cover off for the first time? It might feel like a wrestling match, but don’t worry, you’ve got this! Just remember, the clips are about 5 cm apart, and as you work your way around the device, you’ll hear a satisfying little pop when they let go. Keep at it!
– Gently slide the plastic opening tool all the way around the edge of the device to loosen it up. Take your time and let the tool do the work—it’ll make things easier as you go along.
Step 3

Handle the tablet’s internal parts with care—gentle hands make happy repairs!
– Carefully pop off the back cover after you’ve successfully disconnected all the links. You’ve got this!
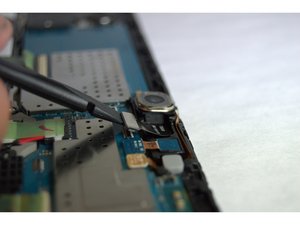
Step 4


– Grab some tweezers and carefully lift the green tape off the ZIF connectors on those black ribbon cables.
– With a plastic opening tool, gently flip up the plastic clips on the ZIF connectors.
Tools Used

Step 5

– Carefully take out the six 2mm Phillips #000 screws that are hanging out around the battery. They’re just waiting for you to give them a little twist!
Step 6

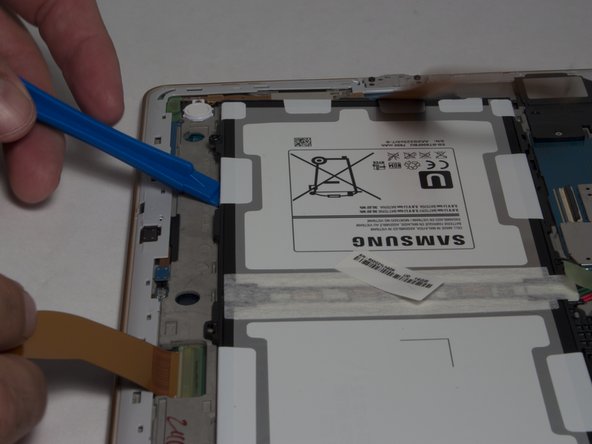

– Gently slide the plastic opening tool between the frame and the battery like you’re slipping a note under a door.
– Once you’re in, give that tool a little wiggle downwards, away from the battery, and watch it pop out like a surprise party!
Step 7


– To put your device back together, just retrace these steps in reverse—easy peasy!
– Didn’t manage to finish? No worries, it happens!
– If things get tricky, you can always schedule a repair for some expert help.
Success!