How to Replace Samsung Galaxy Tab S2 Camera – DIY Guide
Duration: 45 minutes
Steps: 9 Steps
Are your photos looking a bit off? Is the camera on the back panel sporting some scratches or cracks? No worries! Swapping out that back panel camera should do the trick and get you back to snapping those perfect shots.
Step 1
Hey there! Just a friendly reminder: working on your device while it’s powered up could give you a jolt. So, let’s play it safe—make sure to shut down and unplug your device before diving in.
– Warm up the edges of the device with a heat gun or iOpener to soften up that stubborn adhesive holding the screen in place. Time to loosen things up and get that screen ready for the next step!
Tools Used
Step 2
Careful not to lift the screen too far – about 3-4 inches – before disconnecting that pesky ribbon cable, or you might end up damaging your device. Let’s take it slow and easy to avoid any mishaps.
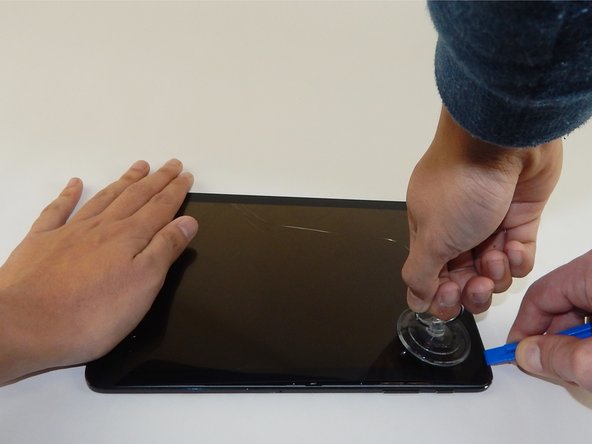
– Slip that plastic opening tool into the gap on the side of the tablet, right near a corner where you want to start lifting the screen.
– Stick the small suction cup on the screen near that corner where the opening tool is chilling.
– Give that small suction cup a lift while pressing down with the opening tool to free the screen (a buddy can hold the device down for better leverage).
Tools Used
Step 3
Place a piece of silver tape over the shiny gold ribbon cable that connects the screen to the tablet.
– Gently grab those tweezers and peel away the silver tape with care. You’ve got this!
Step 4
– Using the plastic opening tool, carefully lift to detach the shiny gold ribbon cable that connects the screen to the base of the tablet. Take your time and be gentle—you’re doing great!
Tools Used
Step 5
– Let’s tackle those nineteen 3mm Phillips #1 screws! Grab your trusty screwdriver and get ready to unscrew your way to success.
Step 6
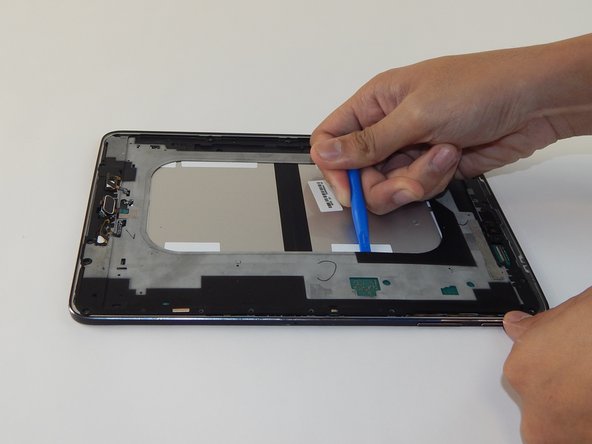
While the device may come apart along the outer edge, using the inner edge (as shown) can give you a handy boost in leverage.
– Use the plastic opening tool to gently pry open the next layer of your device. It may need a little coaxing, but take your time – you’re doing great!
Tools Used
Step 7
– Gently peel off that green tape hiding the camera connector using your tweezers. Keep it steady!
Step 8
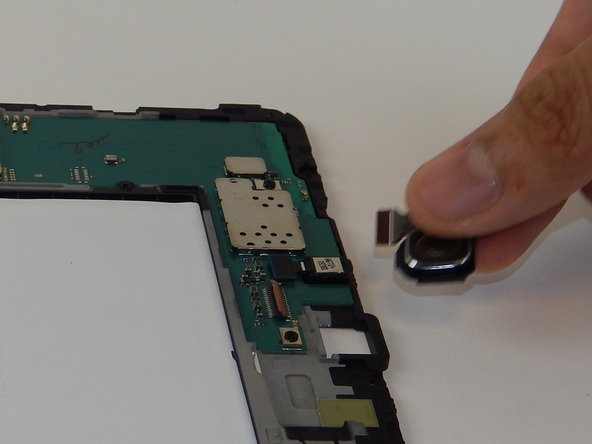
– Grab those tweezers and gently lift the tab on the ZIF connector that’s holding the ribbon cable in place.
– Once the tab’s up, carefully pull the ribbon cable straight out with your tweezers. Easy does it!
Success!


