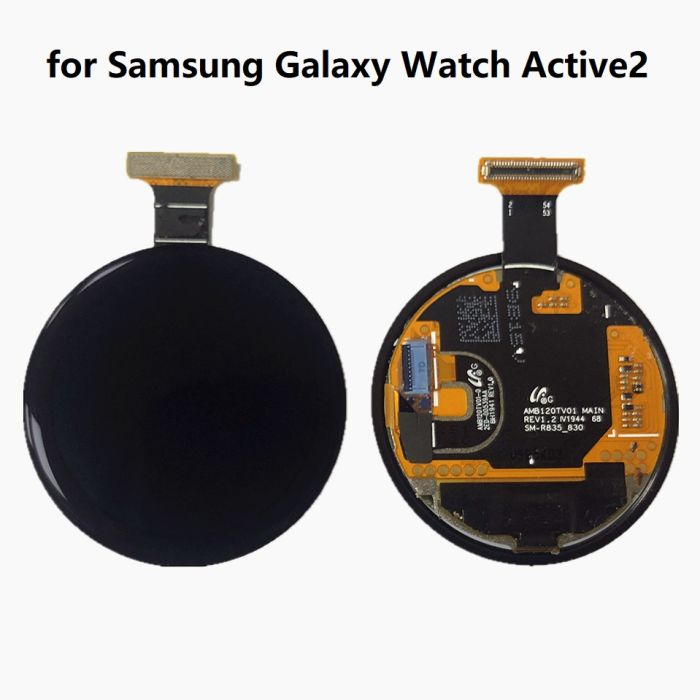
How to Replace Samsung Galaxy Watch Active2 Motherboard
Duration: 45 minutes
Steps: 14 Steps
Ready to give your Samsung Galaxy Watch Active2 a new lease on life? Let’s swap out that faulty motherboard and get your watch ticking like a champ again!
Step 1


– Hold the bottom button on your Galaxy Watch Active2 for about 3 seconds to power it down. You’ll feel a tiny buzz—it’s your watch saying, ‘Goodbye for now!’
– When the ‘Power off’ icon pops up, give the center of the screen a quick tap to shut it down completely. This time, you’ll feel a longer buzz—consider it your wrist gadget’s way of sealing the deal!
Step 2

– Grab your trusty Tri-point Y00 screwdriver and let’s tackle those four 4 mm-long screws on the back of the watch. You’ve got this!
Tools Used

Step 3


Hold your horses! Don’t take off that back cover just yet. There’s a sneaky cable keeping it connected to the motherboard.
– Grab your trusty opening pick and slide it between the plastic back cover and the metal frame right near the buttons.
– Gently work the pick into the gap to nudge the back cover away from the housing. Take your time—steady hands win the day!
Step 4


– Time to get started! Carefully pry the back cover off to reveal the sensor array connector – it’s like unwrapping a present, but way more exciting!
– Now, grab your trusty spudger and use it to gently disconnect the sensor array from the motherboard. Easy peasy, lemon squeezy!
Tools Used


Step 8


If you’re running into trouble, don’t worry! Take a peek at the comments below this step and the next one for some extra help.
– Let’s get started! Place a spudger underneath the motherboard at the top right, right next to the display connector – this is where the magic happens.
– Now, gently twist and lever the spudger to loosen the core assembly. Take your time, it’s all about finesse!
Tools Used
Step 9


– Carefully grab the core assembly and gently slide it free from under the cables. Be sure to take it slow and steady.
– Once it’s loose, remove the core assembly from its spot. You’re almost there!

Step 11


– Gently slide the tip of your opening pick under the top button and lift it off the plastic frame with a little finesse.
Step 12

– Grab a Phillips screwdriver and unscrew the 4.4mm-long screw that’s keeping the motherboard in place.
Step 13


– Slide the flat end of your trusty spudger between the motherboard and the plastic frame, right by that shiny copper coil in the bottom right corner.
– Give the spudger a gentle twist to release the motherboard from those pesky plastic tabs.
Tools Used
Step 14

– Before you dive in, take a moment to match your shiny new replacement part with the original—there might be a few bits and bobs to transfer or some sticky stuff to peel off the new part before you get going.
– When it’s time to put everything back together, just retrace your steps like a pro!
– Got some old gadgets lying around? Don’t toss them! Take them to an R2 or e-Stewards certified recycler and give them a new lease on life.
– If things didn’t go quite as envisioned, don’t sweat it! Check out some basic troubleshooting tips, or pop into our Answers community for a helping hand.
– Oops, I didn’t finish this guide after all!
– You’re not alone on this journey—lots of folks are tackling their repairs too!
Success!