How to Replace Screws on a Mac – Step-by-Step DIY Tutorial
Duration: 45 minutes
Steps: 6 Steps
Alright, let’s dive right into the action! First off, grab your trusty screwdriver. We’re going to gently remove those screws. Remember, lefty-loosey, righty-tighty! Keep those screws safe – you’ll need them later. Ah, and if the going gets tough, remember you can always schedule a repair for some expert backup!

Step 2

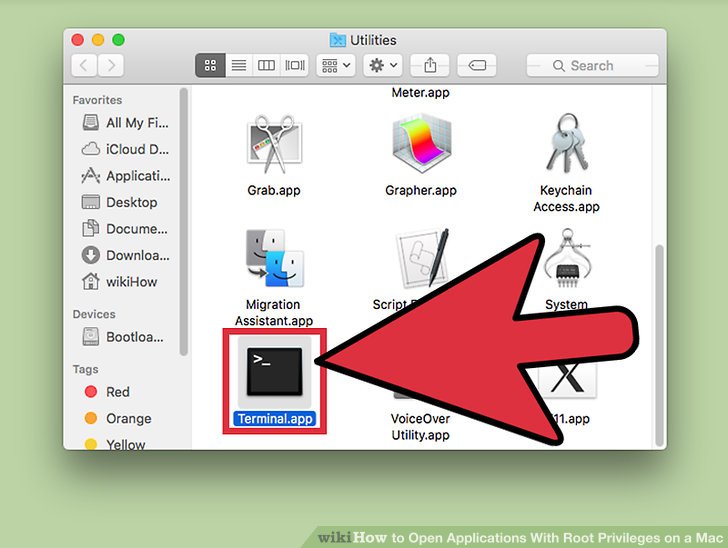
– Fire up your Terminal.
Step 3

– Crack open the package contents of the application like you’re unearthing treasure!
Step 4

Heads up! The executable usually goes by the same name as the app itself, but occasionally it throws a curveball and calls itself something like “run.sh.” Keep your eyes peeled!
Look out for the icon that’s all decked out in black with ‘exec’ chilling in tiny letters. It’s your go-to guy!
– Alrighty! You should now be gazing at one or more folders within the application. Hunt down the executable file nestled in there.
Step 5

Pop a space after sudo—just like taking a breath!
Hold up! Don’t run that command just yet. Wait for the next step.
– Okay, type ‘sudo’ and hit that space bar—but hold your horses, don’t smash that Enter key just yet!
Step 6

Psst! When you type your password, nothing shows up on screen—don’t worry, it’s a ninja move for security! Your password is secretly being typed in, even if you can’t see it.
Time to punch in your secret code to make the magic happen!
– Scoot that executable file right on over into the Terminal line, like you’re sliding into your favorite jeans.


