How to Replace Steam Controller Components DIY Guide
Duration: 45 minutes
Steps: 11 Steps
Hey there, repair rockstar! Just a heads up: tackling this project means you’ll want to keep those fingers nimble and your workspace tidy. If you need a hand, remember, you can always schedule a repair with us. You’ve got this!
So, here’s the deal: my left analog stick was throwing a tantrum with some serious drift and those pesky left-right ghost inputs. It was clear this controller was nearing its end. For disassembly, I decided to take matters into my own hands and drilled out two screws because waiting for a T6 driver felt like an eternity. Unfortunately, this means the controller is now officially a little worse for wear, both on the outside and, well, it was already struggling on the inside.
Step 1
Ran into a little snag when I realized my trusty screwdriver wasn’t quite up to the task. Had to get creative and ended up drilling out two of the four side screws. Remember, it’s all about improvising and adapting on the fly!
– Now it’s time to remove the back plate and take out those batteries! You’re just a step away from getting things back on track.
Step 2
– Alright, let’s kick things off by removing those 4 obvious screws, two on each side.
– Grab yourself a long-necked T6 driver to tackle these bad boys with ease. Make sure it’s at least 1″ (25mm) in length.
– Now, the pro tech toolkit might not have exactly what you need, but don’t fret! I had to get a little creative – used a slightly hacked hex key on a couple of screws (heads got stripped!) and ended up having to drill out the other two. It’s all part of the fun!
– Just keep your cool and remember, if you need a hand, you can always schedule a repair with us. Stay positive and let’s get this fix done!
Step 3
– Don’t worry, these sneaky screws like to hide under labels. You can either sneak up on them with a sharp blade or give them a surprise sharp punch-through.
– At the top, just outside the metal-revealing holes, you’ll find a pair of screws having a little party. And don’t forget about their buddy near the bottom center.
– The top two screws may be playing hard to get, but fear not, your trusty T6 friend fits in just fine to charm them out.
Step 4
– Kick things off at the bottom center—it’s the easiest spot and will keep those pesky visual scratches to a minimum!
– Make your way all around, sneaking below and behind the USB port. (Check out the second picture for a visual aid!)
Step 5
– Once you’ve popped off the backplate, keep an eye out for those two sneaky battery hinges that might try to escape on either side.
– Next up is the backplate release switch, made up of two plastic pieces and two little springs – they can be quite the duo!
– It’s a great idea to hold onto those parts on the backplate for an easy reassembly later on.
– Check out the 3rd picture to see what those parts look like!
Step 6
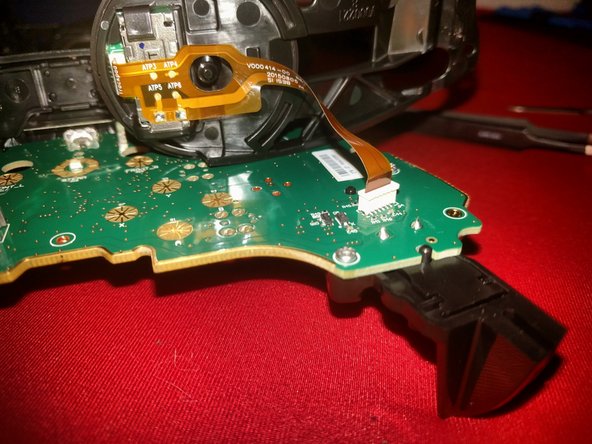
Hold up there, cowboy! Before you go yanking out the motherboard, remember there are sneaky little ribbon cables hiding underneath.
– Look for the two screws near the top center.
– Locate the two screws positioned on the far sides atop the battery holder’s plastic backings.
Step 7
– Each touchpad is held down by a pair of screws, and they’re like twins – mirrored across from each other.
– You might need to give the motherboard a little lift, just by a finger’s width, to spot two of the four screws hiding slightly beneath the battery holder plastic. Don’t worry, you’ve got this!
Step 8
Careful not to let the buttons fall out if you turn the front face upside down – there’s a nifty rubber/conductive silicone piece keeping them in place!
– Just a heads up, the only thing holding those trackpads in place are the ribbon cables, so take it easy when you’re lifting the motherboard away from the front face plastic. You got this!
Step 9
Hey there, if you’re swapping out a trackpad, this step is for you!
– Removing these ribbon cables is a breeze! Just give them a gentle tug straight out from the board.
– For putting them back in, we recommend using ESD-safe tweezers. The little ends can be tricky to handle, so a little extra care goes a long way.
Step 10
When the USB I/O panel pops off, those two bumper buttons are coming along for the ride too! Fun fact: those two top bumpers are actually one long piece of plastic. Who would have guessed?
– Just give it a gentle tug in the direction the USB cable would head from the motherboard, and watch as those two plastic pressure latches let it pop right off! Easy peasy!
Step 11
– Hey there! The secret hiding spot for the bumper setups screw can be found chillin’ on the flip side of the motherboard, kickin’ it under the cool trackpad spot.


