How to Replace Super Nintendo Motherboard – Step-by-Step Guide
Duration: 45 minutes
Steps: 13 Steps
Step 1

– Bust out your Gamebit 4.5mm screwdriver and unscrew those six bad boys on the bottom of the system.
Tools Used

Step 2


– Gently turn the device back over, like you’re flipping a pancake!
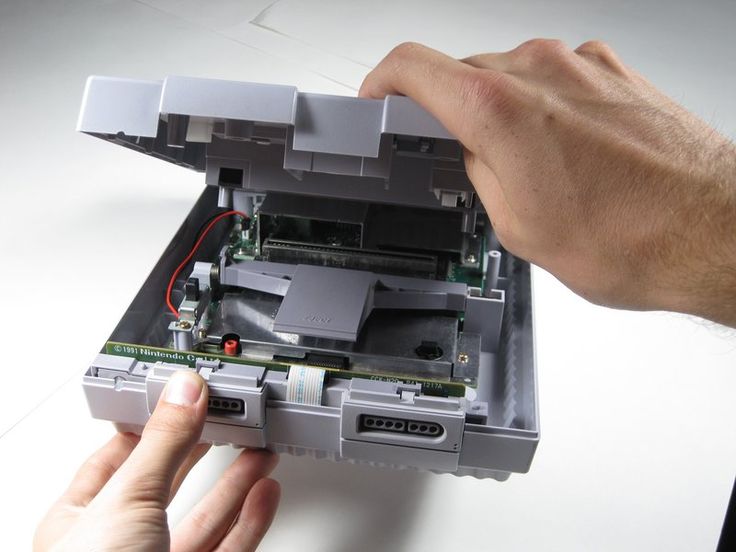
– Find the seam and give it a little lift to separate the top half of the case from the bottom half. You’ve got this!
Step 3

– Unscrew the two 11.7 mm Phillips #2 screws that are holding the power switch to the motherboard. A little twist and you’re on your way!
Step 4


Avoid yanking the connector by the wires—it could spell trouble for both the wires and the socket.
The power button hangs out near the top left corner of the motherboard—easy to spot, so let’s get to it!
– Time to get that connector out! Gently pull it from its socket on the motherboard. Don’t be afraid to give it a little wiggle – it might need some convincing to come out.
Step 5


– Gently pop the right side of the eject lever out of its cozy little housing.
Step 6


Watch out for the spring chilling on the left side of the lever—it’s got a tendency to bounce off when you’re pulling out the metal bar. Keep an eye on it!
Reassembling can be a bit tricky, especially with that spring (you’ll spot it marked in red). It’s a good idea to have one person hold the spring steady (check out picture 3) while the other slides the metal bar back into the left housing and attaches the eject lever onto the metal bar. Teamwork makes the dream work!
– Gently slide the metal bar out from the right side of the eject lever. You’ve got this!
Step 7

– Gently lift the controller ports out of the housing—no need for brute strength here! Keep an eye out for where the ribbon cable connects, so you’ll know where it goes when it’s time to put things back together.


Step 9

– Let’s get down to business! First, grab your trusty Phillips screwdriver and remove those two 11.6mm screws that are holding the front shield snug against the motherboard. You’re doing great!

Step 11

– Pop out those two shiny 15.6 mm Phillips #2 screws chilling on either side of the 62-pin connector. Easy peasy!
Step 12

– Unscrew the 11.8 mm Phillips #2 screw located near the back of the SNES. Easy does it—this one’s crucial!
Step 13

– To put your device back together, just follow the steps in reverse.
– Cancel: I did not finish this guide.
– If you need help, you can always schedule a repair.
Success!