How to Replace The Battery Adhesive for One Phones
Duration: 45 minutes
Steps: 3 Steps
Hey there! Just a little heads up: make sure to handle your device with care during the repair process. A gentle touch goes a long way in keeping things safe and sound! If you ever feel stuck or need a hand, you can always schedule a repair. You’ve got this!
Ready to dive into some battery replacement magic? This guide is here to help you tackle the task of applying custom-cut battery adhesive when swapping out a battery. We’re using a Samsung Galaxy phone as our example, but don’t worry if you have a different phone; the adhesives might look a bit different, but the steps are all the same! If you opt for double-sided tape instead, just think of this guide as your trusty roadmap for where to stick it. And remember, if you need help, you can always schedule a repair.
Step 2


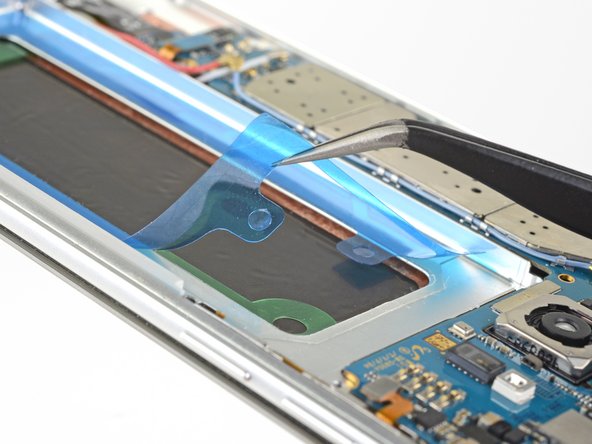
Before diving in, take a moment to check out how the pre-cut adhesive strip should be lined up and which surface it’s meant to stick to.
– Start by peeling off that clear plastic liner from the pre-cut adhesive strip to reveal the sticky goodness underneath.
– Now, align one long edge of the adhesive with the designated surface, just like we discussed earlier.
– Gently place the adhesive down onto the surface, making sure it finds its perfect spot.
Step 3

– Alright, let’s get that adhesive snugly in place! Use your fingers to press it down gently.
– When you’re ready to attach the battery, peel off the blue plastic liner to reveal the sticky goodness underneath.
– Carefully set the battery down without pressing too hard just yet.
– Plug in the battery connector for a quick check to make sure the cable reaches the socket like a champ.
– Now, give the battery perimeter a good firm press with your fingers to ensure it sticks like it means it.
– Before diving back into re-assembly, make sure to disconnect the battery. Safety first!