How to Replace the Battery in Samsung Galaxy Tab S2 9.7 (2015)
Duration: 45 minutes
Steps: 9 Steps
Battery life leaving you high and dry? Is your device playing dead even when it shouldn’t? Swap out that old battery and bring your device back to life.
Step 1
Hey there, safety first! Shut down and unplug your device before you start working to avoid any unexpected electric shocks.
– Warm up the edges of your device with an iOpener or heat gun to gently loosen the adhesive that holds the screen in place. You’re just giving it a little love to make the next steps easier!
Tools Used
Step 2
Hey there! Just a heads up: there’s a ribbon cable snugly attached to the back of the screen. Try to keep the screen’s lift-off to a chill 3-4 inches max before you disconnect that ribbon cable. Going too far could lead to some unwanted device drama!
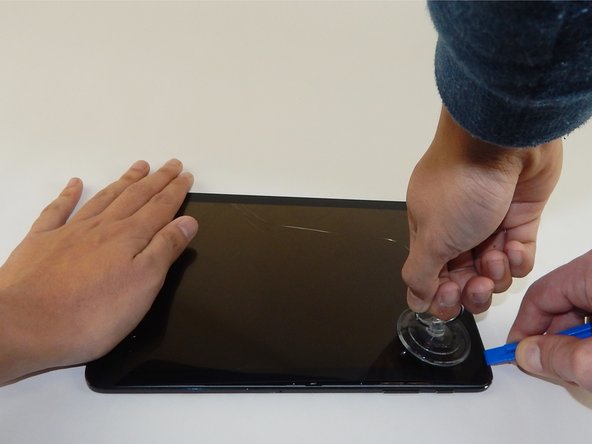
– Slip that plastic opening tool into the gap on the side of your tablet, near the corner where you want to start the screen lift-off.
– Stick the small suction cup on the screen right near the corner where the plastic opening tool is.
– Lift the small suction cup while pressing down with the plastic opening tool to pop off the screen. (Psst, if it’s a bit tricky, you can always schedule a repair!)
Step 3
A shiny strip of silver tape is securing the gold ribbon cable that hooks up the screen to the tablet.
Step 4
– Using the plastic opening tool, carefully lift to detach the shiny gold ribbon cable that connects the screen to the tablet’s base. You’ve got this!
Step 5
– Unscrew those nineteen 3mm Phillips #1 screws like a pro! You’ve got this!
Step 6
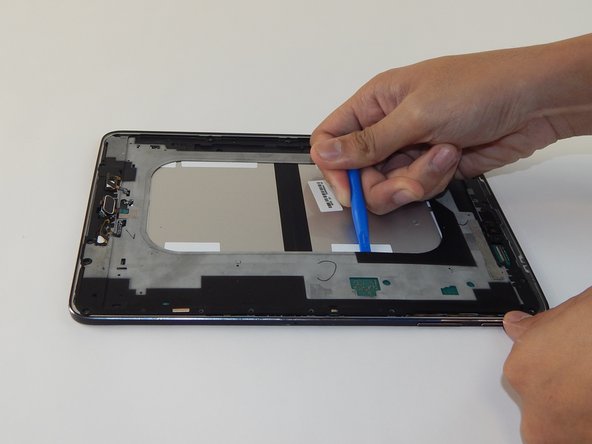
While the device may come apart along the outer edge, trying to work with the inner edge (as shown) can give you a better grip and make things easier.
– Gently work the plastic opening tool around the next layer of the device to pry it open. Take your time and be careful—it’s like peeling an onion, but way less tearful!
Step 7
– Unscrew those four black 3 mm Phillips #1 screws that are keeping the battery snug as a bug. You’ve got this!
Step 8
You don’t have to pull out the entire cable—just unplugging one side will do the trick to free the battery. Easy peasy!
– Grab a trusty plastic opening tool and pop up that black flap on the ZIF connector chilling in the top left corner of your device.
– With the connector unlocked, gently coax the ribbon cable out using tweezers. Take your time—patience is key!
Tools Used
Step 9
– Time to put your device back together! Just follow these steps in reverse.
– Cancel: I didn’t finish this guide.
– If you need help, you can always schedule a repair
Success!


