How To Replace the Gasket on Pebble Smartwatch: A Step-by-Step Guide
Duration: 45 minutes
Steps: 11 Steps
We’re crafting and installing a fresh watch gasket using Sugru, a moldable adhesive. This nifty creation will keep your watch intact after repairs. It needs 24 hours to cure, so we’ll also build a fixture to hold the watch together during this time. If you need help, you can always schedule a repair.
Step 1

Give those hands a good scrub! Any oil or dirt on your fingers can mess up your watch and make it harder to work with the adhesive we’re using.
– Before we dive into resealing your watch, let’s make sure those sealing surfaces are squeaky clean! A little prep goes a long way.
– Grab some isopropyl alcohol and a few cotton swabs to give the bezel and watch case sealing surfaces a good scrub. Don’t forget to say goodbye to any old gasket material—it’s time for a fresh start!
Step 2


Got a ‘food saver’ heat sealer? Perfect! You can use it to re-seal the Sugru for later use, which means less waste for you. And don’t worry, sealing just one watch takes only a tiny bit of Sugru.
– Sugru is like magic clay that sticks to stuff! It’s squishy and moldable, kind of like modeling clay, and it comes in cute little single-use packets. Once it meets air, it starts curing thanks to the humidity—science is cool like that.
– Heads up: The moment you crack open that Sugru packet, the clock starts ticking. You’ve got about 30 minutes before it starts to set, so make sure you’re ready to seal that watch back up like a pro before you dive in.
Step 3

– Pinch off a tiny dab of Sugru.
– Roll it out on a flat surface with your fingers until it’s stretched super thin—like less than 1mm!
Step 4


– Let’s keep the sealing surface of the watch clean and free of adhesive—watch out for those (3x) tiny spring holes!
– Roll out small strips of Sugru and line them around the bezel’s edge. Give the Sugru a gentle press to hold it steady.
– I went a bit overboard with the Sugru on this watch, but no worries, we’ll smooth it out later. Keep yours thinner and you’ll have an easier time.
– Those little spring holes? Yep, they house tiny springs that create an electrical connection between the watch case and the bezel. Handle with care!
– Want to up the waterproofing game? You can line the entire case perimeter with Sugru. Just a heads-up, though—it might mess with Bluetooth range. I haven’t tried it yet, but it’s on my list for the next repair adventure!
Step 5

These springs are essential for your watch to work its magic! Without them, the Bluetooth connection might turn into a shy wallflower, with a weak range or just refusing to connect altogether. They have a sneaky tendency to disappear, and finding replacements is like searching for a needle in a haystack!
– So, here’s the scoop: there are three little holes for springs, but in my experience fixing multiple Pebble Time Rounds, I’ve often only found two springs hanging out. Maybe I’m just not the best at keeping track, or perhaps some models are just made with two springs. Either way, the watches I’ve put back together seem to run just fine with just two springs! I suggest popping one spring in the left hole and the other in the right. Easy peasy!
– Now, grab those tweezers and delicately place a spring in each hole. Just a heads up—be super careful not to let them escape into the wild!
Step 6


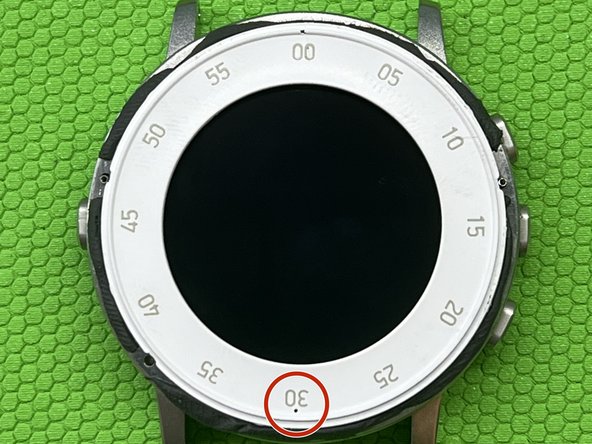
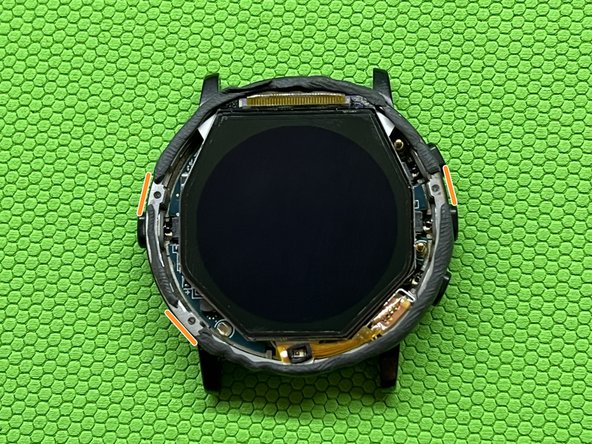
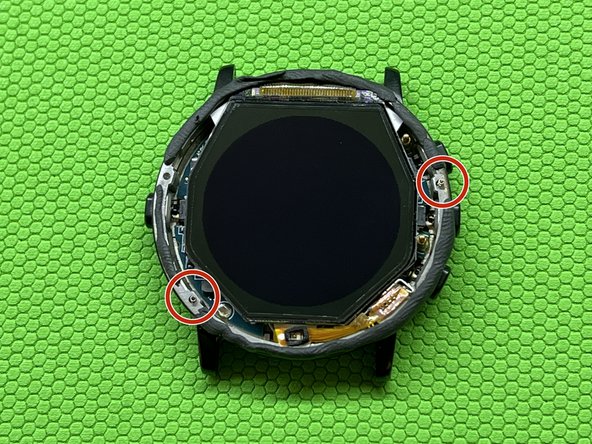
For your watch to tick-tock properly, the inner bezel must be perfectly aligned! Make sure the ambient light sensor hole is at the bottom, and those two ‘pogo’ pins on the motherboard are matching up with the contacts on the inner bezel. You’ve got this!
– Gently place the display inner bezel over the display and the Sugru. It’s like tucking in a cozy blanket!
– For those shiny silver Pebble Time Rounds, make sure the ’30’ is sitting pretty at the bottom for perfect alignment.
– You’ll know the bezel is just right when it sits snugly against the display, fitting into those little notches in the case like a puzzle piece.

Step 8

– Place the outer glass bezel on and give the watch a gentle press all around the edges to make sure it’s seated properly.
– If any Sugru oozes out, no worries! Just grab a cloth or cotton swab and wipe it off before it hardens.
Step 9


– Alright, time to set up a little fixture to let that Sugru do its drying thing. Grab a C-Clamp, some scrap wood, and a foam pad to gently press the watch into place.
– Any excess Sugru that squeezes out? Just wipe it away with a cotton swab.
– The wood helps spread the clamp’s pressure evenly across the display, while the foam keeps that glass safe from any mishaps.
– Now, create a nice little sandwich with the clamp, wood, foam, and your watch. Tighten the clamp just enough so the watch is pressed, but not too tight—you don’t want to overdo it!
Step 10

– Keep the watch clamped snugly together for a full 24 hours to let the Sugru work its magic and fully set.
Step 11

Opening the watch again might turn into a little adventure since Sugru is quite the tough cookie! A gentle tip: try sliding a razor blade into the seam and carefully prying it open. Just a heads up, I haven’t personally given this a whirl, but it sounds like a plan!
Now that you’ve completed this step, don’t worry if your device isn’t totally waterproof – most electronic devices can get wet sometimes. If it gets splashed, you’re probably fine, but try not to swim or shower with it!
– The Pebble Time Round isn’t exactly a ‘waterproof’ wonder; it’s more of a ‘Splash-Resistant’ companion. While this guide will help keep your watch intact, it won’t guarantee that water stays out, so tread carefully!
– Cancel: I did not complete this guide.
–
Success!