How to Replace the Motherboard in TicWatch Pro 3 GPS
Duration: 45 minutes
Steps: 21 Steps
Hey there! For a safer experience, make sure to drain the battery below 25% before diving into your watch disassembly.
Ready to swap out the motherboard in your TicWatch Pro 3 GPS? Let’s do it! First things first—this repair involves removing the battery. If your battery looks damaged or has taken on a weird shape, don’t try to reuse it. That’s a safety no-go! Instead, grab a fresh one. Pro tip: Keep things safe by discharging the battery to below 25% before diving in. This lowers the fire risk just in case the battery gets a little banged up during the process. Got a swollen battery? Handle it with extra care. Oh, and heads-up, you’ll need some replacement adhesive when putting everything back together. Your watch will work like a charm after this, but it’ll lose its IP (Ingress Protection) rating. Let’s get fixing!
Step 1
– Time to get started! Before you begin, make sure to unplug your watch from the charger and power it down completely.
– Now, let’s get comfortable – remove the watch band to give yourself some room to work.
Step 2
– Grab your trusty Torx T3 screwdriver and get ready to make things happen! It’s time to tackle those four screws, each measuring 4.1 mm, that are keeping the back cover snug and secure. Unscrew them gently and let the adventure begin!
Step 3
A hair dryer, heat gun, or hot plate can do the trick too—just make sure not to overdo it with the heat and turn your gadget into toast.
– Warm up an iOpener and give the back of the watch a cozy 5-minute hug. This helps to loosen the adhesive holding everything together.
Step 4
Hold up! Don’t yank off the back cover just yet. It’s still hanging on by a thread to the daughterboard.
– Take the flat end of a trusty spudger and gently slide it into the microphone opening at the top edge of the back cover.
– Give it a nice upward pry to loosen up that back cover assembly—don’t be shy, it might take a little elbow grease.
– Carefully swing the back cover open to about 45 degrees to get a clear view of the sensor assembly cable. Easy peasy!
Tools Used
Step 5
When snapping press connectors back into place, line it up like you’re setting up for the perfect handshake—start at one side, press down until it clicks, then move to the other side. Avoid pushing down on the middle; no one likes bent pins! Misalignment can lead to permanent damage, so take it slow and steady.
– Grab your trusty spudger and gently nudge that sensor assembly cable loose by lifting the connector straight up from its cozy socket. You’ve got this!
Tools Used
Step 8
– Grab your trusty Phillips screwdriver and pop out the three 4.1mm-long screws holding the core assembly. Easy peasy!
Step 9
Hold up! Don’t pull the core assembly out just yet—it’s still got a connection to the screen. Take it slow!
– Gently slide the tip of your trusty spudger between the right edge of the core assembly and the watch frame. You’ve got this!
– With a little upward pressure, pry the core assembly loose. You’re making great progress!
Tools Used
Step 10
Be careful not to stretch or damage the display cables at the base of the core assembly.
– Gently flip open the core assembly like you’re opening the cover of your favorite book.
Step 11
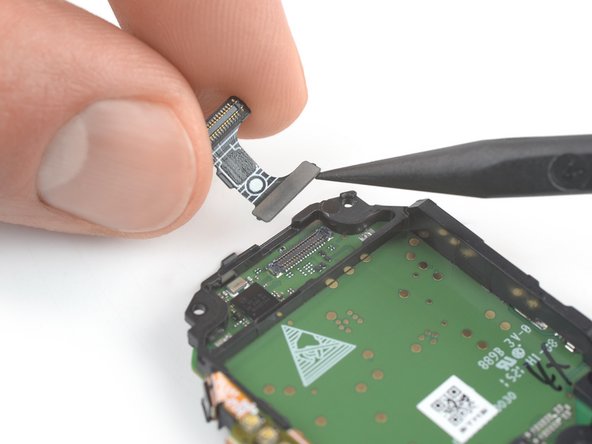
– Grab your trusty spudger and gently pop the screen and digitizer cables loose by lifting their connectors straight up from the sockets. Easy peasy, take your time!
Tools Used
Step 12
– Pop out the core assembly—easy peasy, just take it slow and steady!
Step 15
Handle that battery with care—don’t poke or twist it with your tool! A battery that’s bent or punctured could leak some nasty stuff or even spark a fire. Yikes!
Hold your horses! Don’t pull the battery out just yet; it’s still chilling with the motherboard.
If the battery’s being stubborn, grab a heated iOpener and let it work its magic on the motherboard to loosen the sticky stuff underneath. Just be sure not to place the iOpener directly on the battery itself.
Step 18
Avoid putting in a battery that’s looking a bit worse for wear or has a funky shape. Keeping things safe and sound is the way to go!
Step 20
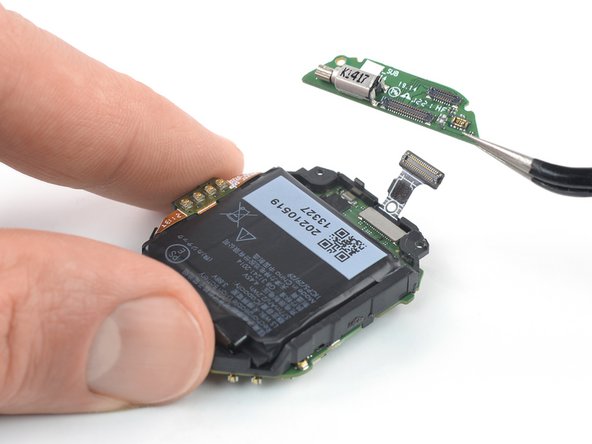
– Wiggle the spudger’s tip in between the midframe and the motherboard—like you’re sneaking a secret handshake.
– Gently pop it upward to nudge the motherboard free. Nice and easy does it!
Tools Used
Step 21
– Check that the new part matches the original—you might need to transfer components or remove adhesive backings before installation.
– Reassemble your device by following these steps in reverse order.
– During reassembly, use fresh adhesive where needed after cleaning with isopropyl alcohol (>90%).
– For peak performance, calibrate your new battery after finishing this guide.
– Recycle your e-waste responsibly with an R2 or e-Stewards certified recycler.
– If the repair didn’t go as planned, try troubleshooting or ask our TicWatch Pro 3 community for help.
– Cancel: I did not complete this guide.
– If you need help, you can always schedule a repair
Success!


