How to Replace TicWatchPro HP Battery: Step-by-Step Guide
Duration: 45 minutes
Steps: 17 Steps
Make sure your battery is under 25% charged—let’s keep things cool and safe while you work your magic!
Ready to breathe new life into your TicWatchPro? This guide’s got you covered for swapping out that tired or lifeless battery. If your battery’s looking a little puffy, handle with care! For a safer repair, make sure your battery charge is below 25% before diving in—this helps keep things cool and reduces the chance of any unexpected drama. Don’t forget, when you’re done, you’ll need some fresh adhesive to secure that shiny new battery during reassembly. Let’s get to it!
Step 1
Hold on! Don’t yank off that back cover just yet. It’s still hooked to the watch assembly.
If your driver feels a bit wobbly, try swapping to a Torx T4 bit—it might just be the snug fit you need!
– Before we get this repair party started, make sure your watch is powered down and removed from its charger – safety first!
– Now it’s time to get hands-on – remove the four 3.9 mm-long Torx T3 screws and let’s get this repair underway!
Step 2
Watch out for the sensor flex cable—don’t tug it like a tug-of-war champ!
– Gently pop the back cover open from the watch crown edge and flip it up.
Step 3
– Grab the flat end of your trusty spudger and gently lift to disconnect that sensor flex cable. You’ve got this!
Tools Used
Step 5
– Time to unscrew those three 3.7 mm Phillips #00 screws—grab your trusty screwdriver and let’s make it happen!
Step 6
Don’t get too eager to remove the core assembly just yet – it’s still hooked up to the watch body, so hang tight!
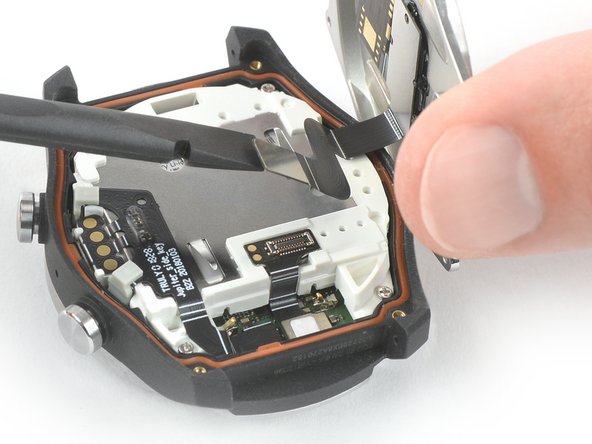
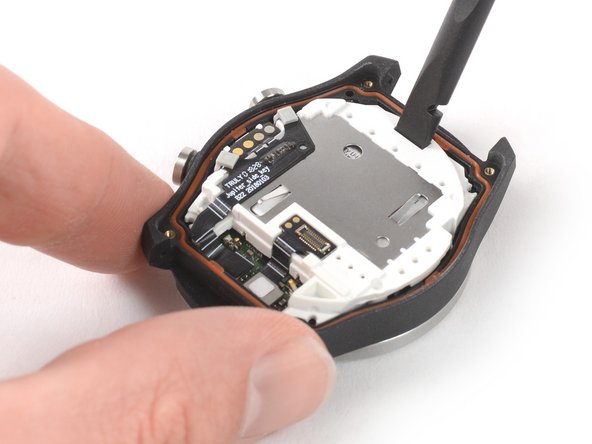
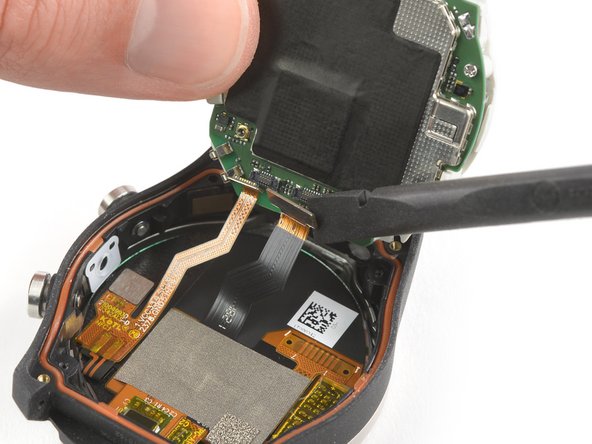
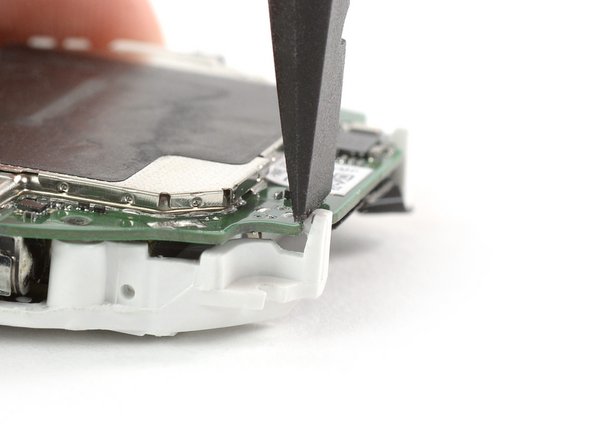
– Pop your spudger into the little notch at the top of the white plastic frame; it’s like unlocking a treasure chest!
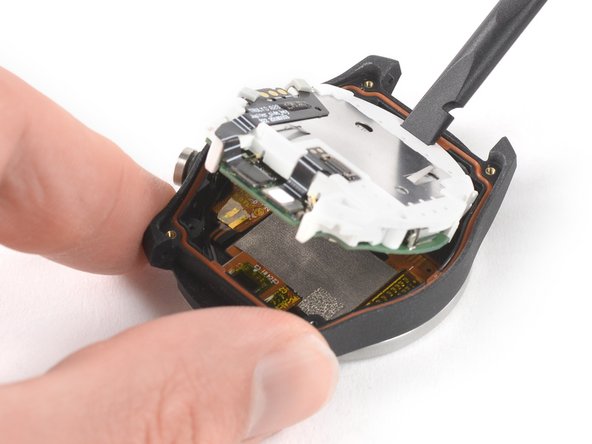
– Now, use that spudger like a trusty lever and gently nudge the core assembly upwards. Slow and steady wins the game!
Tools Used
Step 7
Handle with care! Those display and sensor flex cables are delicate, so be gentle to avoid any strain.
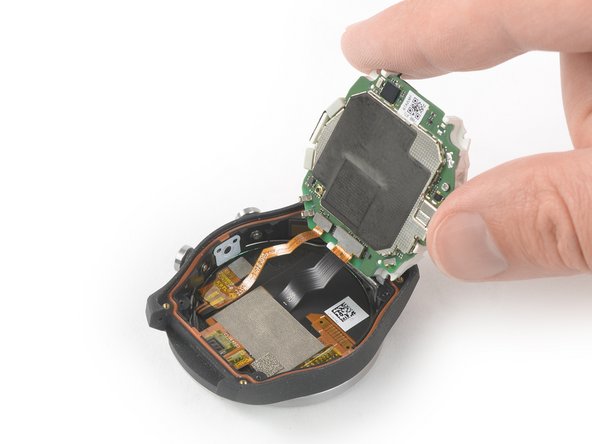
– Gently lift the loose edge of the core assembly and swing it up to about a 100-degree angle like you’re giving it a little stretch!
Step 8
– Grab the flat end of a spudger and gently pop that sensor flex cable loose from the core assembly—easy does it, no rush!
Tools Used
Step 9
– Grab your spudger and gently pry up that display flex cable, disconnecting it from the core assembly like a pro!
Tools Used
Step 10
– Gently pop out the core assembly and let it shine!
Step 12
The motherboard is snugly secured by delicate little plastic clips, so take it easy as you gently pry it loose during this step.
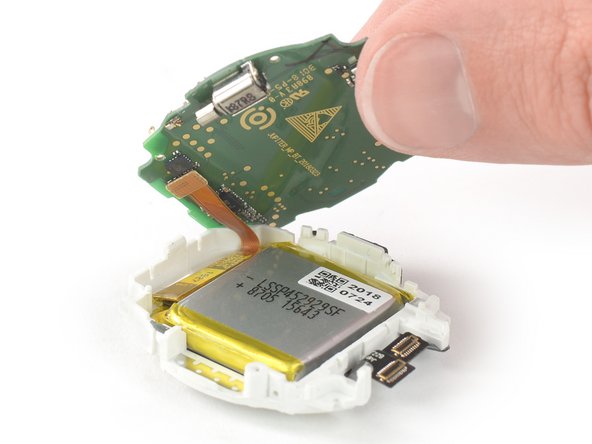
Hold your horses! Don’t try to pull the motherboard out entirely just yet—it’s still buddying up with the battery.
Don’t forget, there are also some sneaky clips hiding under the rubber pads that cover the side buttons. Make sure to check those out too!
– Gently use the flat end of a spudger or your fingernail to nudge the plastic clips around the motherboard to the side. This will free up the motherboard, so you can move on to the next step.
– Repeat this process for all the clips surrounding the motherboard, one by one, until they’re all safely out of the way.
Tools Used
Step 13
Hold up! Don’t pull out the motherboard just yet; it’s still connected to the battery.
– Gently lift the motherboard assembly to release it from any lingering plastic clips. You’ve got this!
Step 14
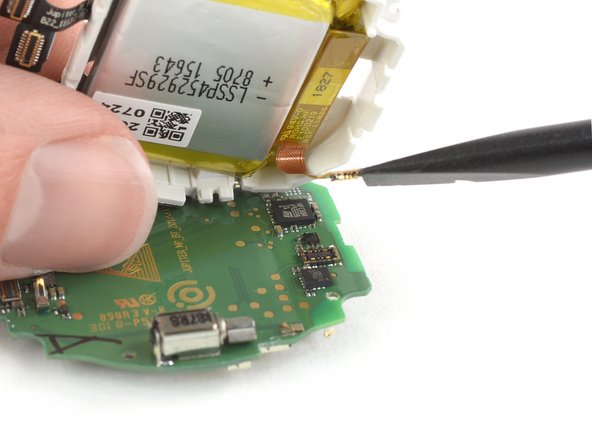
– Grab the flat end of your trusty spudger and gently pop up the battery flex cable to disconnect it from the motherboard. Easy does it—you’re doing great!
Tools Used
Step 16
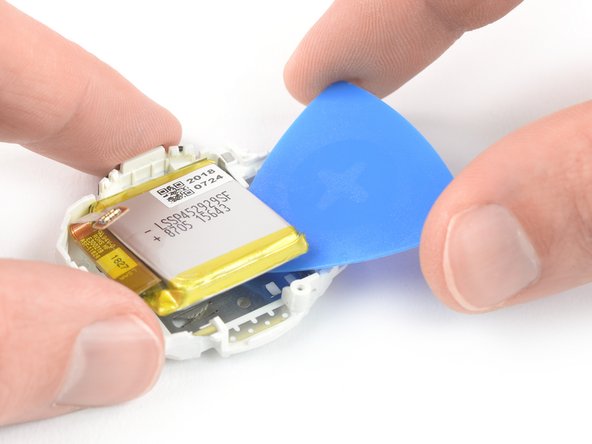
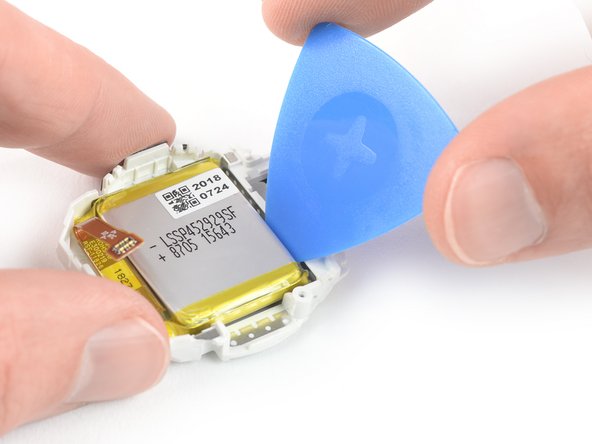
– Slide an opening pick into the space between the white plastic frame and the battery—you’re aiming for that sweet spot in the gap.
– Gently use the pick to nudge the battery up and lift it out of its cozy little recess.
Step 17
Whatever you do, don’t put a bent or busted battery back in—it’s like inviting a safety disaster to the party.
– You’re almost done! Before you button everything up, make sure to test your repair to ensure it’s working as expected. Secure that new battery with some pre-cut adhesive or double-sided tape, and apply it to the device where the old adhesive used to be – not directly on the battery. Press it firmly into place. When reassembling, follow these steps in reverse. Don’t forget to clean the areas with some isopropyl alcohol (>90%) and apply new adhesive where needed. To get the most out of your new battery, calibrate it by charging to 100%, then keeping it charged for at least 2 more hours. Use your device until it runs out of juice, then charge it up to 100% again without stopping. Properly dispose of your e-waste at an R2 or e-Stewards certified recycler. If things didn’t quite go as planned, try some basic troubleshooting or check out our Answers community for help. And if all else fails, don’t worry – you can always schedule a repair with Salvation Repair.
– Cancel: I did not complete this guide.
– You’ve made it to the end of this repair guide!
Success!


