How to Replace Xbox 360 S Top Panel – Step-by-Step Guide
Duration: 45 minutes
Steps: 11 Steps
Ready to give your Xbox 360 S a little makeover? This guide will walk you through the steps to swap out the top panel like a pro. Let’s dive in and get your gaming console looking fresh again! If you need help, you can always schedule a repair.
Step 1

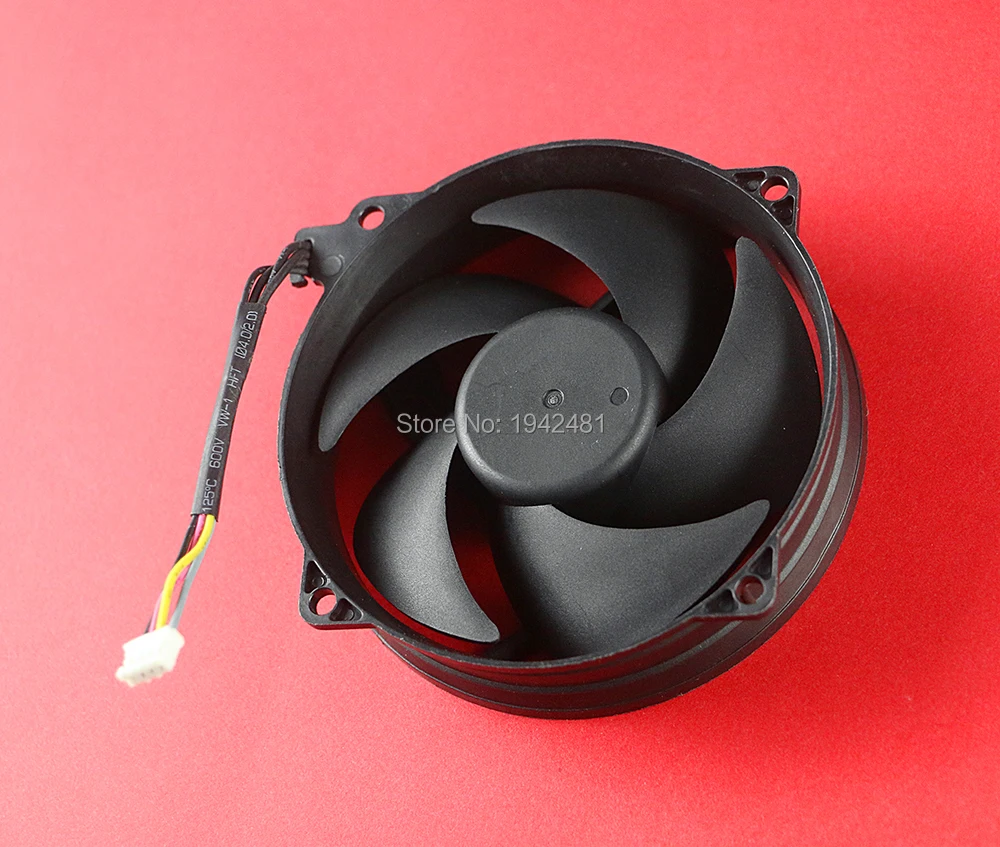
Be careful when you take off the fan vent, those plastic clips are fragile!
– Next up, it’s time to say goodbye to the top vent! It’s held in place by thirteen little clips that are just waiting for you to give them a gentle nudge. Let’s get to it!
Step 2


– Position the console so that the “XBOX 360” text on the sides is facing the right way up, with the faceplate looking to the left.
– Gently slide a metal spudger between the top vent and the top bezel, close to the back of the Xbox.
– Twist the spudger away from the console, lifting the edge of the fan vent until the two plastic clips pop free.
Tools Used

Step 3


– Alright, let’s get this party started! Grab your trusty metal spudger and slide it in between the fan vent and the top bezel along the left side of the console. You’re going to be a pro at this in no time!
– Now, repeat the magic move from the last step – slide that spudger along the left side of the top vent, gently prying it away from the top bezel. Don’t worry, it’ll come off without a fuss!
– Keep on pryin’ along the left side, freeing all those clips. It’s like a little dance, and you’re the lead dancer. You’ve got this!
Tools Used


Step 5


To release each clip, just slide a metal spudger under the bottom edge of the clip. Once you’ve got it under there, give it a gentle pry away from the console, and voila! The clip is free and ready for action!
– Let’s get started! In the following steps, we’ll be releasing the six clips highlighted in red. It’s time to dive in and get your device fixed!
Tools Used
Step 6


Position the console with the left side facing you and the faceplate turned to the right. You’re doing great!
Listen for that satisfying ‘pop’ sound; it means the clip has successfully popped free. Keep it up!
– Time to get this repair started! Insert a metal spudger through the front-most slit on the left edge of the top bezel, making sure it’s between the bottom edge of the clip and the left case – just like we described earlier.
– Now, gently rotate the spudger away from the console while pulling up on the top bezel. This will help free the clip, and you’ll be one step closer to fixing your device!
Tools Used
Step 7


– Now, let’s tackle those last two clips on the left edge of the top bezel. Use the same technique you mastered earlier to release them.
Step 8

Don’t worry, the top panel won’t budge from the console just yet – that’s totally normal at this stage.
– Take hold of the top panel with both hands like a champ! Elevate the left edge just enough so those little clips can take a breather on the left case.
– If some clips decide to play peek-a-boo and snap back, no worries! Just grab your trusty spudger and gently encourage them back to the un-attached team.
Step 9


– Let’s get started by rotating your Xbox 360 S so the rear is on the right and the right case is facing you – easy peasy!
– Now, take a metal spudger and carefully insert it through the slit on the right edge of the top bezel, making sure it’s between the bottom edge of the clip and the right case. You’re doing great!
– While gently lifting the top bezel with your fingers, rotate the spudger away from the console to release the clip. If you need help, you can always schedule a repair
Tools Used
Step 10


– Now, let’s tackle those clips on the right side of the top panel. Just like before, gently pry them open with your trusty tool. You got this!
Step 11

– Time to lift off the top panel of your device like a pro!
– If any pesky clips have reattached themselves to the console, just grab that trusty spudger and gently coax them back into place.
Success!