How to Replace Xiaomi Redmi Note 10 Pro Screen Guide
Duration: 120 min.
Steps: 46 Steps
Hey there! Just a heads up: once you pop open your device, the IP certification that keeps dust and water at bay will no longer be in action. So, handle with care and keep that tech safe!
Thinking about giving your screen a fresh start? In this easy-to-follow photo guide, we’ll walk you through the process step by step to make it a breeze. If you need help, you can always schedule a repair!
Step 1

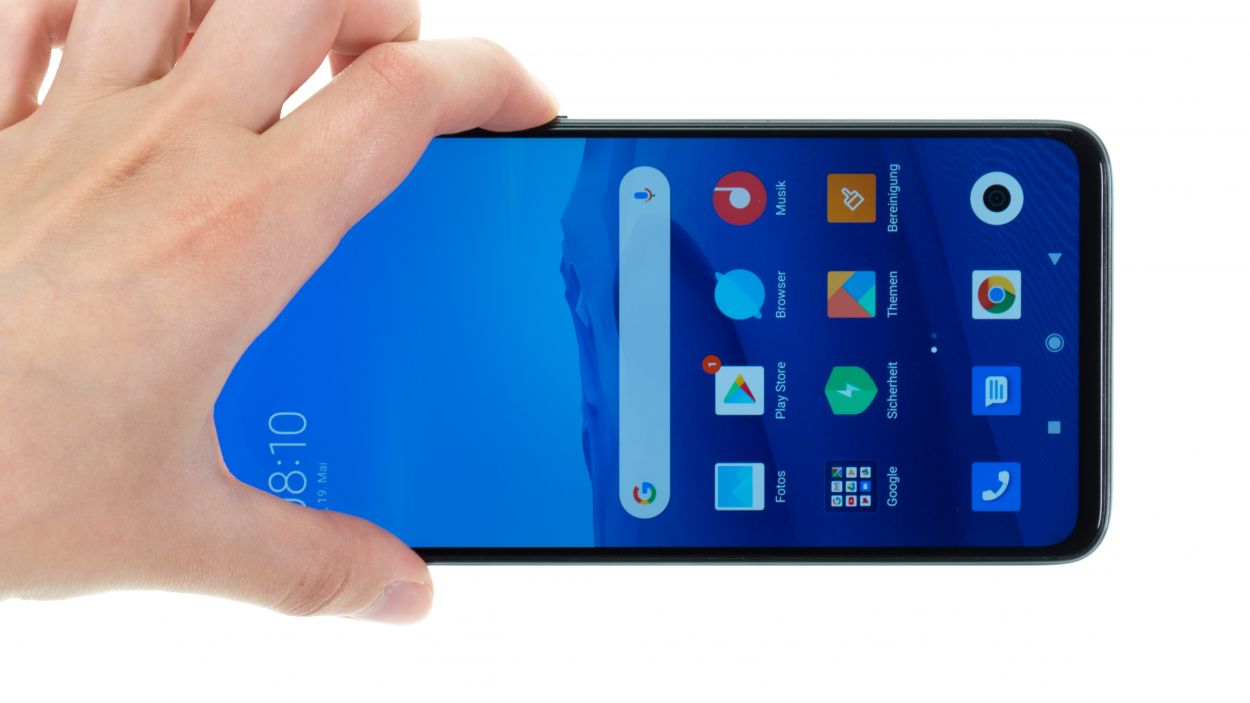
Hey there! Before diving into fixing your Xiaomi Poco X3 NFC, let’s do a quick check-up of its basic functions. This helps us see if your awesome repair skills worked their magic! If you need a hand, you can always schedule a repair
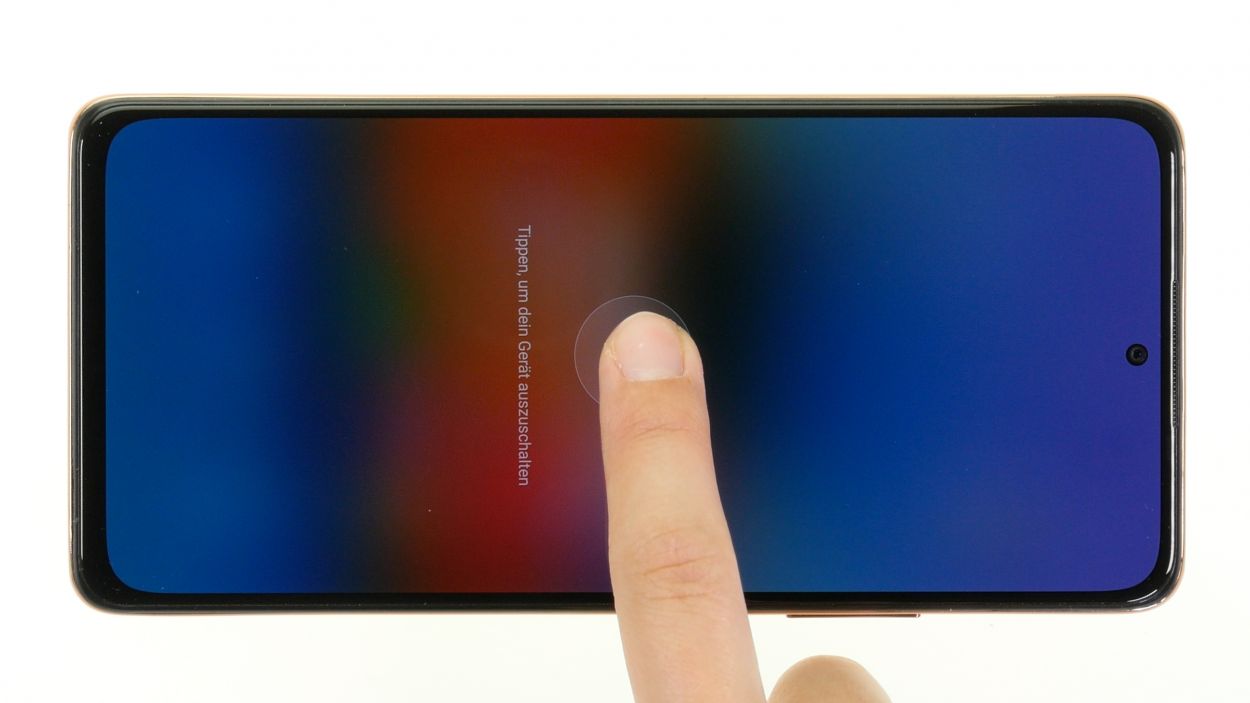
– Hold down the power button until the phone begs for mercy (the Power Off menu shows up!).
– Tap “Power off.” Your phone will take a little nap. Sweet dreams!
Step 2

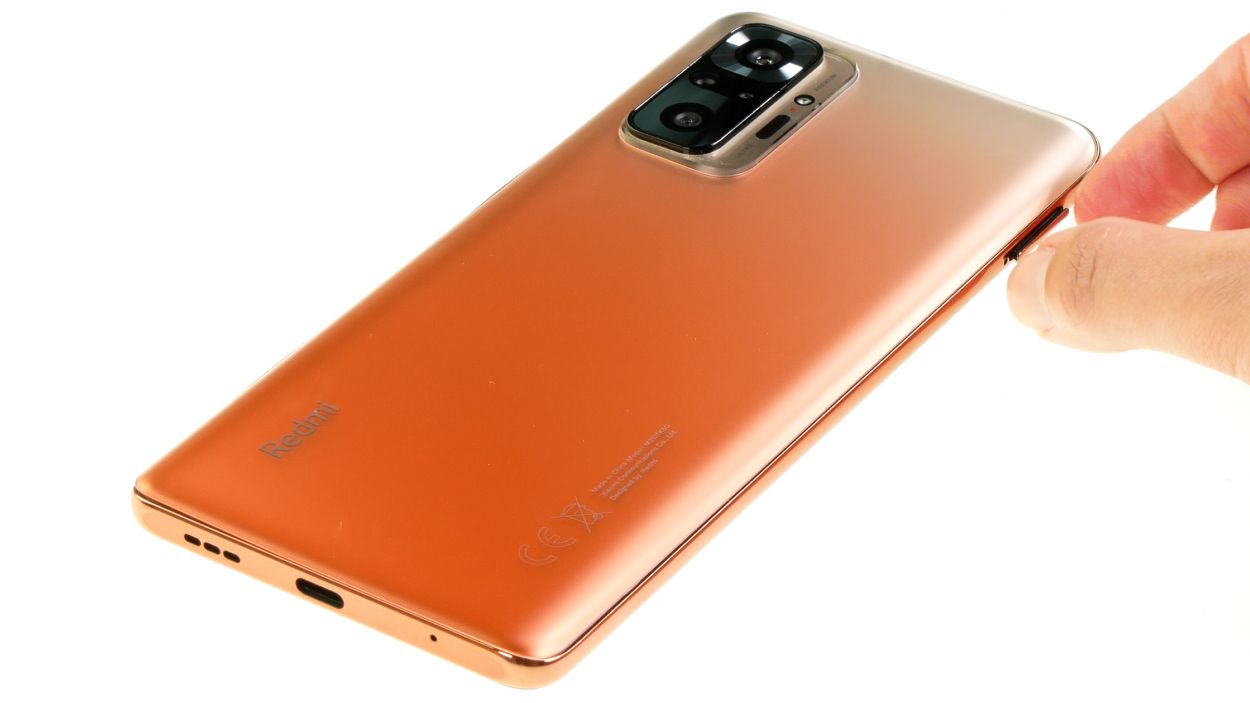
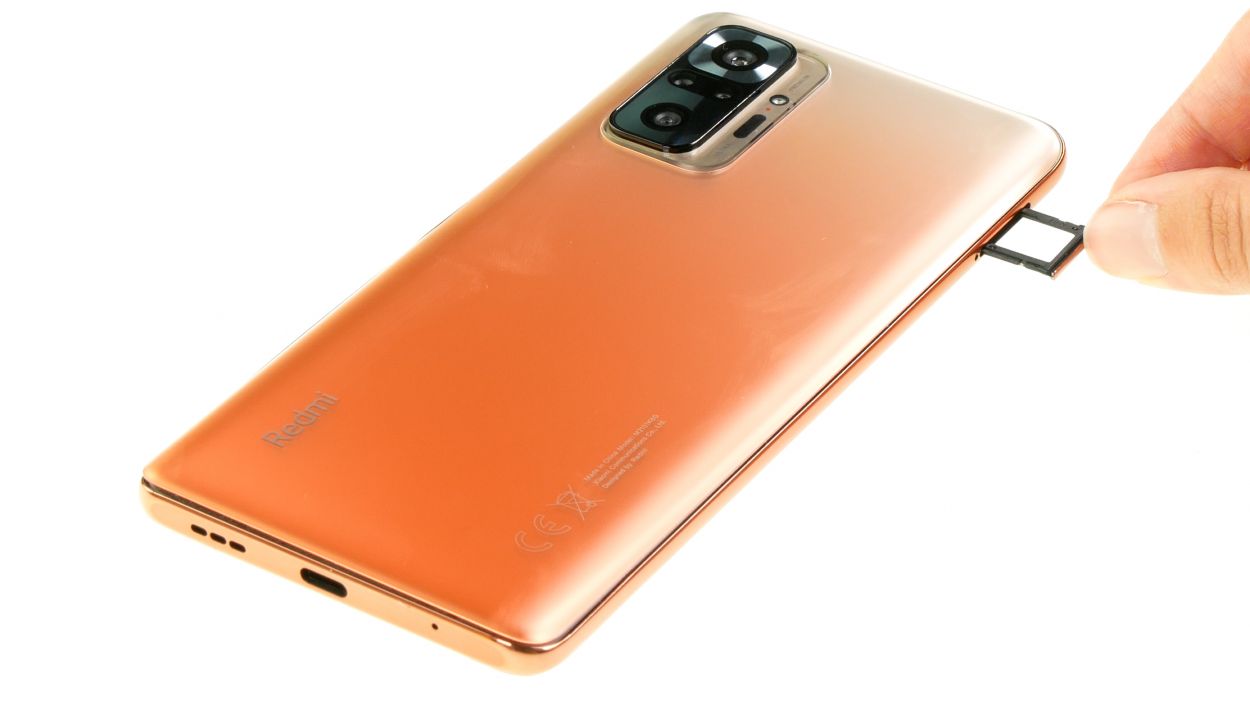
– Grab a slim, pointy object and gently poke it into the tiny round hole next to the SIM tray. This will help you nudge it out of the device frame. A SIM tool works perfectly for this job!
– Now, just pull the tray all the way out of the frame. Easy peasy!
Tools Used
- SIM card slot. This tool is designed especially for ejecting the SIM card from all iPhones and iPads, and fits perfectly into the appropriate opening.” rel=”noopener”>SIM Tool
Step 3
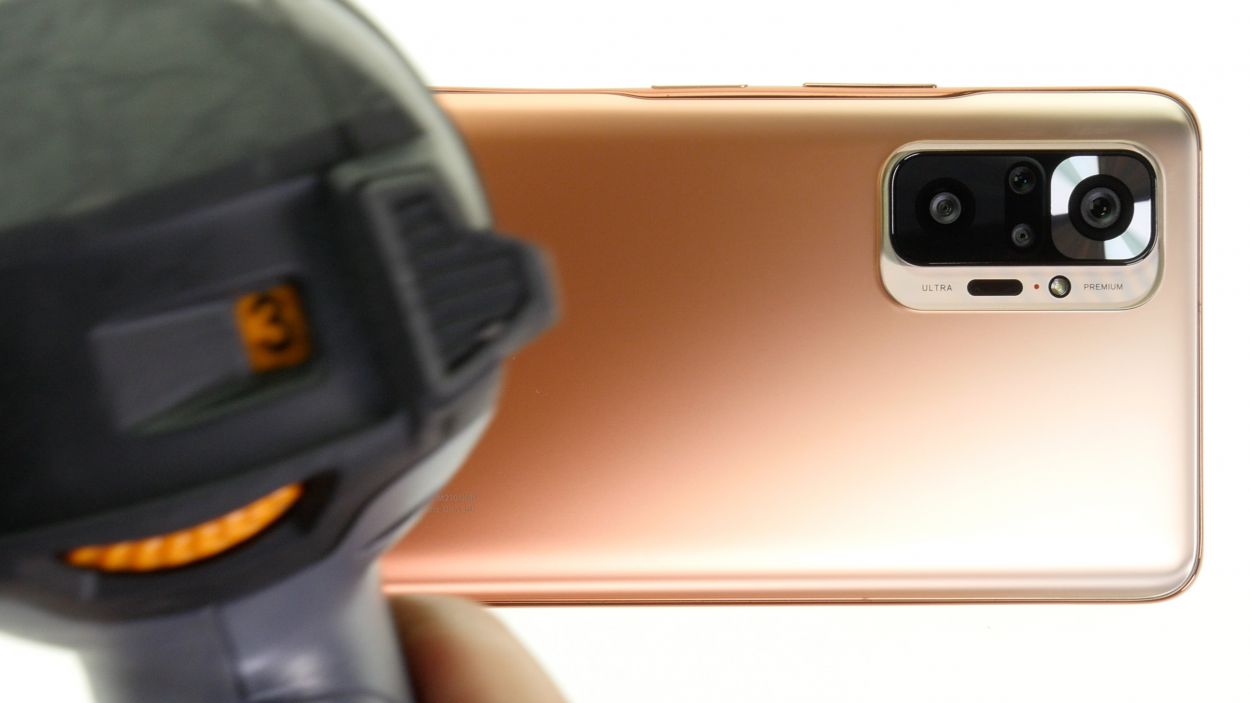
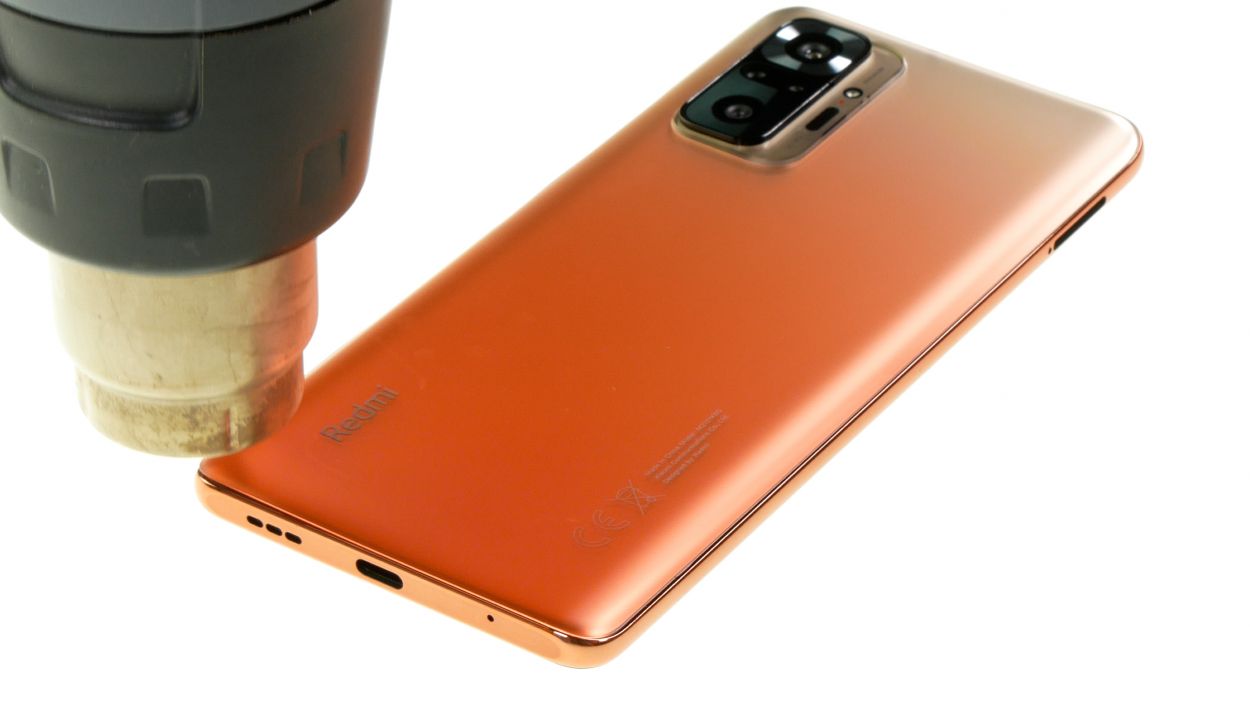
The back cover is really stuck on there, so let’s give it a little warmth to make things easier! Grab a hot air tool, like a heat gun or even a trusty hair dryer, and warm it up nicely before you start prying it off. You’ve got this!
– Heat the edge of the back cover by running the hot air device evenly over it.
Tools Used
- heat gun to heat parts that are glued on so they’re easier to remove.
In most cases, you can also use a hairdryer.” rel=”noopener”>Heat gun
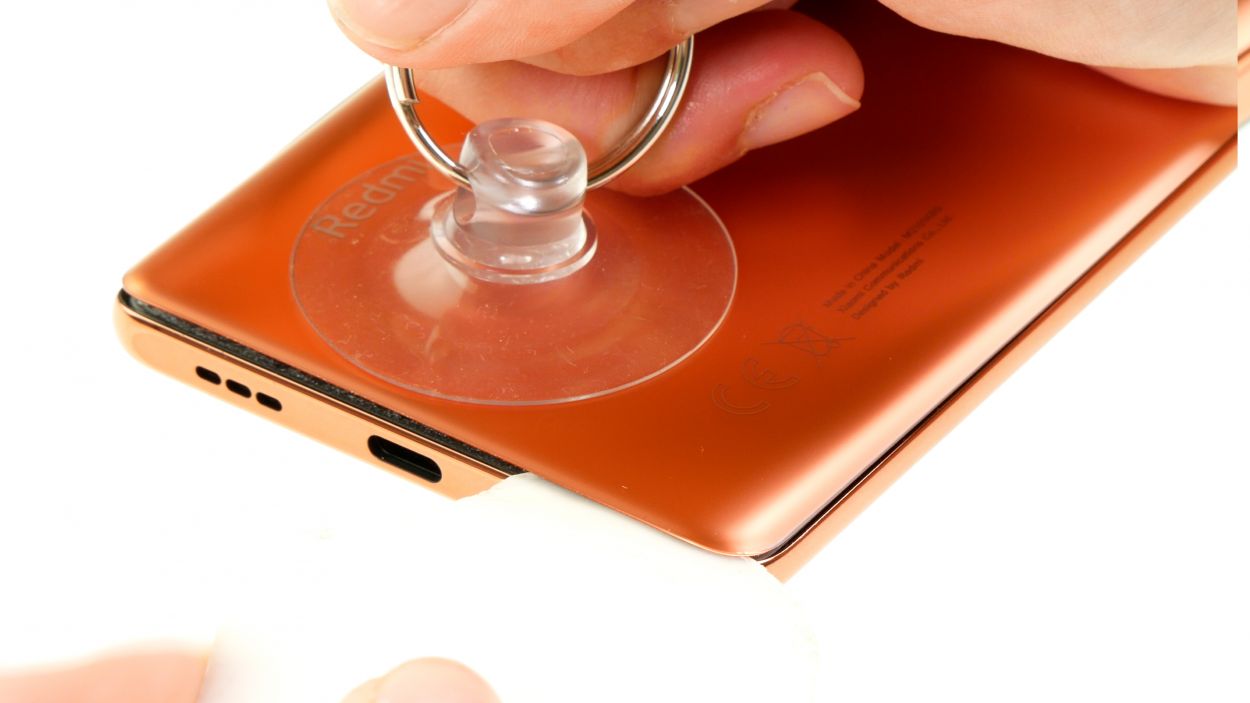
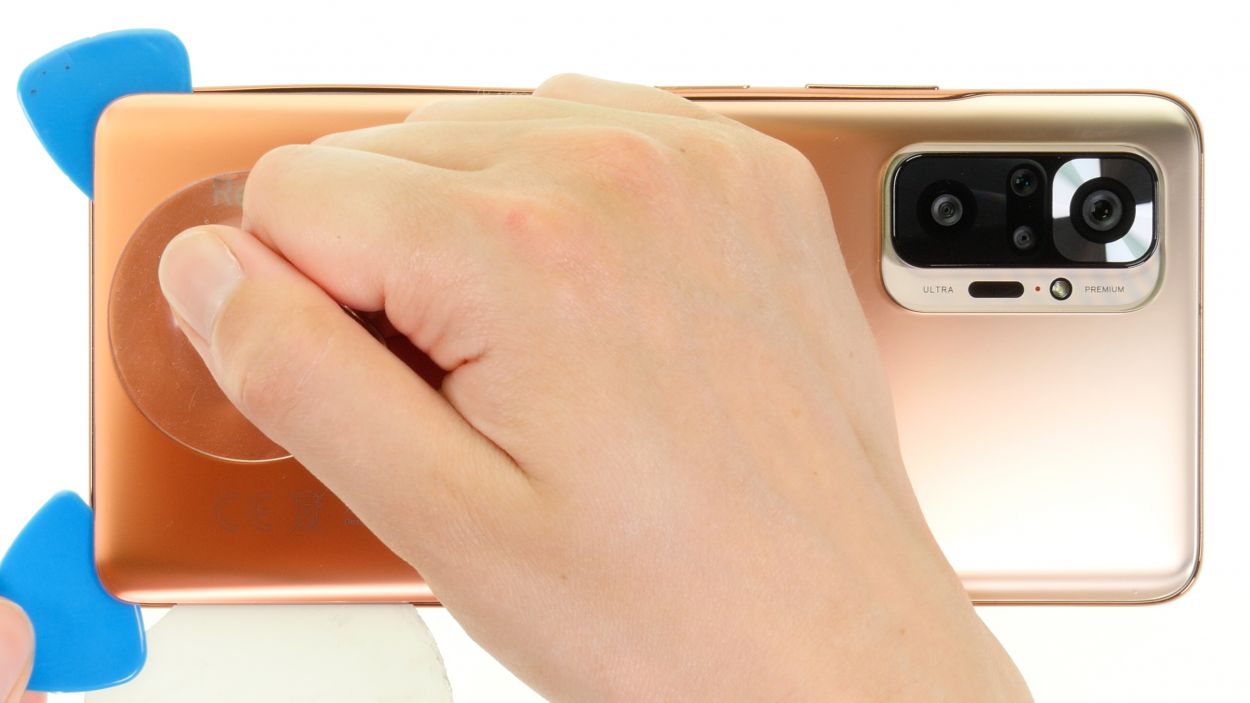
Step 4
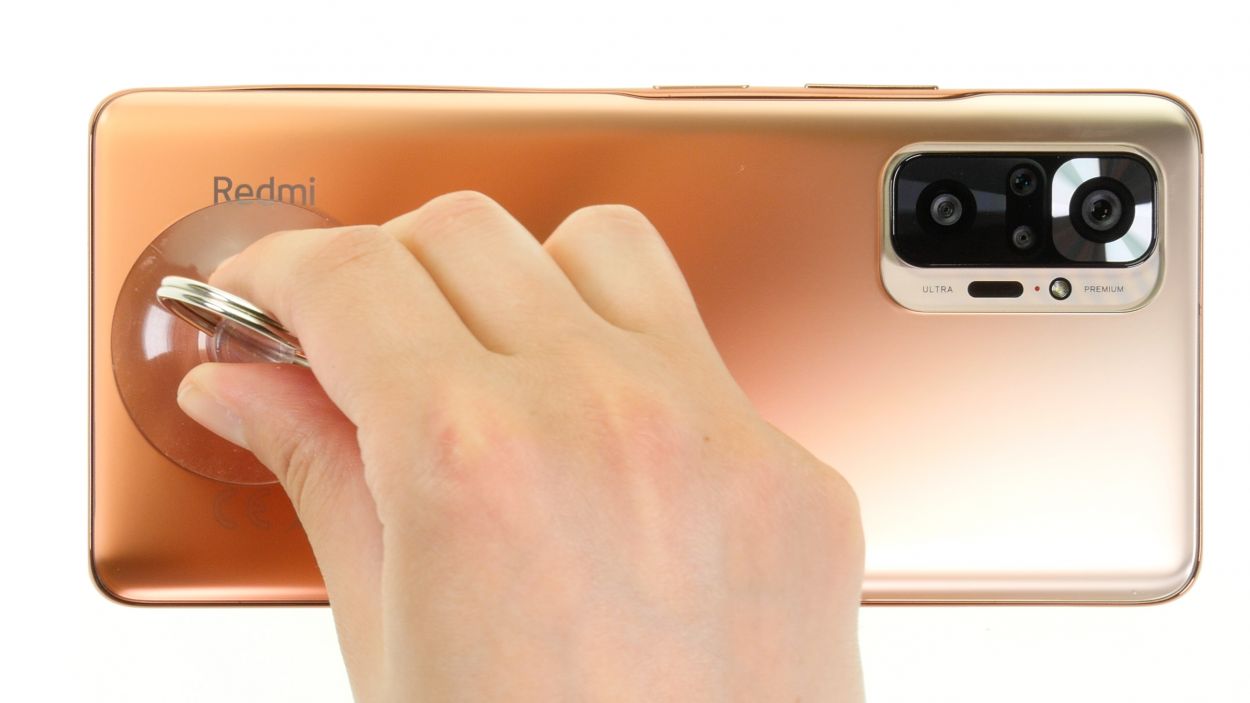
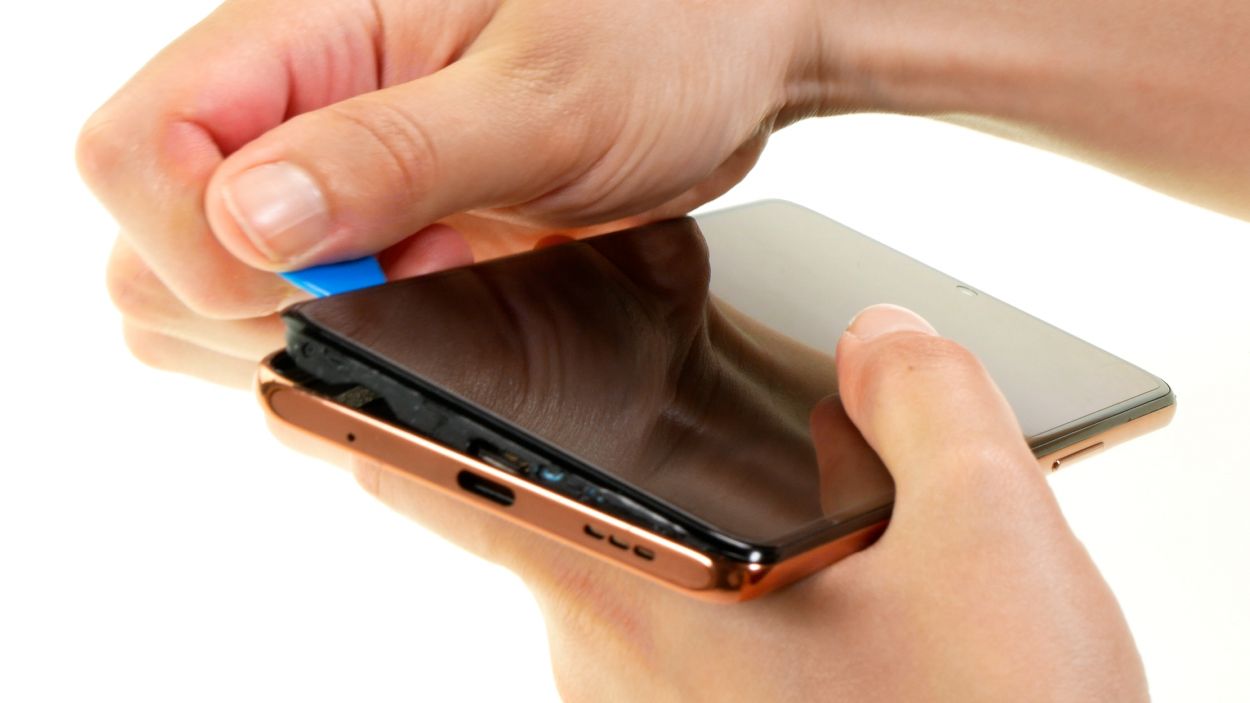
– Grab a suction cup and stick it to the bottom edge of the back cover, then gently pull it upwards. At the same time, slide the iFlex tool between the display unit and the back cover. You’re doing great!
Alright, champ! Time to sneak a tiny gap between your device’s back cover and display. You’ll need a super-flat, sturdy tool for this delicate mission. We love the iFlex for this job – its razor-sharp edges make it a total pro at slipping into tight spaces. If you need a hand, you can always schedule a repair.
Tools Used
- screen and the frame. The practical iFlex is made of stainless steel and sits comfortably in the hand. This makes it the perfect assistant for every smartphone repair.” rel=”noopener”>iFlex Opening Tool
- VAKUPLASTIC Suction Cup
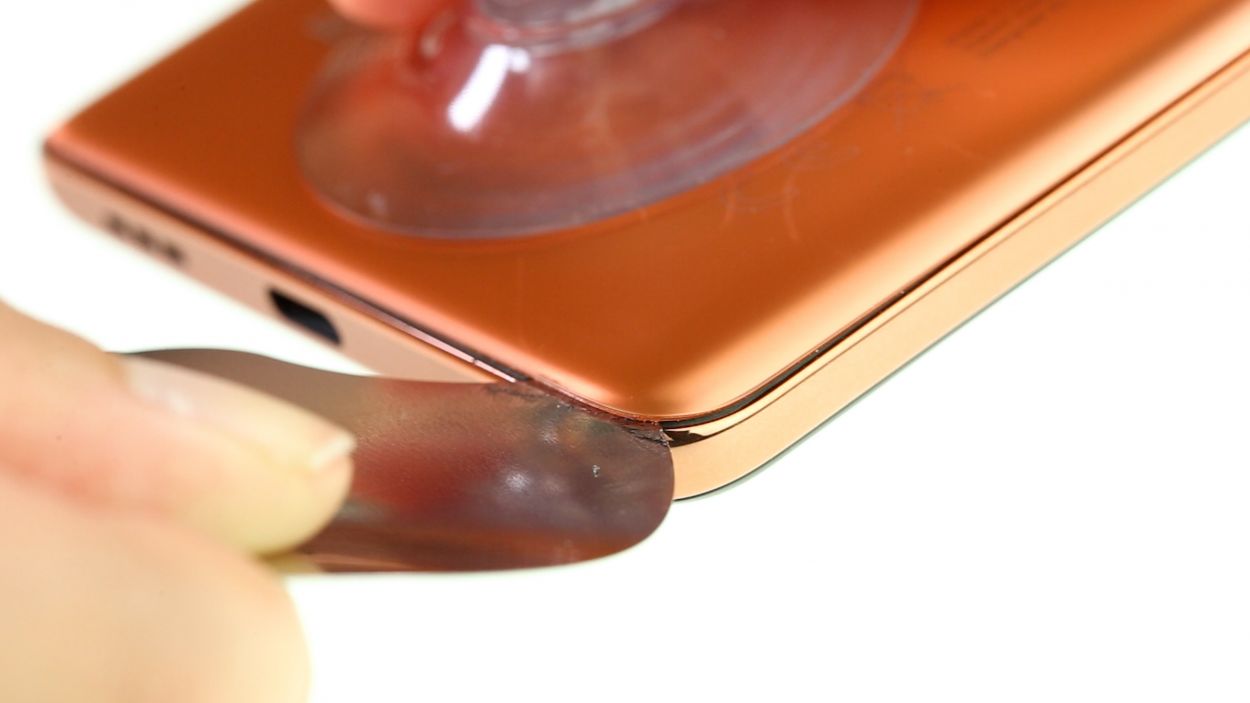
Step 5

Be extra careful when loosening around the camera module, so you don’t damage it with your tool.
To keep the edges of your case safe from the pointy bits of the iFlex, it’s a good idea to switch to a plastic buddy like the iPlastix as soon as you can. Your device will thank you!
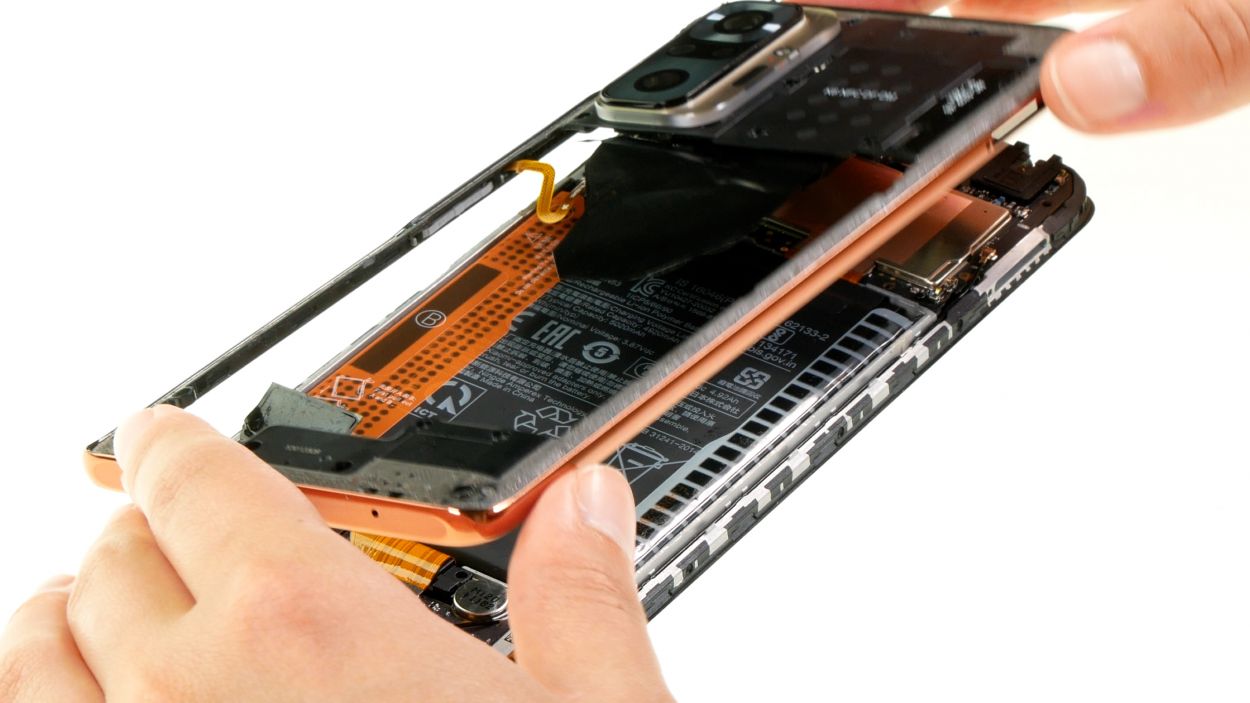
– Gently run your tool all around the edge of the back cover, loosening it up bit by bit. Think of it as giving your device a little massage!
– Slide those flat picks under the back cover at regular intervals to keep the glue from getting too cozy again. It’s like keeping the peace between them!
Tools Used
- heat gun to heat parts that are glued on so they’re easier to remove.
In most cases, you can also use a hairdryer.” rel=”noopener”>Heat gun - Flat Picks
- battery? Then the iPlastix with its large blade will help you. The practical assistant is made of flexible, especially sturdy plastic and lies comfortably in the hand. Thanks to its design, you can even get into smaller gaps, for example to lift the screen or to prevent it from sticking together again.” rel=”noopener”>iPlastix Opening Tool
Step 6
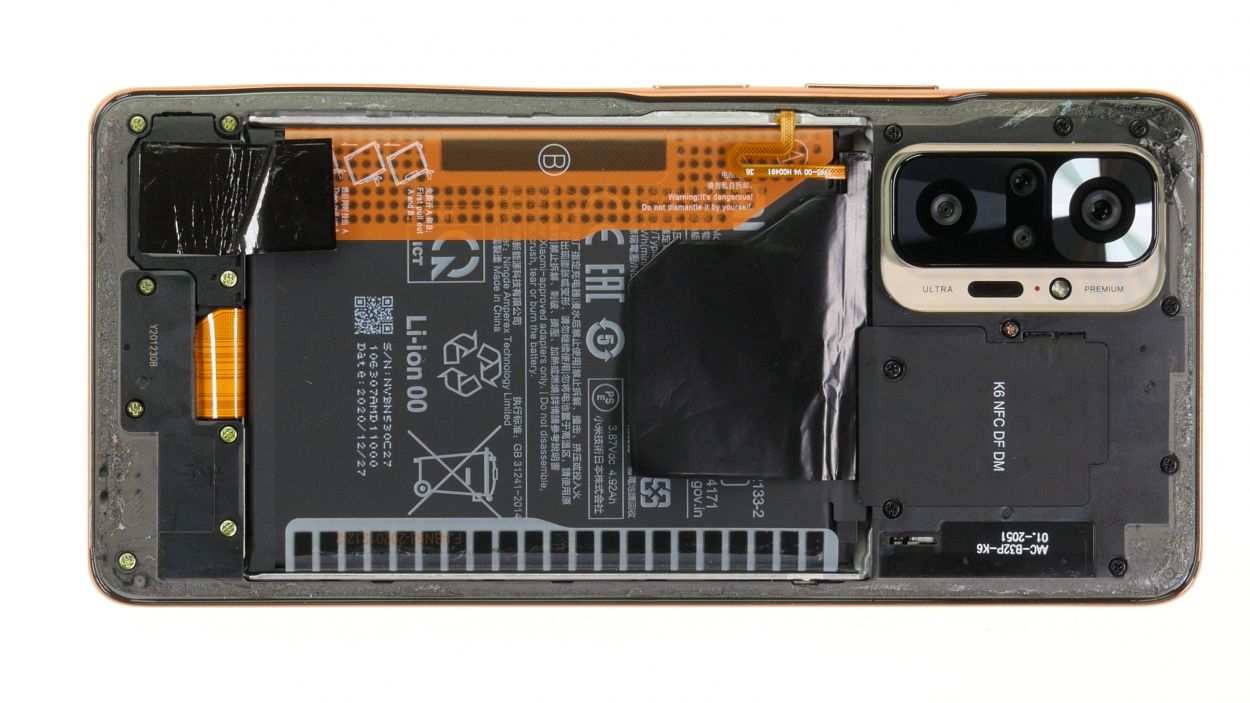
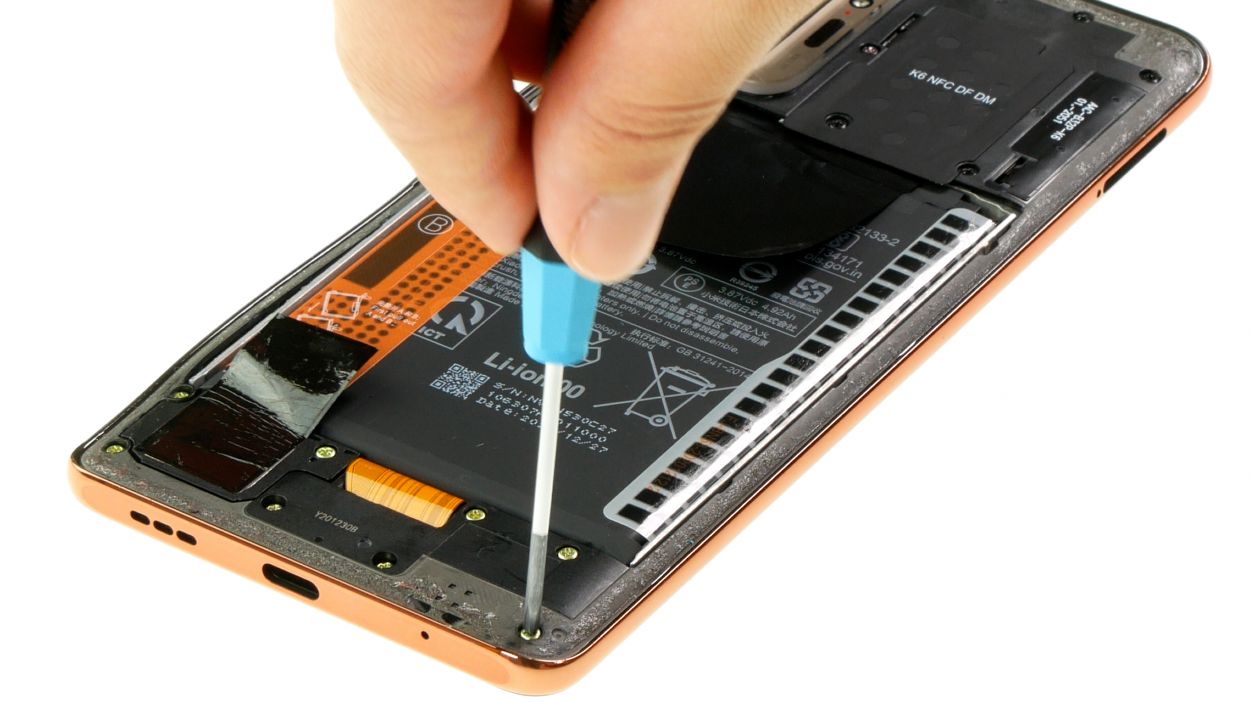
9 × 4.3 mm Phillips
8 × 3.3 mm Phillips
Hey there! Using a screw storage is a smart move. It helps you keep everything organized during the repair so nothing goes missing. For instance, our awesome magnetic pad is a great option to keep those pesky screws in check!
– First up, let’s tackle those 17 Phillips screws from the middle frame. Grab your trusty screwdriver!
– Once you’ve got them out, make sure to place them on the magnetic pad so they don’t go wandering off.
Step 7
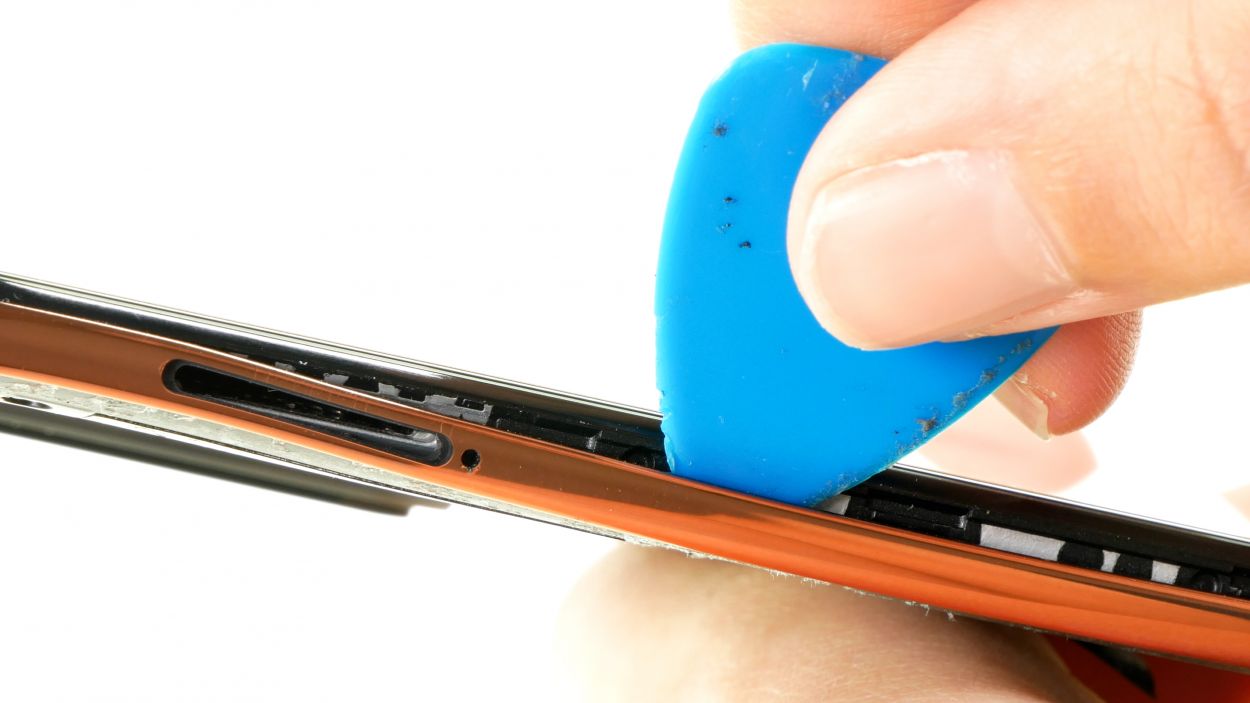
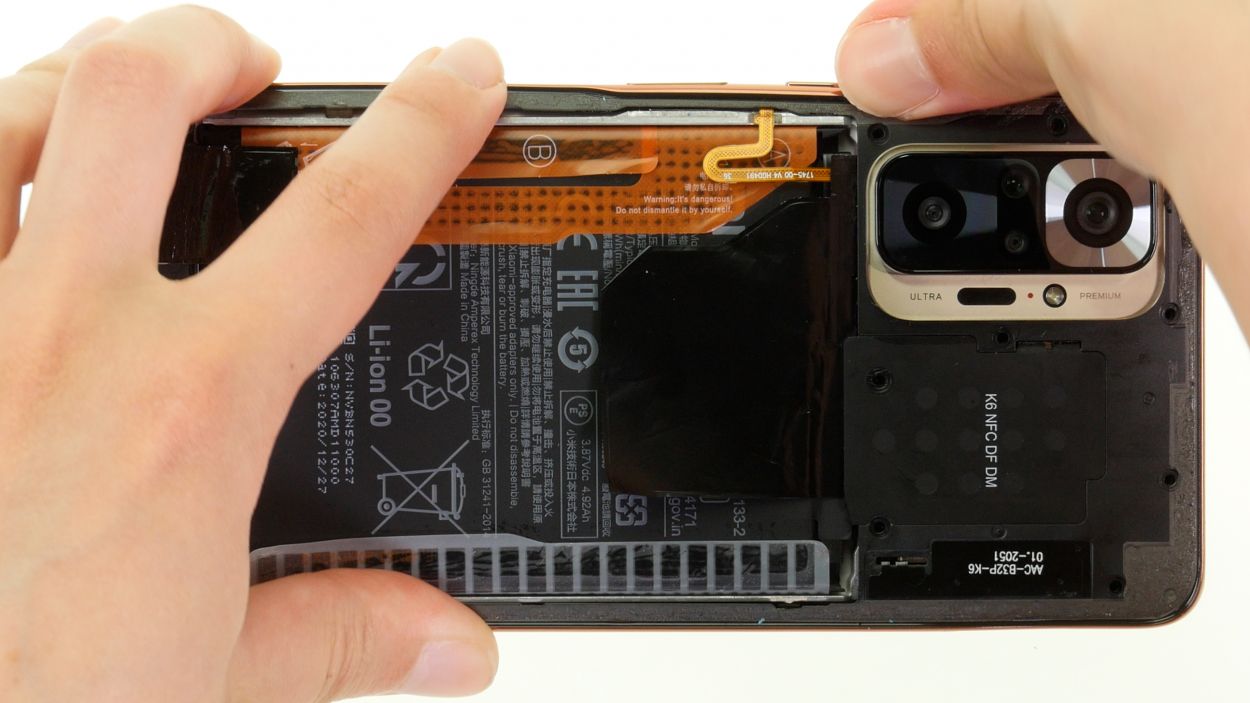
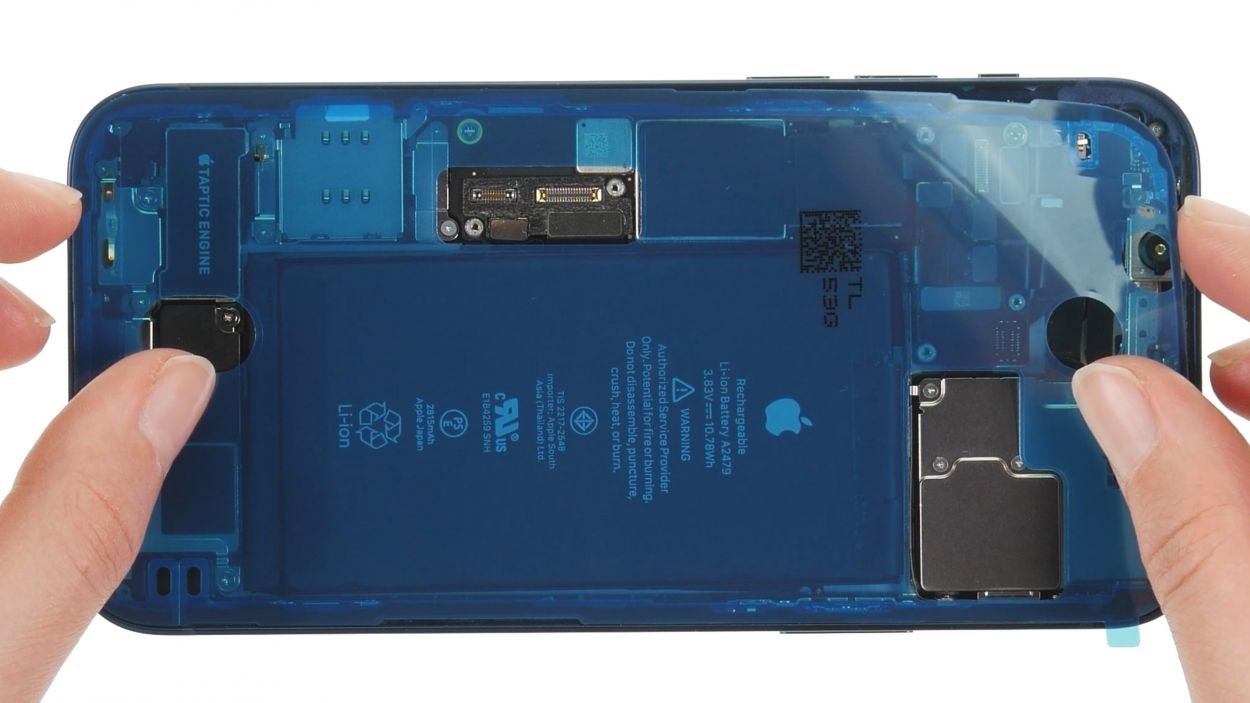
Take it easy when you’re unfolding that middle frame! We want to keep that fingerprint sensor safe and sound, so handle it with care.
– Gently slide a flat plectrum into the gap between the screen unit and the middle frame, applying a little pressure. Starting from one of the longer sides is usually a smart move!
– Run that pick all the way around the frame. You should hear a satisfying sound as it separates from the screen unit, indicating you’re on the right track!
– Carefully unfold the now-loosened middle frame and marvel at your handiwork!
Tools Used
Step 8
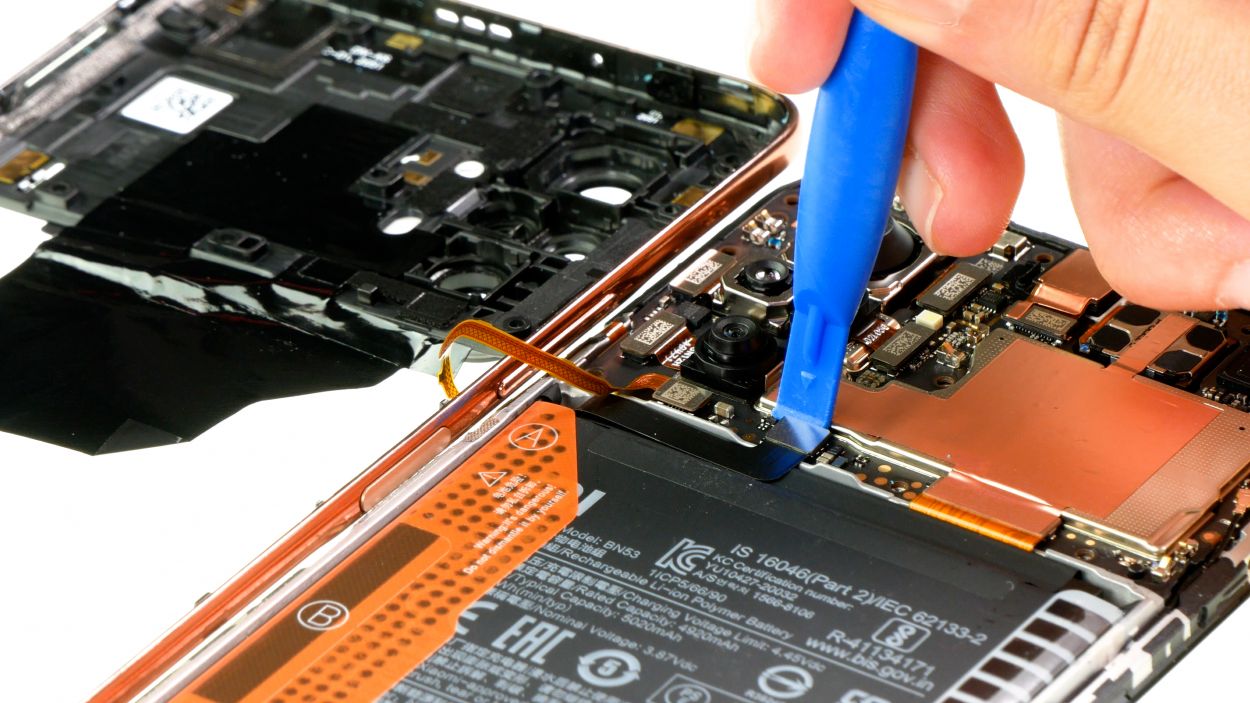
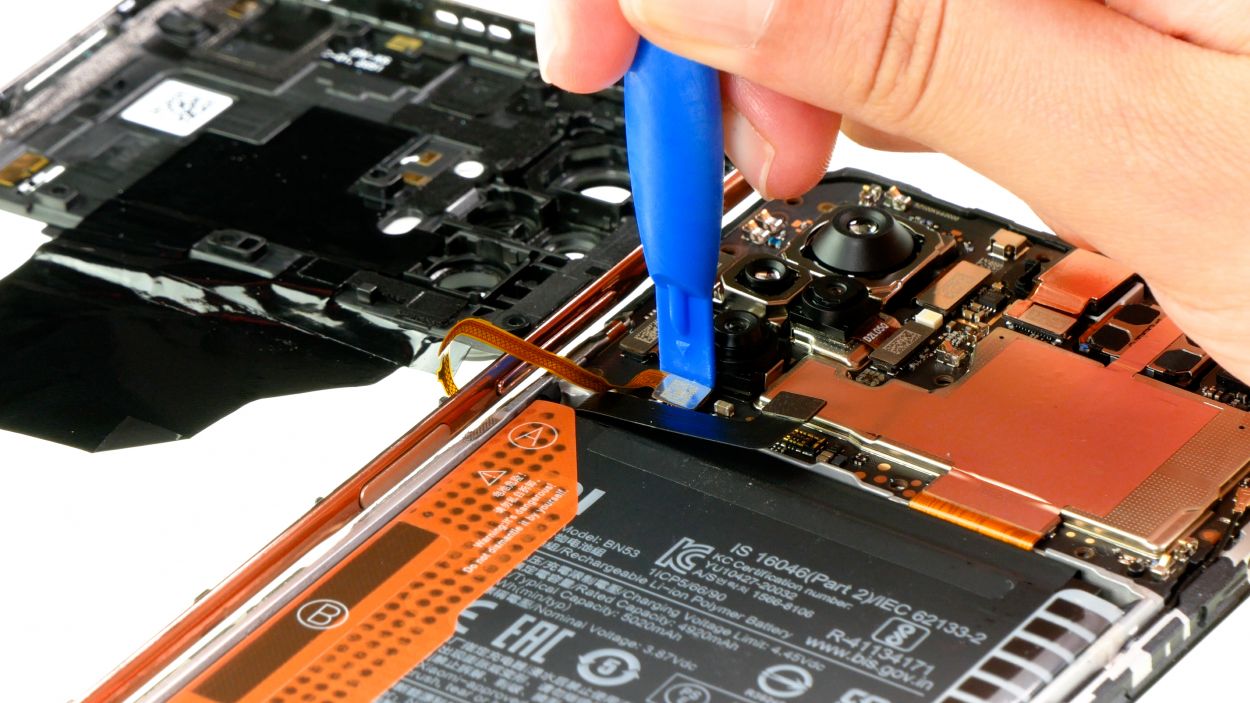
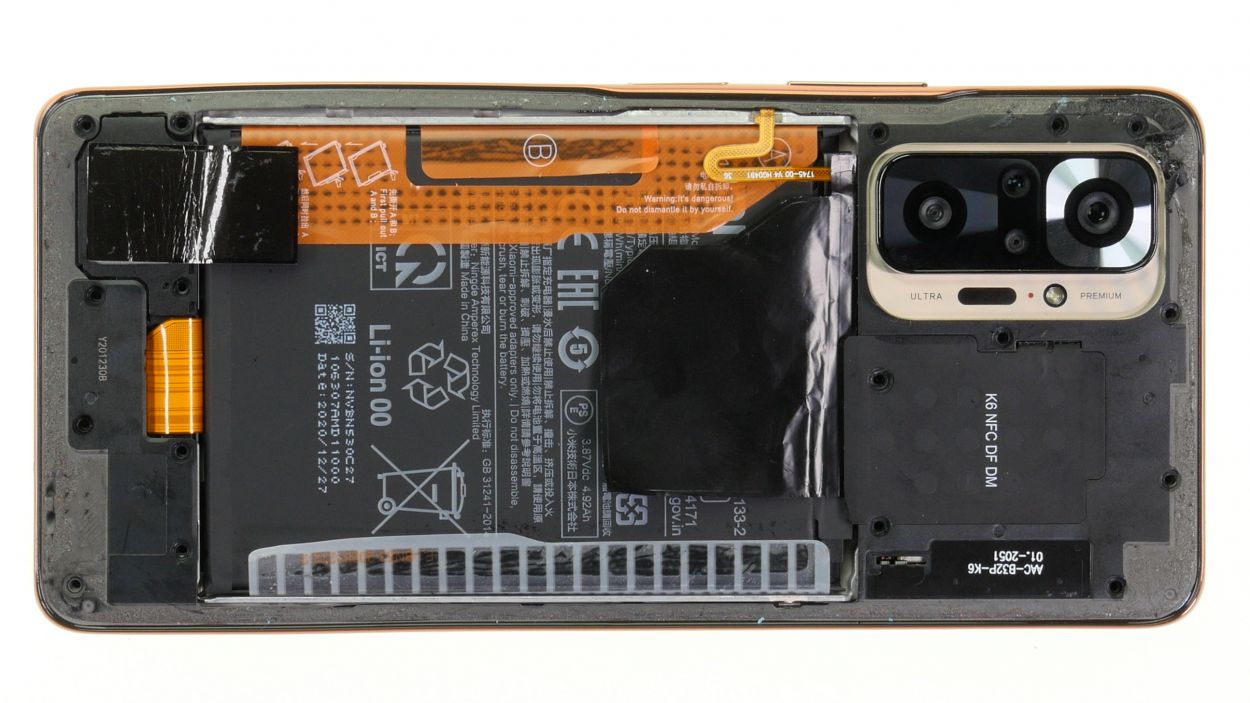
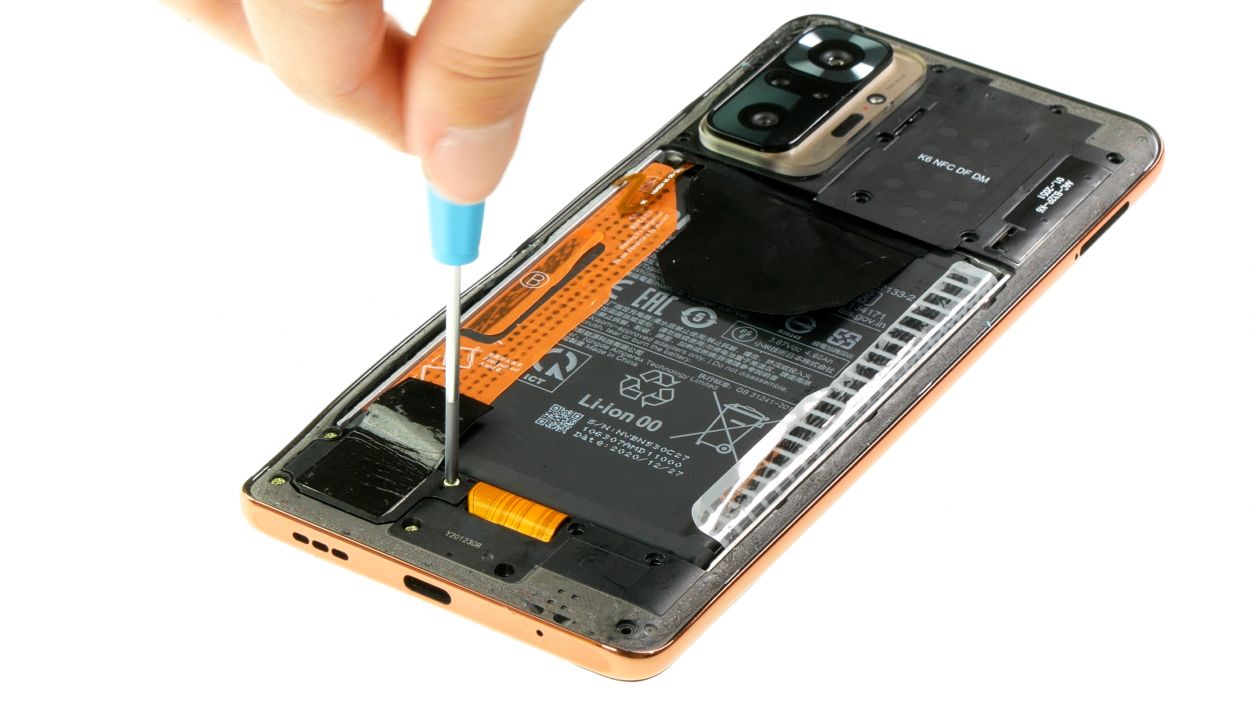
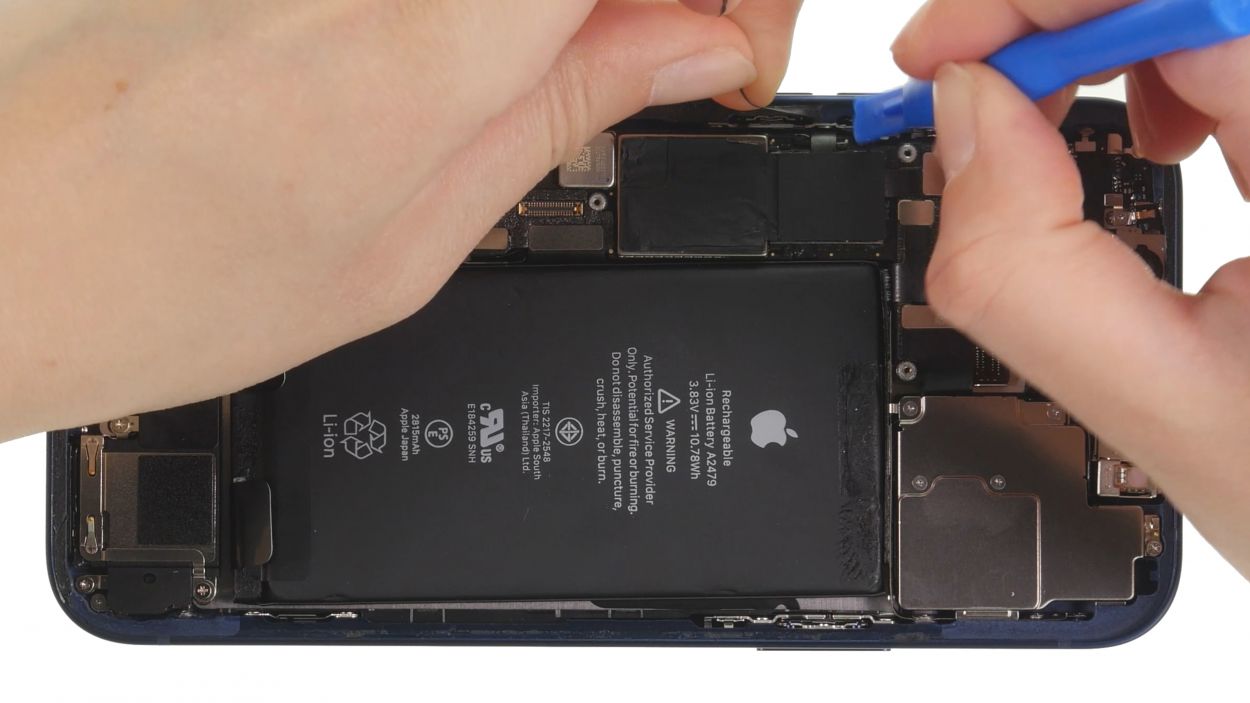
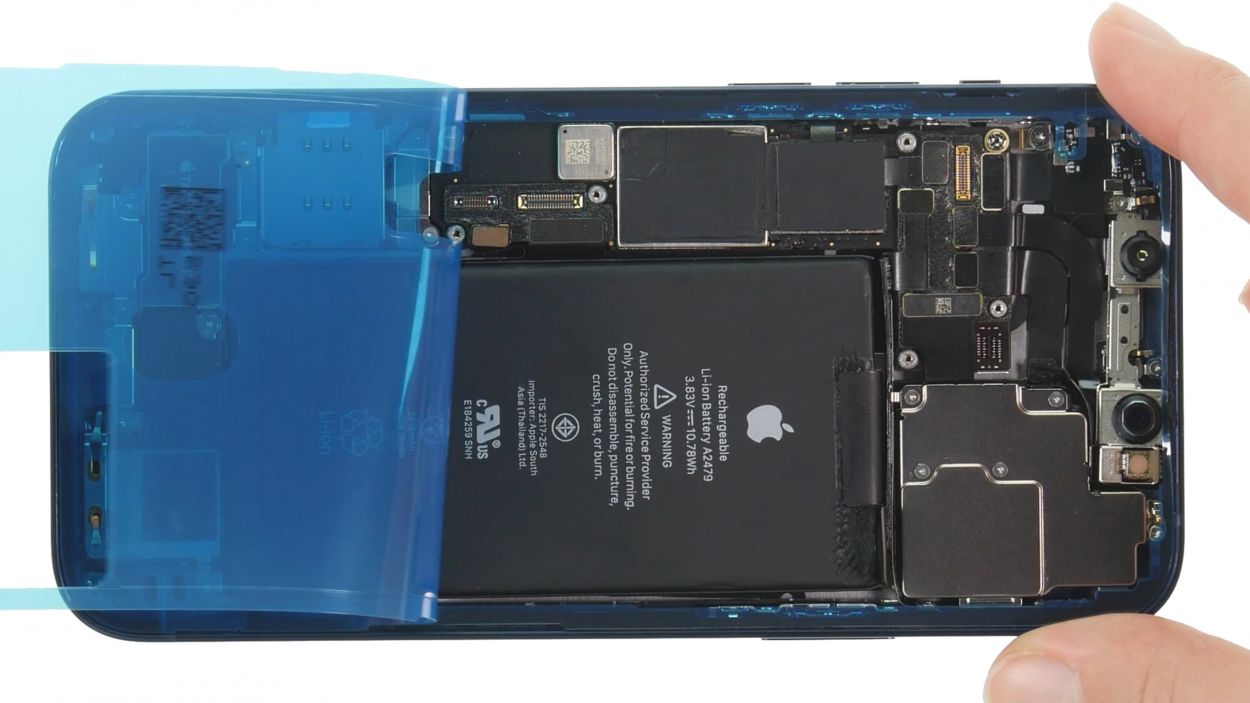
Disconnect the battery connector ASAP to avoid a nasty short circuit surprise!
– Carefully pry the battery connector from the motherboard with a plastic spudger.
Tools Used
Step 9

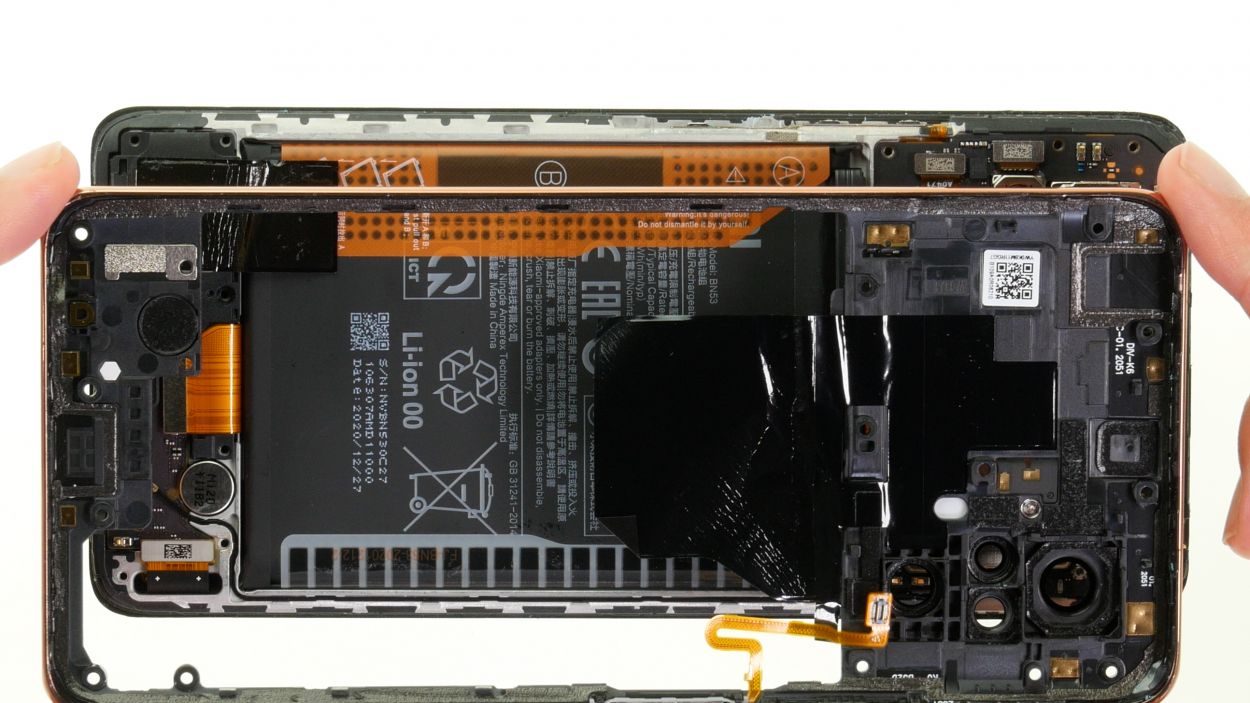
– Carefully disconnect the fingerprint sensor connector just like you did with the battery connector – nice and easy!
– Once that’s done, feel free to lift off the middle frame and set it aside. You’re making great progress!
Tools Used
Step 10

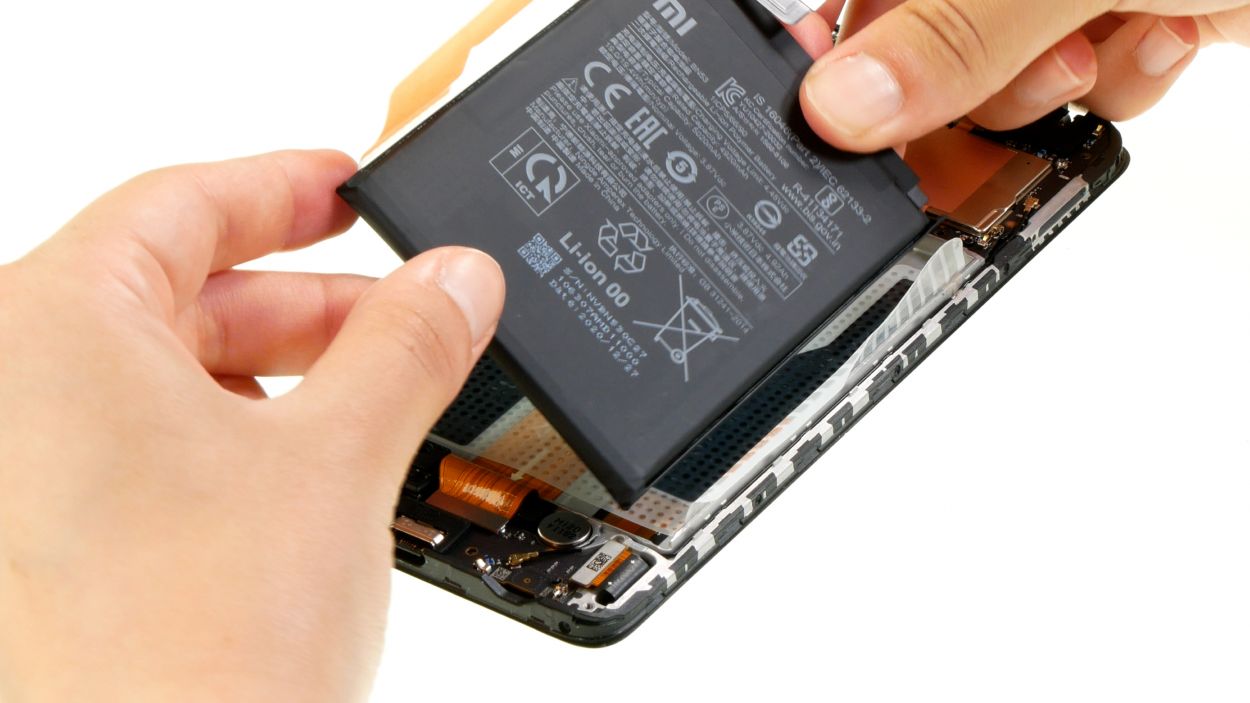
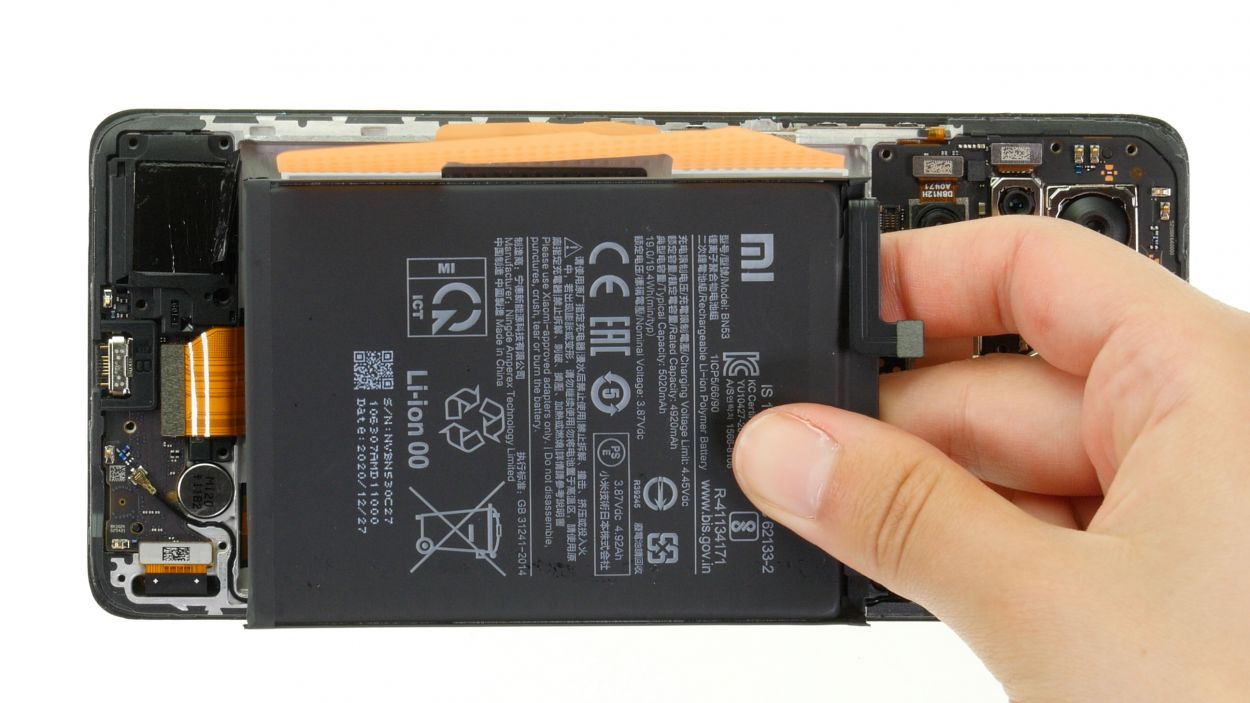
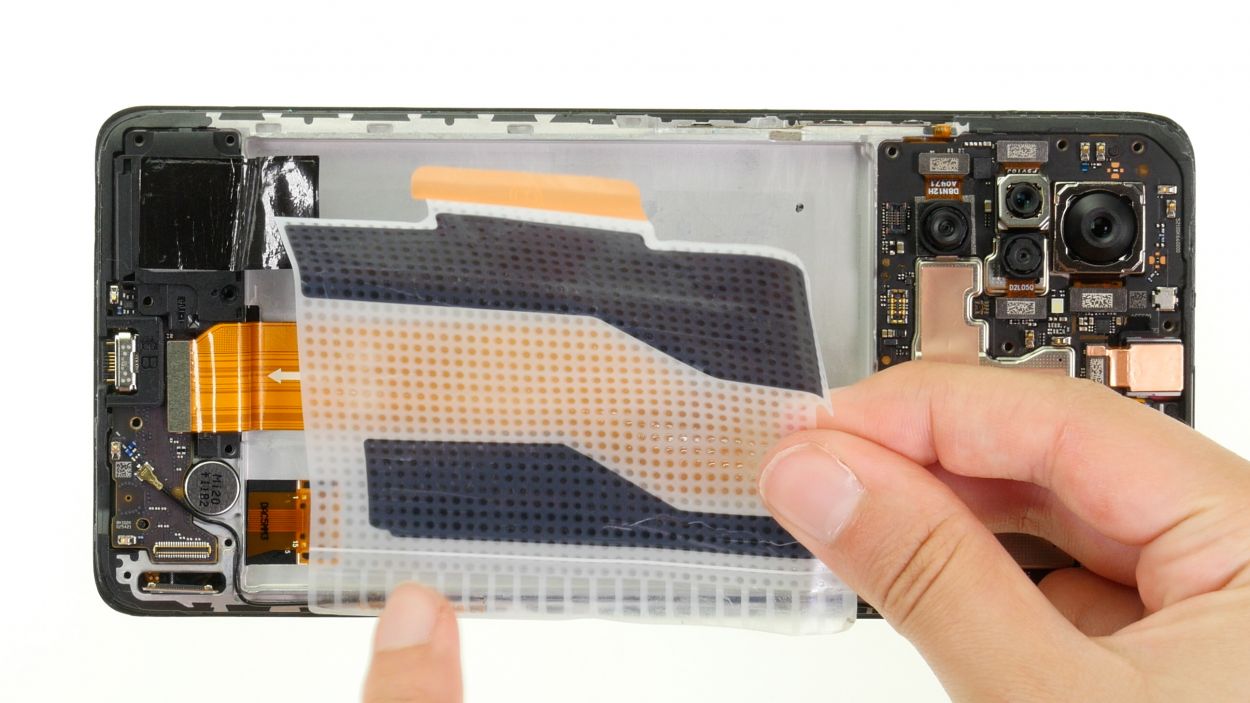
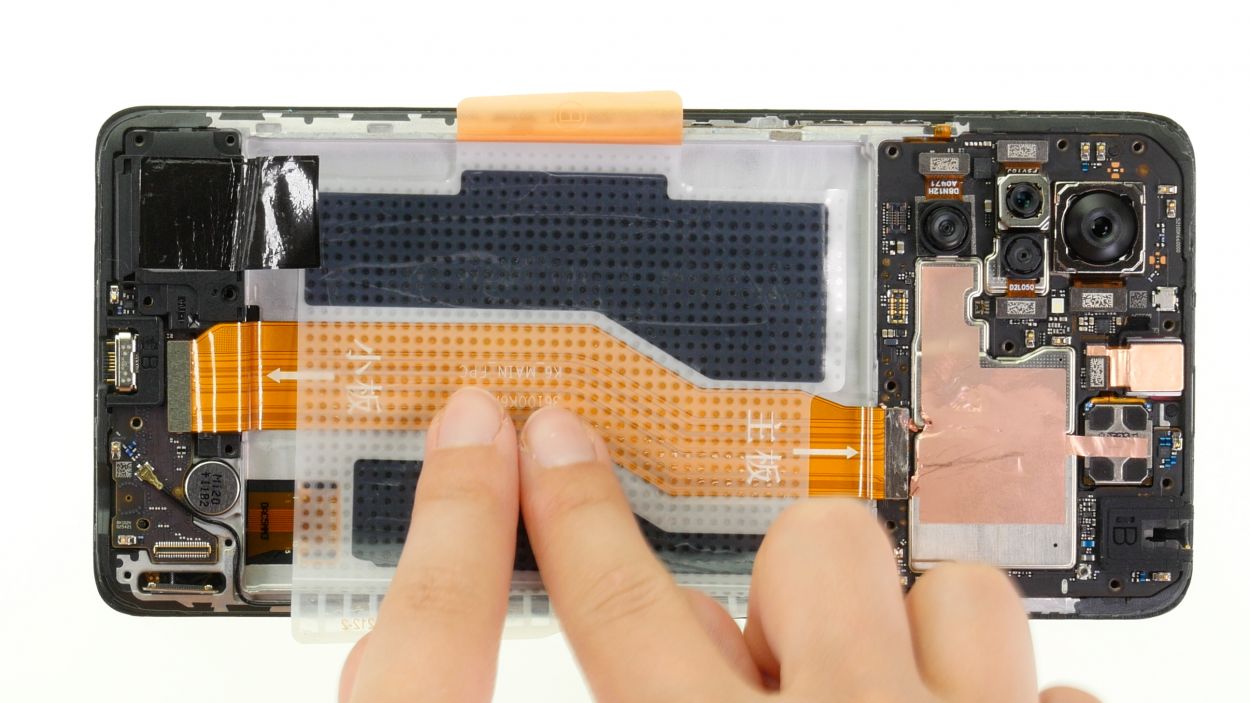
Step 12
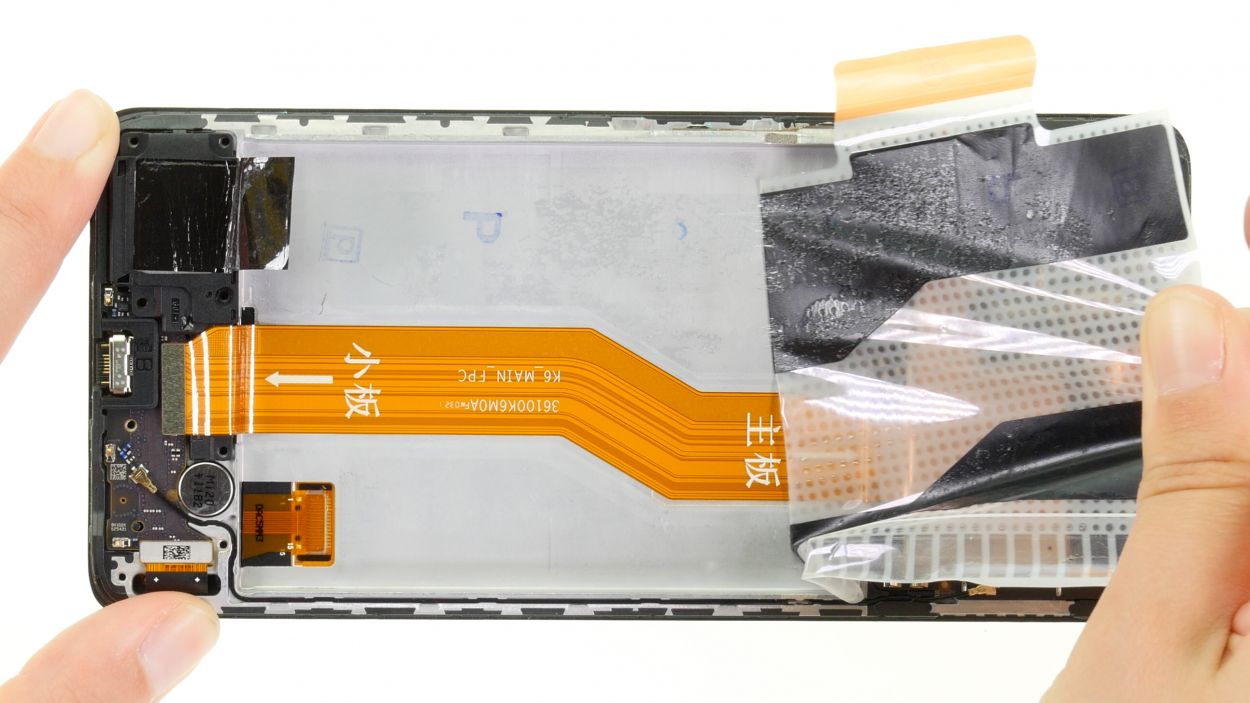
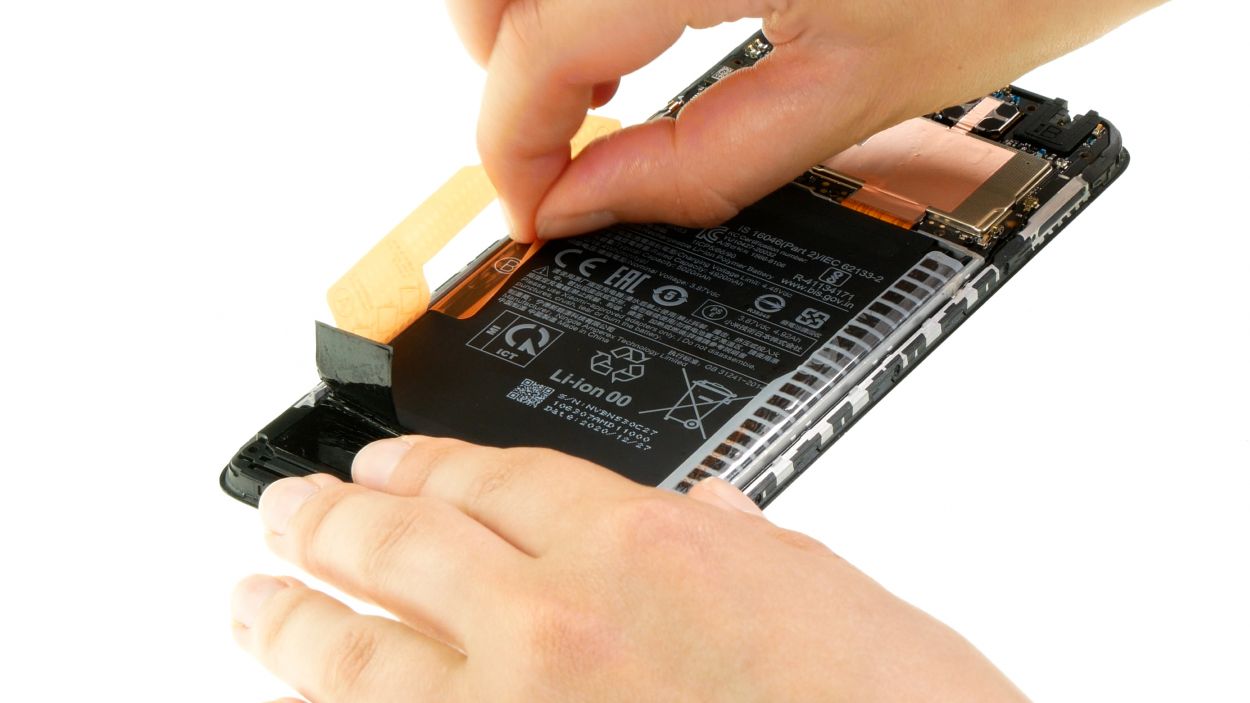
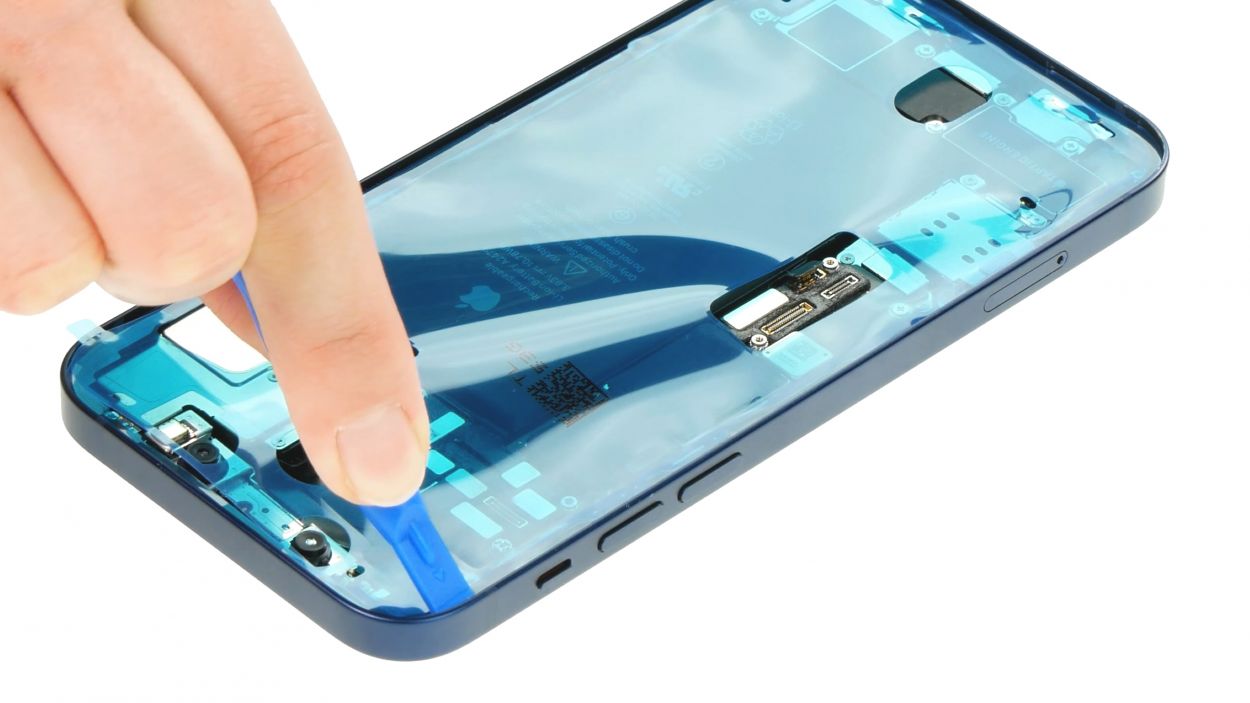
– Time to get this adhesive film hot and ready! Use a hot air device to evenly heat it up.
– Now, it’s time to get a little aggressive – gently pull the film off piece by piece. If you need a little extra help, a flat tool like a steel spatula can be your new BFF. And remember, if you need help, you can always schedule a repair.
Tools Used
- heat gun to heat parts that are glued on so they’re easier to remove.
In most cases, you can also use a hairdryer.” rel=”noopener”>Heat gun - Steel Laboratory Spatula
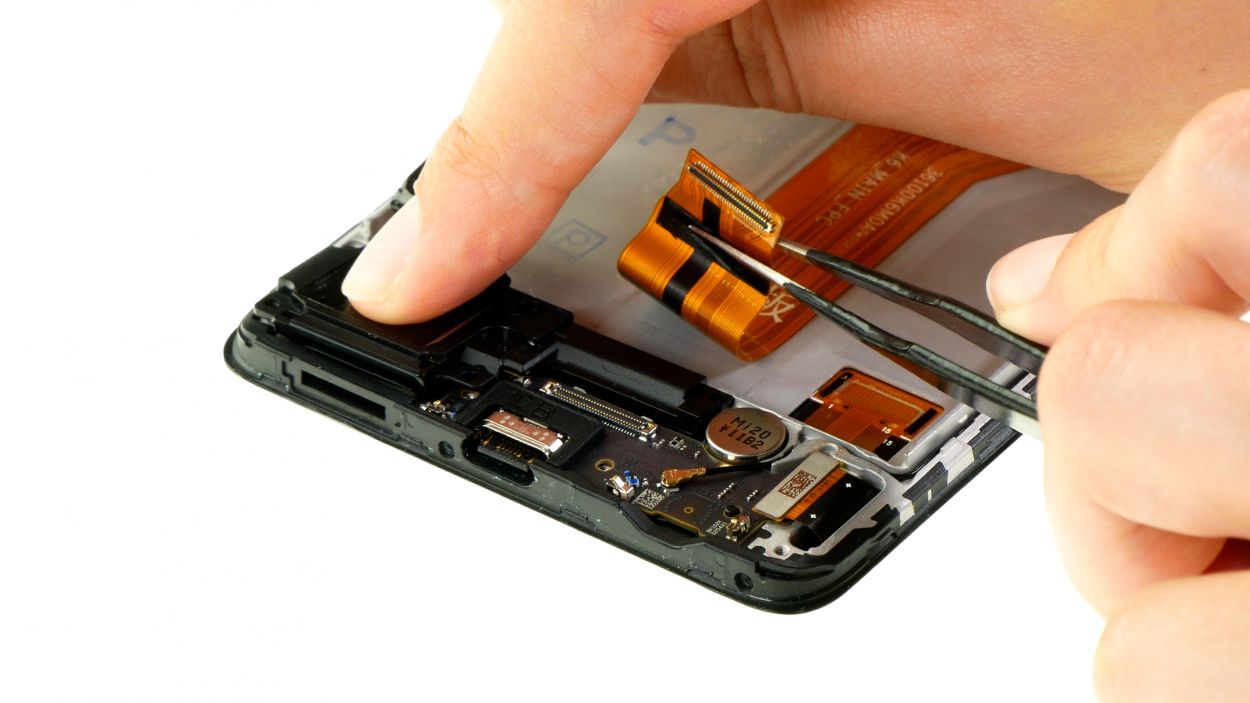
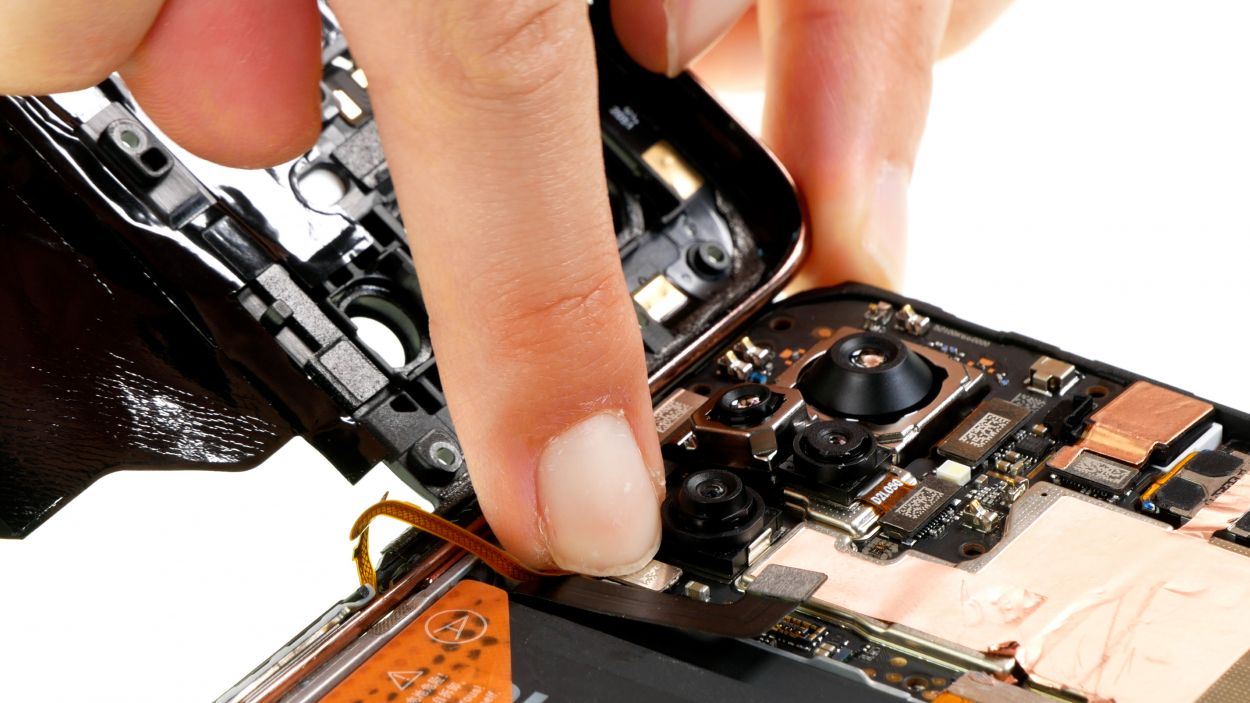
Step 13

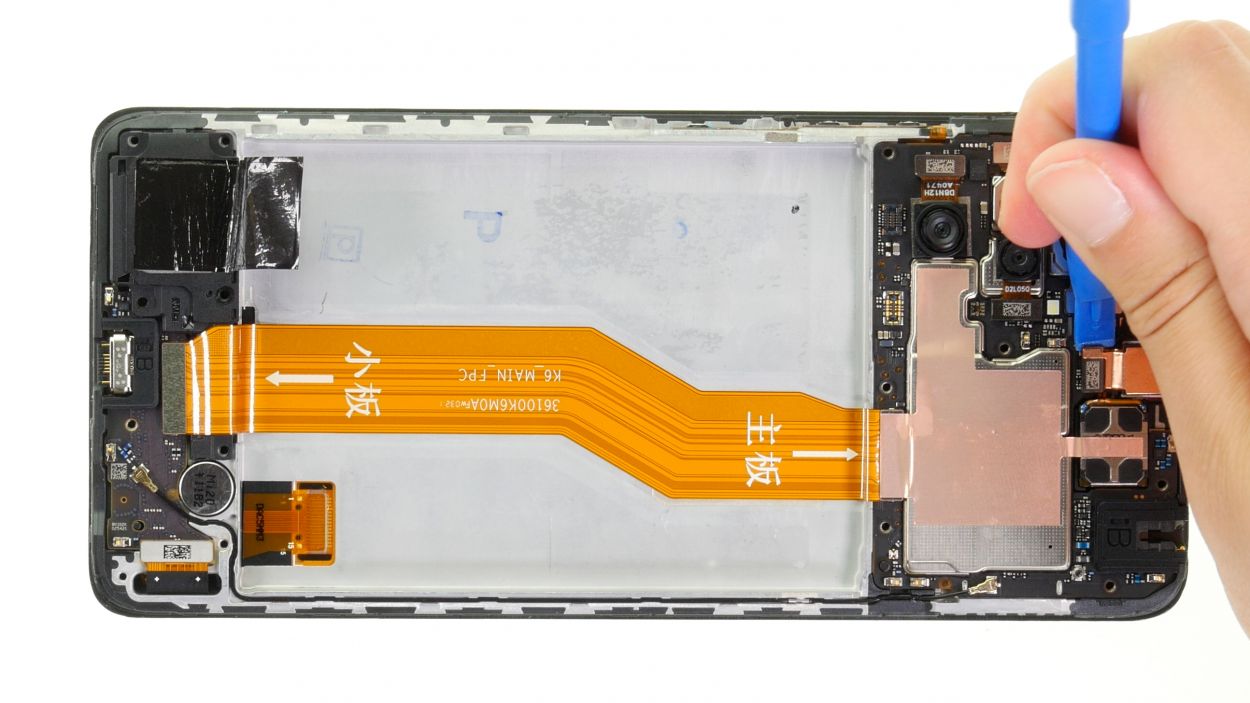
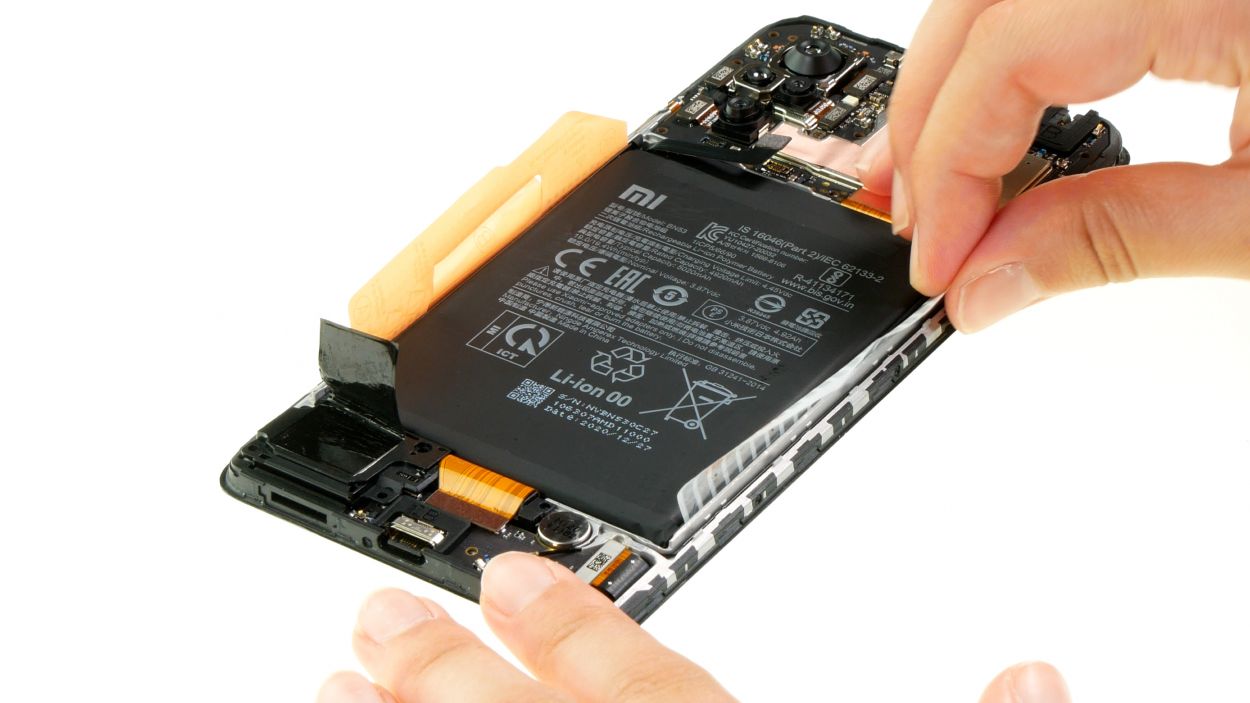
– Gently pop the front camera connector off the board like a pro!
– Once it’s free, carefully lift out the front camera and set it aside for now.
Tools Used
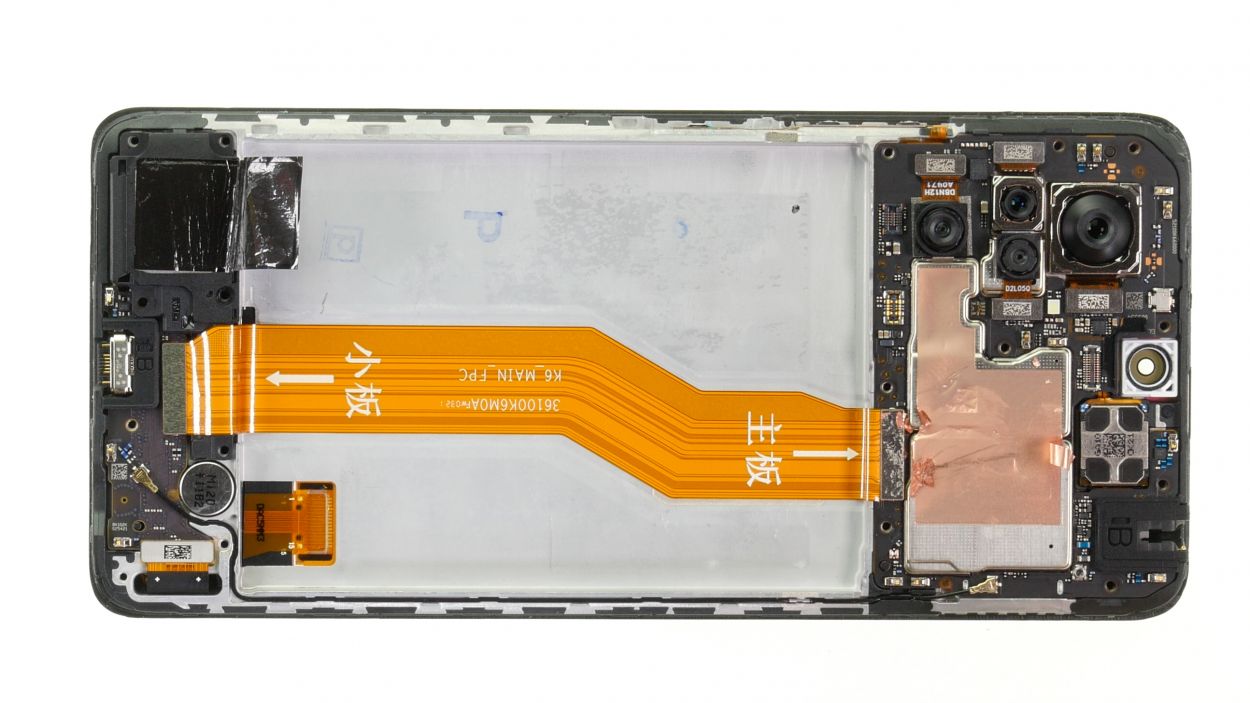
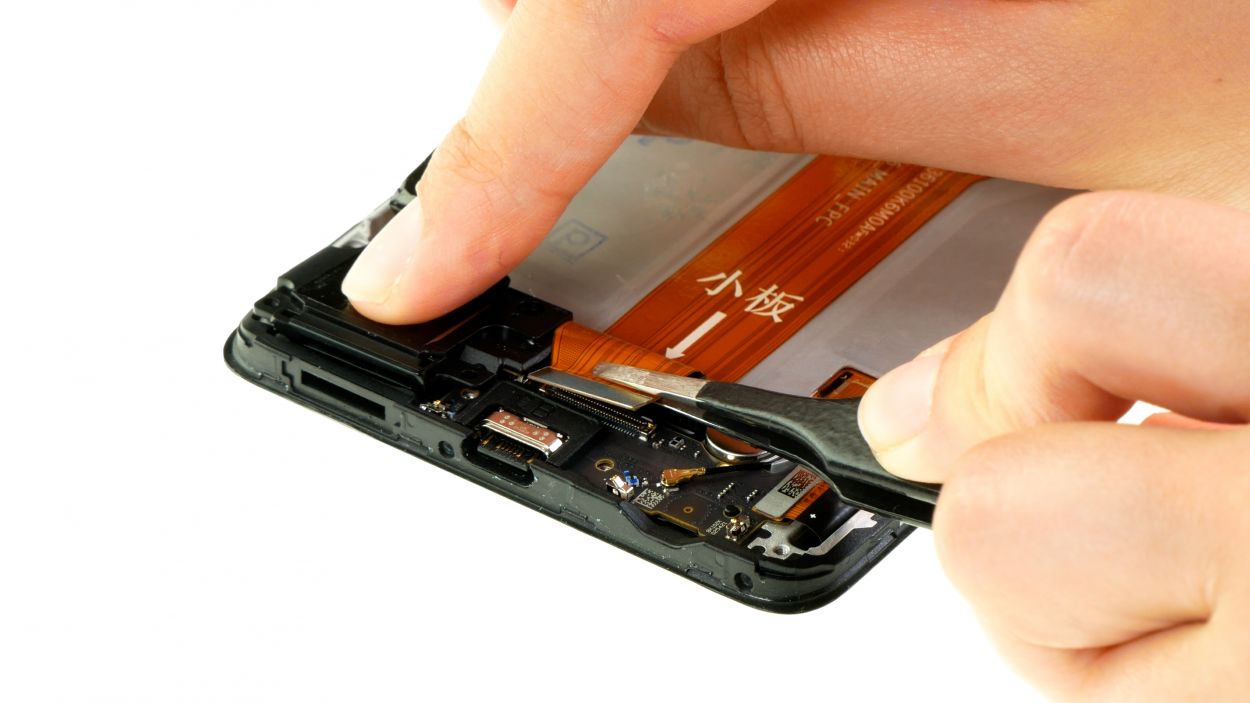
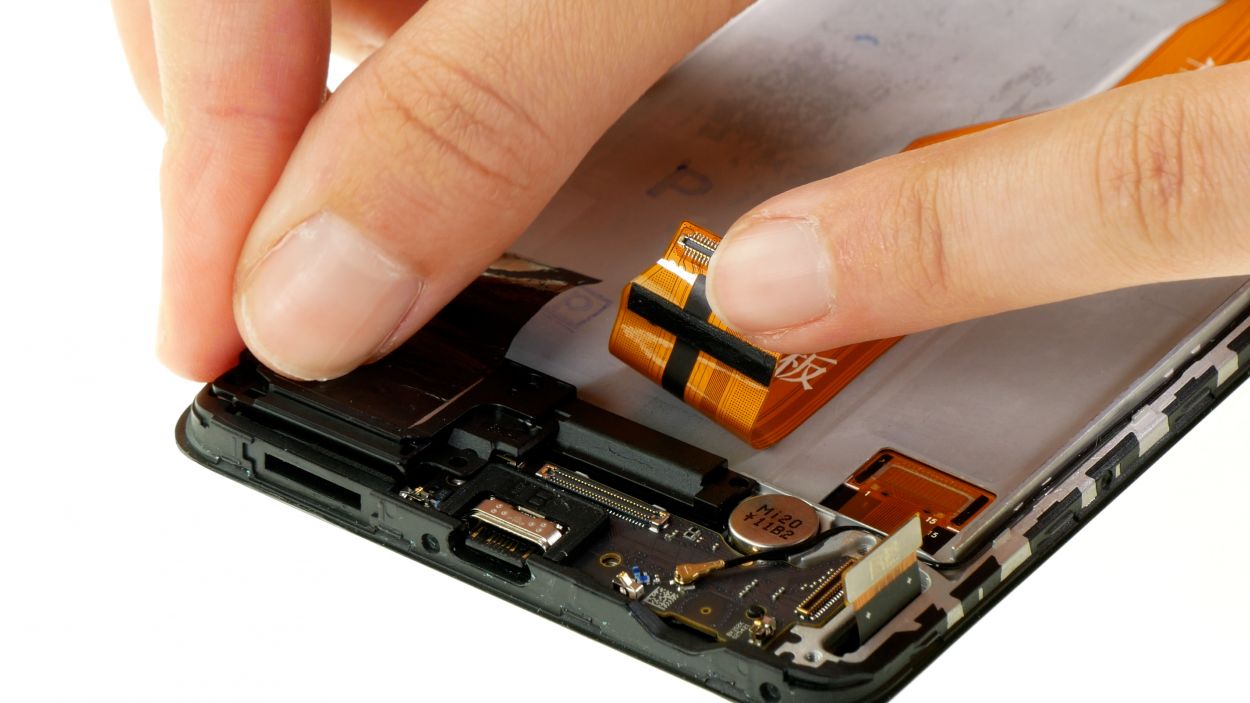
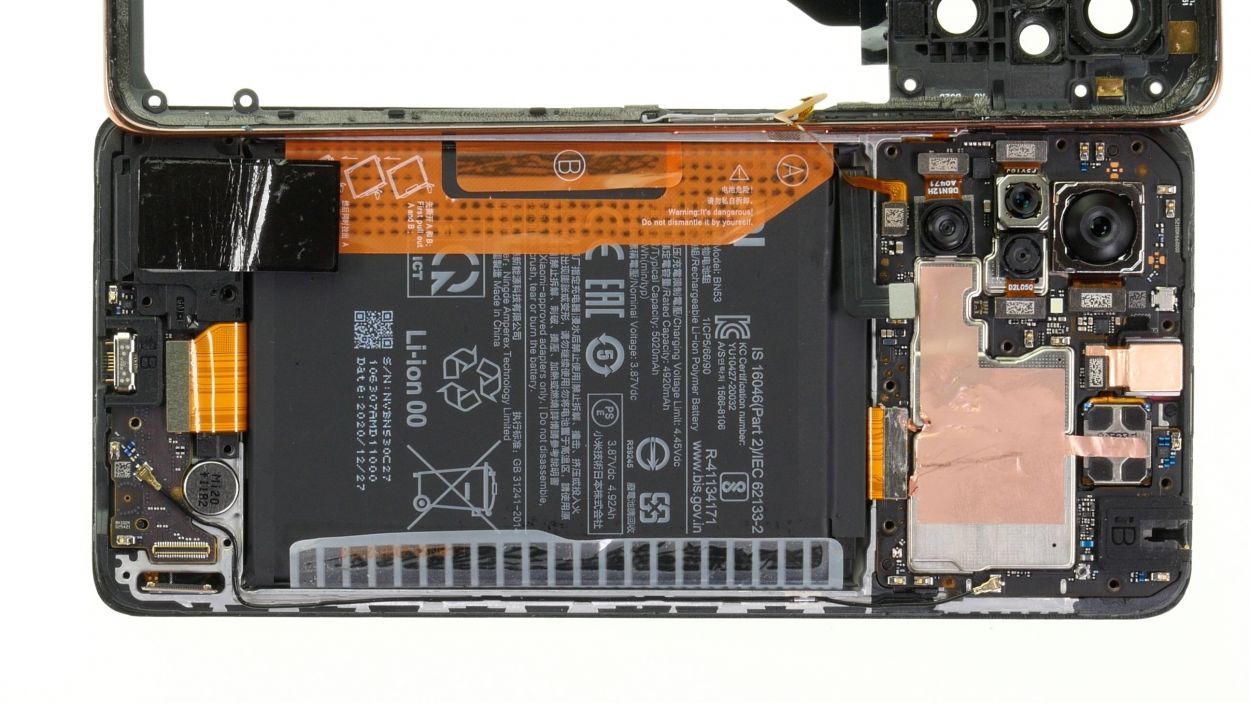
Step 14

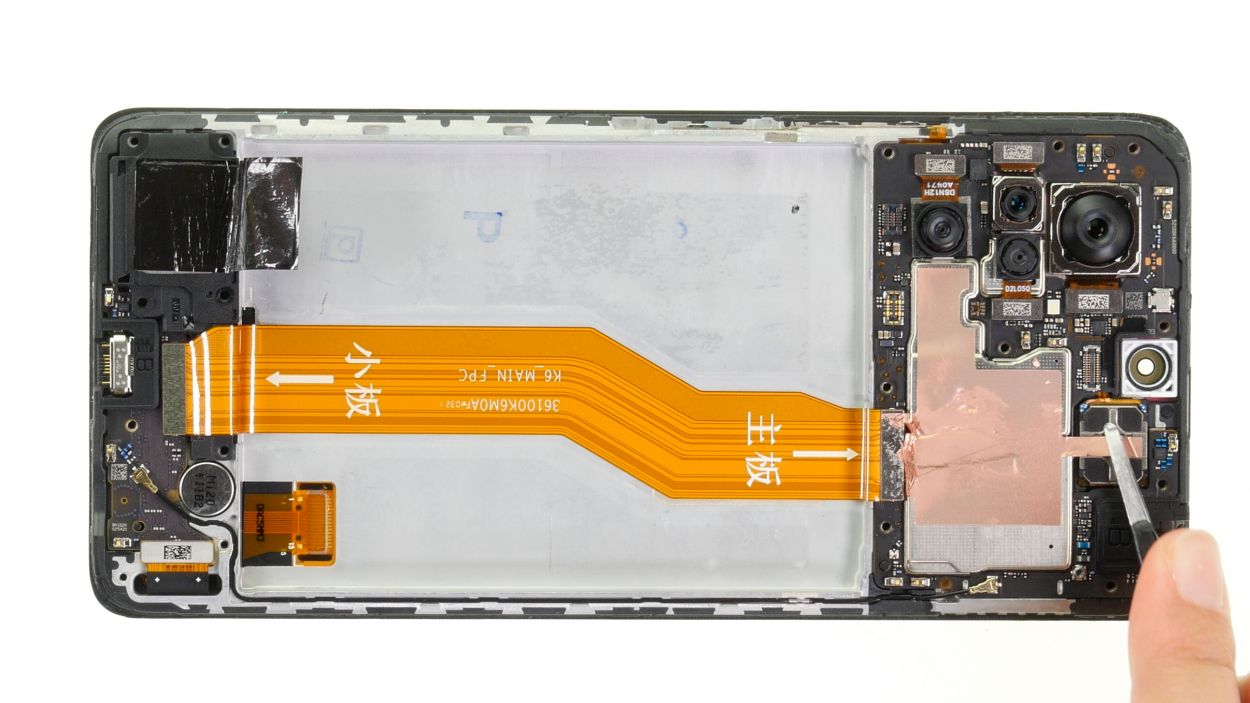
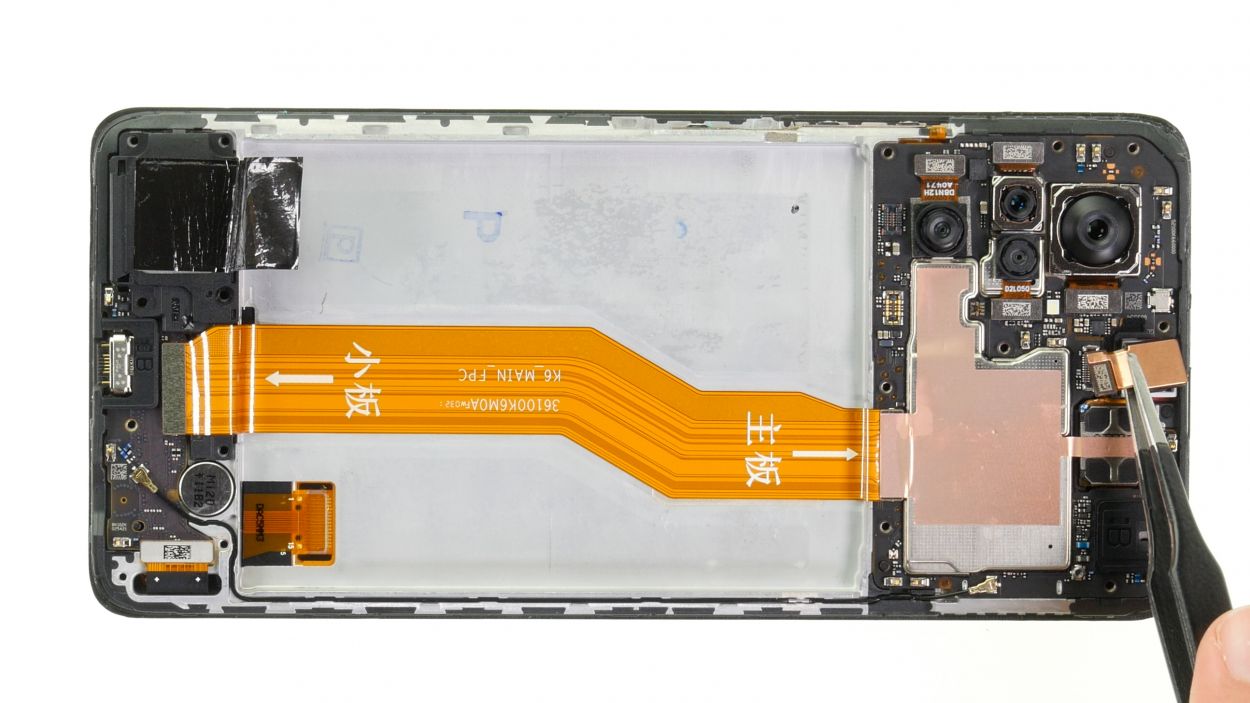
There’s a nifty little heat protection foil sitting over the connector of the cable and the earpiece. Before you can liberate the motherboard, you’ll need to peel that foil away first. Let’s get to it!
– First up, let’s tackle that pesky heat protection foil sitting on top of the connector for the connection cable. Just gently nibble it away using your fingers or grab some ESD tweezers for a more precise touch.
– Now, don’t forget to take off the heat protection foil covering the earpiece as well. You’ve got this!
Tools Used
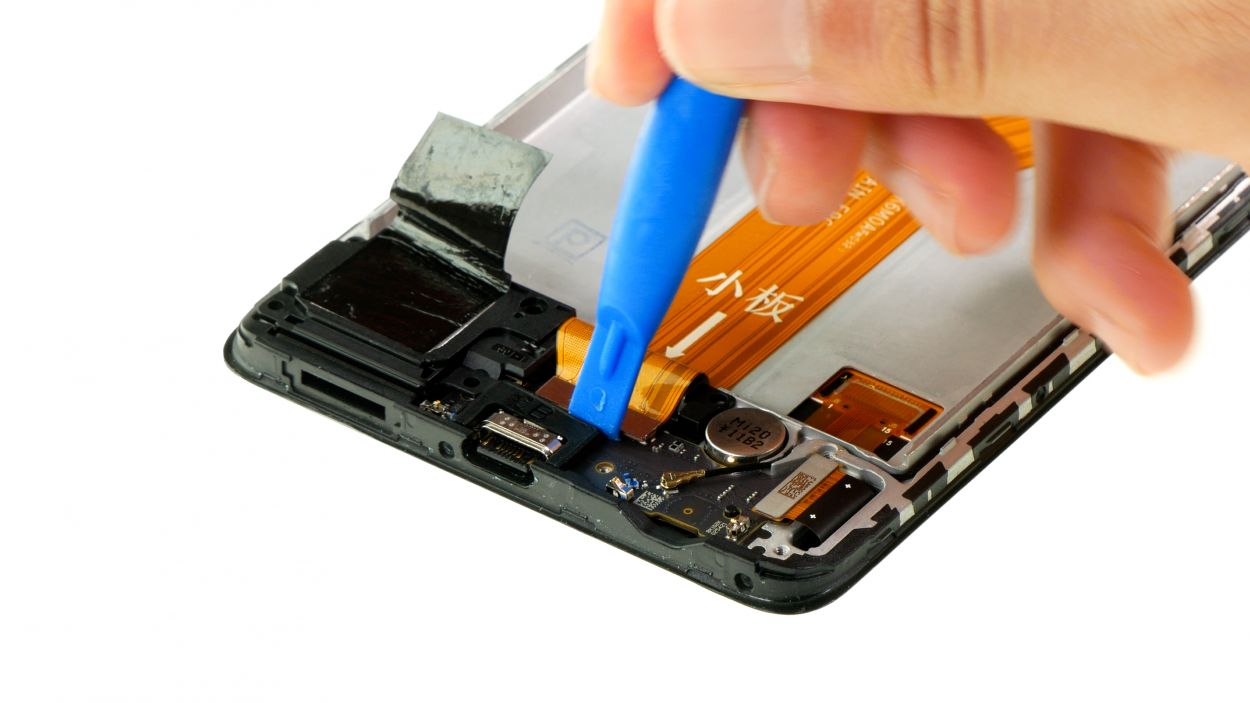
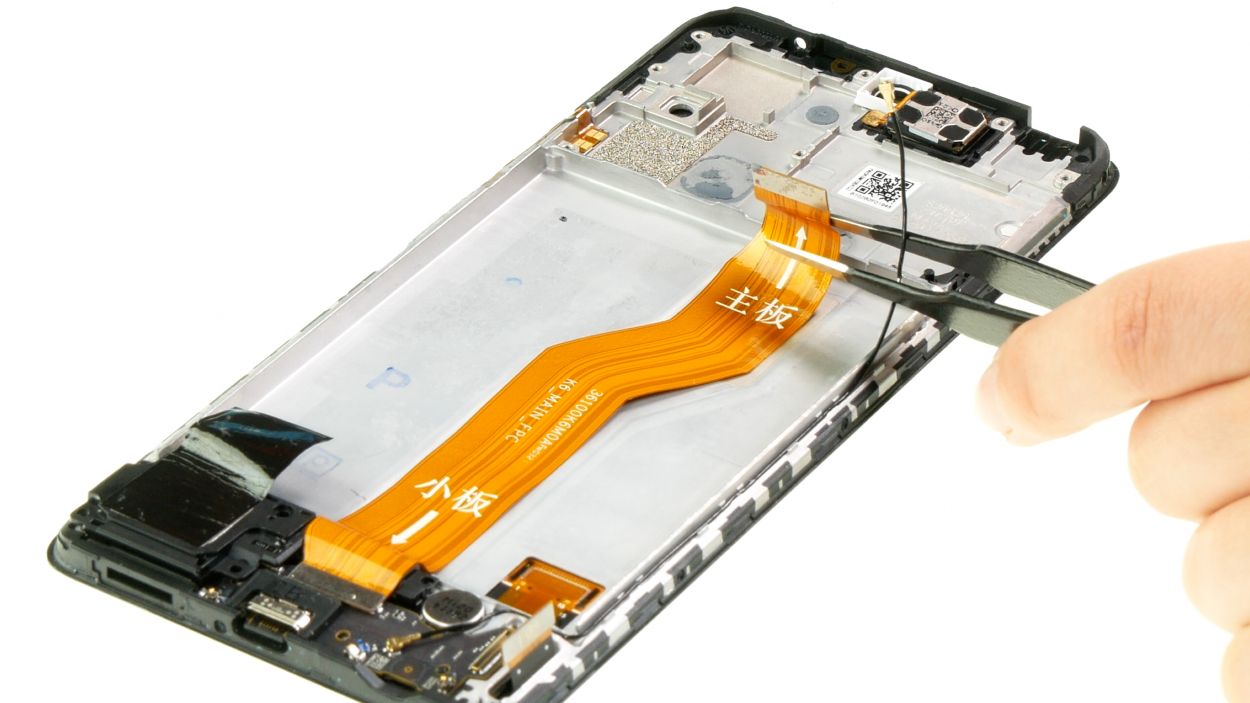
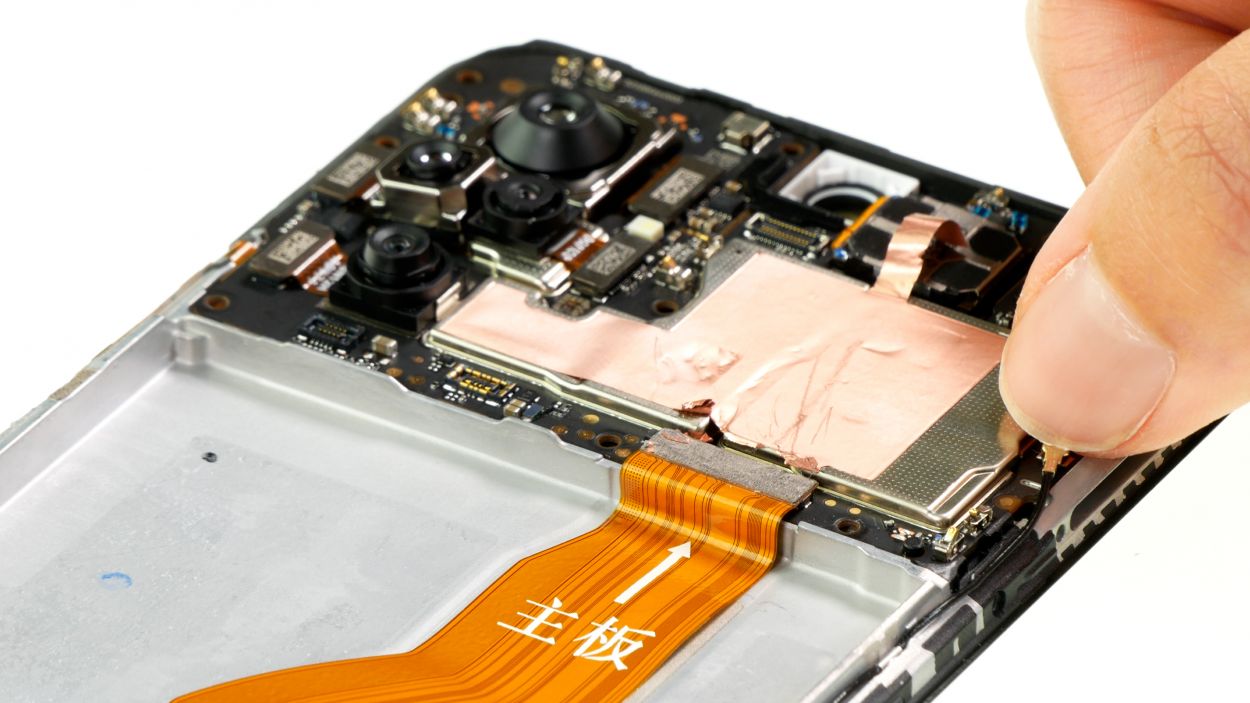
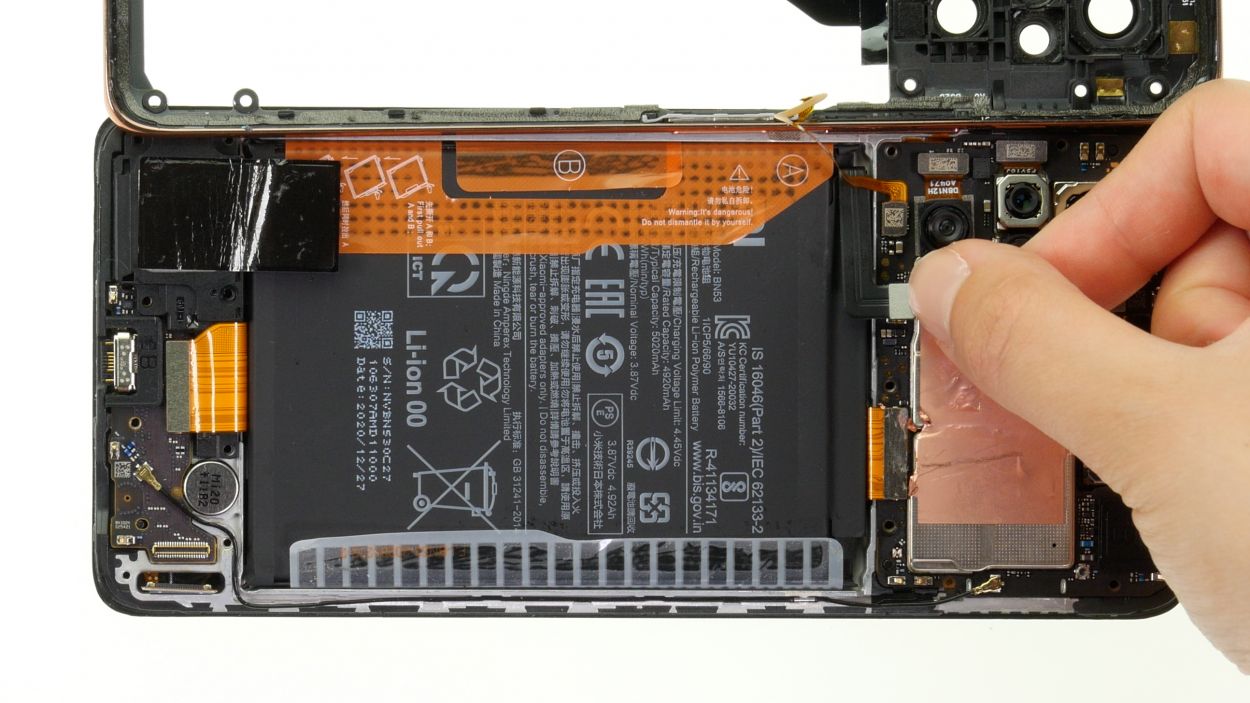
Step 15
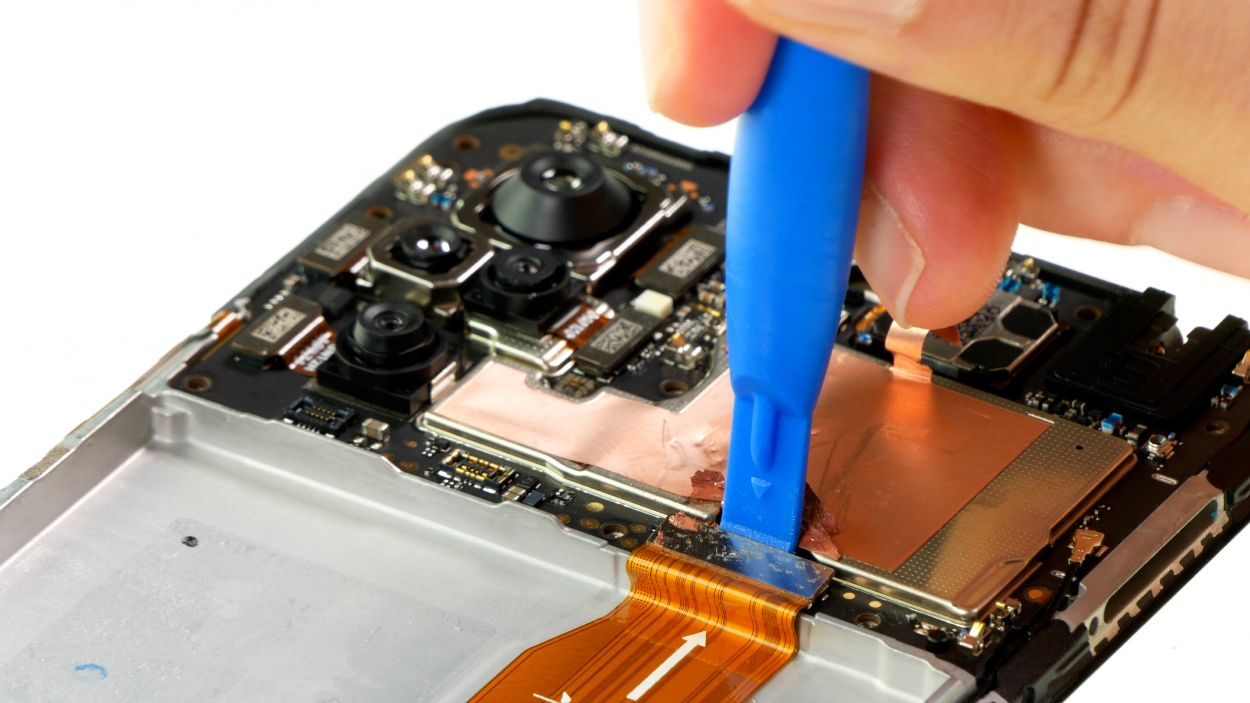
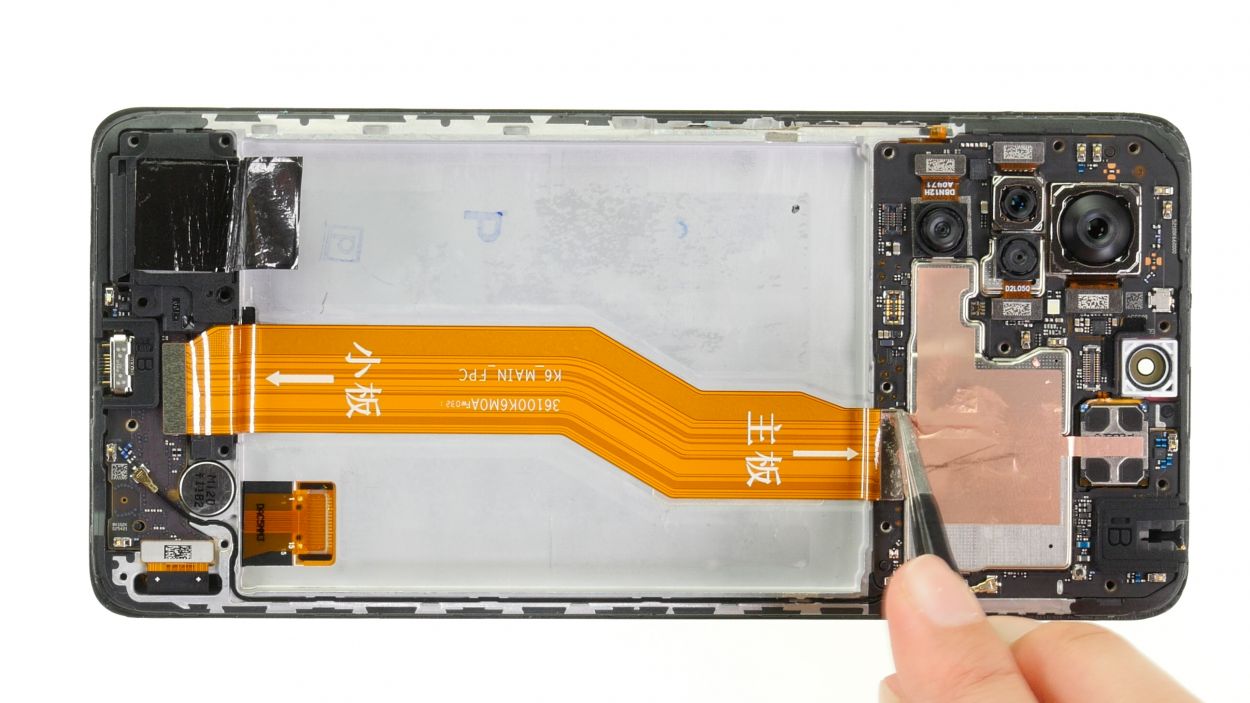
– Gently pry off the exposed connector of the connection cable using a spudger. It’s like giving it a little nudge to say, ‘Hey, it’s time to disconnect!’
– Next up, grab a pair of tweezers and delicately detach the antenna cable from the motherboard. Think of it as giving the antenna a friendly wave goodbye!
Tools Used
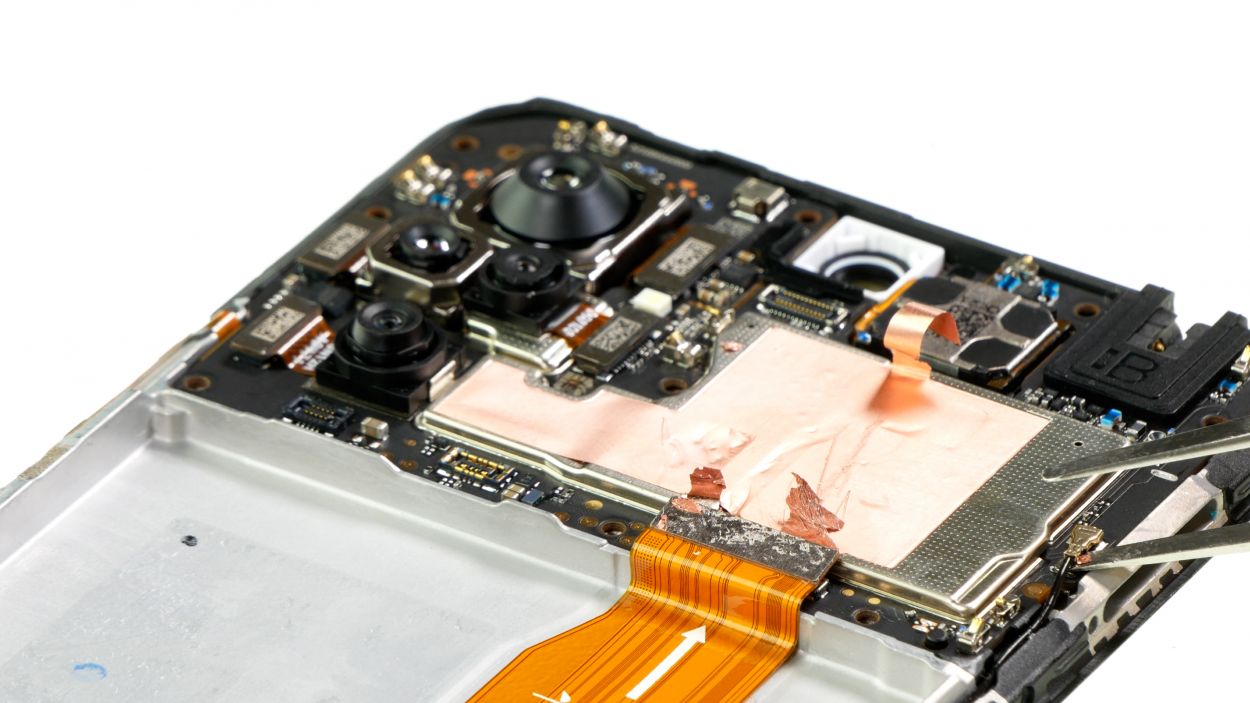
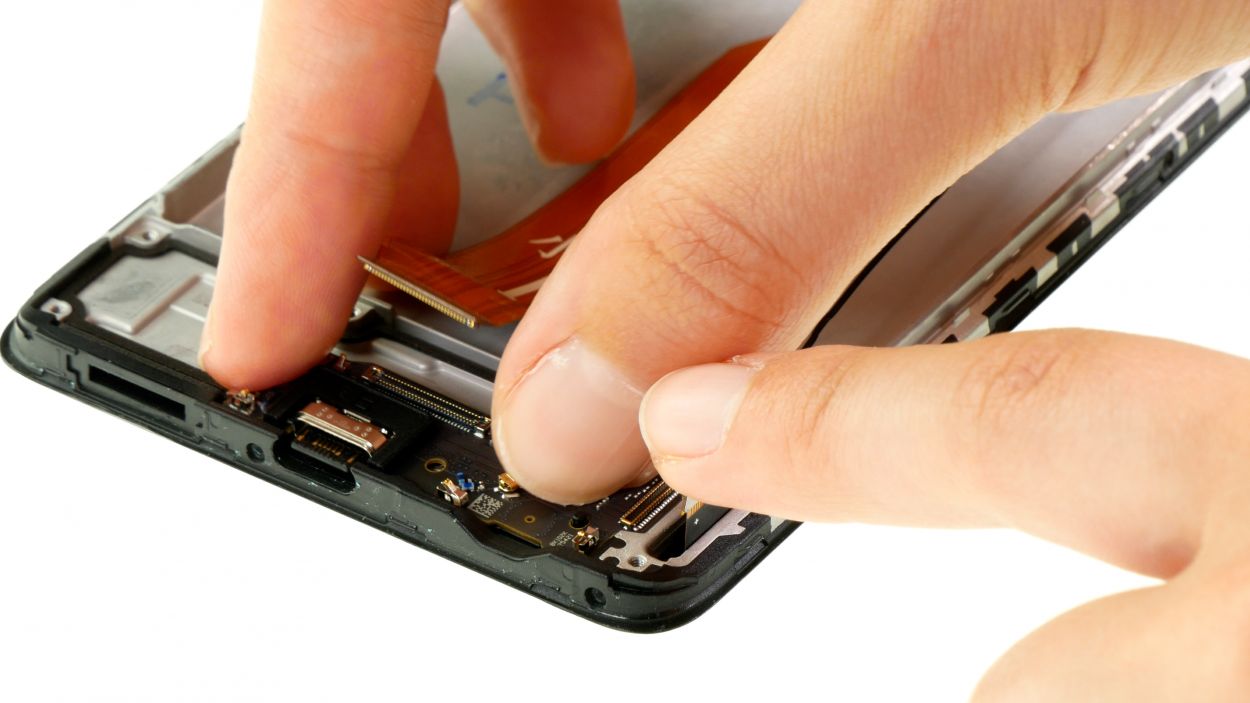
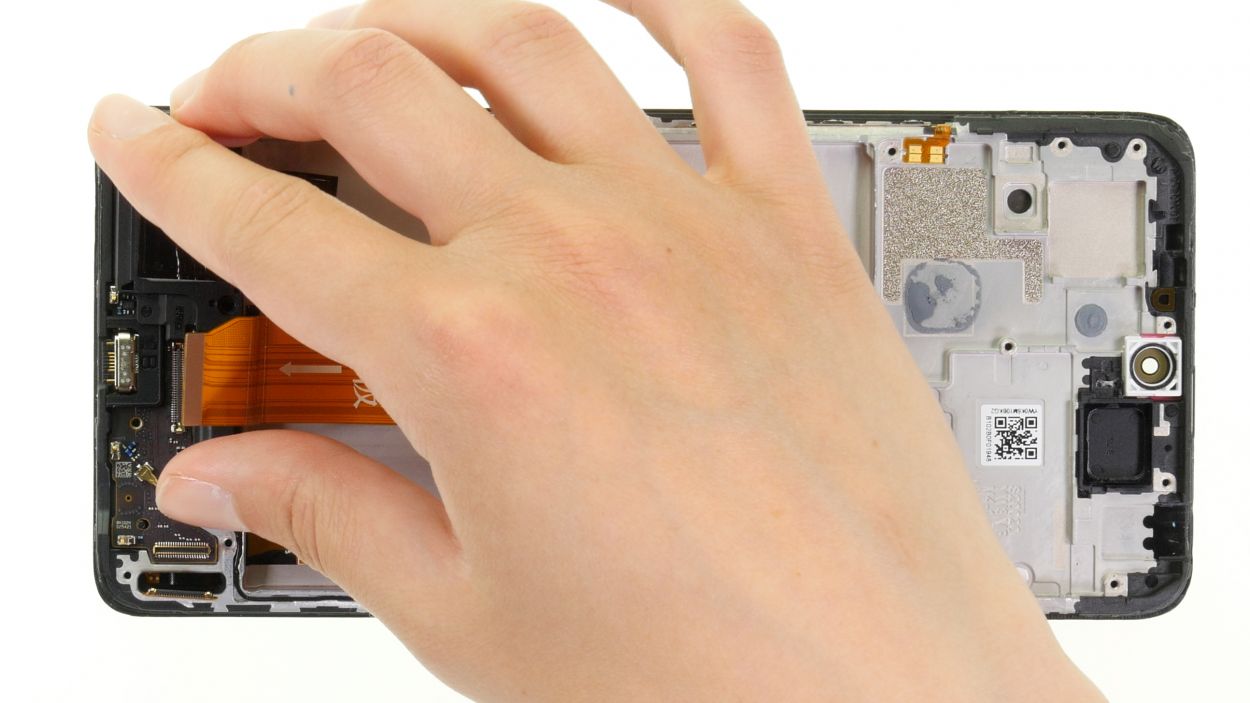
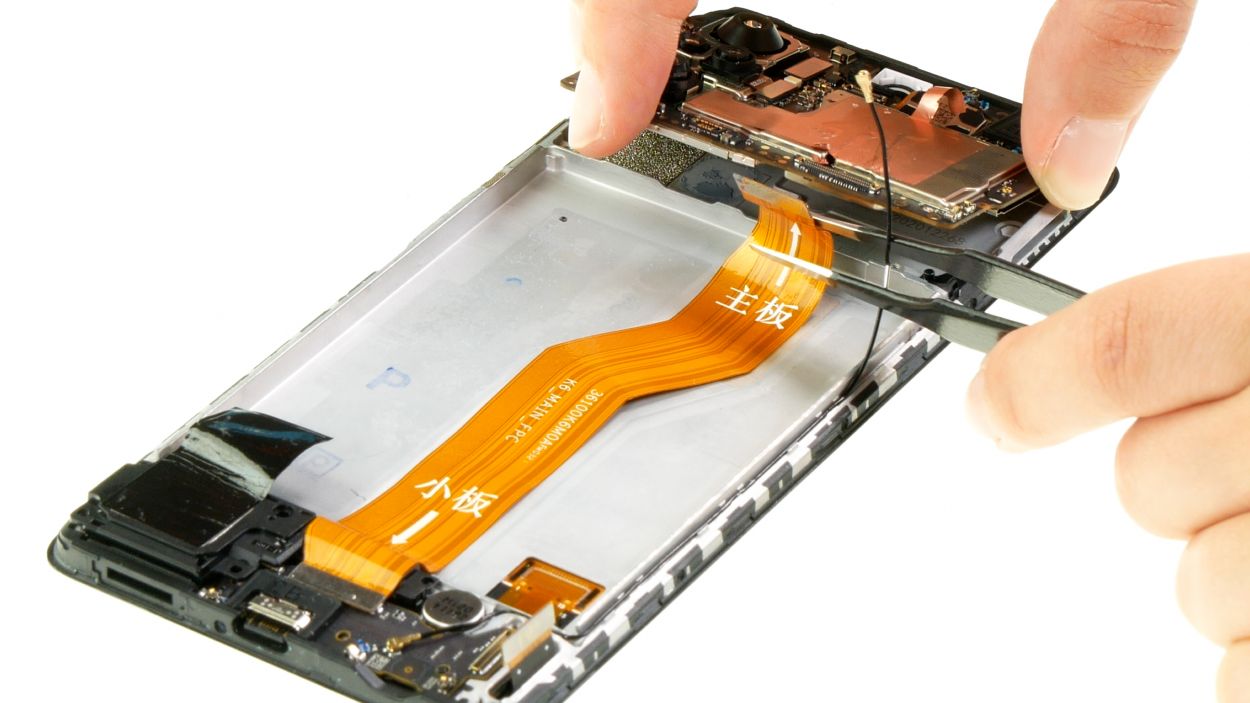
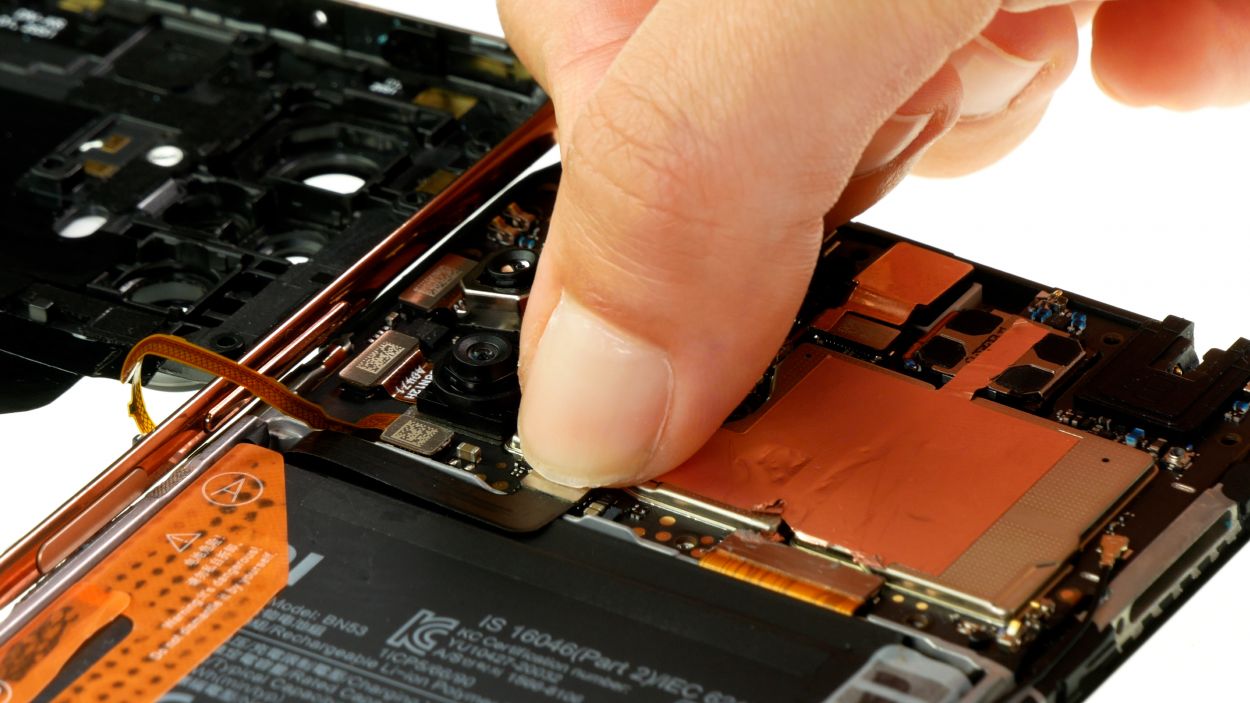
Step 16

Look for the little notch on the motherboard—it’s your guide for where to place your tool. You’ve got this!
– Gently coax the motherboard out of its cozy spot with a spudger and lift it out of the device.
Tools Used
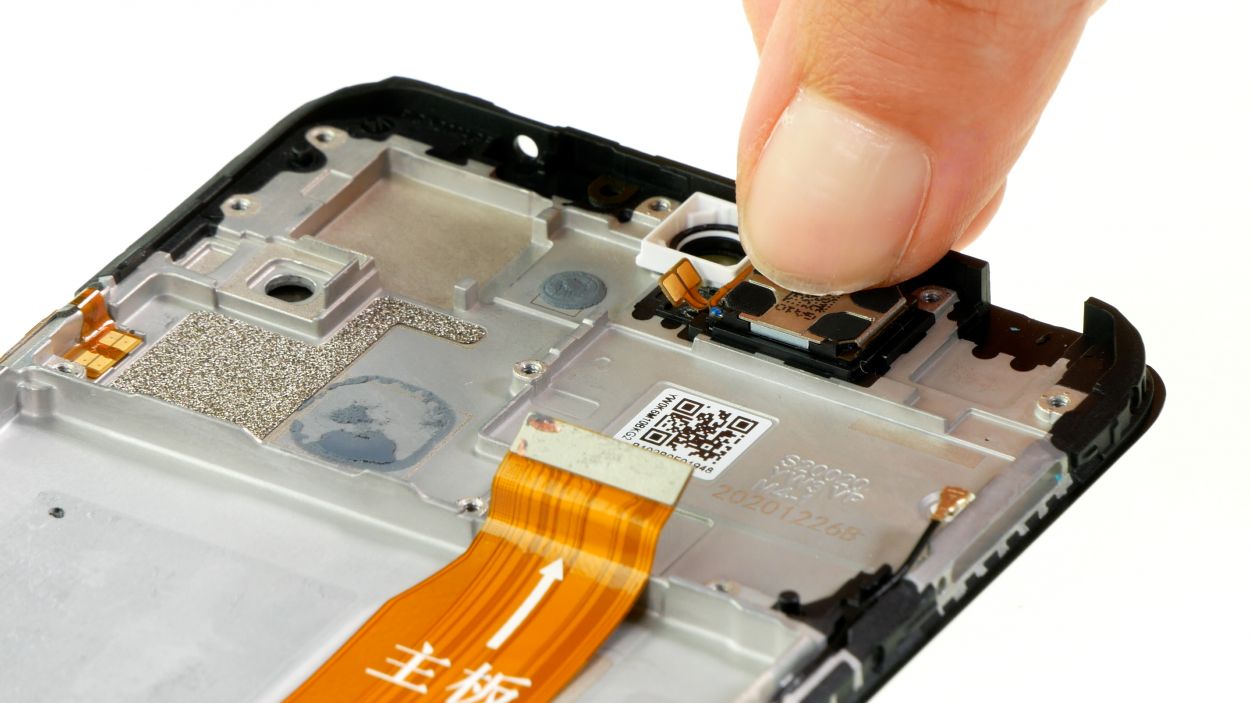
Step 17

Heads up! The earpiece connector is a little shy and doesn’t have a socket on the motherboard. It’s glued right to the bottom of the case, so make sure to handle it with care when you’re detaching the earpiece. We believe in you!
– Get ready to liberate that earpiece from its cozy guide! Simply slide a pair of trusty tweezers underneath and gently coax it out.
Tools Used
- heat gun to heat parts that are glued on so they’re easier to remove.
In most cases, you can also use a hairdryer.” rel=”noopener”>Heat gun - Piergiacomi Tweezers 2a SA ESD
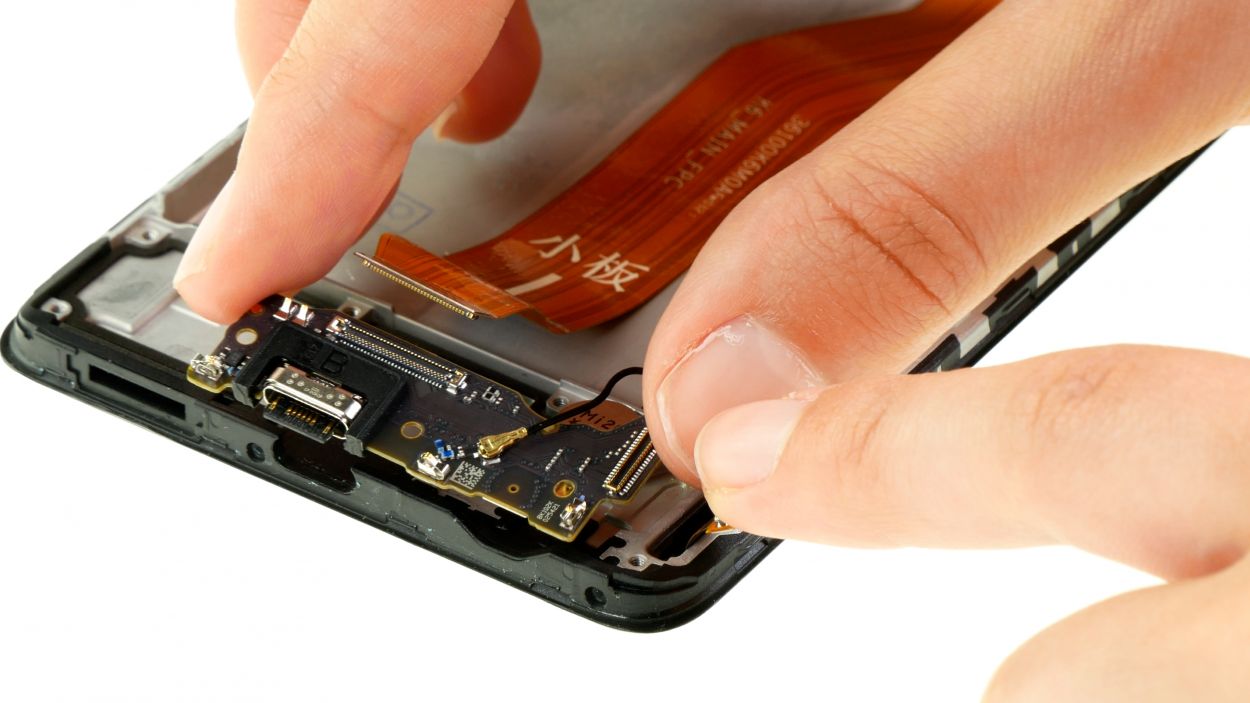
Step 18
The lower section of the connecting cable is snugly glued to the speaker module. To successfully liberate the speaker, you’ll need to gently disconnect and remove that cable. You’ve got this!
– Gently pry the connector of the connecting cable out of its cozy spot on the USB board.
– With a pair of tweezers, carefully pull the glued end of the connecting cable away from the speaker module while giving the speaker a little press down. You’ve got this!
Tools Used
Step 19
– Gently pluck the speaker from the device using tweezers and set it aside like a pro.
Tools Used

Step 22
– Take the USB board including the antenna cable out of the device and put it aside.
Tools Used
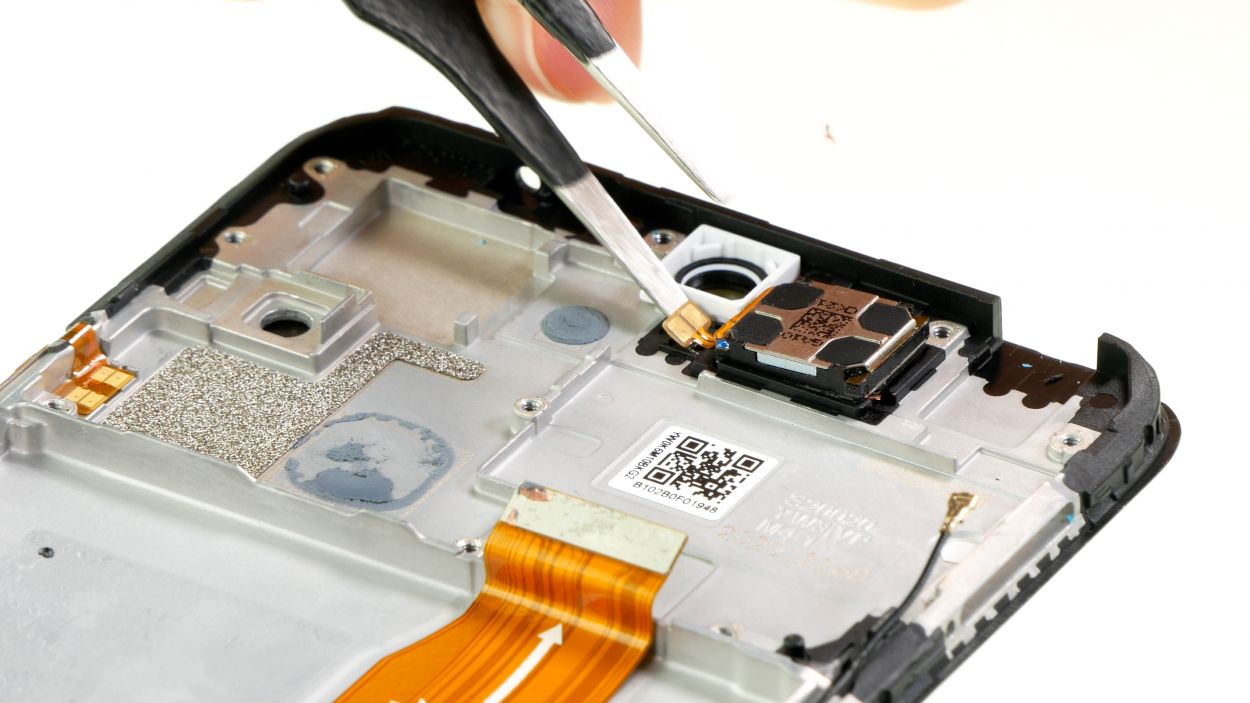
Step 23
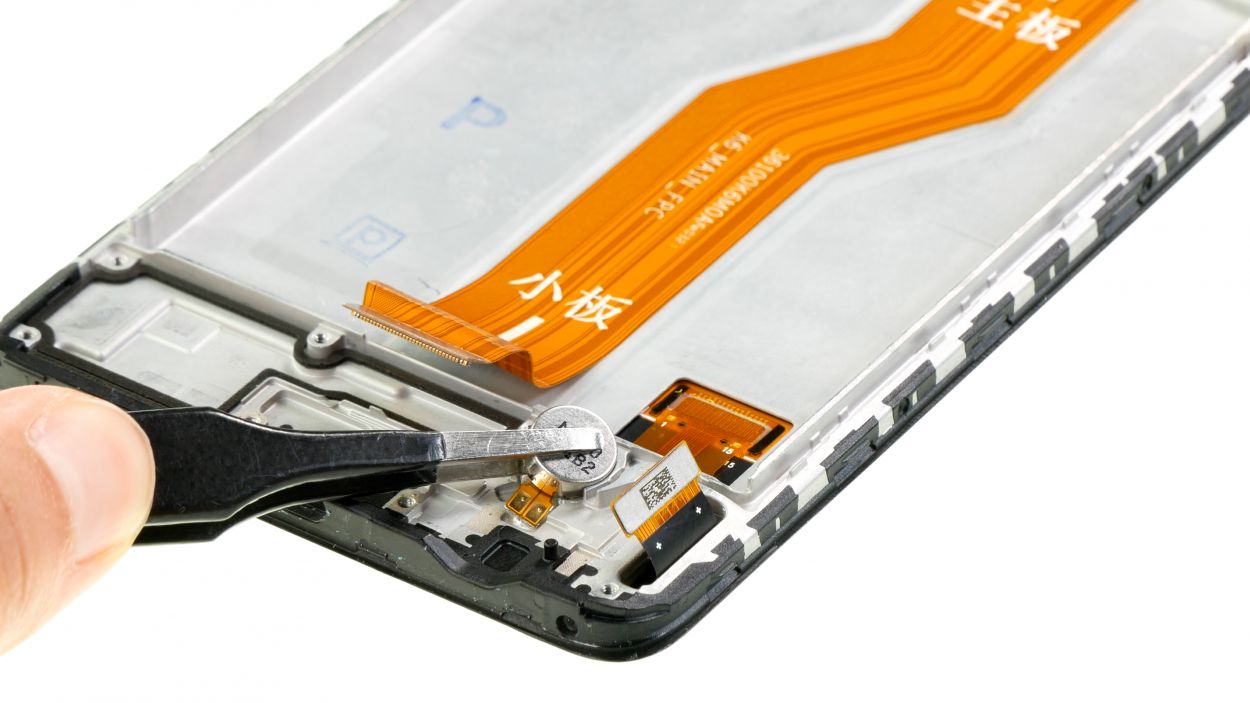
Uh oh! Looks like your vibration motor’s feeling a little sluggish. Don’t worry, we’ve got this! A quick blast of hot air will help loosen things up – think of it as a mini spa day for your phone’s insides. If you need a hand, you can always schedule a repair.
– Let’s get that vibration motor outta there! Gently grab it with tweezers and give it a little wiggle to free it from the screen. Easy peasy!
Tools Used
- heat gun to heat parts that are glued on so they’re easier to remove.
In most cases, you can also use a hairdryer.” rel=”noopener”>Heat gun - Piergiacomi Tweezers 2a SA ESD
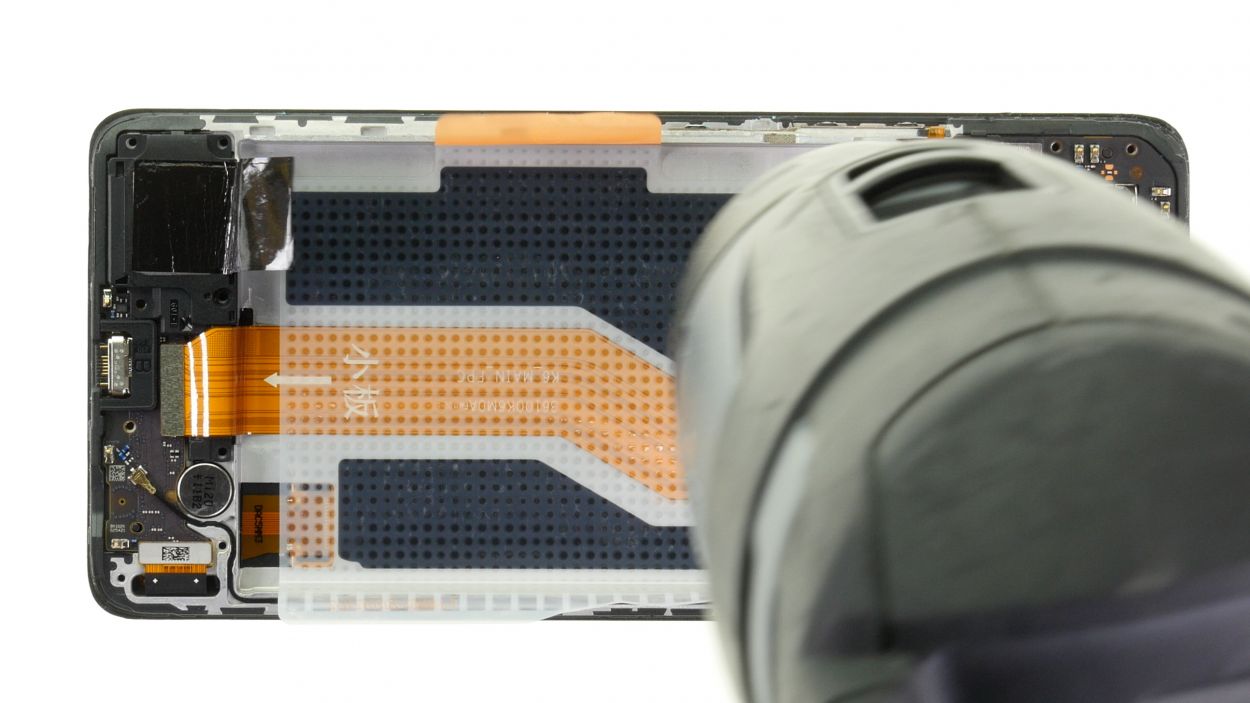
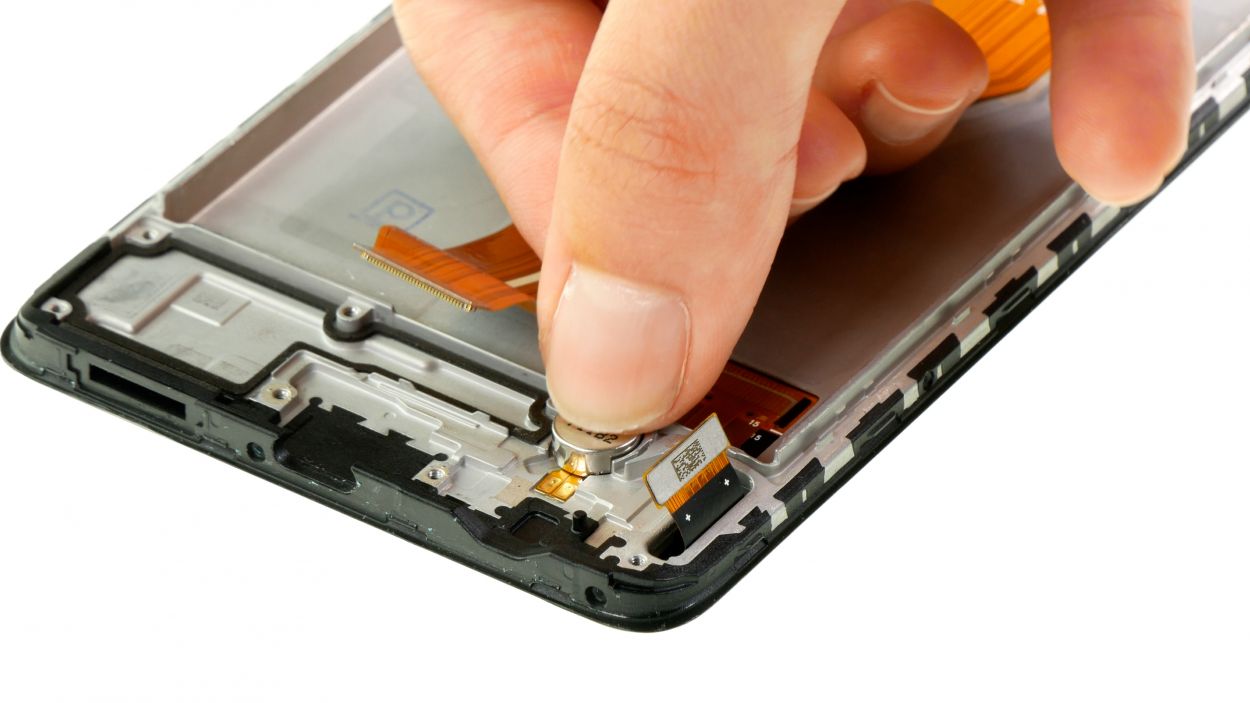
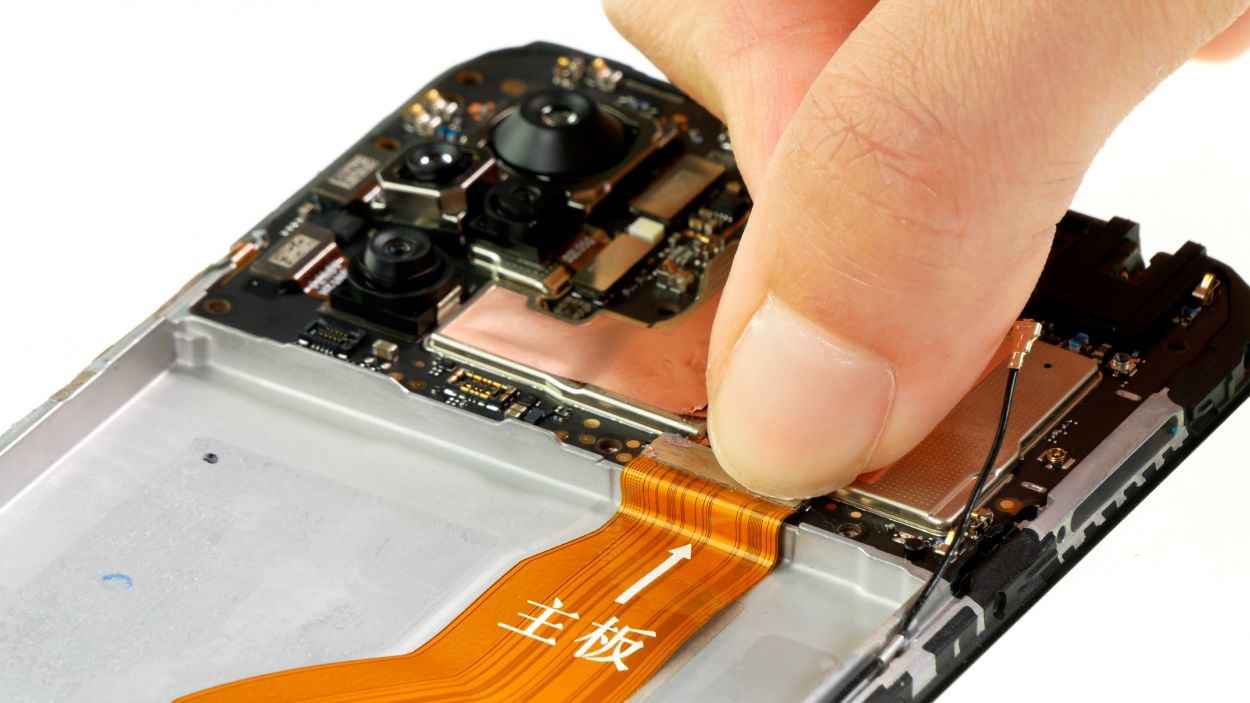
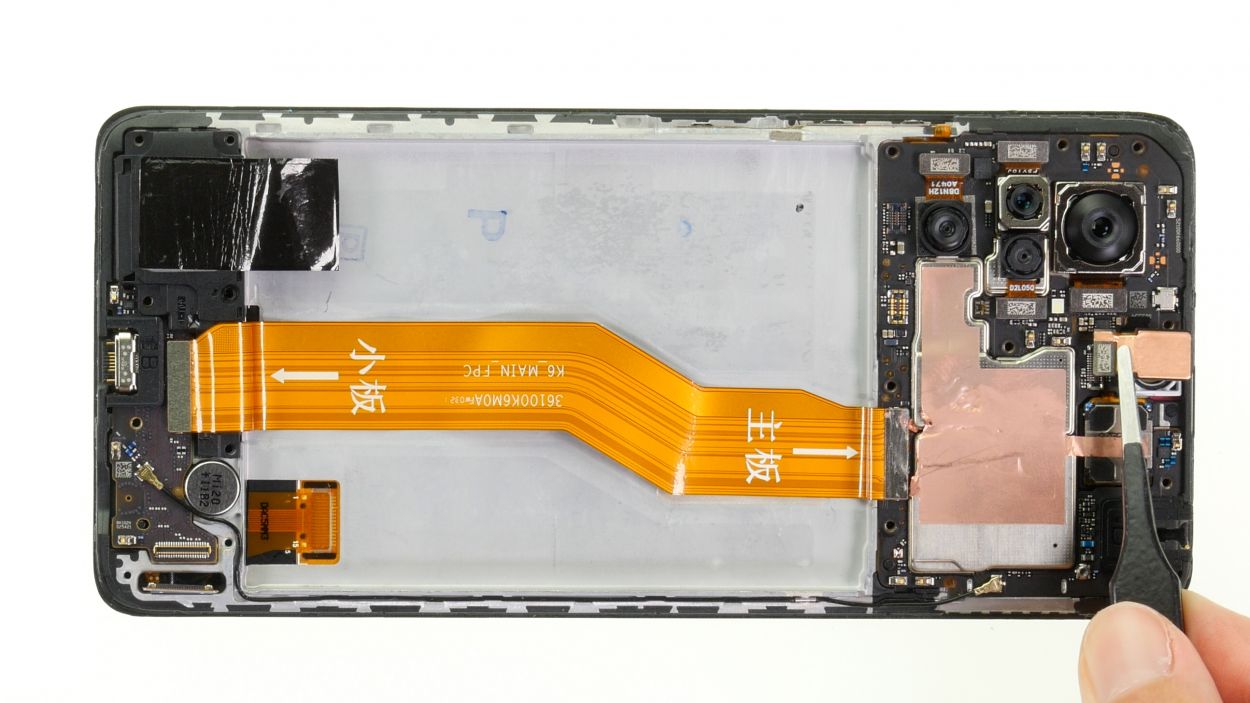
Step 24
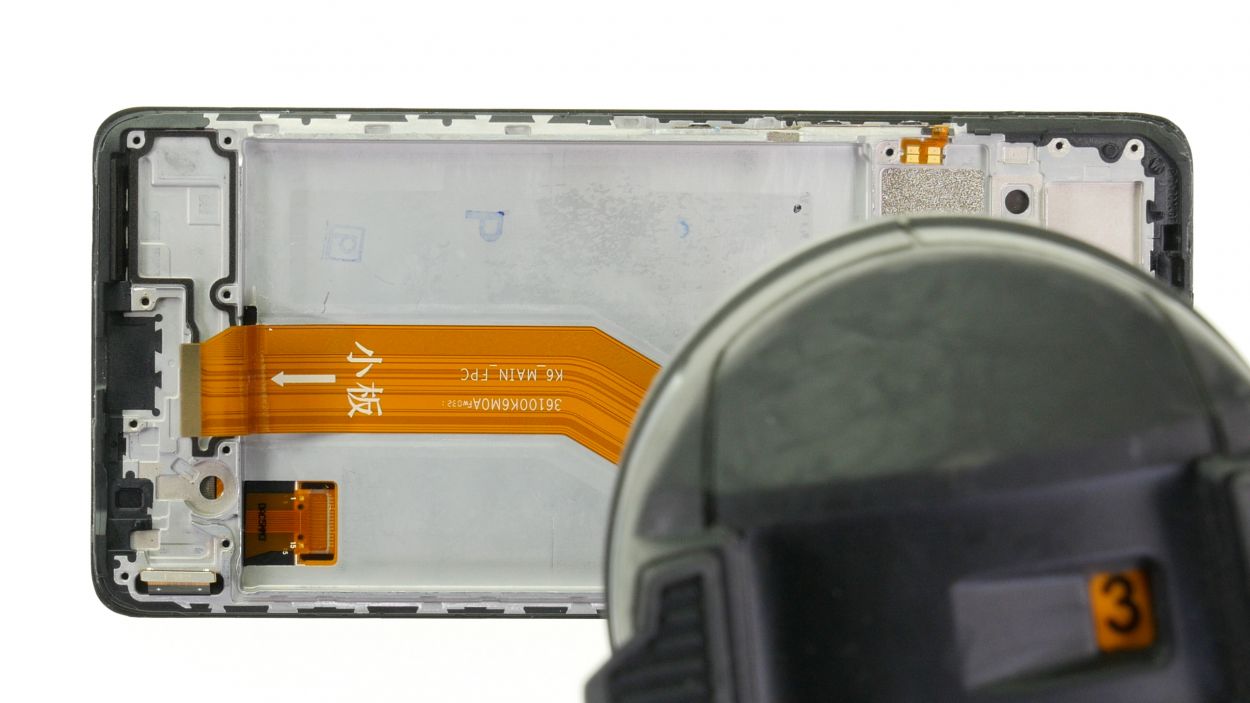
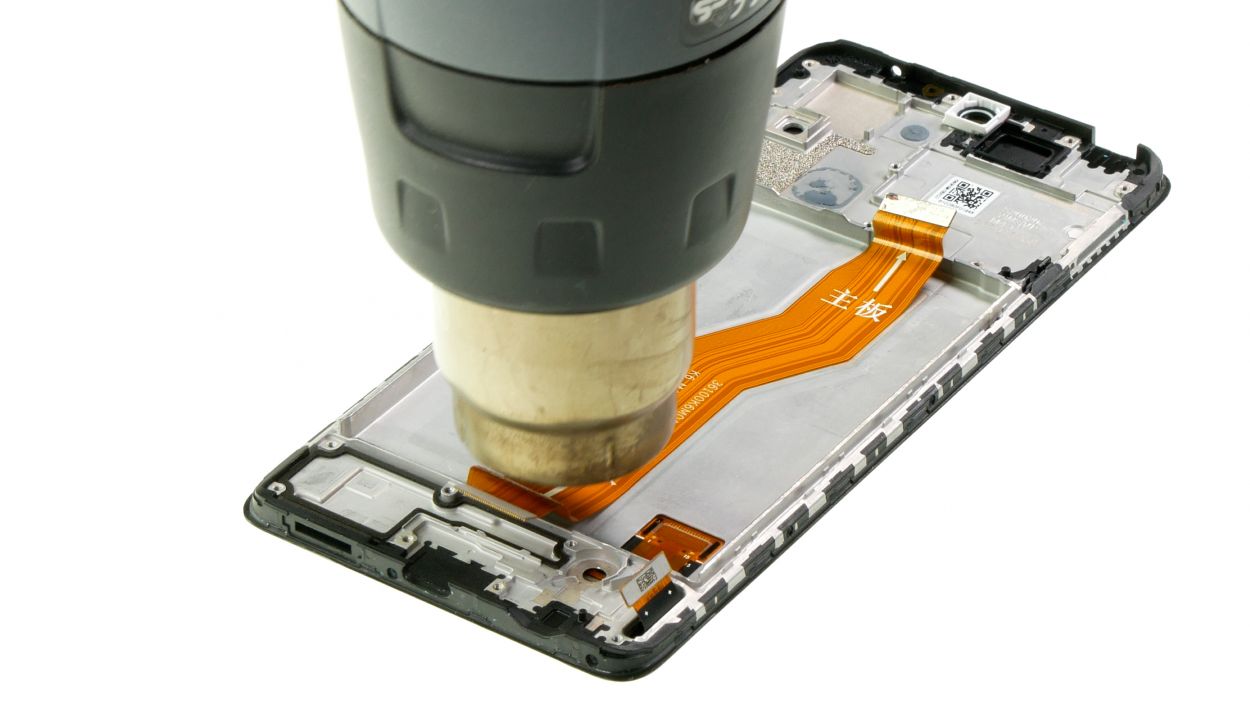
The connecting cable links the USB- to the motherboard and is snugly glued to the bottom of the case. To make your life a bit easier when it’s time to remove it, give it a quick blast of hot air first!
– Gently wave a hot air tool over the connecting cable to warm up that stubborn glue.
Tools Used
- heat gun to heat parts that are glued on so they’re easier to remove.
In most cases, you can also use a hairdryer.” rel=”noopener”>Heat gun
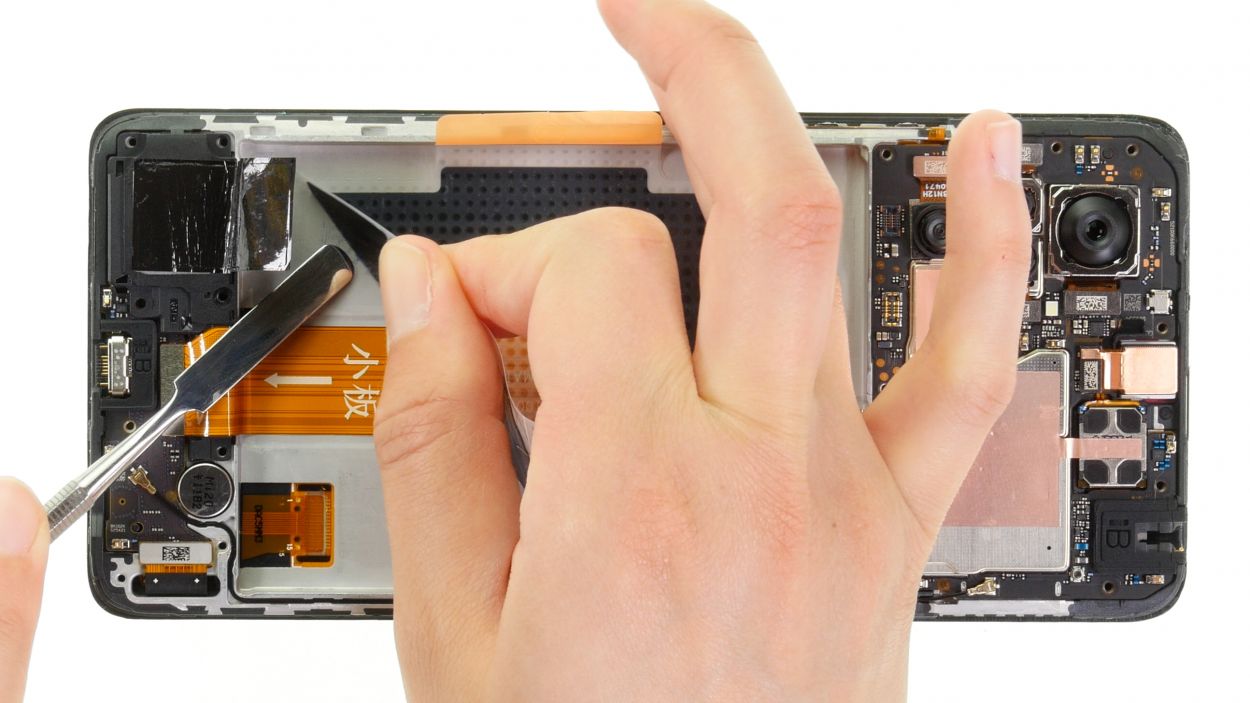
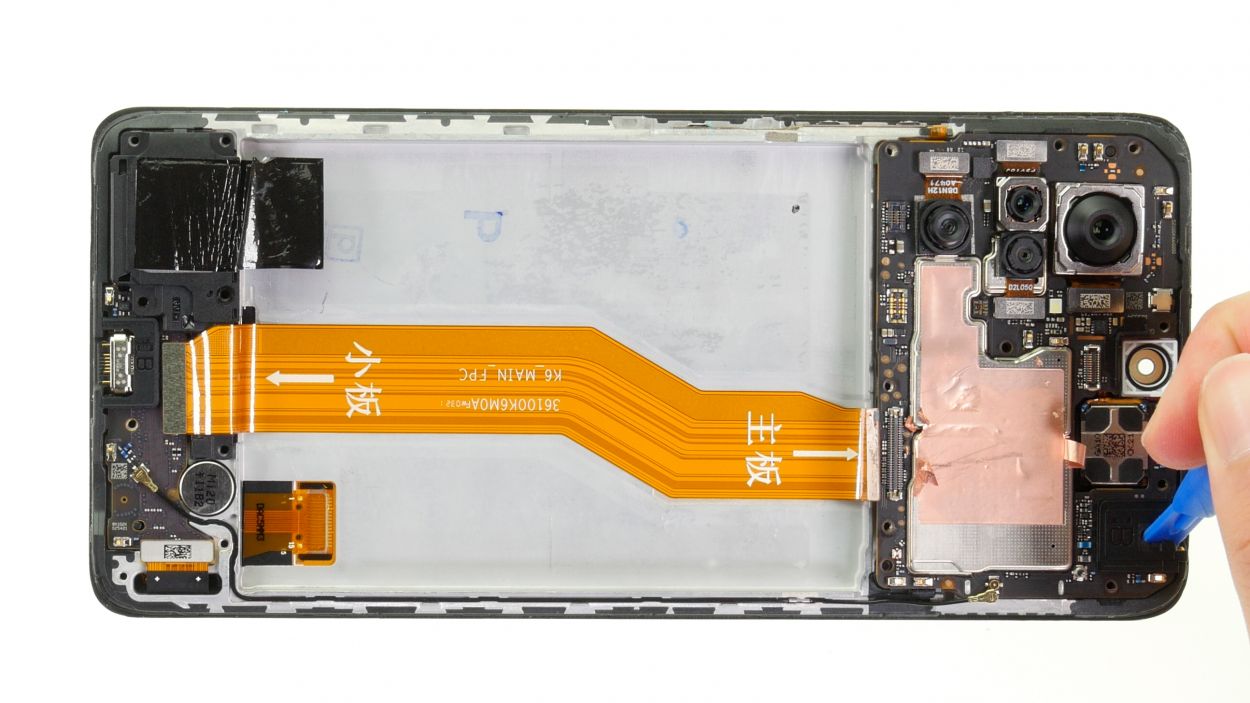
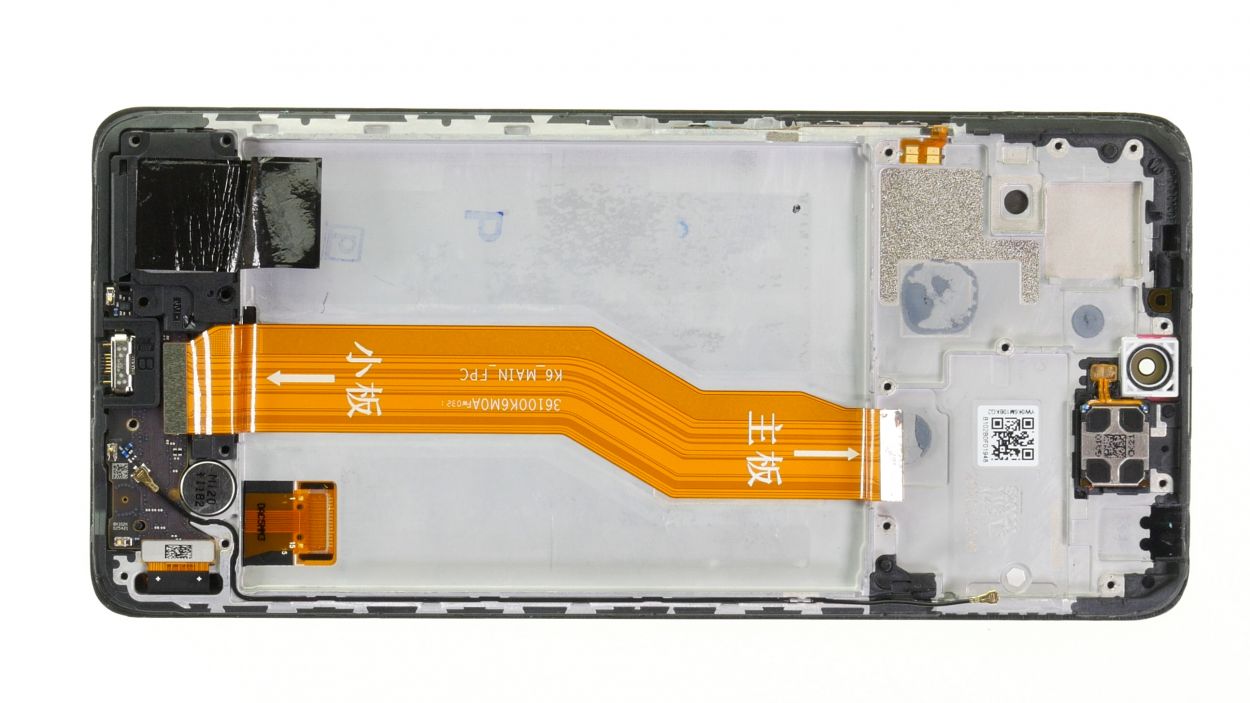
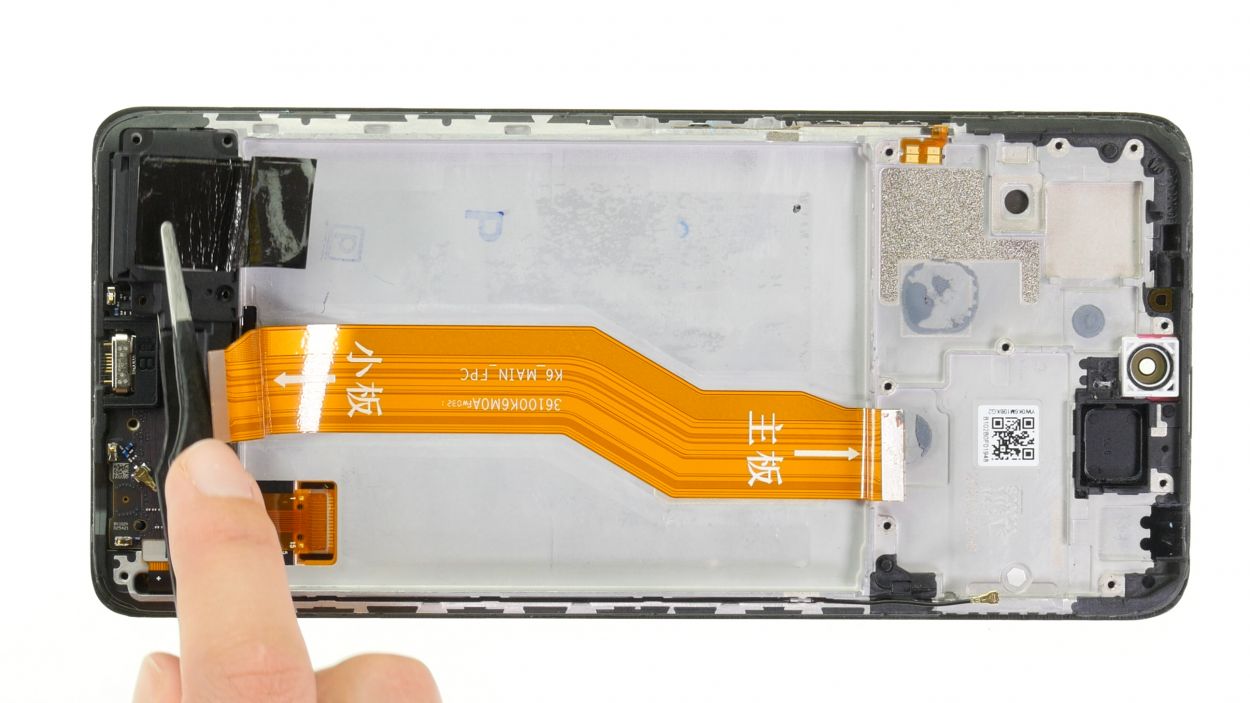
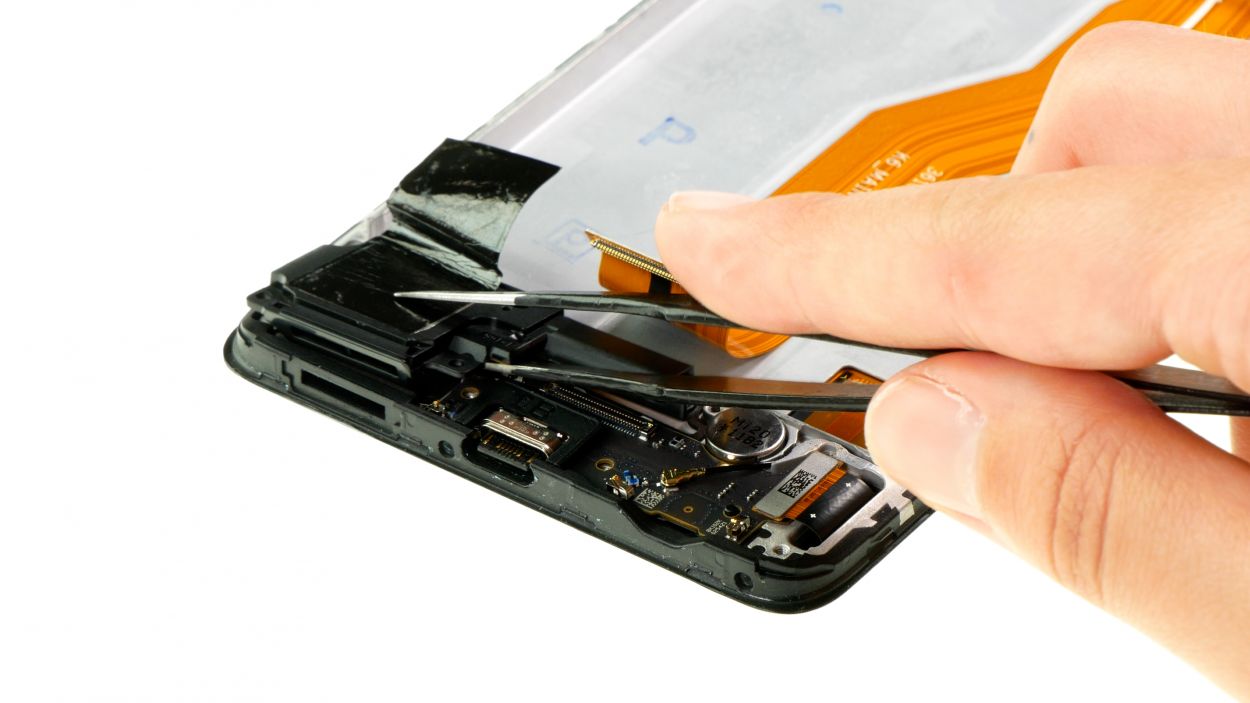
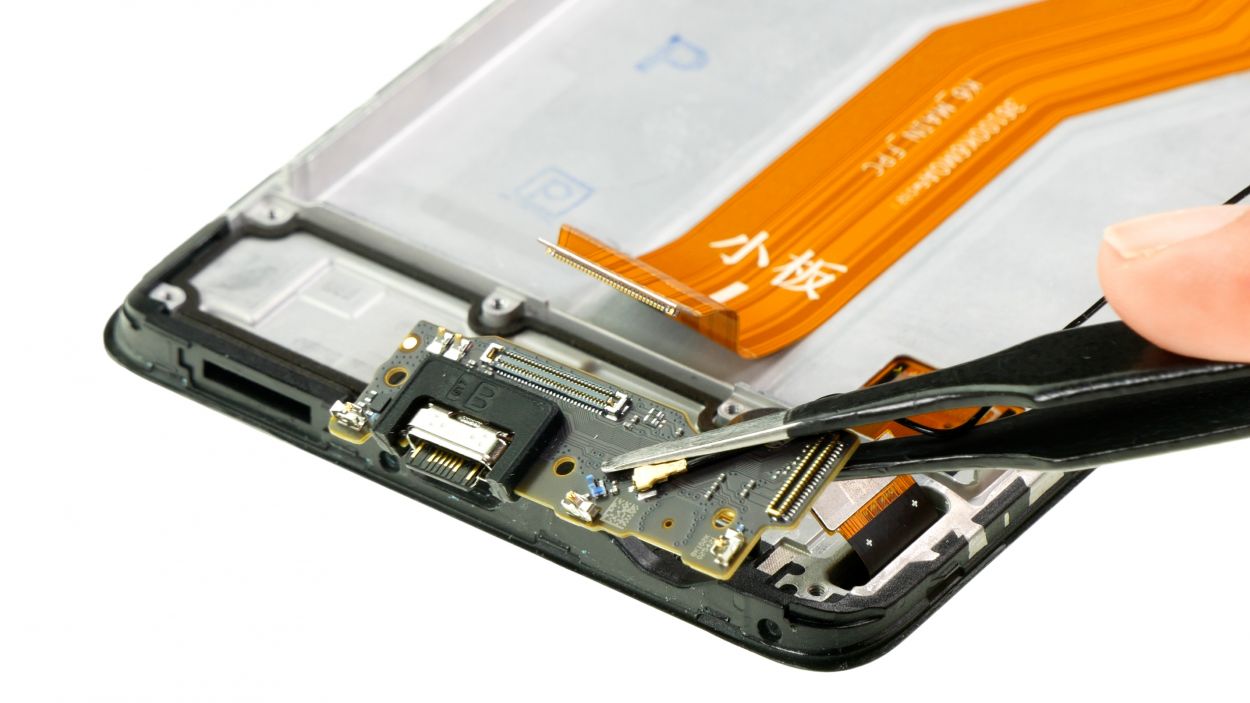
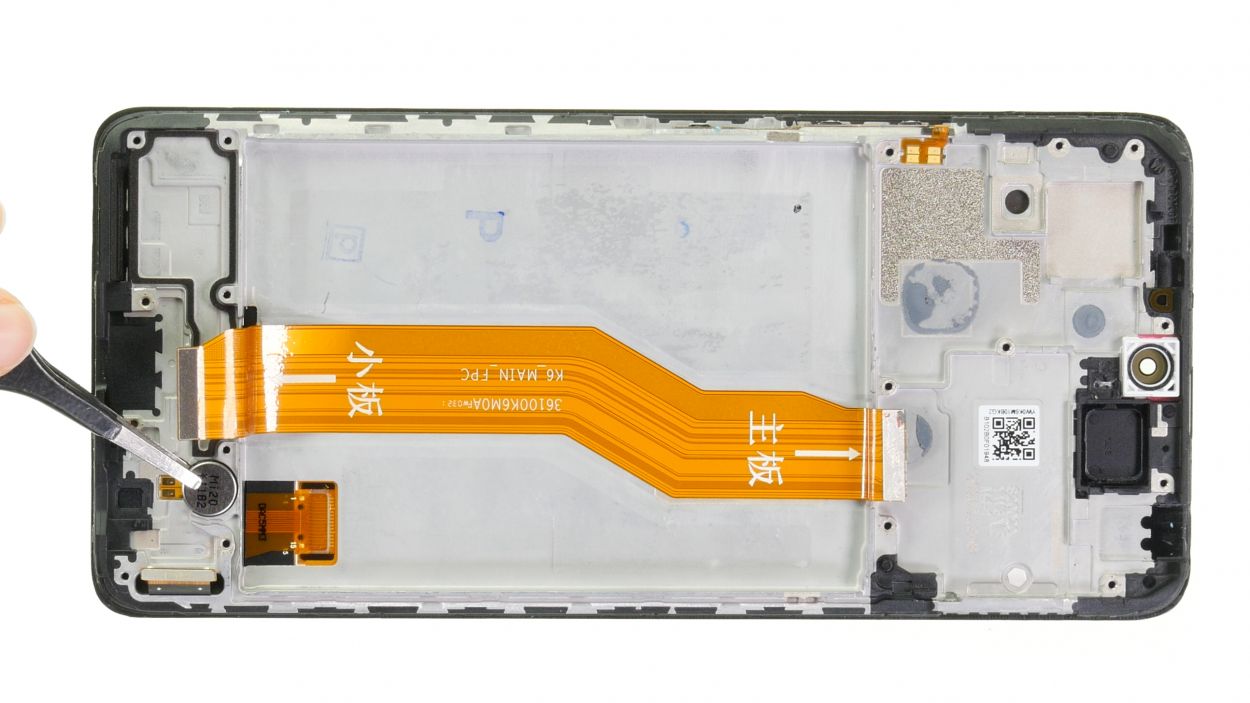
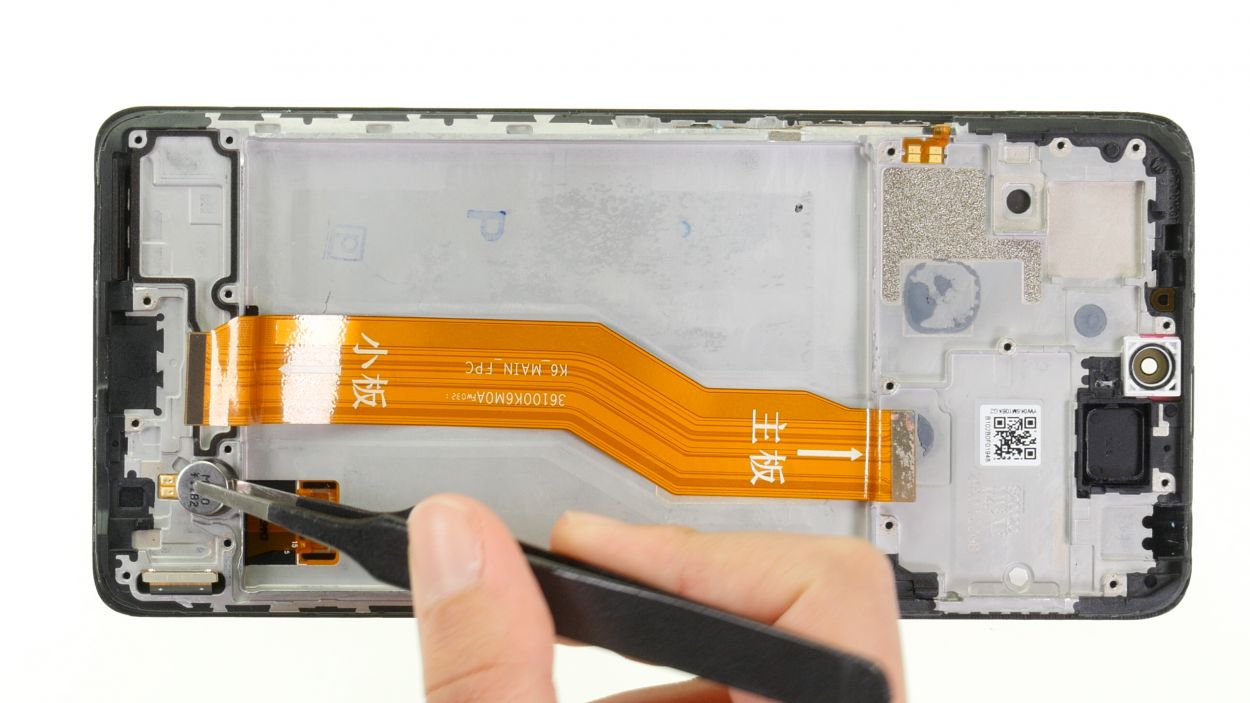
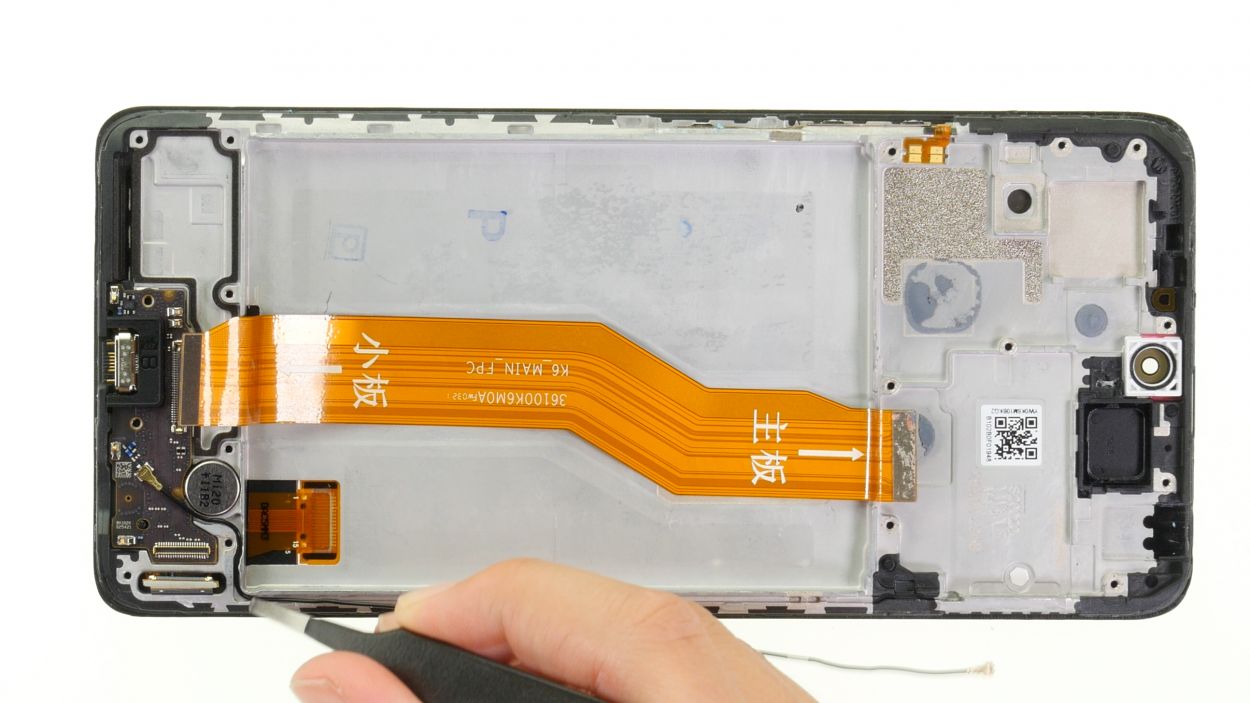
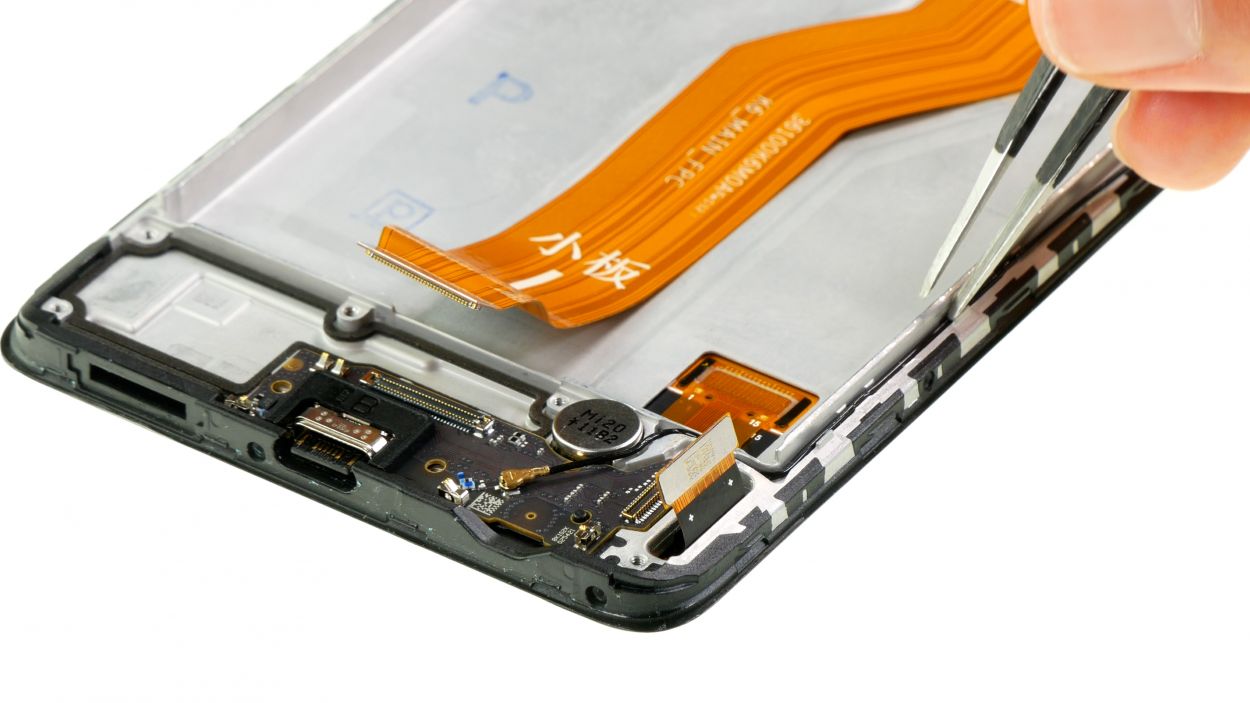
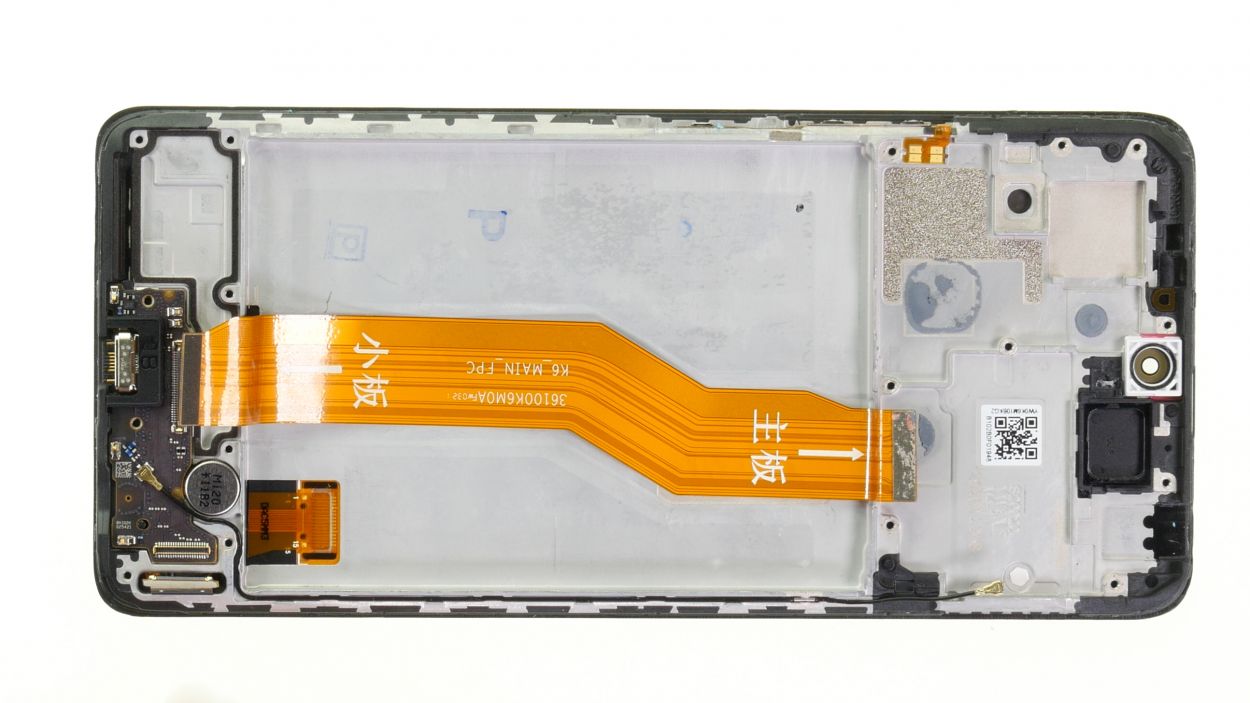
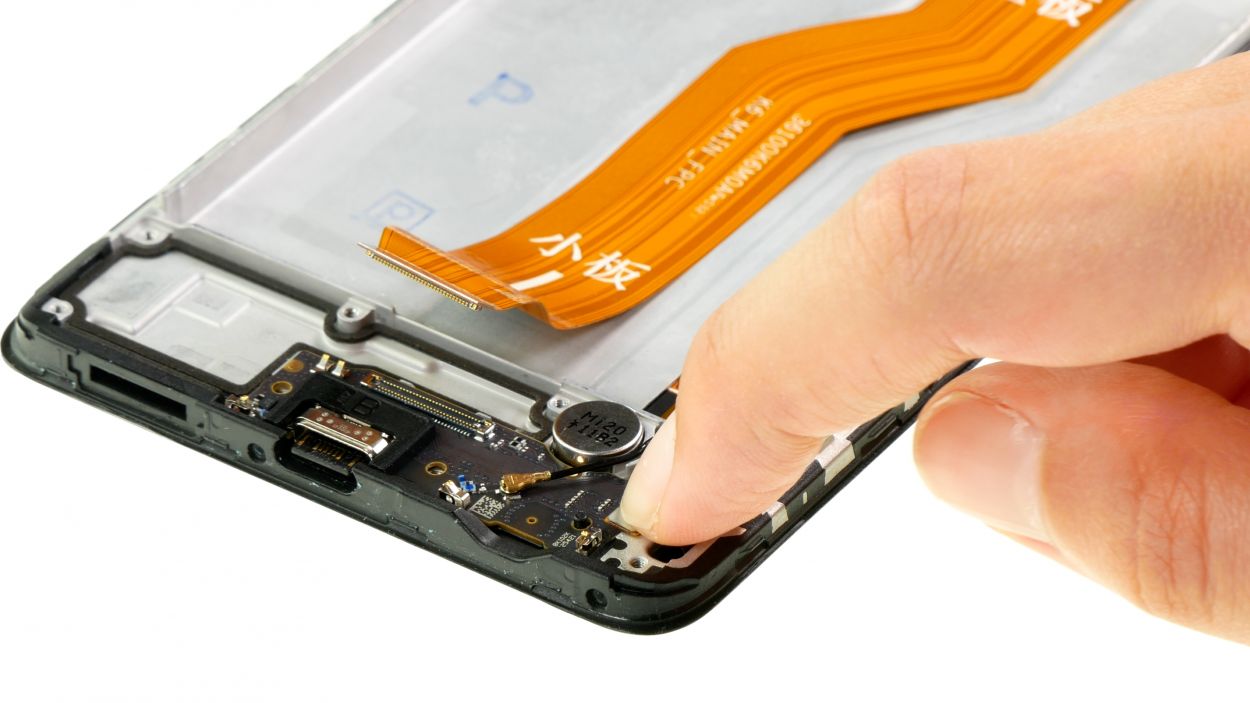
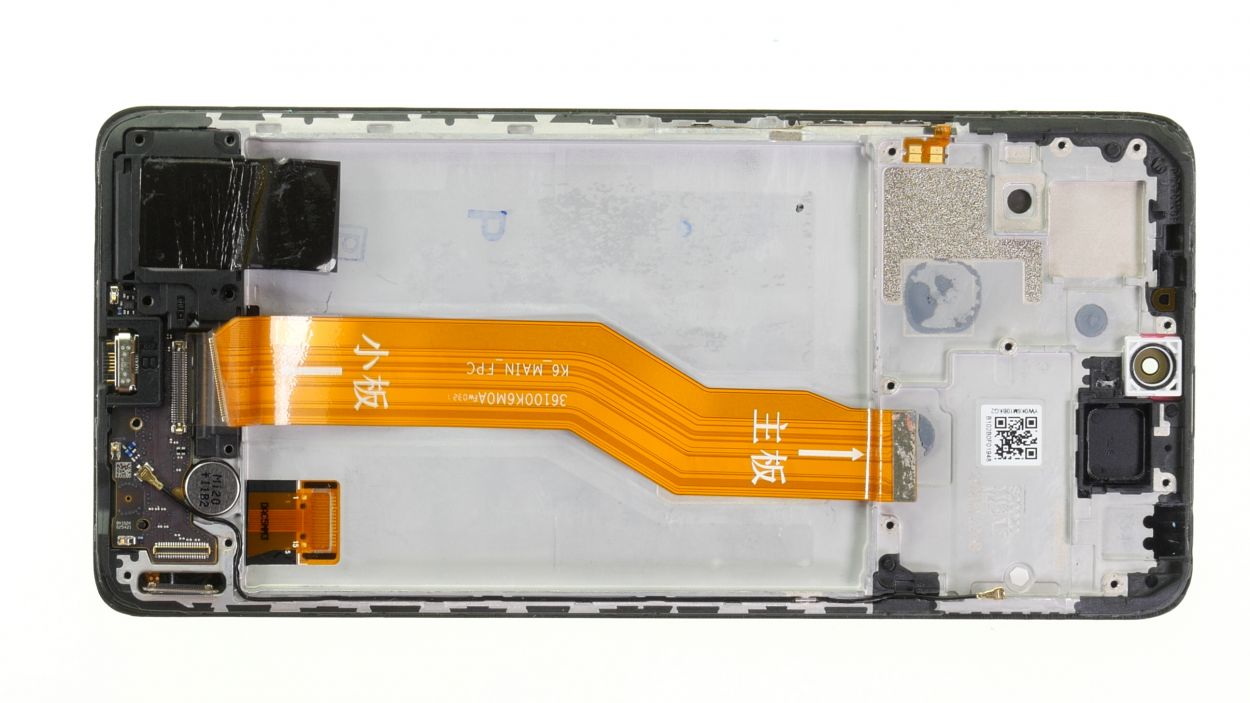
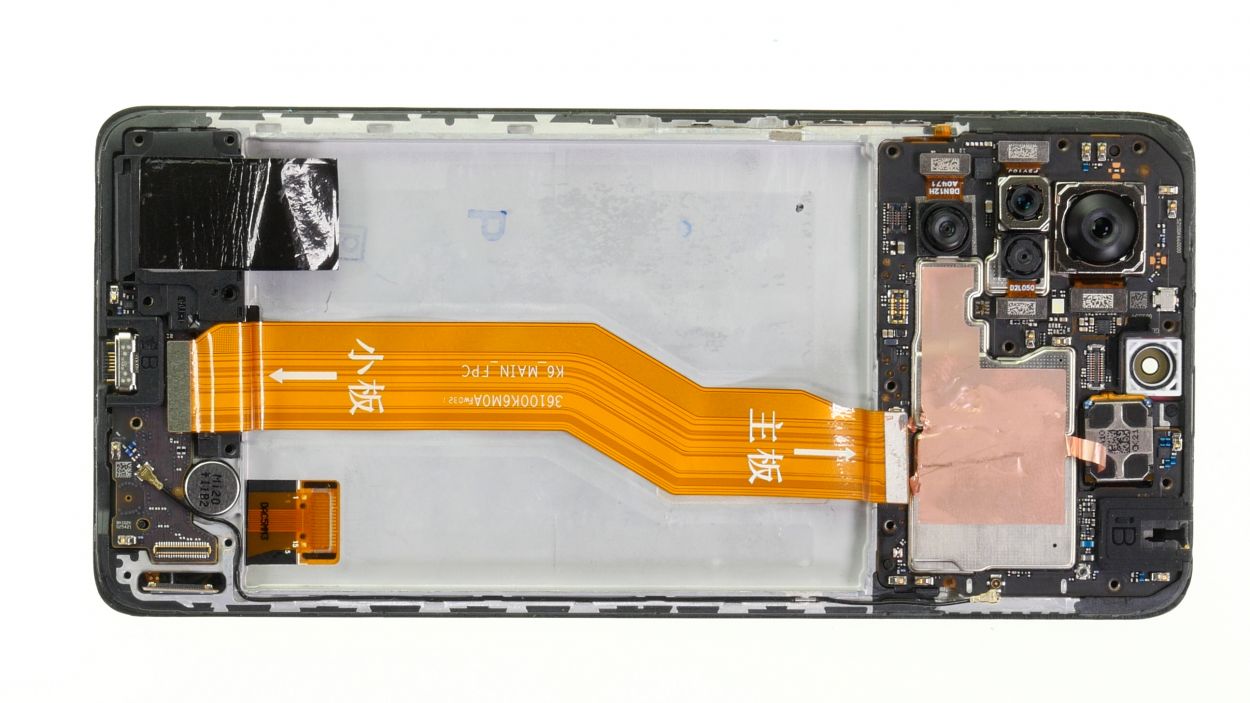
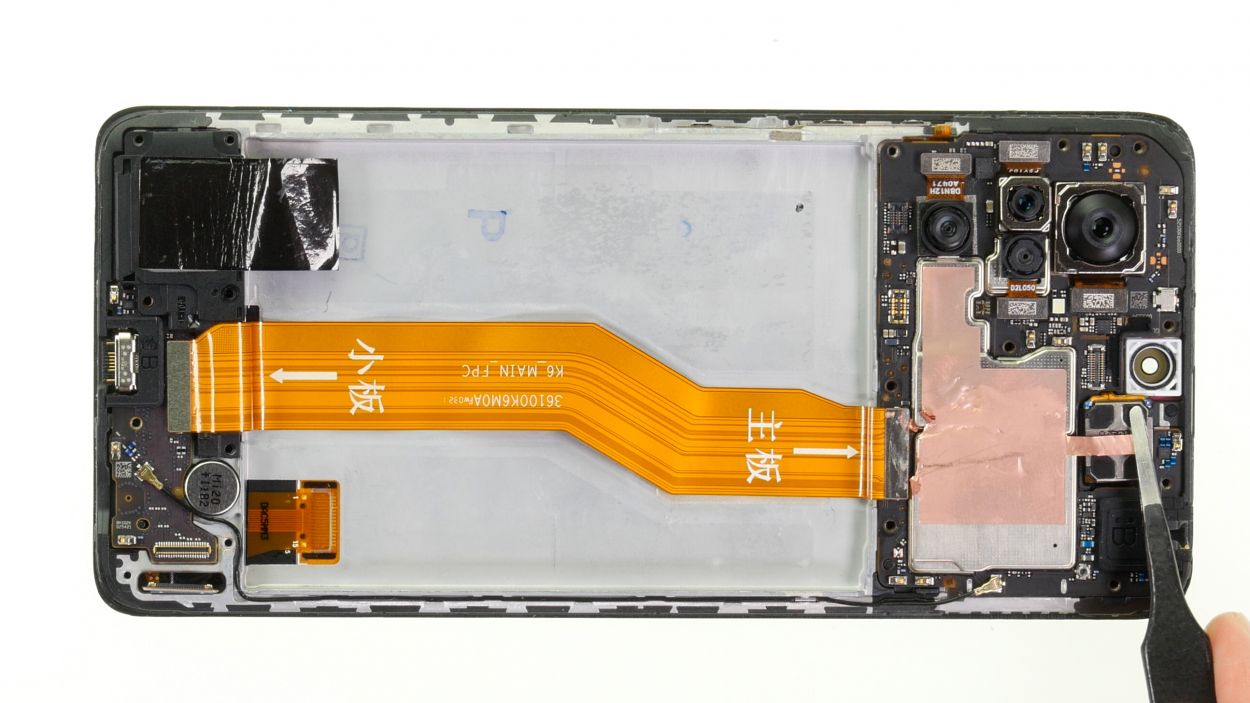
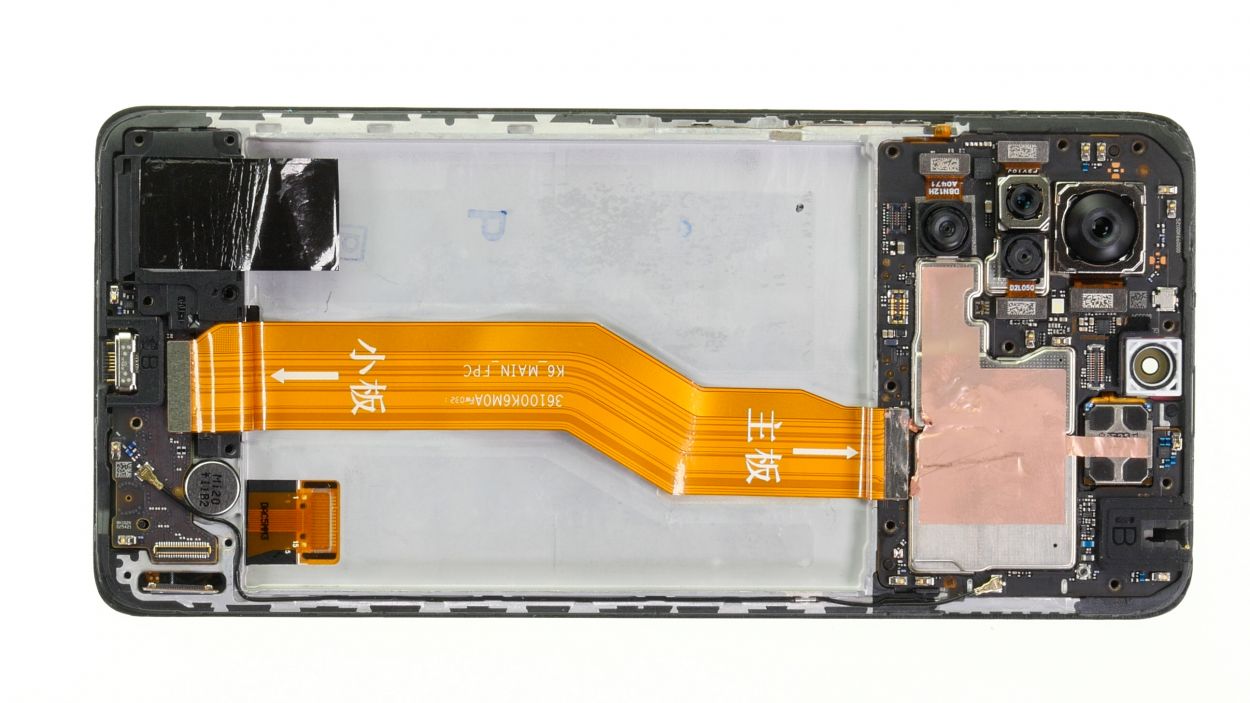
Step 25
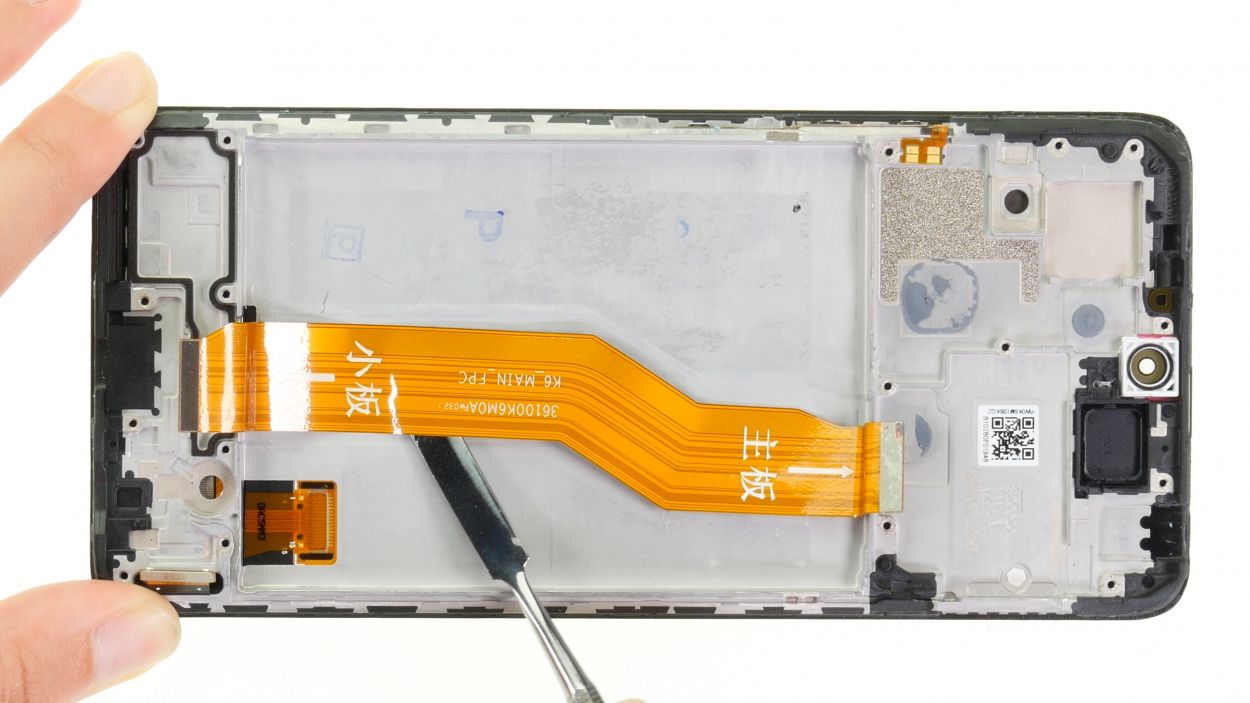
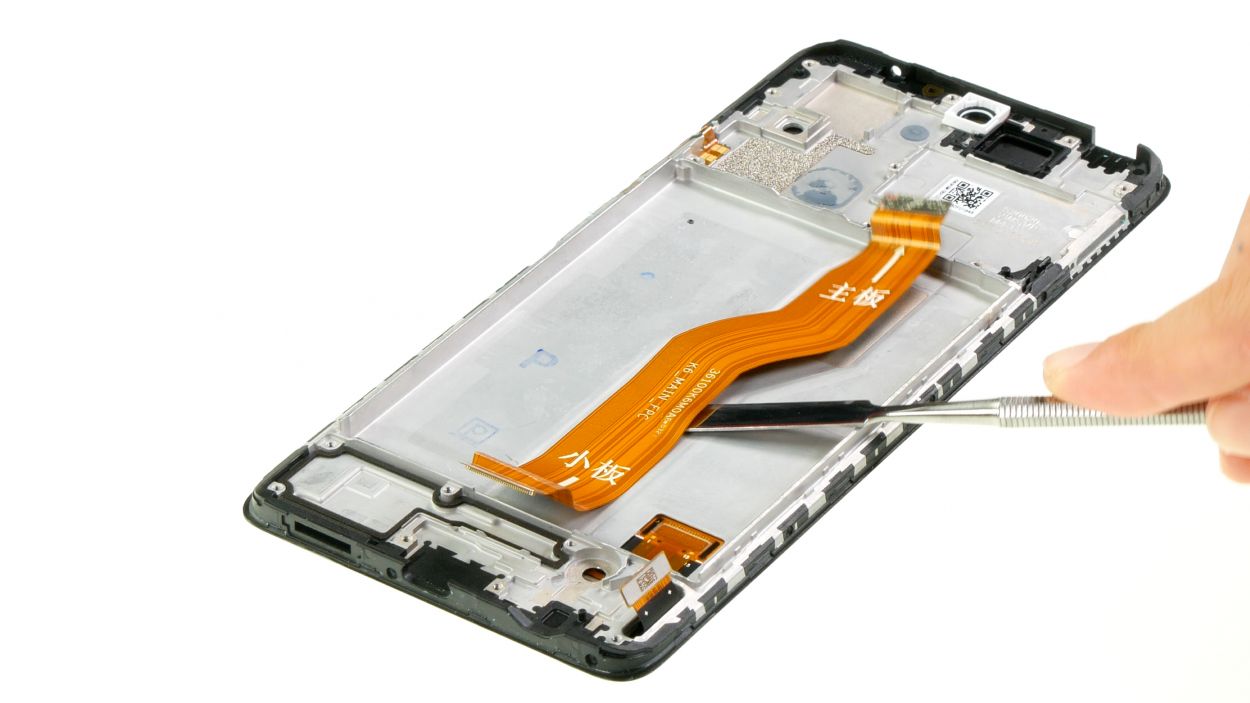
Heads up! The cable’s labeling is all in Chinese, so it’s a good idea to remember which way the cable is facing when you take it apart. You’ll thank yourself later when putting things back together!
– Grab a flat, sturdy tool and gently slide it under the connecting cable to pop it off from the case bottom. A steel spatula works like a charm for this task!
– Once you’ve freed the cable, just set it aside for now.
Tools Used
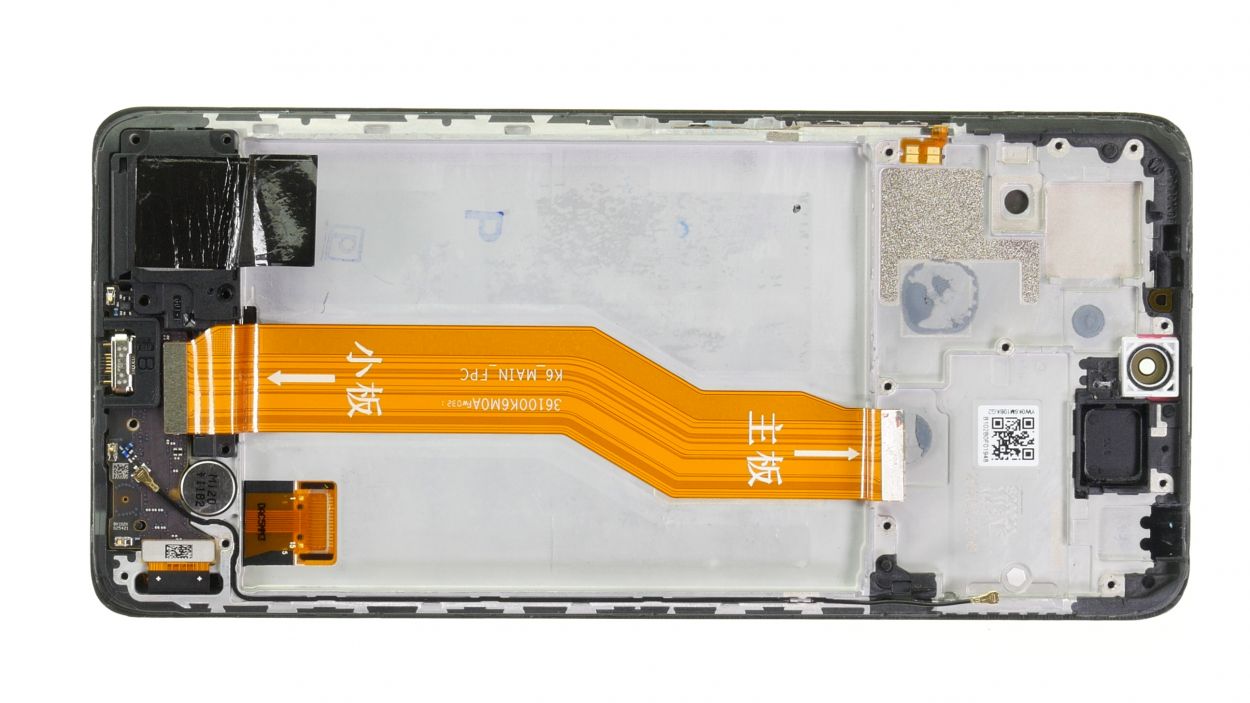
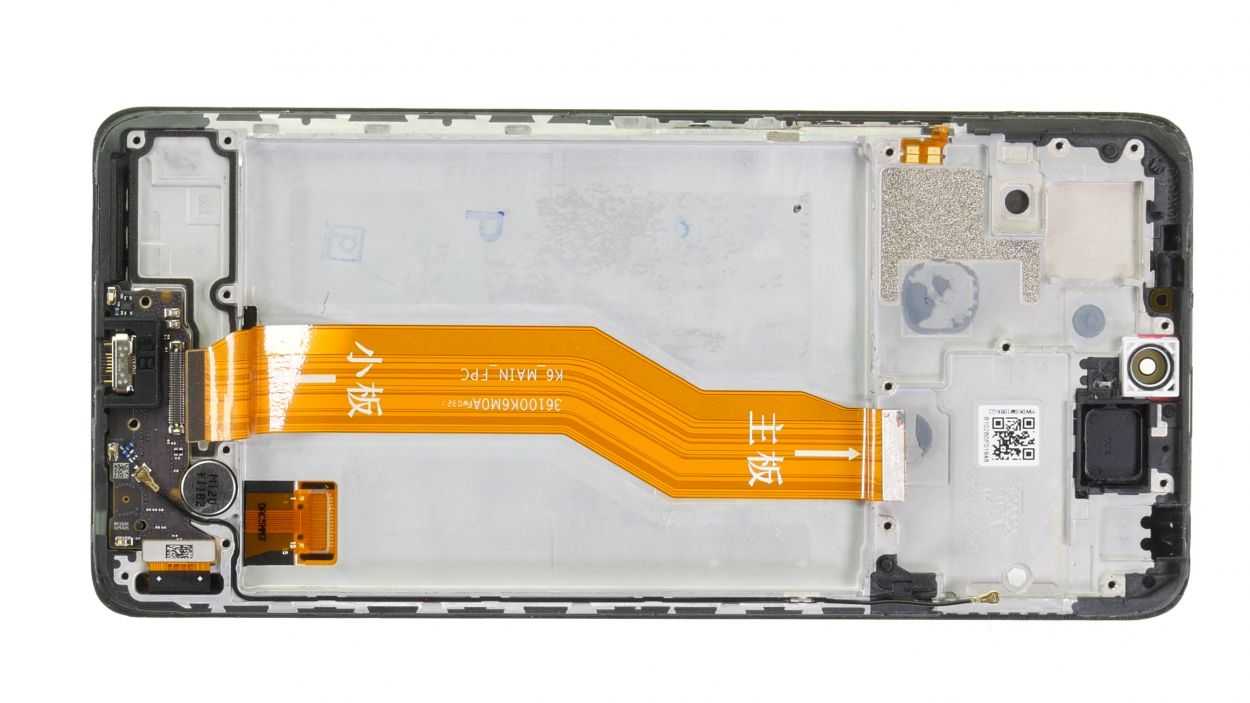
Step 26
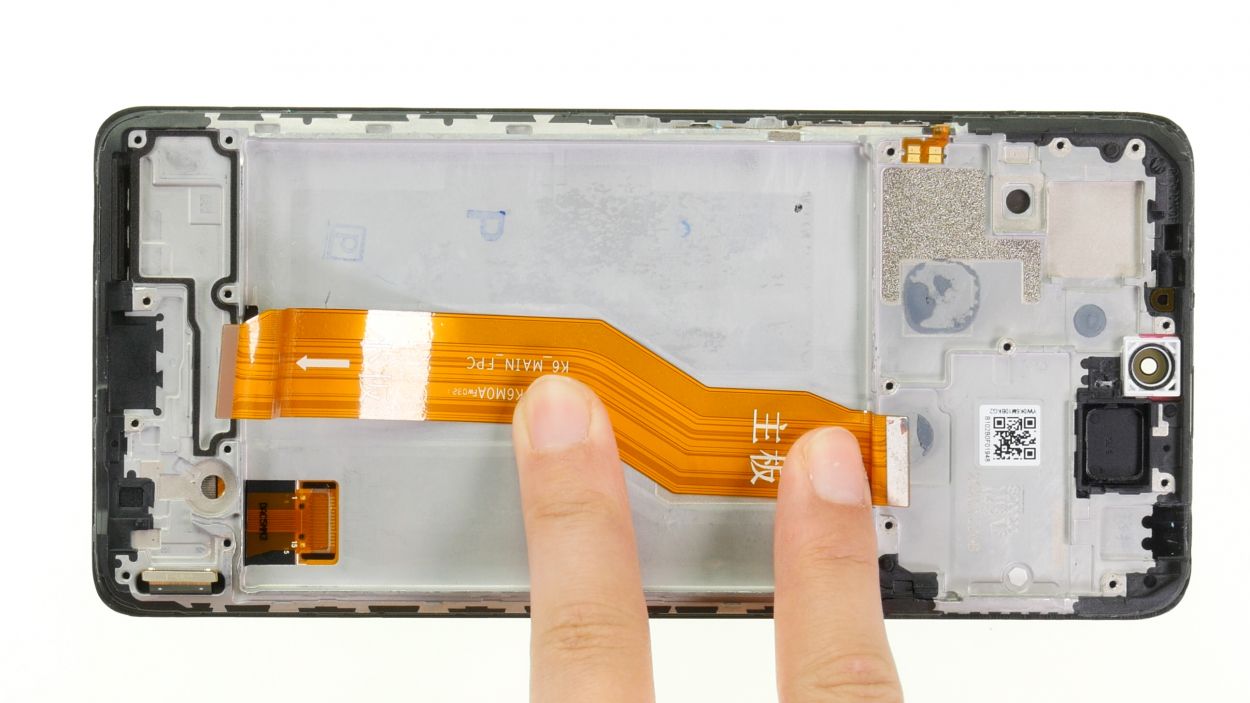
– Get your replacement screen ready by peeling off all those pesky films and seals.
– Carefully place the connecting cable back in its original spot at the bottom of the case.
– Give it a good press so the remaining glue can do its thing and bond securely.
Tools Used
Step 27
– Gently pop the vibration motor back into its cozy spot and give it a light press to secure it. You’ve got this!
Tools Used
Step 28
To make sure the USB board fits just right, you’ll want to gently nudge the USB socket into its cozy little spot in the case frame. A little tip? Angle the board ever so slightly for the perfect placement!
– Time to put the board back where it belongs! Gently place it back in its original position within the screen unit.
Tools Used
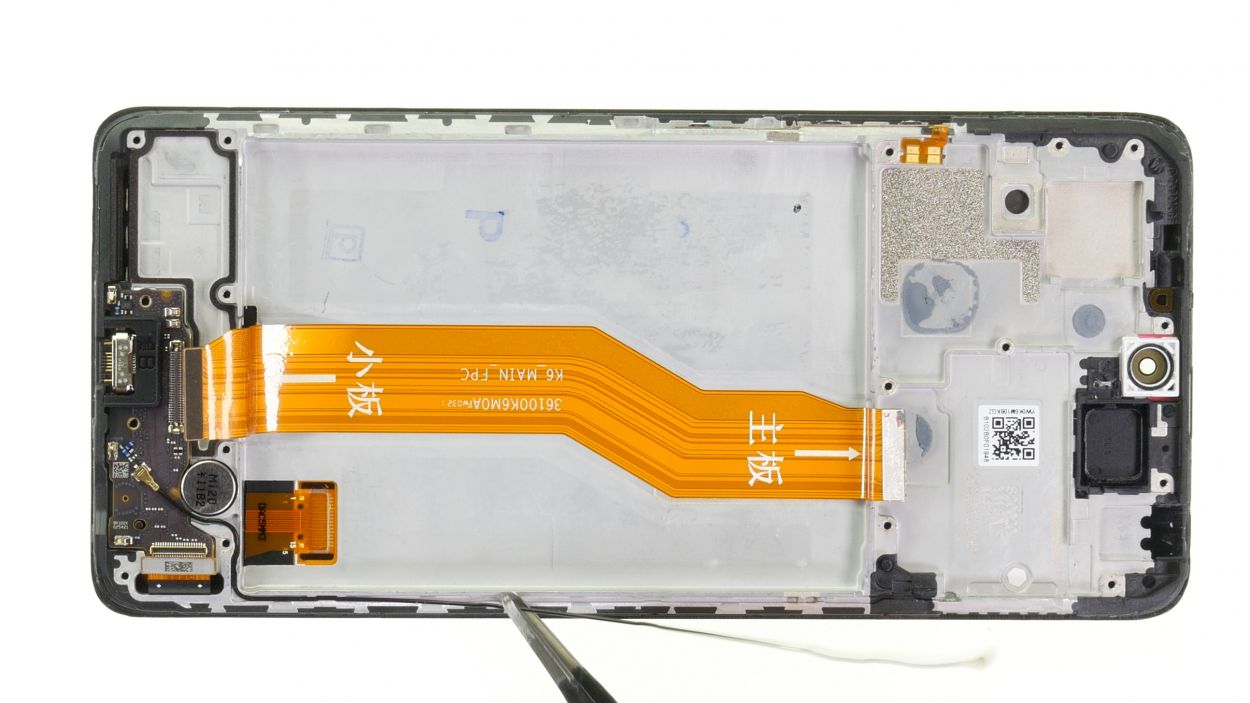
Step 29
– Use tweezers to carefully push the antenna cable back into its guide at the edge of the case.
Tools Used
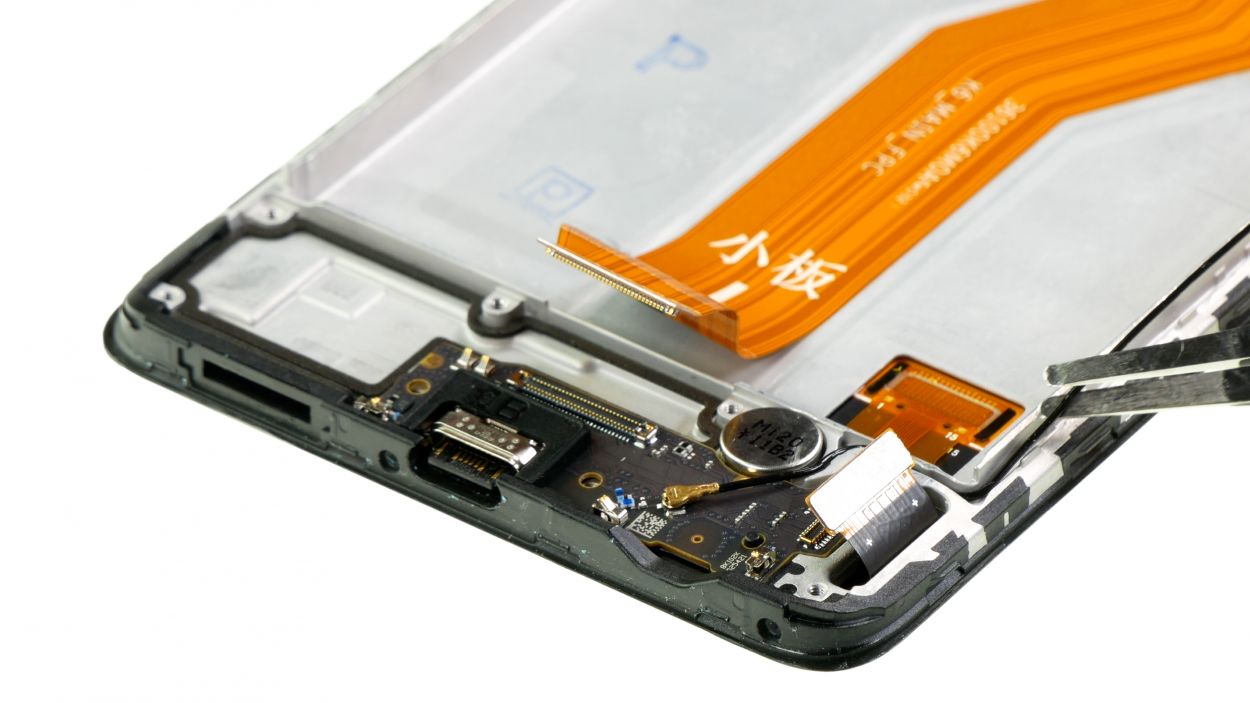
Step 30
Hey there! Remember, connectors are like friends—never force them together! Doing so could cause some serious damage to your device. Keep it gentle and everything will be just fine!
– Get that screen connector back on the USB board, stat! Press down gently, and you’ll know it’s in place when you hear and feel that satisfying click.
Step 31
Hey there! Just a friendly reminder: when you’re popping in that speaker, give the connecting cable a little bend. It’ll keep everything snug and safe from any mishaps!
– Pop that speaker into place! Just make sure the connecting cable is lounging comfortably over the speaker.
Tools Used
Step 32

– Reattach the connecting cable by gently pressing its connector onto the USB board.
Step 33

– Nestle that earpiece back into its cozy little home and give it a solid press. You’re doing great!
Tools Used
Step 34
To keep those delicate flex cables safe while you’re sliding in the motherboard, just give them a little nudge to the side. Easy peasy!
To slide that motherboard in like a pro, give it a little tilt! It makes the whole process smoother and way more fun.
– Gently place the board back into the screen unit and give it a little press to secure it in place.
Tools Used
Step 35
– Gently press the connecting cable and the antenna cable back onto the motherboard until you hear and feel them snap into place. It’s like giving them a little high-five!
Step 36
– If the heat protection foil is still in good shape, feel free to pop it back on over the connecting cable connector or the earpiece. You’ve got this!
Tools Used
Step 37
– Pop that front camera back into its home!
– Now, connect its connector to the motherboard. You’ll hear and feel a satisfying click – high five to you!
Tools Used
Step 38

That handy white stripe on the adhesive film is your best buddy for getting everything lined up just right!
Step 39
Take it easy when connecting the fingerprint sensor! We want to keep that delicate flex cable happy and unstretched. You’ve got this!
– Gently lean the middle frame against the screen unit like it’s taking a cozy break.
– Reconnect the fingerprint sensor by pressing its connector onto the motherboard with a soft touch. Listen for that satisfying click – it’s like a tiny high-five!
Step 40
Last step: Battery connector! Avoid a short circuit by plugging it in only after everything else is connected. Easy peasy!
– It’s time to connect the battery back to the motherboard!
Step 41
Make sure the middle frame is sitting pretty – level and even everywhere! If it’s sticking out in some spots, loosen it up and double-check that everything is installed correctly and those flex cables aren’t getting jammed. If you need help, you can always schedule a repair.
– With the battery and fingerprint sensor connectors happily connected, it’s time to gently fold down the middle frame.
– Give it a nice firm press all around the screen unit. If you listen closely, you should hear it click into place like a perfect puzzle piece.
Step 42
9 × 4.3 mm Phillips
8 × 3.3 mm Phillips
– Fasten the middle frame with the 17 Phillips screws.
Tools Used
Step 43
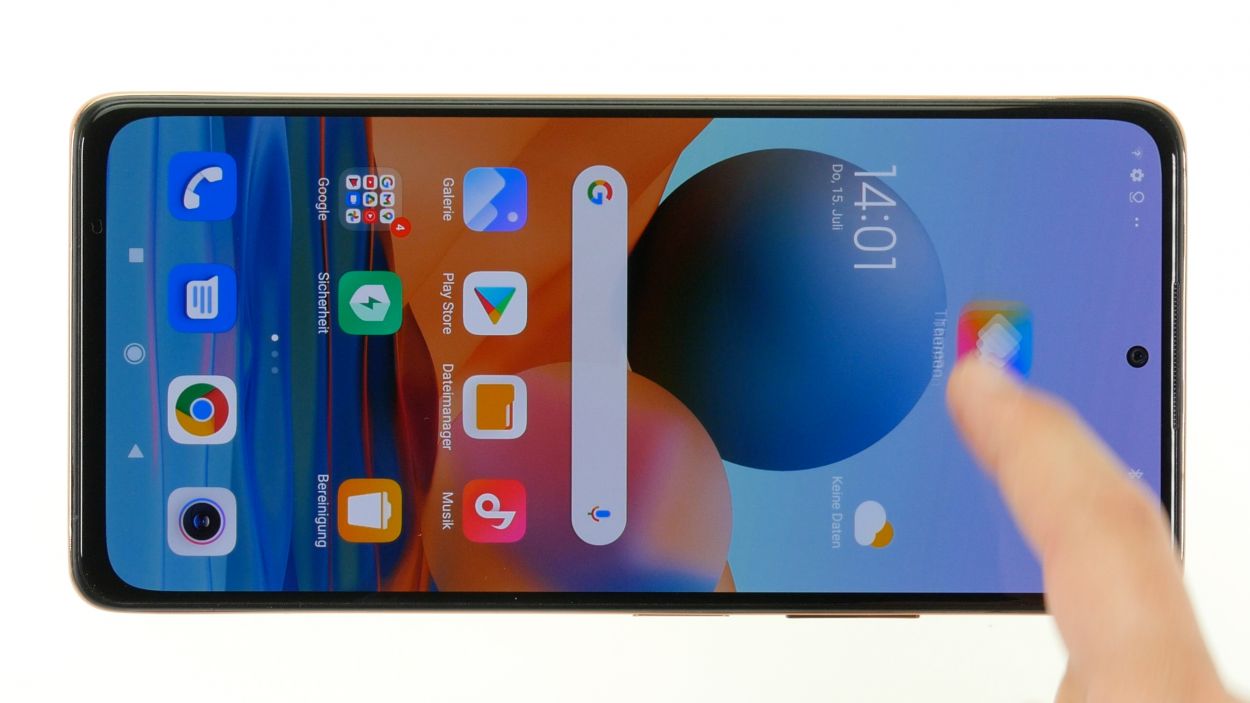
Before you get your Xiaomi all glued up again, take a moment to test its functionality. It’s a great idea to make sure everything’s working smoothly before sealing the deal!
– Fire up your Redmi Note 10 Pro and give it a whirl!
– Swipe an app across the screen to check if the touch is as responsive as ever.
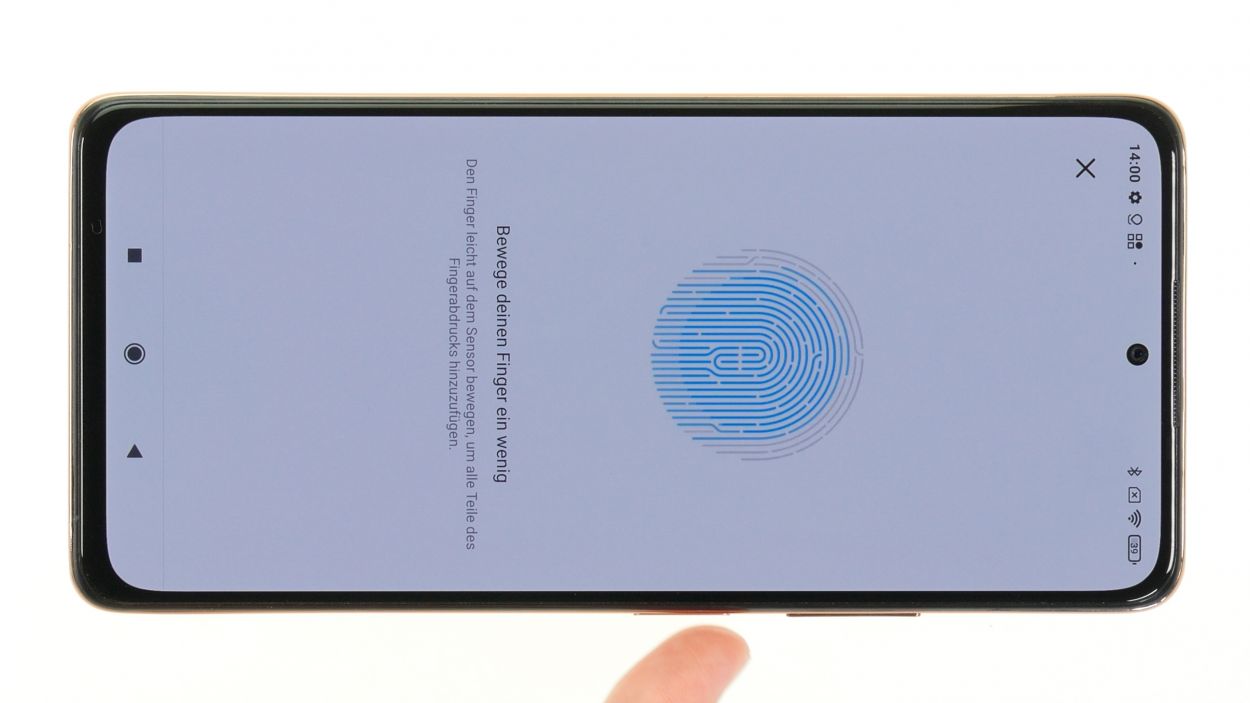
– Don’t forget to test out that fingerprint scanner – make sure it’s still got your back!
– For a thorough check on other components, feel free to use our handy checklist as your guide.
Step 45
Give that back cover a little extra love by running some hot air along the edges again to ensure the glue sticks like it should. And hey, if you want to add some weight to your device, grab a few books and let them sit on top for a few minutes. It’s like a cozy blanket for your gadget!
– Wrap up your Xiaomi Redmi Note 10 Pro repair by gently pressing the back cover back onto the screen unit. You’ve got this!
Tools Used
- heat gun to heat parts that are glued on so they’re easier to remove.
In most cases, you can also use a hairdryer.” rel=”noopener”>Heat gun
Step 46

Remember to pop that SIM tray back in the right way! It’s like a puzzle piece – it only fits one way, so don’t force it. If you need help, you can always schedule a repair.
– Pop that SIM tray back in once you’ve snugged the back cover down nice and tight!