How to Tie a Tie: Half Windsor Tutorial (Apparel N/A)
How to Tie a Tie: Half Windsor
Tying a tie can seem like a daunting task, but with a little practice, you’ll be a pro in no time. In this tutorial, we’ll show you how to tie a Half Windsor knot, a classic and stylish way to keep your tie in place.

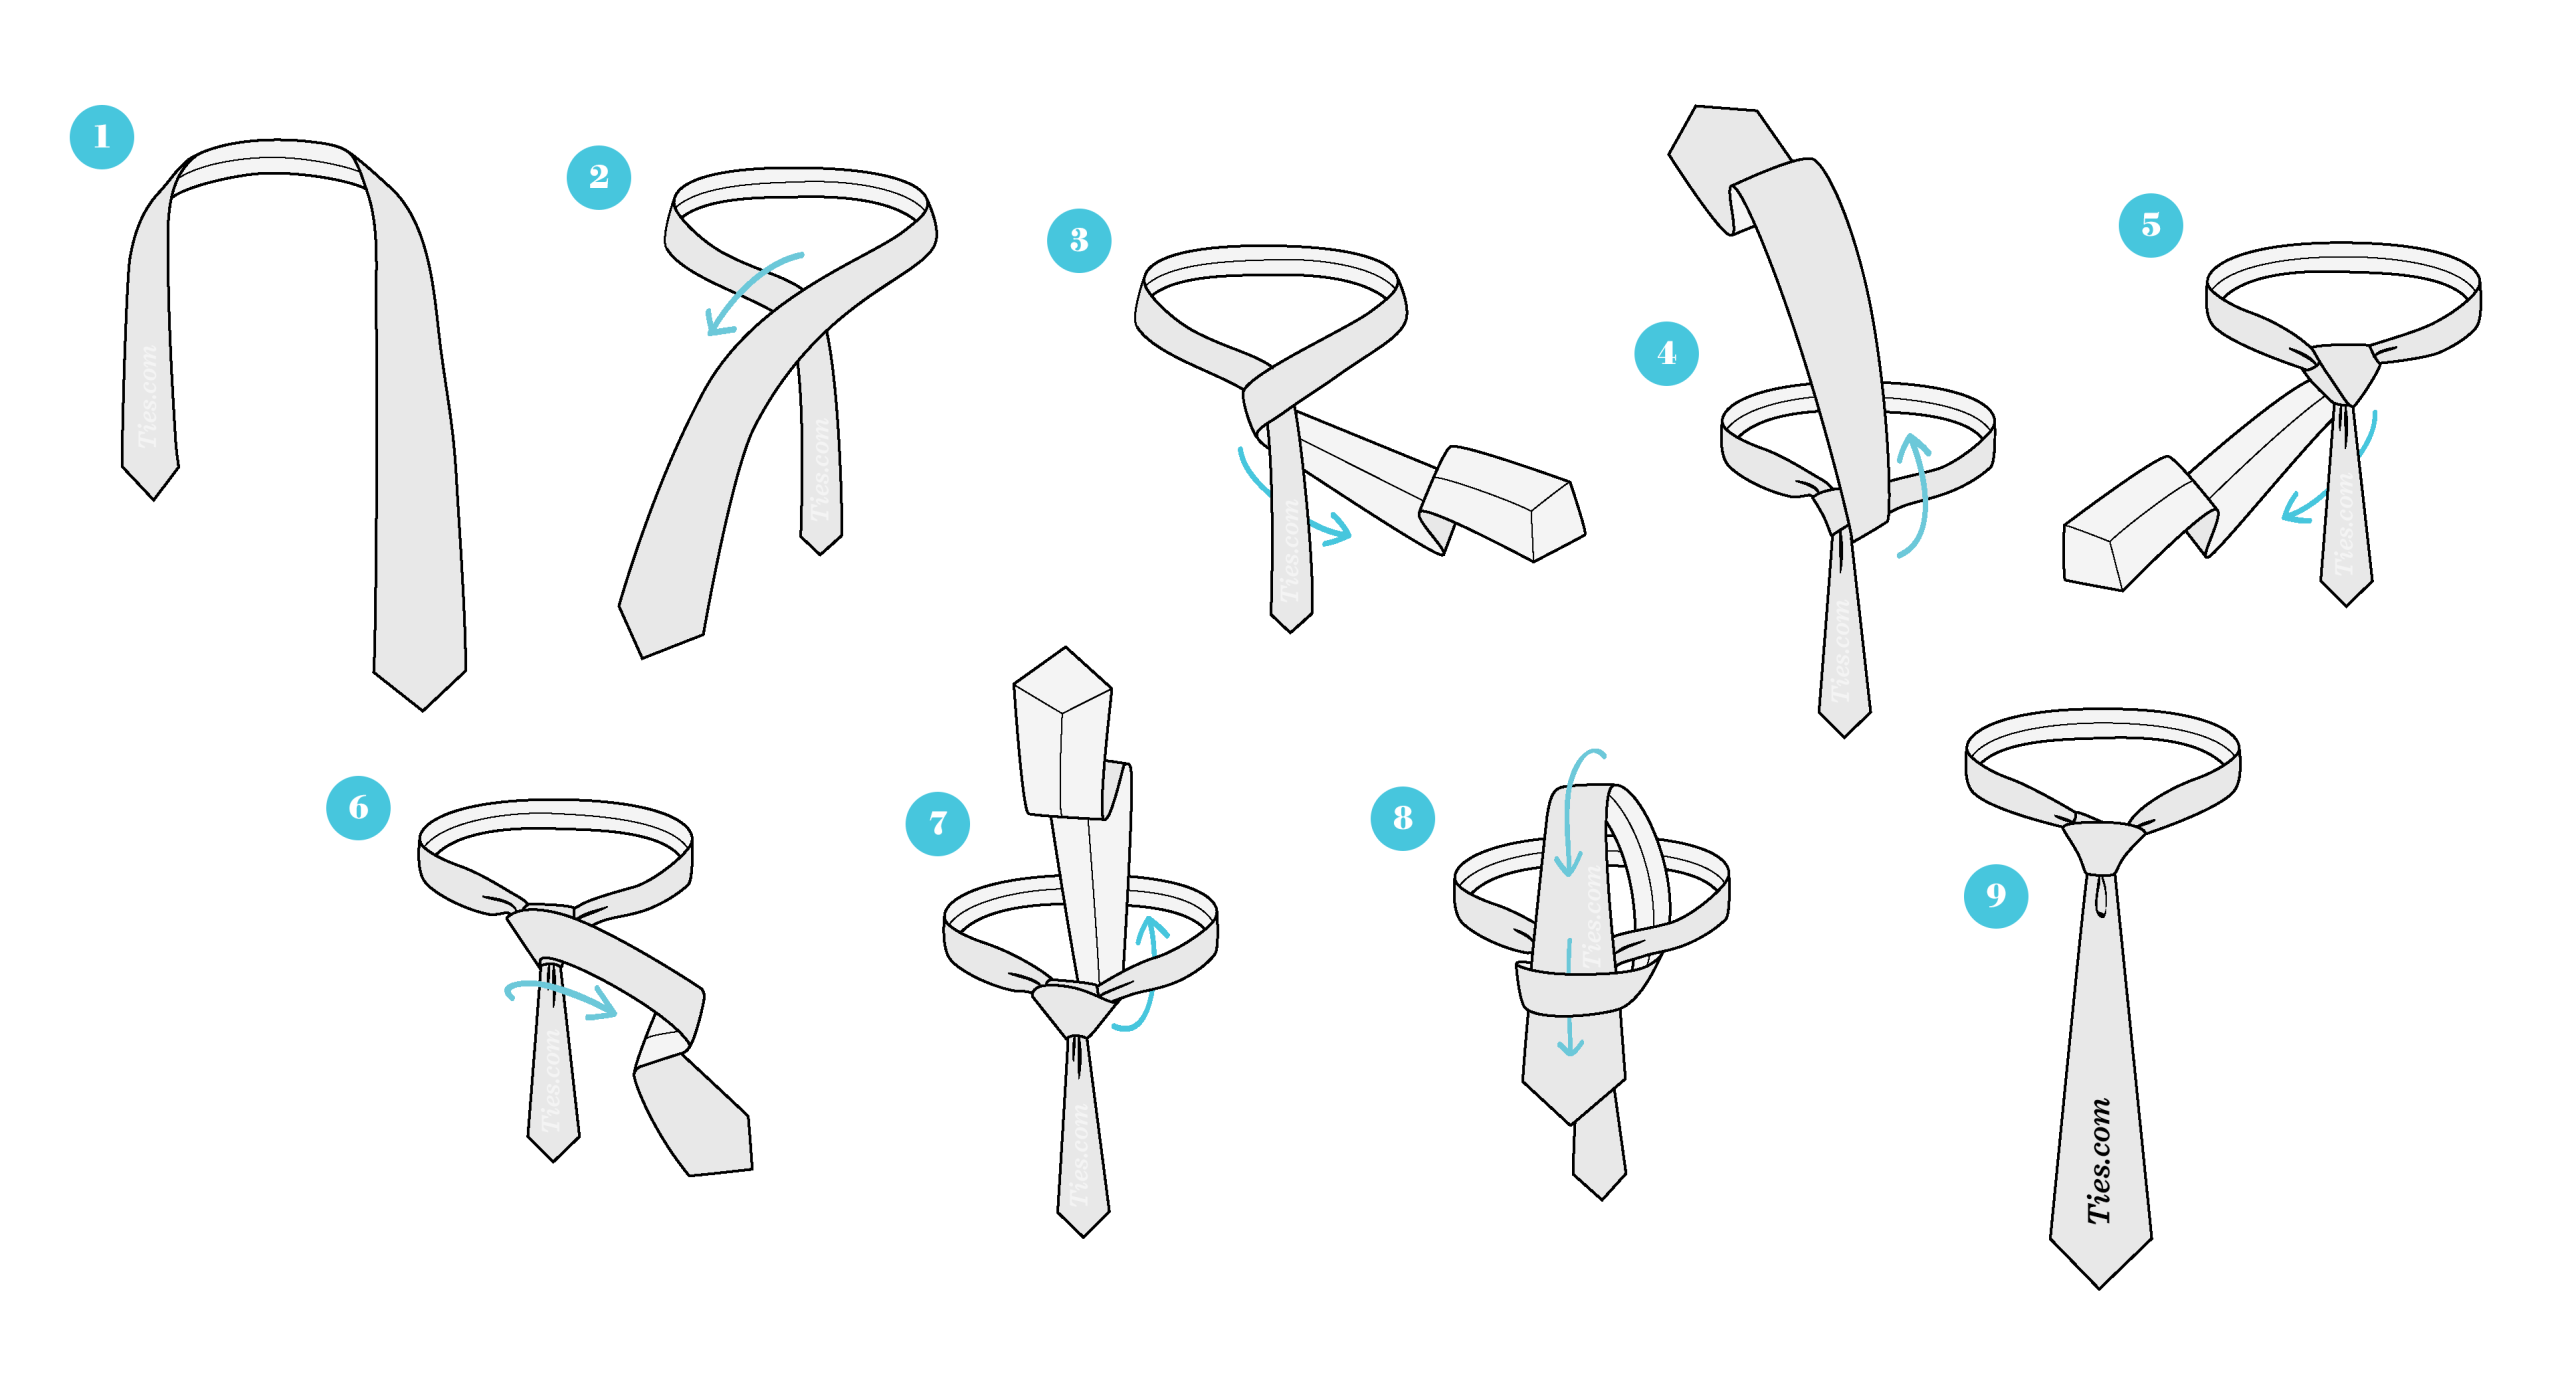
Step 1: Begin with the basics
Start by facing a mirror and standing up straight. Place the tie around your neck with the wide end on your right side and the narrow end on your left side. The tie should be hanging down about 12 inches below your neck.
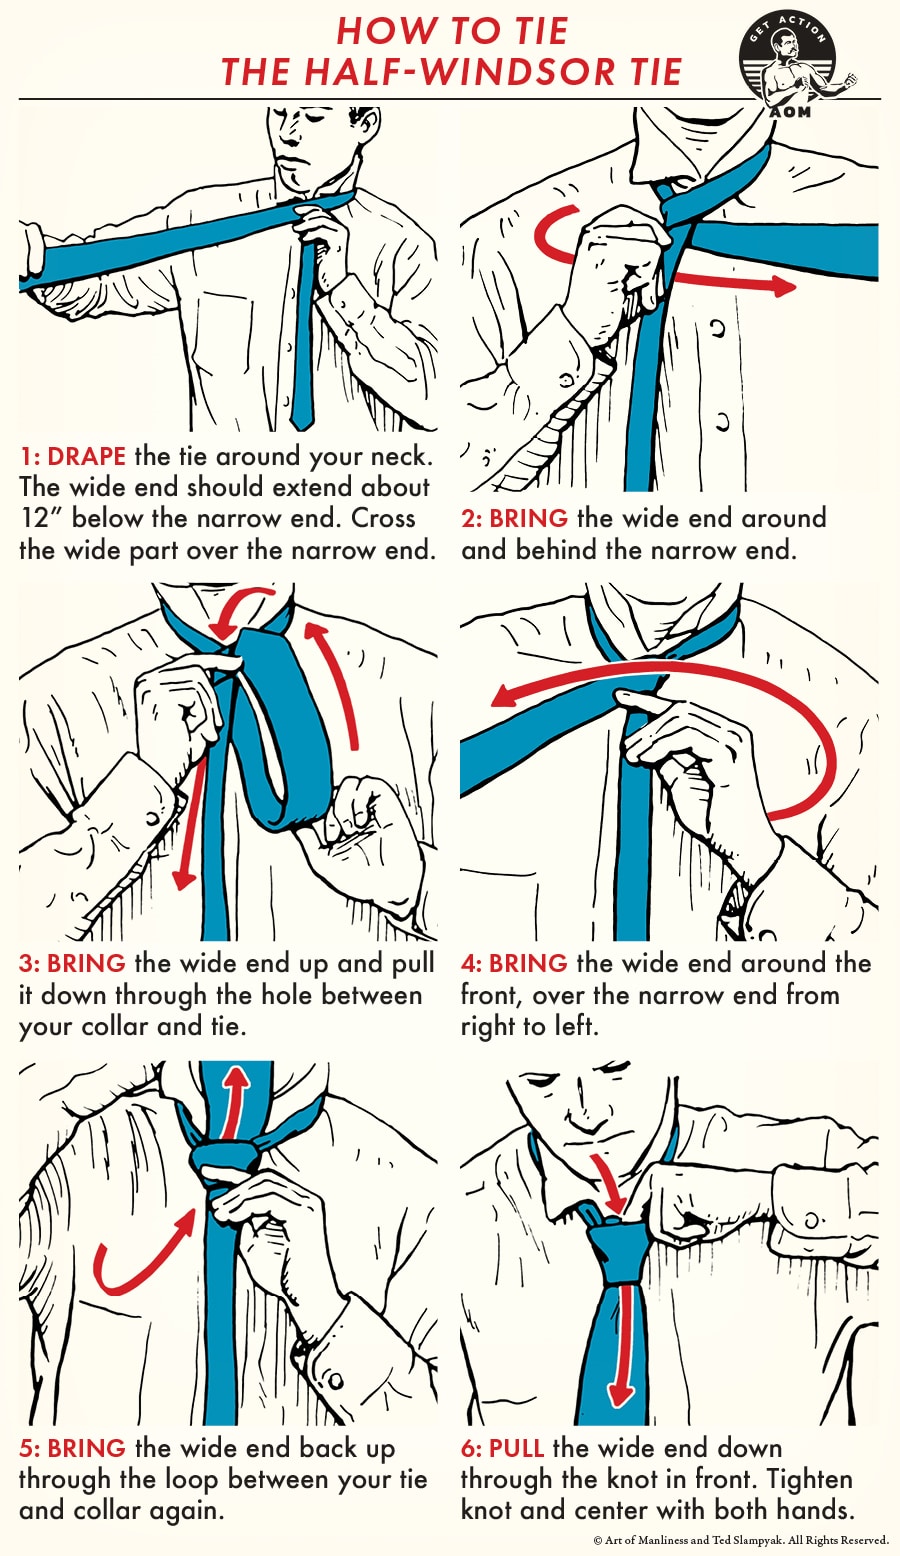
Step 2: Cross the wide end over the narrow end
Take the wide end of the tie and cross it over the narrow end, so that it forms an “X” shape. This is the starting point for the Half Windsor knot.

Step 3: Loop the wide end around the narrow end
Take the wide end of the tie and pass it behind the narrow end. Then, bring it up and over the knot, so that it forms a loop.
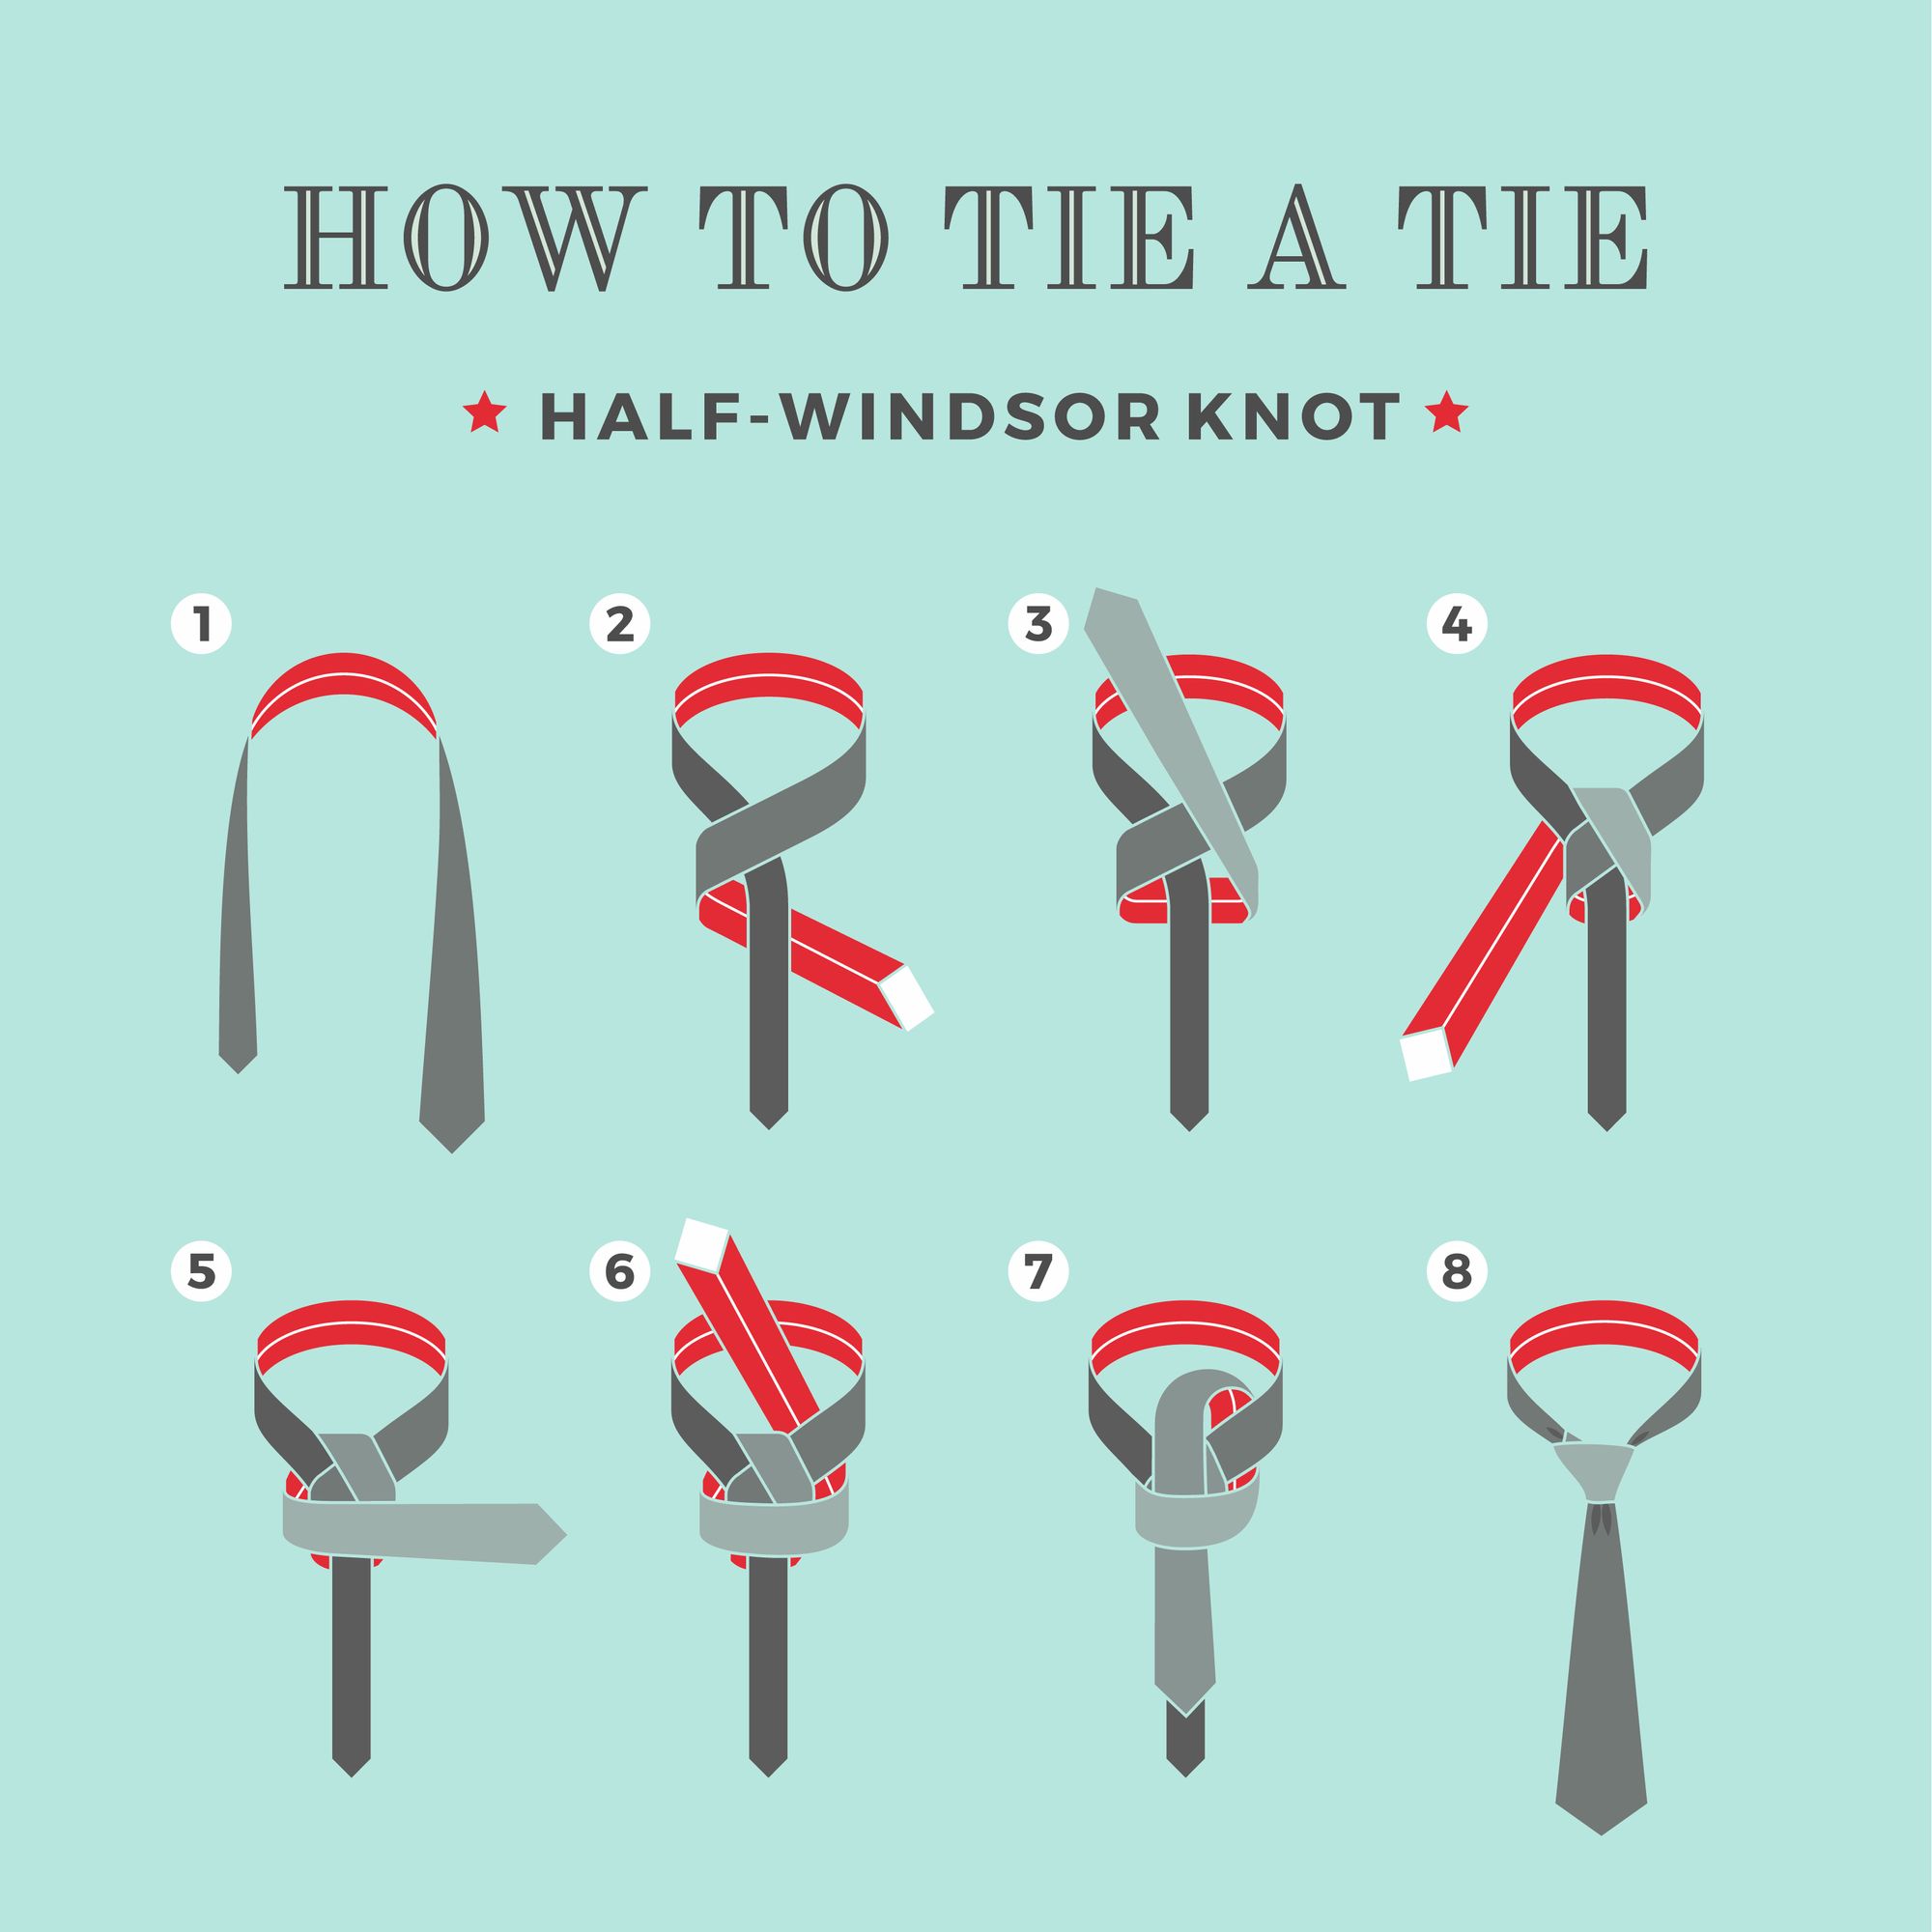
Step 4: Pass the wide end through the loop
Take the wide end of the tie and pass it through the loop you just created in step 3.
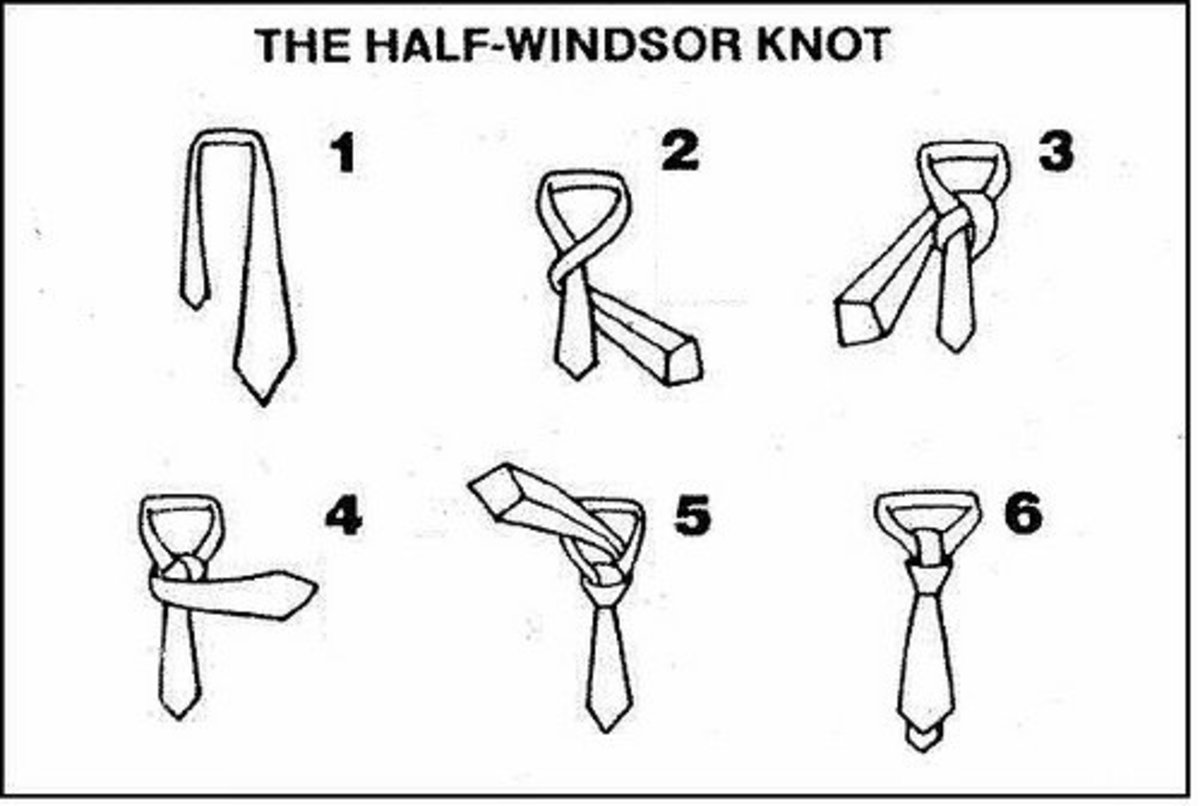
Step 5: Tighten the knot
Take the wide end of the tie and pull it gently to tighten the knot. You should start to see the Half Windsor knot take shape.

Step 6: Adjust the knot
Adjust the knot so that it’s centered and the edges are even. You can also adjust the tightness of the knot to your liking.

Step 7: Tuck the narrow end into the keeper loop
Take the narrow end of the tie and tuck it into the keeper loop. This will keep the tie in place and prevent it from coming undone.
Step 8: Final adjustments
Make any final adjustments to the knot and tie. You should now have a perfectly tied Half Windsor knot.

And that’s it! With a little practice, you’ll be tying a Half Windsor knot like a pro. If you’re having trouble, don’t worry – it takes a little time and patience to get the hang of it. If you’re still having trouble, consider scheduling a repair with Salvation Repair, where our expert technicians can help you with all your repair needs.