How to Use the Anti-Clamp for One Electronics Skills
Duration: 45 minutes
Steps: 13 Steps
Get ready to tackle your device with an Anti-Clamp! Just follow these simple steps to pop it open like a pro. If you need help, you can always schedule a repair.
Step 1


For the Anti-Clamp to do its magic, it needs nice, smooth surfaces for its suction cups to stick. Make sure those surfaces are ready to go!
Step 2


– Give that blue handle a gentle tug back to set the Anti-Clamp arms free!
Step 3


– Give the Anti-Clamp a little twist to the side so it doesn’t block your starting edge. Check out your original guide to see which edge to kick things off with.
– Position the suction cups right over a nice, smooth spot on your device, close to the starting edge.

Step 5


– Make sure those suction cups are lined up just right for the Anti-Clamp to do its magic. Think of it as teamwork!
– If they aren’t aligned, they might just pop off when you least expect it. No worries! Just grab those pull tabs, gently lift the cups off, and give them a little re-centering love.
Step 6


– Slide the blue handle forward to secure the arms in place.
Step 7

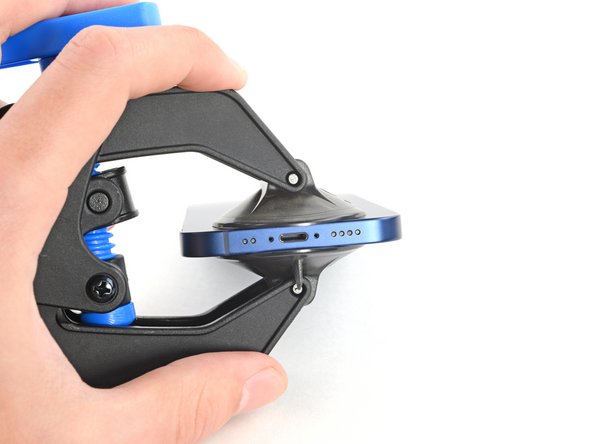
– Set your device on a sturdy support so the Anti-Clamp can stand tall and proud all on its own.
Step 8


Most adhesives give way under steady tension rather than sudden force. So take your time with this step to avoid sending those suction cups flying or unexpectedly popping open your device. You’ve got this!
– Give that handle a good twist to the right, making a full spin (360 degrees) or until you see those cups start to stretch a bit. You got this!
Step 9


– For those petite devices, slide a warm iOpener through the arms of the Anti-Clamp to give your device a little love and warmth.
– For the bigger gadgets, or if you’re rocking an iPhone 12 or newer, grab a hair dryer or a heat gun to gently melt away that adhesive along your starting edge.
Step 10


– Take a breather and wait for a minute to let the adhesive have a moment to chill and create a little gap.
– If after a few heating sessions your device is still playing hard to get, give that knob a gentle twist—just a quarter turn, and let’s see what happens!

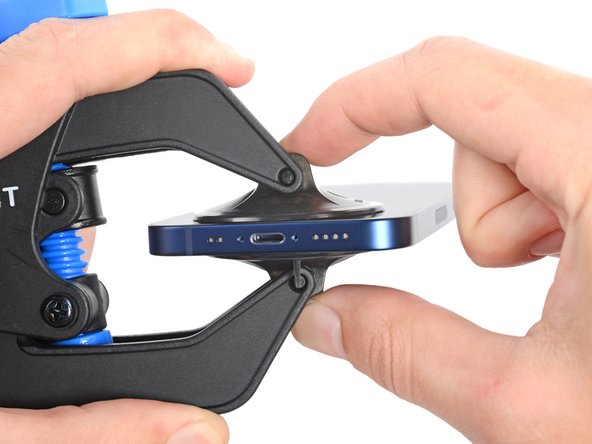
Step 12


– Give that blue handle a gentle tug towards the unlock icon to let those arms loose.
– Carefully peel the suction cups away from your device using their handy pull-tabs.
– Take off the Anti-Clamp and place your device on a nice, flat surface.
Step 13

– Hop back to your original guide and keep the disassembly party going! Just breeze past any steps that involve using a suction handle to open the device.