HTC One M8 Headphone Jack/Micro USB Board Replacement
Duration: 45 minutes
Steps: 12 Steps
Heads up! Your device might have some copper shielding and tape covering the back of the display assembly. Don’t worry, it’s easy to remove – just gently take it off to access the motherboard.
Get ready to tackle the replacement of the headphone jack/micro USB board in your HTC One M8! Just a heads up, your device might be sporting a fair bit of copper shielding and tape on the back of the display assembly, as you can see here. If that’s the case, take your time and carefully peel it away to access the motherboard. You’ve got this!
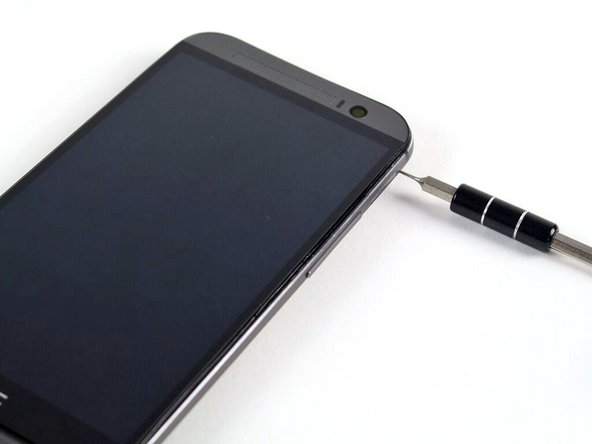
Step 1


You might need to put in a bit of elbow grease for this one.
– Take a SIM card eject tool or even a trusty paperclip, and poke it into the tiny hole on the SIM card tray—it’s hanging out on the upper left side of your phone.
– Give it a firm press, and voilà, the tray pops out!
Tools Used

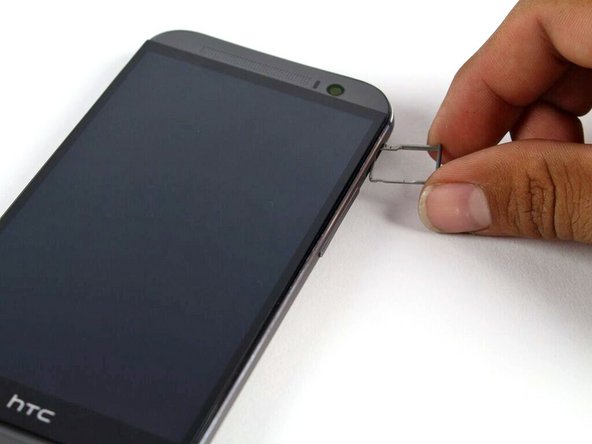
Step 2

– Gently slide out the SIM card tray from your HTC One M8. Don’t force it – it should come out with a little nudge!
– When you pop that SIM card back in, make sure it lines up just right with the tray. A little alignment goes a long way!
Step 3

You’ll need to put in a bit of elbow grease for this one.
– Time to get started! Insert a SIM card eject tool or a paperclip into the tiny hole on the microSD card tray, which you’ll find on the top right side of your phone.
– Gently press the tool or paperclip to eject the tray – it’s like magic!
Tools Used
Step 4
– Time to get started! Remove the microSD card tray assembly from your HTC One M8 – it’s the first step towards getting your device up and running again.
– When you’re ready to put everything back together, make sure the microSD card is properly aligned with the tray. It’s like putting a puzzle piece in the right spot – easy peasy!
Step 5

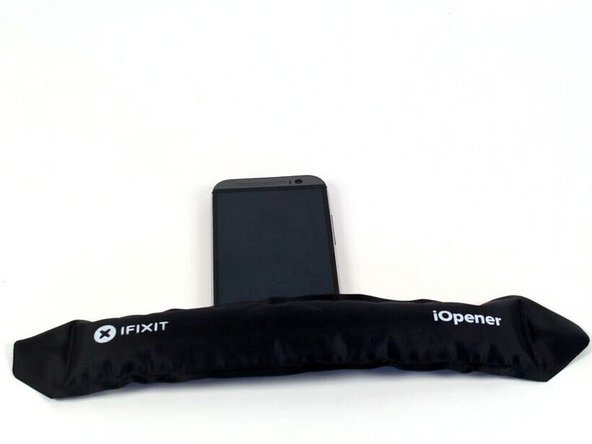
Check out the iOpener guide for some handy tips on how to get the most out of your iOpener.
– Time to get this repair started! Use an iOpener or heat gun to loosen the adhesive on the upper and lower speaker grilles. This will help you get a grip on the situation and make the rest of the repair a whole lot easier!
Tools Used

Step 6


The adhesive can be a bit of a sticky situation, but a dab of Goo-gone will clean it up nicely.
– Grab a plastic opening tool and carefully lift the lower speaker grille—easy does it, no rush!
Step 7


– Grab a plastic opening tool and, with a little finesse, lift up that upper speaker grille. Gentle hands win the day!
Step 8

– First things first, let’s tackle those two shiny, silver 3 mm Phillips #00 screws sitting at the top. Remove them with confidence!
– Now, let’s move on to the bottom where four black 4 mm T5 Torx screws are waiting for their turn. Unscrew them like a pro!
Step 9


You might need to channel your inner superhero to gently separate the casing. A little muscle goes a long way!
We’ve got a metal spudger in the photo, but trust us, a nylon spudger is the way to go for keeping your device looking sleek and scratch-free.
Heads up! Don’t let the power button disappear on you—it’s chillin’ loosely on top of the lower chassis, so keep an eye on it.
– Use a spudger and plastic opening picks to carefully work your way around the edges of the phone. This will help loosen up the clips holding the rear case to the display assembly. Take it slow and steady, and you’ll have it open in no time!
Step 10


– Alright, superstar, grab your Phillips #00 screwdriver and unscrew those two shiny silver 2mm screws keeping the battery connector locked onto the motherboard. They’ve done their job, but it’s time for them to move on.
– Next, with finesse and a bit of swagger, use your trusty plastic opening tool to gently persuade the battery connector to come up and away from the motherboard. Be cool, be gentle—they’re fragile friends.
Step 11
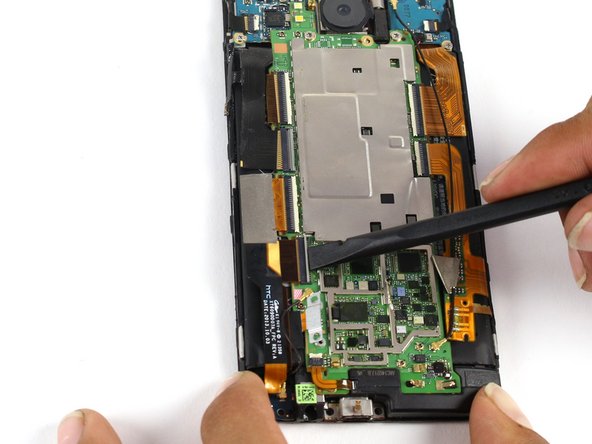

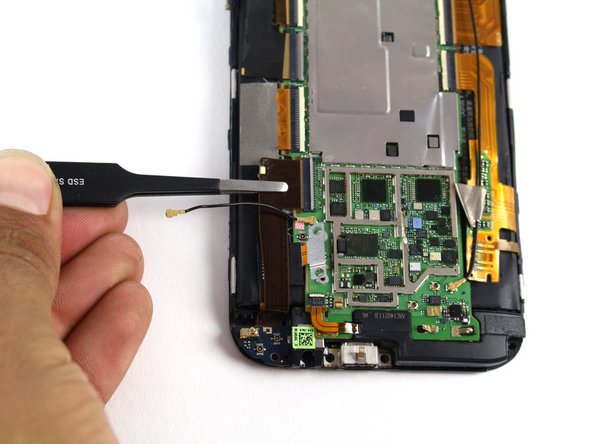
– Grab your trusty spudger and gently pop off those two ZIF connectors—easy does it!
– Use the flat end of your spudger to carefully unhook the sneaky black antenna cable.
– Take some tweezers, channel your inner artist, and liberate those ribbon cables from the ZIF connectors. Precision is key!
Tools Used

Step 12


Gently nudge that little ribbon cable out of the way to access the screw. You’ve got this!
– First things first, grab that shiny 4mm T5 Torx screw and give it a twist to free the headphone jack/micro USB board from its cozy spot.
– Now, with your trusty tweezers or a plastic opening tool, gently nudge the headphone jack/micro USB board upwards, coaxing it out of the phone like a pro!
Tools Used
Success!