
Huawei Ideos S7 Slim Camera Replacement
Duration: 45 minutes
Steps: 8 Steps
The camera is tucked right behind the LCD, and you’ll get to it once the logic board is out of the way.
Step 1


- Place your tablet on a nice, flat surface to make sure the screen stays safe and sound.
- Gently slide the larger part of the back cover off the tablet. No need to rush, it should come off smoothly!
- Once you do that, you'll see the battery hanging out, ready to be dealt with.
Step 2


Heads up! Use the slot near the bottom of the device exactly as shown. Trying to pry it up anywhere else is a no-go and might mess up your battery or the device itself.
- Gently pop the battery out using your finger.
Step 3


- Grab a plastic opening tool and carefully work it around the top cover casing on all three sides to gently lift it off.
Step 4

- Using a T5 hexagonal tool, let's get those nine black 2.5 mm torx screws out of the picture! Carefully set them aside on your magnetic mat so they don’t wander off. You've got this!
Step 5


- Take your trusty plastic opening tool and carefully wiggle it along the edges to lift off the back cover of the tablet, one side at a time.
Step 6


There's a sneaky 5mm screw hiding beneath the round white tape right in the middle of the logic board. Keep your eyes peeled for it!
- Grab your trusty Phillips #00 screwdriver and get ready to unscrew these bad boys:
- Four 5mm grey Phillips screws holding down the logic board.
- Seven 3mm small grey Phillips screws—four on one side, three on the other—from the black side casing.
Tools Used

Step 7


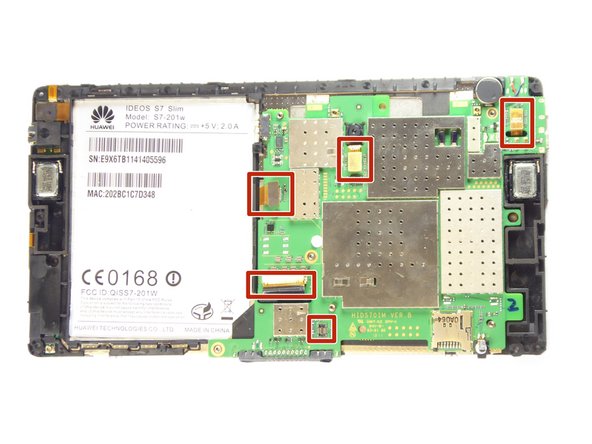
- Unplug the five cables hooked up to the logic board, then gently lift the logic board out of its home like a pro.
Step 8


Be gentle with that cable! Yanking on it might put that camera in a tight spot even if it’s still working like a charm. Tread carefully, my friend!
You might want to grab some fresh adhesive to make sure that new camera sticks around nicely.
- Gently unplug the camera by disconnecting its cable.