iFixit Fast Charger Teardown
Duration: 45 minutes
Steps: 4 Steps
The clear plastic casing of the iFixit Fast Charger makes it easy to see what’s happening inside. But what about the rest of the device? Curious how it’s put together or want to make your own custom housing? Whether you’re interested in 3D printing a replacement case or diving into some board-level repairs, check out the schematics here. If you need help at any point, you can always schedule a repair.
Step 1


Pushing in those Jimmys and picks may take a bit of muscle, and you might notice some scratches on the case. A little wear and tear when opening is just part of the adventure!
We’re starting with the Europlug version of the Fast Charger, but don’t worry, the steps are pretty much the same for other prong types too. Let’s dive in and get this charger back in action!
– The charger’s clear shell lets you peek at its inner workings—no prying required. Still, if you’re feeling adventurous, we totally get wanting to pop it open.
– The black plastic prong cover is clipped onto the clear body with some pretty tenacious tabs. You’ll need a Jimmy or two and some opening picks to get those tabs to budge.
Step 2


– If your goal is just to swap out the case, you’re all set! Want to customize your charger? Grab the STP file here and go wild with your own 3D printed twist.
Step 3
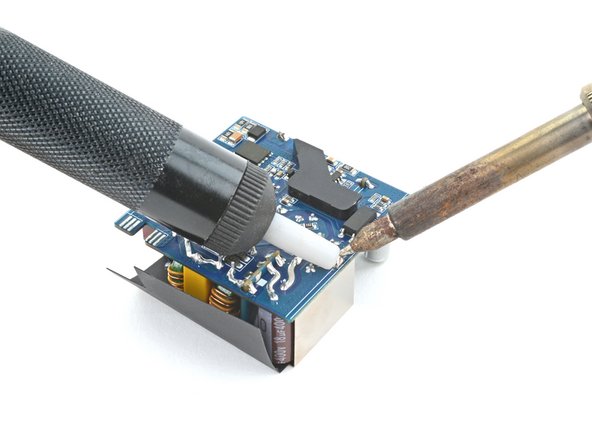
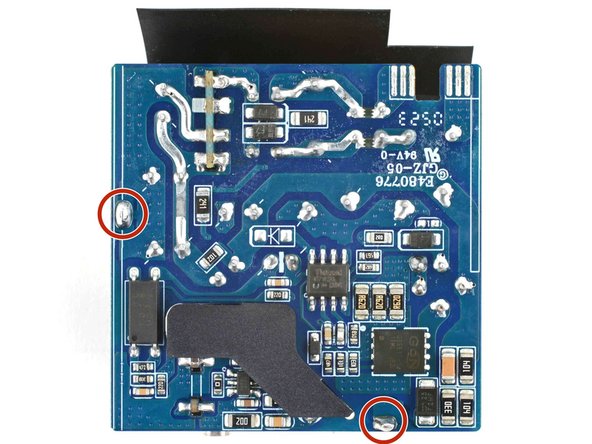

– There’s a nifty electromagnetic interference shield on top of the charger that also works as a heatsink. It’s attached to the board with two through-hole pins.
– To free it, simply desolder the pins using your soldering iron and desoldering pump. Take your time and make sure it comes off clean!
Step 4

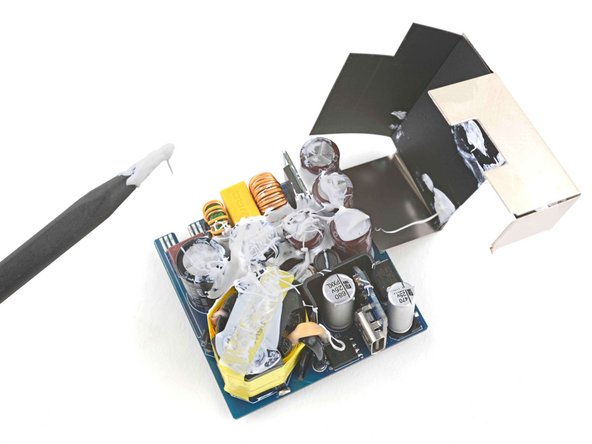
– Beneath the shielding, you’ll spot a whole lot of thermal compound spread over the guts of your device. Glue isn’t usually our jam, but here it’s all about keeping things chill—literally. Fast charging heats things up, and this stuff helps keep a cool head.
– The thermal compound acts like a heat highway, pulling warmth away from those sensitive electrical components and sending it out through the shielding. Bonus: it also keeps everything in place.
– Heads up—this compound stays soft, so your tool will come out looking like it’s been through a snowstorm. Any deep-dive repairs down here are gonna get a little messy.
Success!