iMac Intel 21.5″ EMC 2889 Teardown
Duration: 45 minutes
Steps: 12 Steps
iMac Intel 21.5″ with Retina 4K Display
Apple season is here, and so is a fresh look at the 21.5″ iMac Intel EMC 2889. Curious about what’s packed inside this sleek machine? Let’s open it up and see what makes it tick. Craving more details on its high-res sibling? Check out our teardown of the iMac Intel 21.5″ Retina 4K Display. Hungry for more tech insights? Follow us on Twitter, Instagram, or Facebook.
Step 1


We’ll dive into those accessories in just a bit, stay tuned!
– The 2015 21.5″ iMac brings some solid specs to the table:
– A 1.6 GHz dual-core or a beefier 2.8 GHz quad-core Intel Core i5 processor
– 8 GB (4×2 GB) of speedy 1867 MHz LPDDR3 RAM, and if you’re feeling fancy, you can bump it up to 16GB
– Intel HD Graphics 6000 or Intel Iris Pro Graphics 6200 – both great for your display needs
– A 1 TB (5400-rpm) hard drive, with options to upgrade to a 1 TB Fusion Drive or a fast 256 GB of flash storage
– Wi-Fi 802.11ac and Bluetooth 4.0 for smooth connectivity
Step 2


– Before we dive into the shiny new features, let’s take a quick detour to the left rear side of this updated iMac.
– This iMac may still be rocking the classic 21.5″ size and model A1418, but check it out: it’s sporting a fresh EMC number—2889.
– On the back, you’ll spot the usual suspects: headphone jack, SD card slot, four speedy USB 3.0 ports, two Thunderbolt 2 ports, and good old gigabit ethernet.
Step 3


– With our specially designed iMac service wedge, opening the device is a breeze. The wedge keeps the hinge stable while you work—no wobbling, no hassle.
– No, we’re not serving pizza here! We’re just using our trusty iMac opening tool to slice through the display adhesive. We’re making good progress!
– Just like the previous generation, the display cables on the new iMac can make the opening process a bit trickier. But don’t worry, we’ve got this!
Tools Used
Step 4


– The versatile iMac opening tool makes quick work of peeling away the stubborn adhesive.
– We’ve got separation — the display is free and clear!
– Now, let’s see what this machine is truly hiding inside…
Step 5

And once again, LG delivers an amazing high-resolution display. Kudos to them!
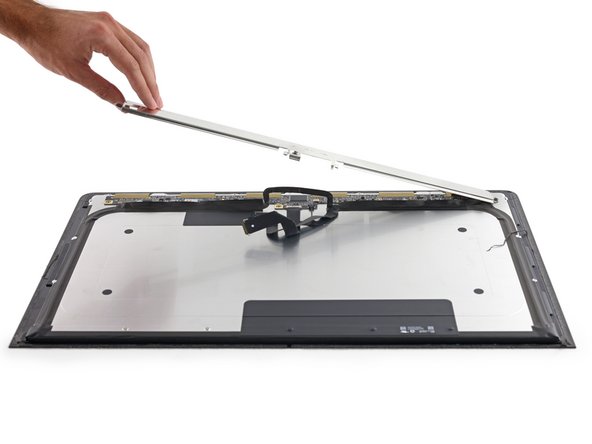
– Give that screwdriver a few twists and you’re rewarded with your first peek at the inner workings.
Step 6

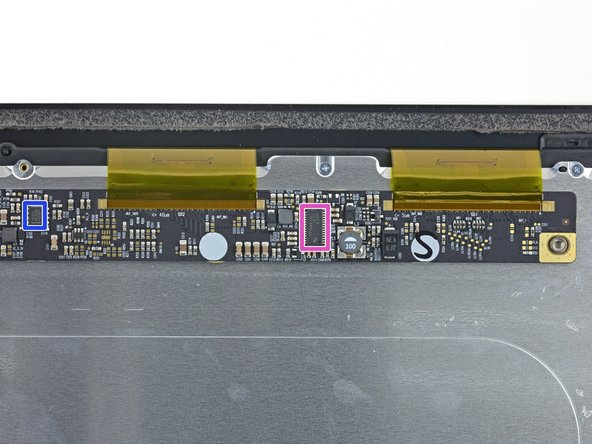
– Just like its predecessors, this iMac display comes with a full set of high-tech control hardware to keep everything running smoothly. Here’s what you’ll find inside:
– Texas Instruments BUF16821 Programmable Gamma-Voltage Generator – The brains behind the display’s color calibration.
– Richtek RT8250 Synchronous Step-Down Converter – Helping to efficiently manage the power for your screen.
– ST Microelectronics 404RP K516 – A key component to keep everything in sync.
– Winbond W25X20CL 2 Mb Serial NOR Flash Memory – Storing all the crucial data for your display.
– Parade DP627HDE DisplayPort LCD timing controller – Making sure your screen gets the right signals at the right time.
– Texas Instruments TPS54231 Step-Down Converter – Ensuring power reaches every part of your display at the right level.
– Texas Instruments TPS65161 Bias Power Supply for TFT LCD Panels – Powering the fine details of the TFT screen.
Step 7


Answer: Sorry, time travel isn’t an option—yet! Hang tight, maybe in the next software update.
– Is this 21.5″ iMac from last year, or have we somehow time-traveled to the same model? It looks almost identical, but don’t be fooled—there’s a key difference. The Fusion Drive in this version packs a smaller flash partition than the previous model.
– Still waiting for something groundbreaking, huh? Well, if you’re itching to dive into removing the speakers, hard drive, or fan, feel free to check out our guides for the previous generation. They’ve got all the details you need!
Step 8


– We hit a brief pause—seems the logic board has a new trick up its sleeve!
– This time, the antenna cables are held down with screw-secured cable clamps attached to the AirPort card.
– Once you unscrew and release the AirPort card, the logic board is ready to slide out from the back case.
Step 9

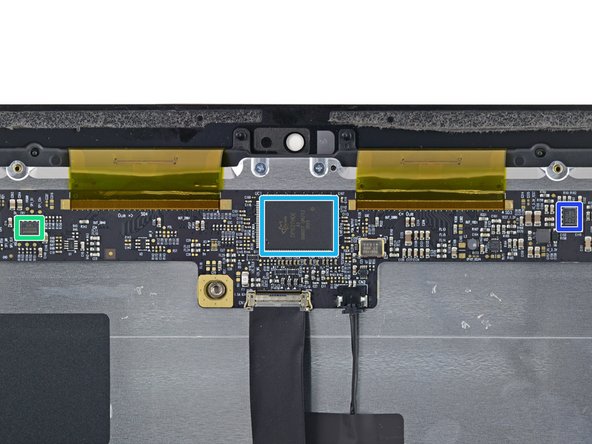
– Time to get acquainted with the logic board:
– Intel SR26C Core i5-5250U 1.6 GHz Processor (3M Cache, TurboBoost up to 2.70 GHz) featuring Intel HD Graphics 6000
– Samsung K4E6E304EE-EGCF 2 Gb LPDDR3 1867 MHz SDRAM—four chips combine for a total of 8 GB
– Broadcom BCM5776 runs the Gigabit Ethernet show
– Texas Instruments LM4FS1EH SMC Controller keeps things in sync
– Adesto AT45DB021E 2 Mb SPI Serial Flash Memory stores the essentials
– National Semiconductor 545AR6SU joins the party
– Delta 8904C-F Filter wraps up the lineup
Step 10

– Time to tame the beast! Begin by carefully removing the Intel DSL5520 Thunderbolt 2 Controller. It’s the backbone of your high-speed connections, so treat it with care.
– Next, let’s talk audio. Pop out the Cirrus Logic 4208-CRZ Audio Controller, the little chip that keeps the music flowing. A delicate touch is all you need here.
– Up next, we have the Macronix MX25L6473E 64 Mb Serial Multi I/O Flash Memory. This one’s a bit shy, but it’ll do wonders once it’s out of the way.
– Now, say hello to the Vimicro VC0359 Camera Processor. It’s the mastermind behind your device’s camera. Handle it gently, because your device’s eyes are precious!
– Ready for some power? The Intersil ISL62383CHRTZ Power Supply Controller controls the whole operation. If this little guy isn’t working, nothing is. Be mindful when removing it.
– Finally, remove the Intersil ISL95826. It’s not the flashiest, but it plays a vital role in making sure your device runs smoothly. Keep it safe and secure as you go!
Step 11
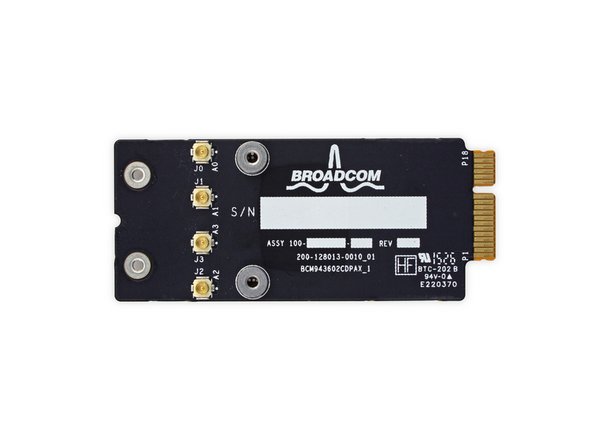

– We’ll also take a moment to remove the AirPort card, but honestly, it’s pretty much the same as the other steps—nothing too fancy.
– For a detailed look at this component, check out the 2013 teardown if you’re curious to see it in action.
Step 12


– iMac 21.5″ EMC 2889 Repairability Score: 1 out of 10 (10 is easiest to repair)
– Opening up the iMac isn’t too tricky with the right tools, but keep in mind that once you peel back the tape, you’ll need to replace it to finish any repair.
– The RAM is soldered to the logic board, so what you bought is what you’re stuck with. No upgrades here!
– The Fusion Drive connector is a no-show on the logic board, so any dreams of adding extra storage are dashed.
– The CPU is soldered in place, so swapping or upgrading it isn’t an option.
– The glass and LCD are fused together, which means replacing them can get a little pricier.
Success!
