iMac Intel 21.5″ Retina 4K Display Teardown
Duration: 45 minutes
Steps: 10 Steps
The 21.5″ Intel iMac is getting a sweet upgrade today—it’s getting a 4K display! If you’re hoping for this pixel-perfect upgrade, make sure you ask for the 4K model and not its less exciting sibling, the iMac Intel 21.5″ EMC 2889. And now, let’s dive right in and get this display swapped! If you’re looking for more tech teardown fun, we’ve got you covered—just follow us on Twitter, Instagram, and Facebook!
Step 1


– This guide covers the essentials of the 21.5″ Retina 4K iMac, which boasts a stunning display and some modern specs. You’ll find details like a 3.1 GHz quad-core Intel Core i5-5675R processor (with Turbo Boost up to 3.6 GHz), 8 GB of 1867 MHz LPDDR3 RAM, and Intel Iris Pro Graphics 6200. Storage options include a 1 TB (5400-rpm) hard drive, with upgrades available up to a 2 TB Fusion Drive or 512 GB of flash storage. Connectivity features include 802.11ac Wi-Fi and Bluetooth 4.0, and it carries the new EMC number 2833, keeping the familiar model number A1418. Follow these steps to perform repairs confidently, and if you ever need extra help, you can always schedule a repair.
Step 2


Whoa, check out those colors!
– Check out this shiny new display (first image) — it’s a game changer! Compared to the non-Retina iMac (second image), it’s like switching from a pixelated night to a super-clear day.
– We took a close look at a few of the 9 million-plus pixels in this 4K IPS display. Each pixel is made up of red, green, and blue strips—mix those up, and you get a colorful pixel.
– This 4,096 x 2,304 pixel display packs over 4.5 times the pixels of the standard 21.5″ iMac display. That’s some serious resolution!
Step 3


Those extra pixels don’t really add any noticeable weight—it’s actually the bumper that steps in to give solid backup and a bit more cushion for the latest, greatest (and yes, pricier) display assembly.
– Take your time with the opening tool – a little patience goes a long way! We’ve got the technique down after plenty of these, so we’re stepping it up a notch.
– The display cable is a bit wider now to handle all those extra pixels. It’s 16.4 mm, compared to the 12.4 mm on the non-Retina 21.5″.
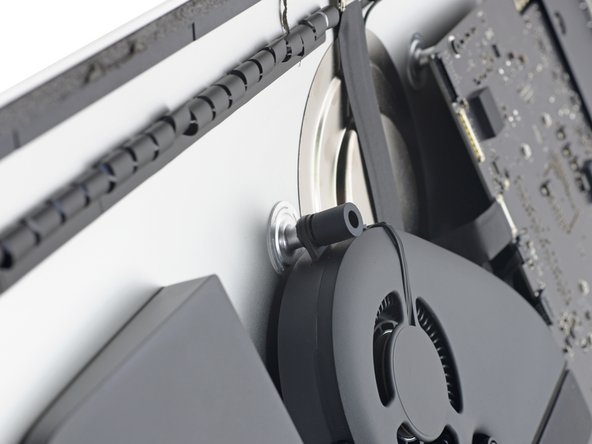
– A new rubber bumper is added to the fan’s top screw. It’s probably there to give a little extra support for those heavy new pixels.
Step 4


The display here is made by LG—Apple’s top pick for both regular and super-sharp iMac screens.
– This iMac comes with a sleek DCI-P3 display, one of the first available to the public. So, let’s get that shiny metal cover off to reveal some tasty tech hiding underneath.
Step 5


We’re guessing this is an Apple-modified version of the DP663, so let’s get to work and make sure everything goes smoothly!
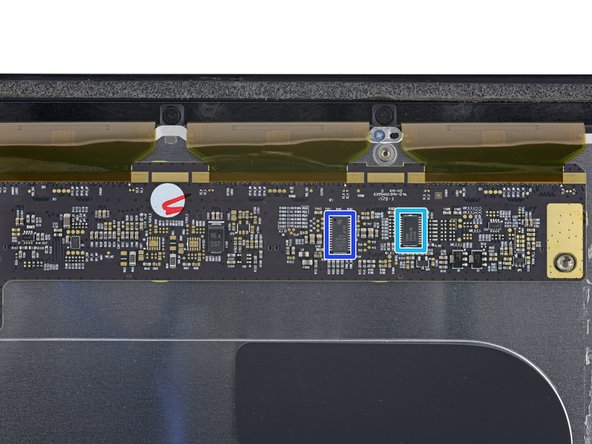
– Just like its siblings, this 4K display hides some nifty control hardware right behind the front panel:
– Texas Instruments TPS65168: the fully programmable LCD bias mastermind.
– Texas Instruments TPS54320: a 3A synchronous step-down SWIFT converter, running on 4.5 V to 17 V.
– Texas Instruments TPS54218: another 3A SWIFT converter, ready to roll with 4.5 V to 17 V input.
– Parade Technologies DP665 LCD Timing Controller, straight from the previous 27″ 5K model.
– Texas Instruments NH245 55K G4, holding it all together.
– Texas Instruments BUF16821: the programmable gamma-voltage generator and Vcom calibrator, for picture-perfect displays.
Step 6
We’ve turned this step into a quick montage so you can breeze through the less thrilling parts.
Once again, this model is rocking a so-so 5400 RPM hard drive—maybe that’s a not-so-subtle hint to consider a Fusion drive upgrade?
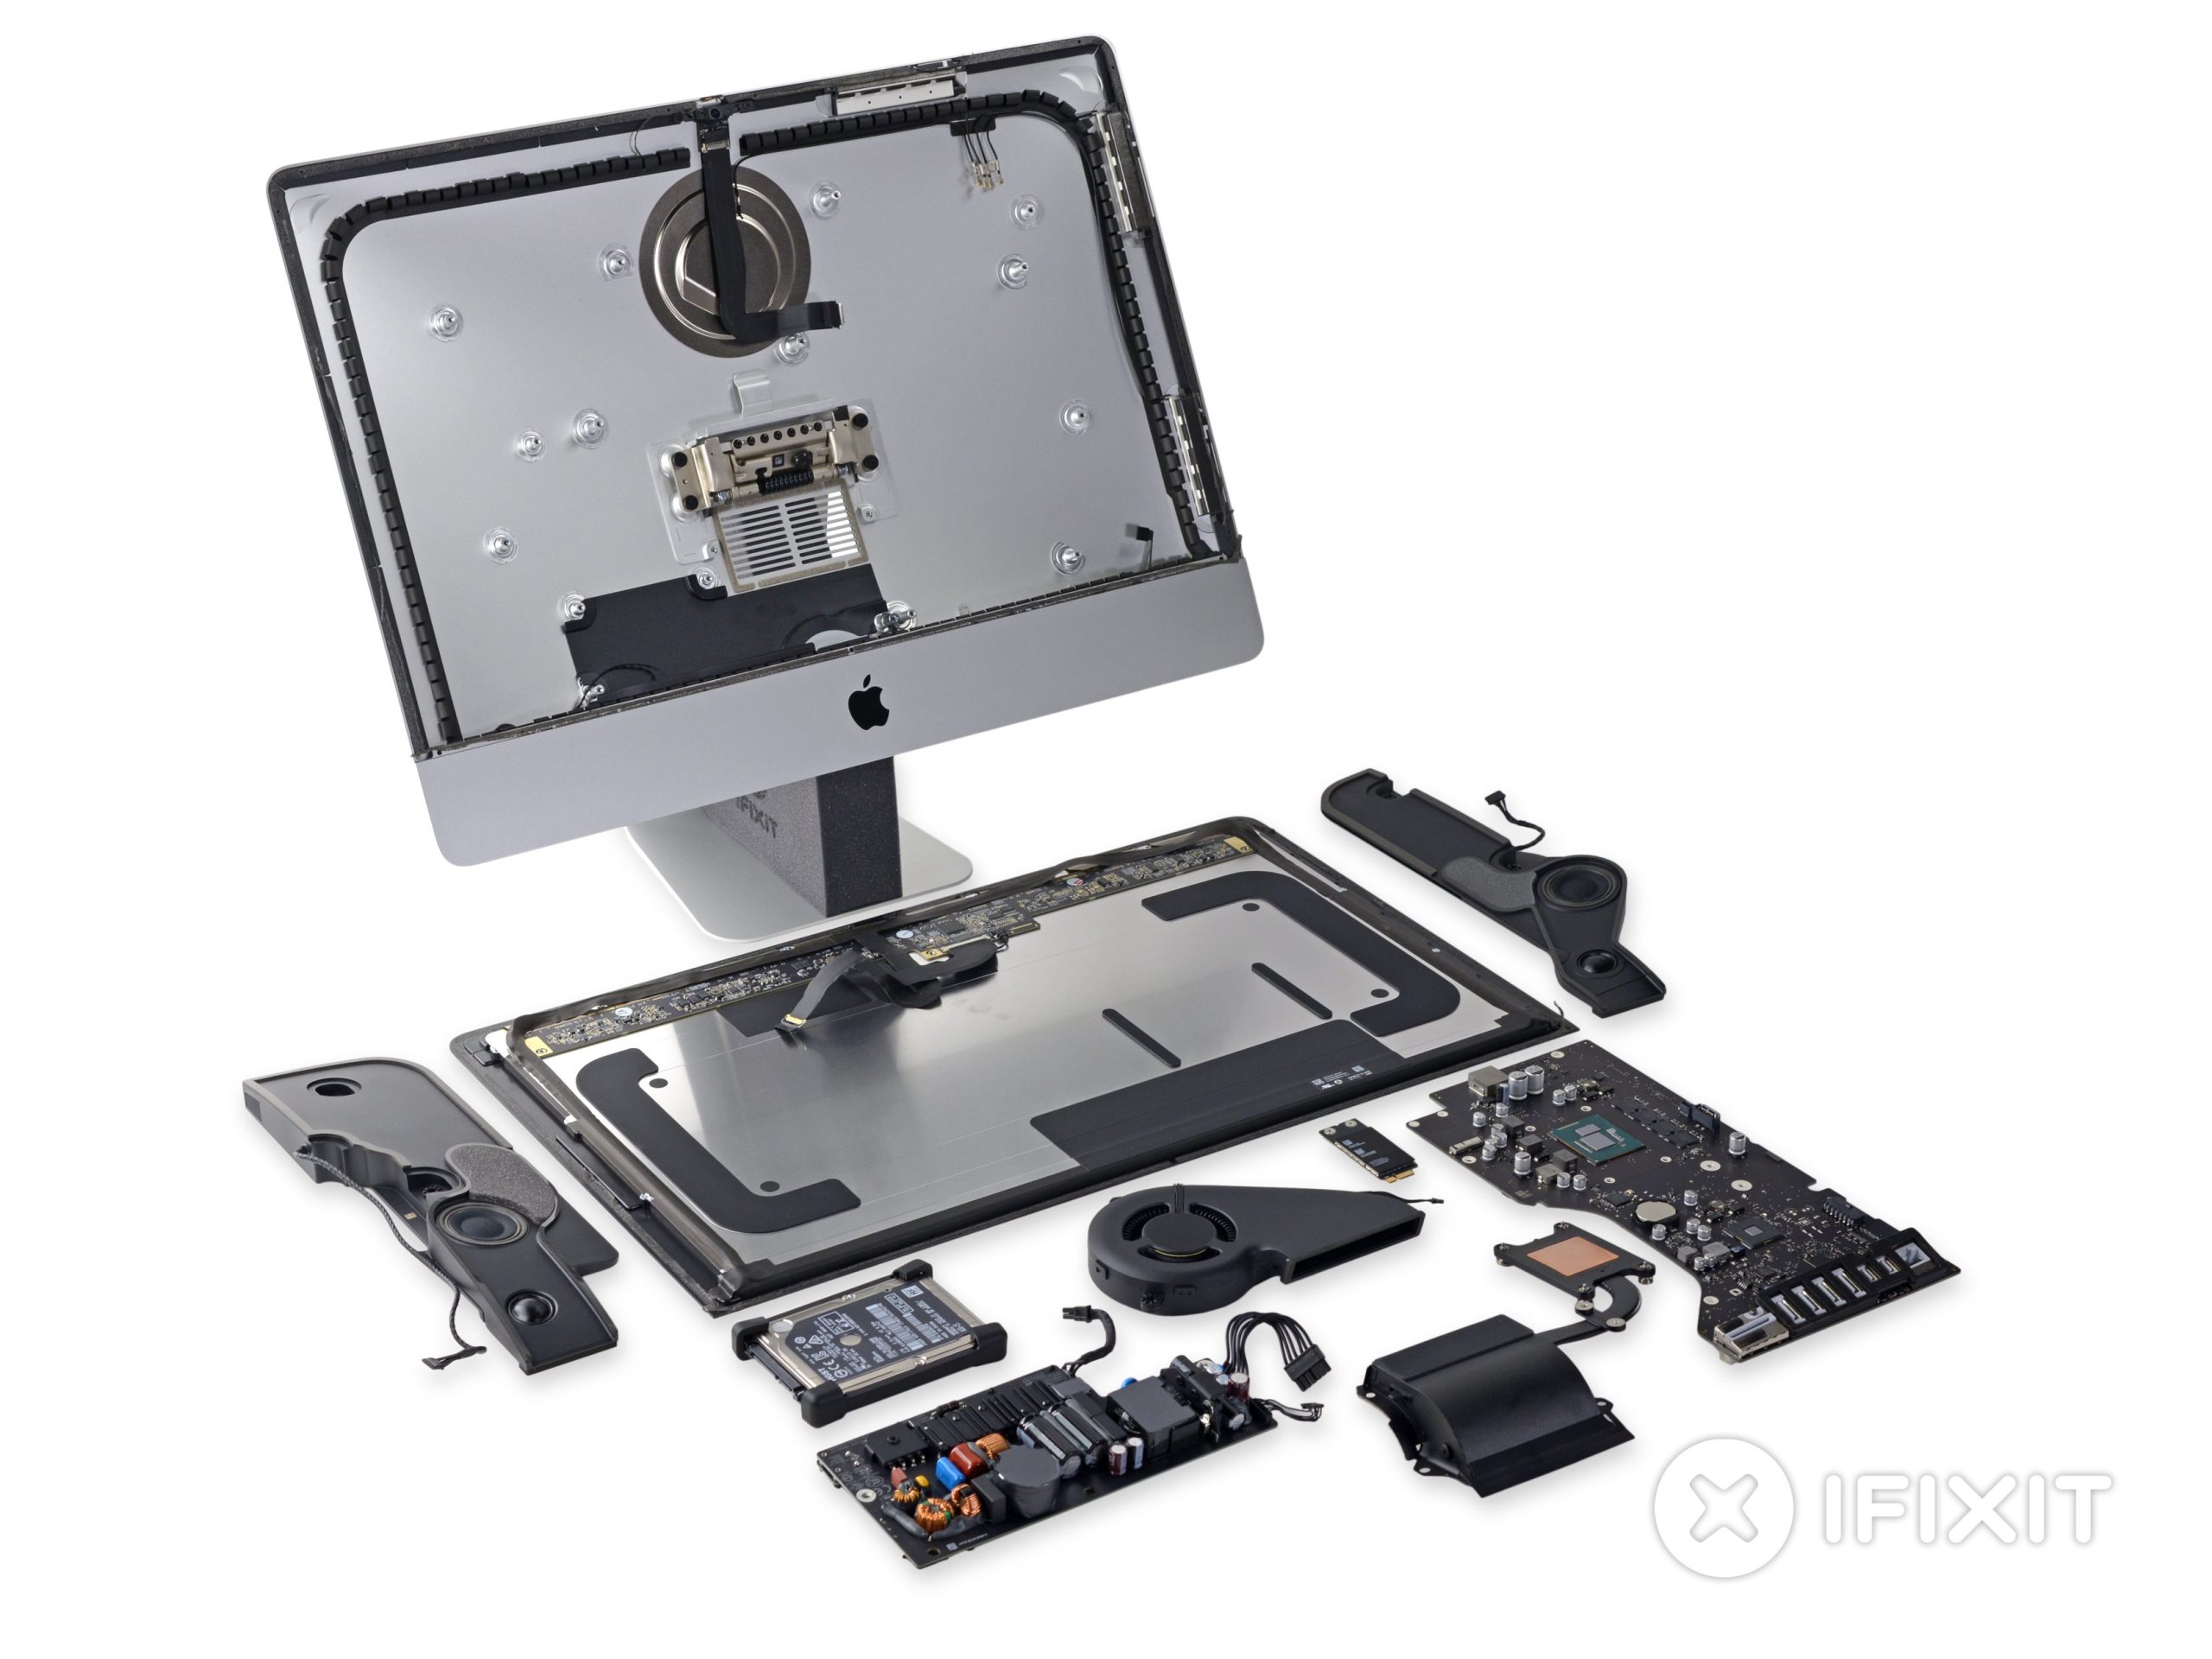
– Let’s take a look inside the iMac. You’ll notice it’s pretty much the same as last year’s 21.5″ model—nothing too flashy there. As usual, Apple keeps the same design for its hard drive, fan, and speakers across generations, so there’s no surprises on those fronts. If you need a hand with this process, you can always schedule a repair for more help.
Step 7


We’re looking at empty pads again, so DIY upgrades are off the table—unless you’re a wizard with a soldering iron. Want Fusion Drive? Make sure to pick that option when you buy, or get ready for some seriously advanced tinkering.
– Apple’s back at it again: Remember when the super-slim iMac hit the scene in 2012? Our base model had an empty spot where the Fusion Drive’s SSD slot could have gone.
– The heatsink this time around is a bit chunkier than what we saw earlier this week, making a comeback to the 2013 design. Looks like it’s giving that Broadwell CPU a cool new home.
– Fast forward to the next year, and our teardown unit showed up with an empty slot, just waiting for that sweet upgrade.
Step 8

– This compact powerhouse packs some serious punch, but let’s take a peek under the hood to see what makes it tick:
– Intel SR2AJ Core i5-5675R 3.1 GHz Processor (4M Cache, TurboBoost up to 3.60 GHz) with Intel Iris Pro Graphics 6200
– Samsung K4E6E304EE-EGCF 16 Gb LPDDR3 1867 MHz SDRAM (4 chips totaling 8 GB for snappy multitasking)
– Broadcom BCM5776 Gigabit Ethernet Controller — keeping those wired connections fast and steady
– Texas Instruments LM4FS1EH SMC — managing system control with style
– Texas Instruments HD3SS213 5.4Gbps DisplayPort 1.2a 2:1/1:2 Differential Switch — for crisp, clear display connections
– Fairchild FDMF6808N Ultra-compact, high-performance, high-frequency DrMOS module — likely a newer version of FDMF6708N, bringing the power
Step 9

– Intel DSL5520 Thunderbolt 2 Controller: The speed demon for your data highways. If it stops working, your ports might go quiet. Give it a check if you’re missing Thunderbolt action.
– Cirrus Logic 4208-CRZ Audio Controller: This little chip is the DJ for your device. No sound? This might be your culprit.
– Delta 8904C-F Filter: Keeps the power clean and smooth—kind of like a spa day for your device’s electronics.
– Vimicro VC0359 Camera Processor: The mastermind behind your video calls and selfies. If your camera acts up, this is where you want to look.
– Intersil ISL6372CRTZ PWM Controller: Manages power delivery like a pro. If you’re dealing with power issues, this controller deserves a peek.
– Winbond 25064FVIQ: Handles some of your device’s memory—think of it as your gadget’s short-term memory bank.
– International Rectifier IRFH3702 30V Single N-Channel HEXFET Power MOSFET: This is your power switch, turning up the voltage when needed. If your device is totally dead, this might be the reason. If you’re stuck, schedule a repair and get back up and running.
Step 10


– iMac Intel 21.5″ Retina 4K Display Repairability Score: 1 out of 10 (10 being the easiest to repair)
– Opening up the iMac isn’t too tricky with the right tools, but just remember: the tape you cut will need replacing to finish up any repair job.
– Unfortunately, the RAM is soldered directly to the logic board, so what you bought is what you’re stuck with—no upgrades here.
– The Fusion Drive connector is missing from the logic board, so forget about any storage modifications or hacks.
– The CPU is soldered onto the logic board, meaning it’s a no-go for any upgrades or replacements.
– The glass and Retina Display are fused together, which can make replacement a bit more costly.
Success!