iPad 2 Wi-Fi EMC 2415 Battery Replacement
Duration: 45 minutes
Steps: 51 Steps
Follow this guide to swap out your battery like a pro. If your battery looks puffed up, handle it with extra care and caution.
Step 1
For carousel microwaves: Check that the plate spins without any hiccups. If your iOpener gets stuck, it might get too hot and cause a burn, so keep an eye on it!
Before you get started, give your microwave a quick clean-up—trust us, it's worth avoiding any mystery sludge getting cozy with your iOpener.
- Pop that iOpener right in the middle of your microwave—center stage for the warm-up act!
Tools Used
Step 2
Take it easy heating the iOpener—overheating it might make it pop like a balloon! Keep it below 100˚C (212˚F).
If the iOpener looks puffy or swollen, don’t touch it—better safe than sorry.
If the iOpener’s still too hot to handle in the center, keep it warm while you wait for it to cool a bit before reheating. When done right, it should stay nicely warm for about 10 minutes.
Microwaves can be quirky—higher wattage means less waiting, lower wattage means a little more. The iOpener is good to go when it’s just about too hot to handle, but not so hot it’s auditioning for a superhero origin story.
- Pop the iOpener in the microwave for a quick thirty-second warm-up.
- As you work your magic, if the iOpener starts cooling down, just give it another thirty seconds in the microwave to keep things toasty.
Tools Used
Step 3
Heads up! The iOpener gets seriously hot, so handle it like a pro—oven mitts or a thick cloth are your best friends here.
- Carefully take the iOpener out of the microwave, holding onto one of the flat ends so you don’t accidentally grab the hot center. Safety first, my friend!
Tools Used
Step 4
Heads up! The iOpener gets super hot, so make sure to grab it by the tabs on the ends only.
No microwave? No worries! You can warm up your iOpener using boiling water for this step.
- Grab a pot or pan and fill it up with enough water to cover your iOpener.
- Crank up the heat until the water is boiling, then switch off the stove.
- Drop your iOpener into the hot water for a chill 2-3 minute soak—make sure it's totally underwater.
- Use some tongs to fish out your toasty iOpener. No bare hands!
- Give your iOpener a good towel dry so it's not dripping all over the place.
- Boom, your iOpener is warmed up and ready for action! Need it hot again? Just repeat the boiling-water spa for another 2-3 minutes.
Tools Used
Step 5
Pop on some safety glasses to keep your eyes safe, and handle the LCD screen gently to avoid any oops moments.
This will keep those pesky glass shards under control and help maintain the strength of your display while you gently pry and lift it.
- If your display glass is cracked, keep those shards in check and avoid any ouch moments by taping over the glass before you get started.
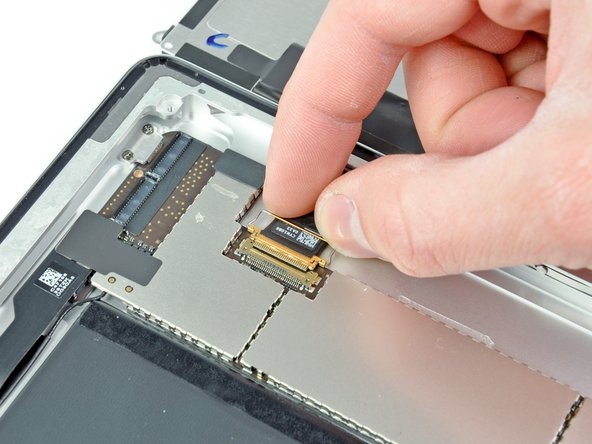
- Cover the entire iPad screen with overlapping strips of clear packing tape until it’s fully wrapped up.
- Follow the rest of the steps as outlined, but heads up: once the glass is cracked, it might keep cracking as you work. You may need to carefully use a metal prying tool to lift out the broken glass pieces.
Step 6
Hey there! Just a quick heads-up: when dealing with broken glass, it's a smart move to rock some safety glasses. Protect those peepers from any unexpected flying shards. Better safe than sorry, right?
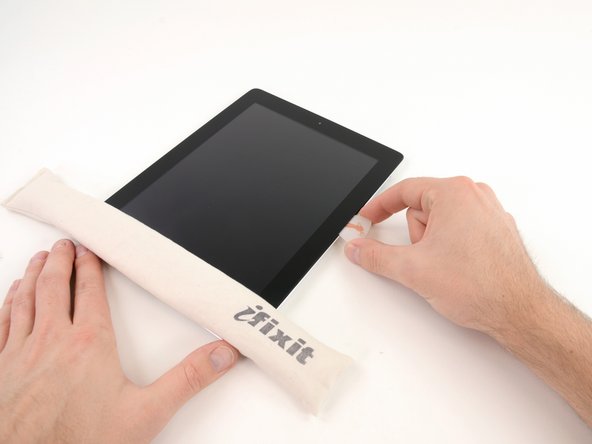
- Place the iOpener snugly on the right edge of the iPad, making sure it’s lying flat and making good contact with the surface. We want that warmth to work its magic!
- Give the bag some quality time on the iPad for about 90 seconds before you dive in and attempt to lift the front panel.
Tools Used
Step 7
Getting the tip of your opening tool wedged between the glass and plastic might take a bit of muscle. Stay cool, be patient, and gently wiggle that tool back and forth until it slides in nicely.
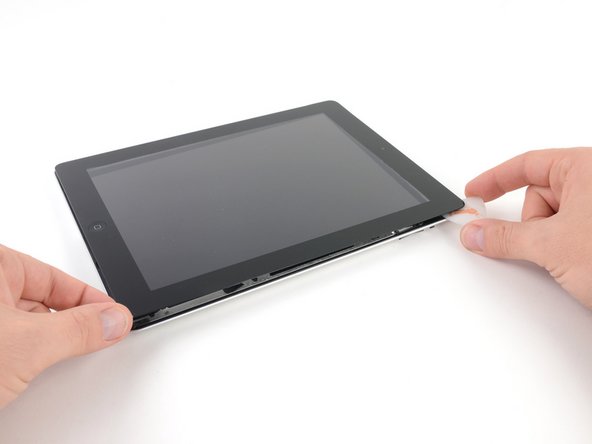
- There's a tiny gap in the iPad's adhesive ring, located in the upper right corner about 2.0 inches (~5 cm) from the top. It's your ticket to getting this job done.
- Line up your tool with the mute button, then gently slide the tip of a plastic opening tool into that gap between the front glass and the plastic bezel. Just nudge it in enough to widen the crack slightly.
Step 8
- Carefully slide your tool right into the sweet spot—nestled between the plastic display bezel and the front panel glass. You've got this!
Step 9
- Wedge the tip of your plastic opening tool between the front glass and plastic bezel, then gently slide a plastic pick into the gap right next to it. Take it slow, you’ve got this!
Step 10
- Take the plastic opening tool out of the iPad, then keep sliding your opening pick gently under the front glass until it goes about half an inch in. Steady hands, you're doing great!
Step 11
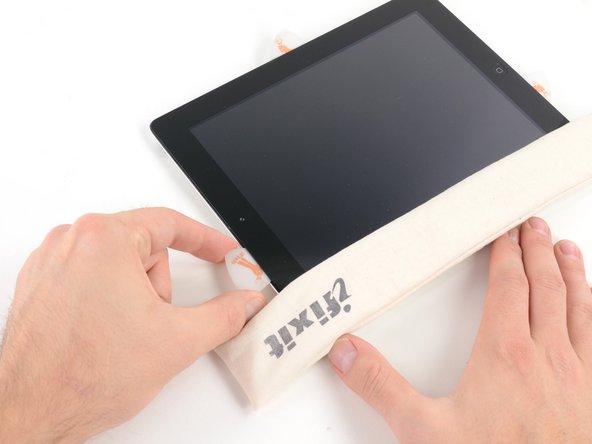
- While you're loosening the adhesive on the right side of the iPad, heat up your iOpener again and set it on the bottom edge of the iPad. Let it work its magic!
Tools Used
Step 12
The adhesive is really strong, so you might need to apply some muscle here. Take your time and stay steady!
If you spot the tip of the opening pick poking out from under the front glass, gently pull it back just a smidge. Going this deep with the pick won’t cause damage, but it might spread some sticky adhesive onto the LCD.
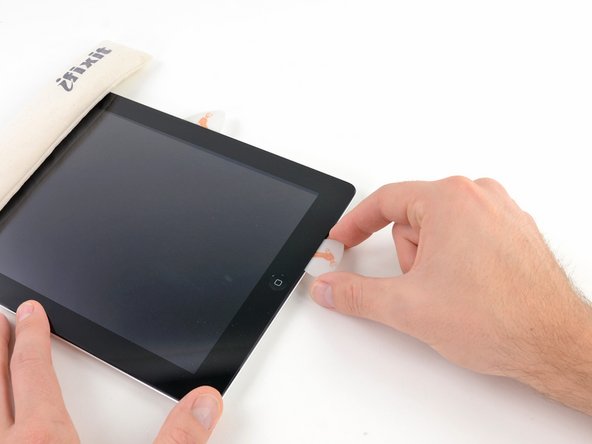
- As the iOpener warms up the bottom edge, start peeling away the adhesive from the right side of your iPad.
- Gently glide the opening pick down the edge of the iPad, carefully releasing the adhesive as you go.
Tools Used
Step 13
If your iPad starts playing hard to get with that sticky adhesive, you might need to invite the heated iOpener back for another round on the right edge. Whether or not you need to reheat depends on how long your iPad has been chilling while you've been working your magic.
- If the opening pick gets stuck in the adhesive, try gently 'rolling' it along the edge of the iPad to keep loosening the adhesive without any hassle.
Tools Used
Step 14
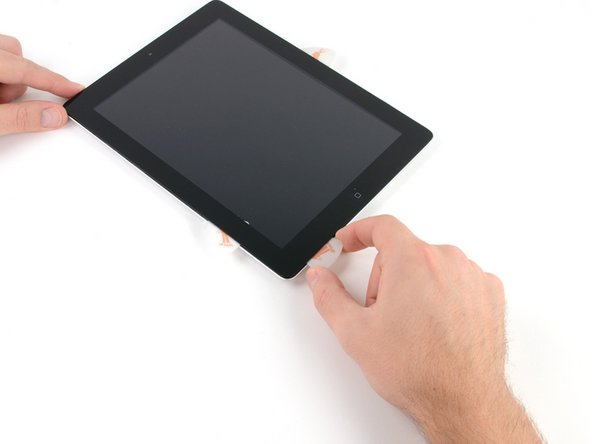
- Before you pull out the first opening pick from the bottom corner of the iPad, slide a second pick under the right edge of the front glass to keep that sticky adhesive from sticking back together.
- Warm up the iOpener again, then shift it to the top edge of the iPad to keep things nice and toasty.
Tools Used
Step 15
The Wi-Fi antenna is secured to the bottom right edge of the iPad's rear case with screws and a cable. Since the antenna sits in a particular way, take your time and handle it gently—one wrong move could cause permanent damage to this little gadget.
- Heads up! The next steps call for some serious care and attention.
- You'll need to gently loosen the adhesive holding the antenna to the front panel, making sure not to mess with the fragile parts connecting the antenna to the bottom of the iPad. Take it slow and follow along carefully.
Step 16
Hey there! Just a quick heads up: don't slide that pick any further than the bottom right corner. You could accidentally mess with the Wi-Fi antenna, and nobody wants that!
- Gently slide the opening pick around the bottom right corner of the iPad to loosen the adhesive hiding out there.
Step 17
Carefully slide the opening pick along the bottom right edge of the front panel. Watch out for the Wi-Fi antenna near the corner—it’s super close and can get cut if the adhesive comes loose the wrong way.
Just gently wiggle that pick out from under the front glass, but don’t go all the way—leave about 1/8" (3 mm) of the tip snugly in there. You've got this!
- Gently glide the tip of the opening pick along the bottom edge of the iPad, freeing the adhesive that’s holding onto the Wi-Fi antenna. You've got this!
Step 18
- Once you've scooted past the Wi-Fi antenna (that's about 3 inches or 75 mm from the right edge, right by the home button), pop that opening pick back in all the way.
- Now, slide that pick to the right like you mean it! This will let go of the adhesive that's holding the Wi-Fi antenna tight to the front glass.
- Remember, the antenna is fastened to the bottom of the iPad with some screws and a cable. By doing this step, you're safely detaching the antenna from the front panel, so when it's time to remove the panel, you won't risk a mishap with the antenna.
Step 19
- Keep on peeling away that adhesive at the bottom of the iPad! Gently pull the opening pick out far enough to slide around the home button, and once you've navigated past it, pop that pick back in to a depth of about 1/2 inch (10 mm). You're doing great!
Keep it cool with the iOpener – don't heat it for more than a minute at a time. Give it a quick two-minute break before you heat it again. Patience is key!
If the adhesive has cooled down too much on the bottom edge, just reheat your iOpener and give that adhesive a little extra warmth where you're working. It'll get back to being nice and tacky in no time!
Tools Used
Step 20
When working with iPad 4 models in this area, keep your pick shallow—no more than 1/2 inch (10 mm)—to steer clear of the home button ribbon cable. Treat it like a game of Operation for your tablet!
- Keep peeling back that adhesive along the bottom edge of the iPad like you're unwrapping a present—smooth and steady!
- Once you've got that adhesive under control, pop an opening pick right by the home button to keep the front glass happy and secure.
Step 21
- Pop the iOpener back in the microwave to warm it up again, then place it on the left edge of your iPad to gently heat and loosen that stubborn adhesive.
Tools Used
Step 22
If the adhesive is playing hard to get, pop the iOpener back on top and keep at it. If the iOpener has cooled off too much, send it on a quick trip to the microwave for a recharge.
- Gently slide the opening pick along the top edge of your iPad, nudging it out a bit to work around the front-facing camera bracket.
- Heads up: the adhesive here is pretty stubborn, so you might need to apply some firm, steady pressure. Take it slow and steady to avoid any slips or scratches—your fingers and iPad will thank you!
- If your pick gets stuck in the adhesive, try "rolling" it as demonstrated in step 9 to keep things moving smoothly.
Tools Used
Step 23
If the adhesive feels nice and warm, go ahead and set the iOpener aside to make things easier. But if it's still clinging on tight, just reheat the iOpener and rest it on the left edge while you keep going.
- Keep peeling away that stubborn adhesive along the top edge of the iPad, then gently work the opening pick around the top left corner. You've got this!
Tools Used
Step 24
The digitizer cable is hanging out about 2 inches (50 mm) from the bottom of your iPad. When you reach around 2.25 inches (60 mm) from the bottom, it's time to stop sliding that pick and give yourself a high five for being careful!
- Gently slide the opening pick along the iPad’s left edge to loosen the adhesive. Heads up: the adhesive here is pretty thin because of the digitizer running along the entire left side. Keep the pick shallow—no deeper than 10 mm (about 1/2 inch)—to avoid any accidental digitizer drama.
Step 25
Be super careful here! The bottom of that digitizer cable is just about 1 inch (25 mm) from the bottom of your iPad. Take your time and watch out—let's keep that cable intact!
- Grab that opening pick hanging out under the iPad's bottom edge and gently work it along the bottom left corner to break free the sticky adhesive.
Step 26
It looks like some of the adhesive along the edge of your iPad may have decided to stick around a bit longer than expected. No worries! Just slide a pick under the edge where the front glass is still holding on tight and gently 'cut' through that adhesive. You've got this!
- Take one of those trusty opening picks and gently lift the bottom right corner of your iPad—then snag it with your fingers like you’re picking up the last slice of pizza!
Step 27
Watch out for sneaky adhesive that might still be sticking around! Grab an opening pick and gently slice through any leftover sticky bits holding the front panel in place.
- Grab the iPad by the top and bottom right corners and gently swivel the front glass away from the device.
- When putting it back together, give the LCD a good once-over with a microfiber cloth and some compressed air to clear away any dust or pesky fingerprints before snapping the glass back on.
Step 28
- Unscrew those four 2.0 mm Phillips screws holding the LCD in place—let's get that screen free from the rear case!
Step 29
Handle the LCD with care and don’t try to yank it off the iPad—its display data cable is still holding on while you gently flip it over.
To get to those front panel ribbon cables hiding under the LCD, you'll need to gently flip the LCD over and out of the way for a bit. Don’t worry, it’s all part of the adventure!
- Gently lift the LCD from the edge closest to the volume buttons and flip it out of the rear case, just like you would turn a page in a book.
- Now, place the LCD face down on the front panel, ready for the next step!
Step 30
Make sure you’re lifting the hinged retaining flaps gently—not the sockets themselves—to keep everything happy and intact.
Check out the second picture for a peek at the retaining flaps, which are marked in red. They're your guiding stars on this repair journey!
- Gently use the edge of a plastic opening tool to flip up the little retaining flaps on the two digitizer ribbon cable ZIF sockets. Take it slow and steady!
Step 31
- Grab a plastic opening tool and gently wedge it along the edge of the digitizer cable, peeling it away from the shields on the logic board. Easy does it!
- Now, carefully tug at the digitizer cable, freeing it from the adhesive that's holding it to the rear case. Keep it steady!
Step 32
- Gently slide the digitizer ribbon cable straight out from its two sockets on the logic board. No need to rush—slow and steady wins the repair race!
Step 33
Handle the LCD with care, and don’t try to fully remove it—the cable’s still attached, so just gently flip it over like turning a page in a book.
To get that front panel assembly off, you'll need to gently slide the ribbon cable out from between the case and the LCD. Just give the LCD a little nudge to create some space, and you'll be all set!
- Gently lift the LCD from the edge that's farthest from the digitizer cable and flip it back like you're closing a book—easy peasy!
- While you’ve got the LCD up, carefully slide the front panel away from the iPad. Just a heads up—avoid snagging that digitizer cable on the rear case or LCD.
- Once you're done, place the LCD back into the body for safekeeping. You're doing great!
Step 34
To get inside the iPad, gently flip the LCD screen out of its case so we can start working on the juicy parts inside.
- Carefully lift the LCD from the long edge nearest the volume buttons and gently swing it out of the rear case—kind of like flipping a page in a book.
- Place the LCD face down on a clean surface. To avoid any scratches, consider resting it on a soft cloth.
Step 35
Heads up! When disconnecting the connector, don’t yank it upward—gently ease it out from its socket instead.
- Gently pry up the display data cable lock using a plastic opening tool.
- Carefully pull the display data cable free from its connector.
Step 36
- Gently detach the LCD assembly from the back panel assembly, taking care not to damage any components along the way.
Step 37
- If there’s a piece of tape chilling over the end of the dock connector cable, grab your trusty plastic opening tool and gently lift it off.
- Next up—use the edge of the plastic opening tool to carefully pop the dock connector cable’s connector up and out of its socket on the logic board. Just a little finesse here!
- Now, peel that dock connector ribbon cable off the rear panel, like you’re unwrapping a techy present. Smooth moves!
Step 38
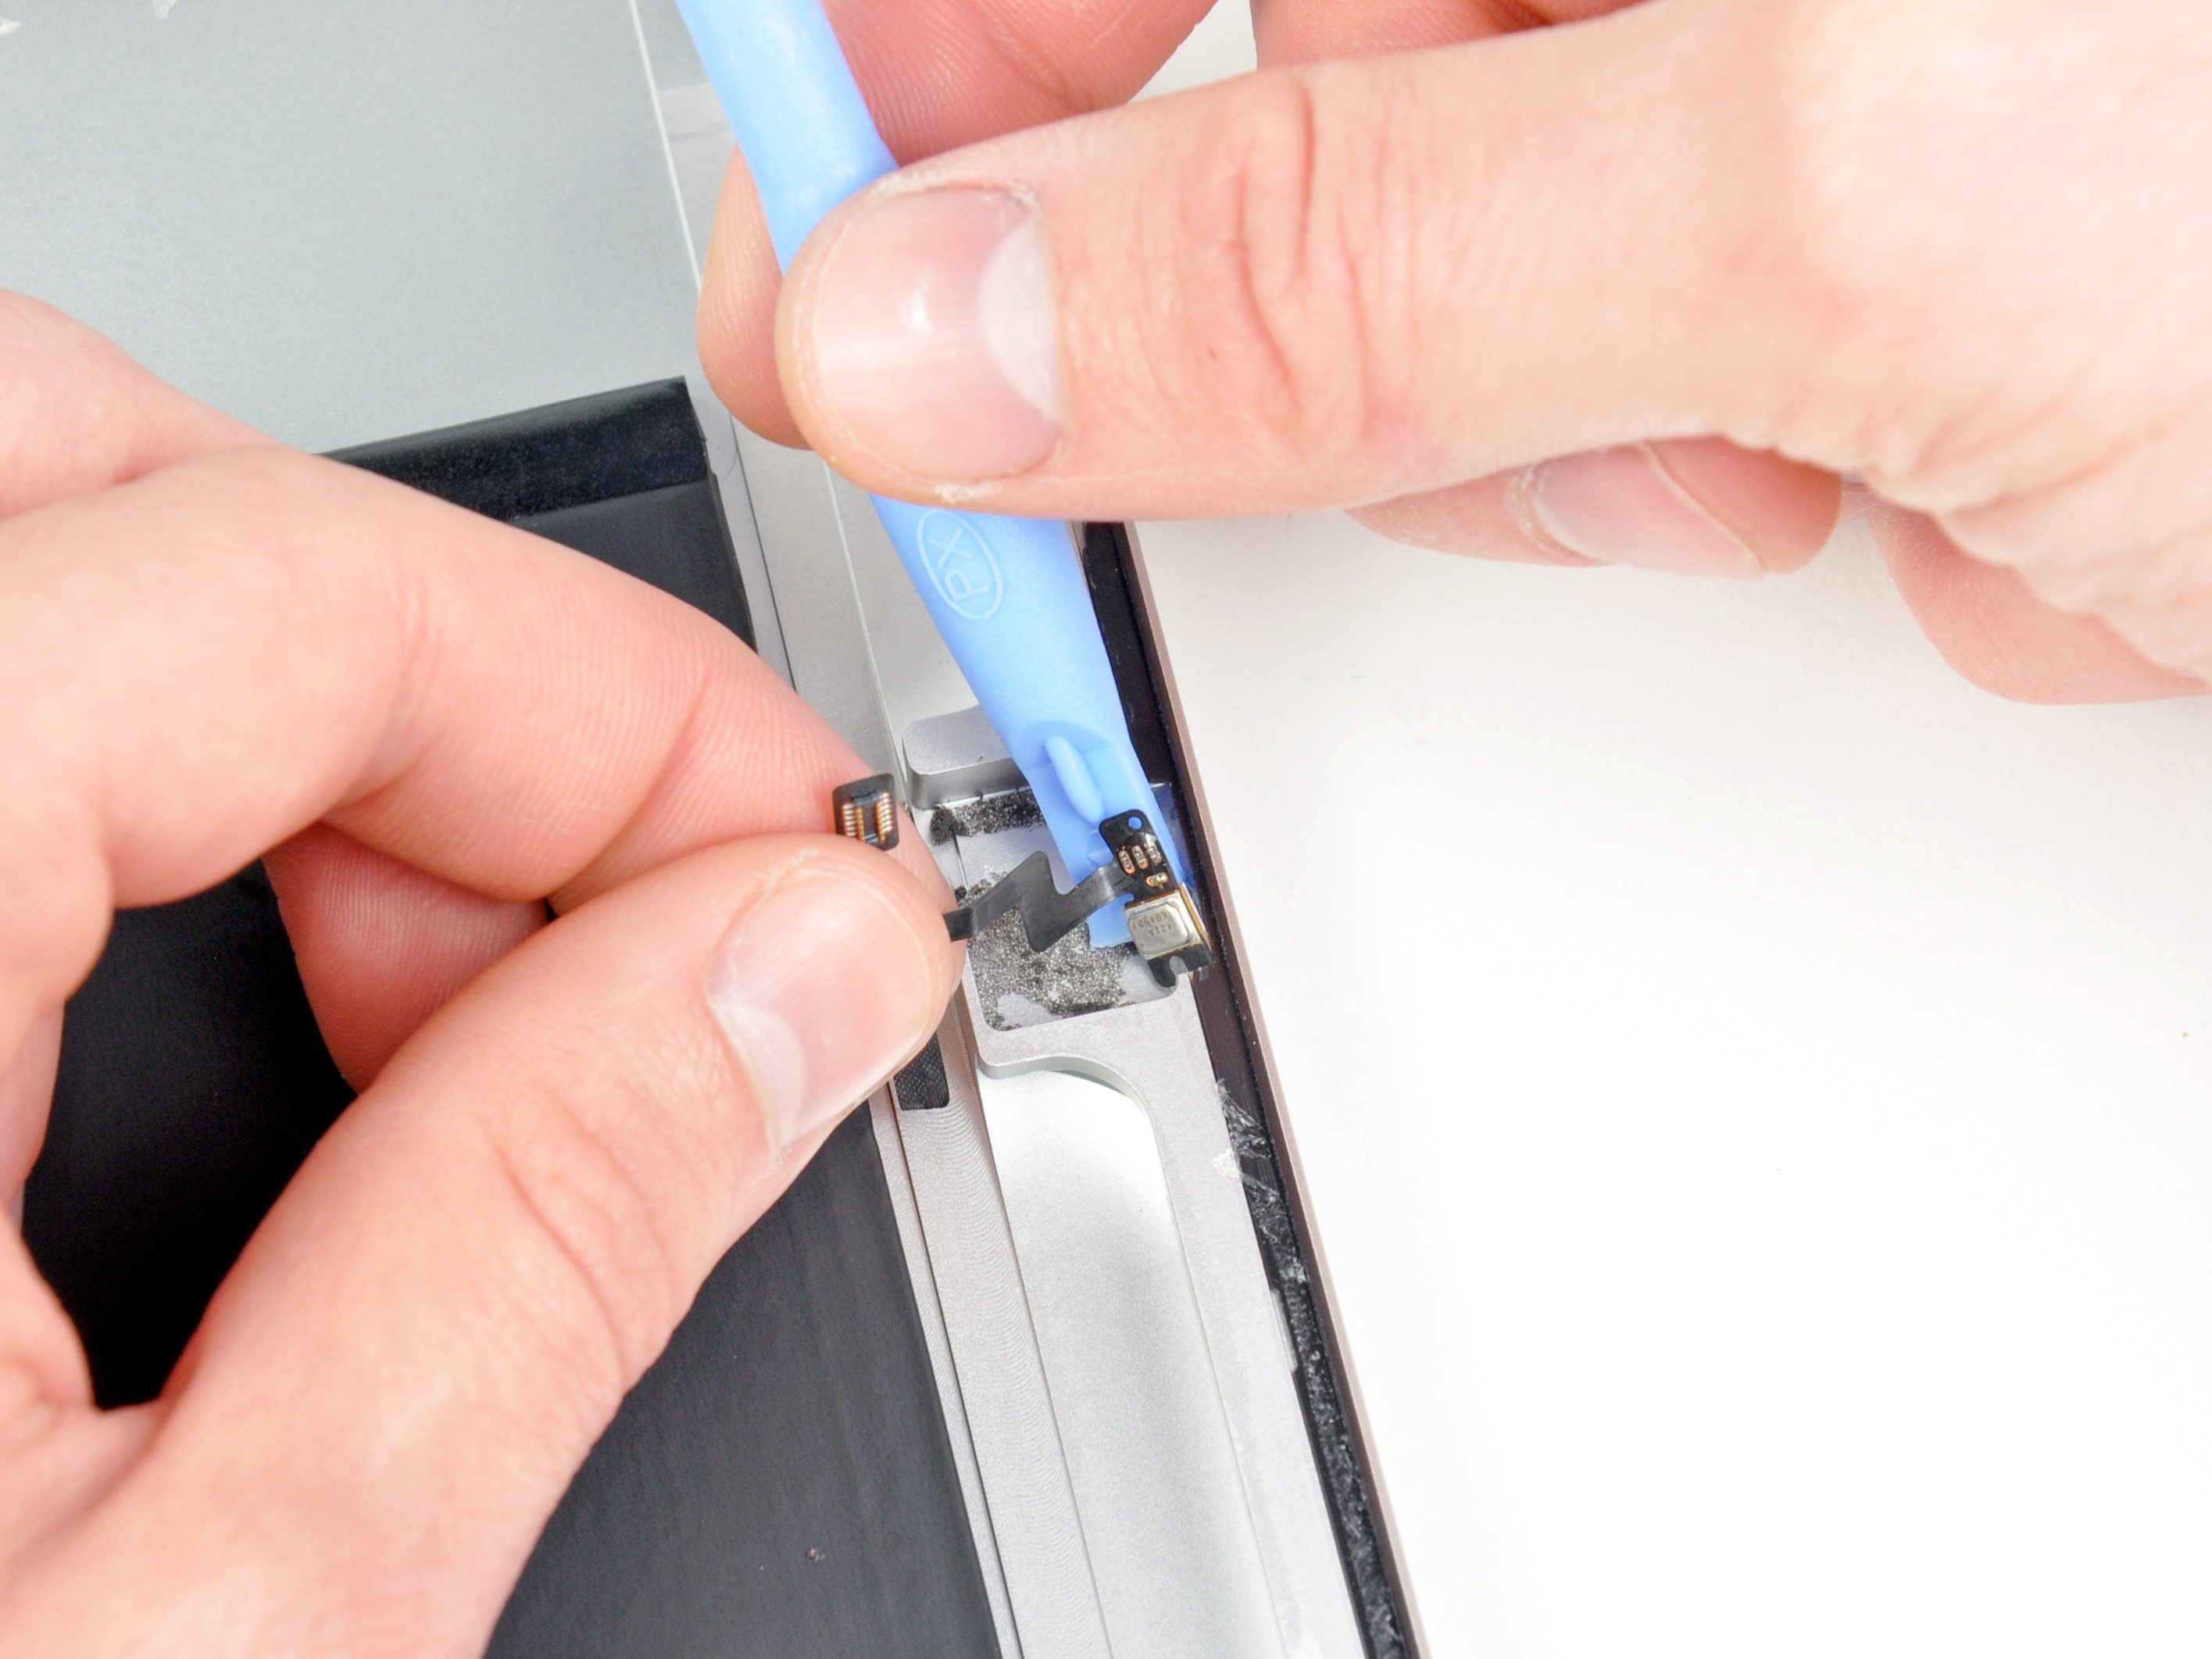
Be cautious when prying; focus solely on the connector and steer clear of the socket on the logic board. If you accidentally mess with the socket, it could be game over for it!
- Gently lift the speaker cable connector straight up from its socket on the logic board—no need for muscle, just a little finesse!
Step 39
Just a friendly reminder: make sure you're prying up on the hinged retaining flap, not the socket itself. You've got this!
- Grab your trusty plastic opening tool and gently lift up the retaining flap on the headphone jack and front camera cable ZIF socket. You've got this!
- Carefully peel away the headphone jack and front camera cable from the rear case. It's all about that gentle touch!
Step 40
- Gently pull the headphone jack and front camera ribbon cable straight out from their socket on the logic board.
Step 41
Be careful not to pull the cable upwards while disconnecting it.
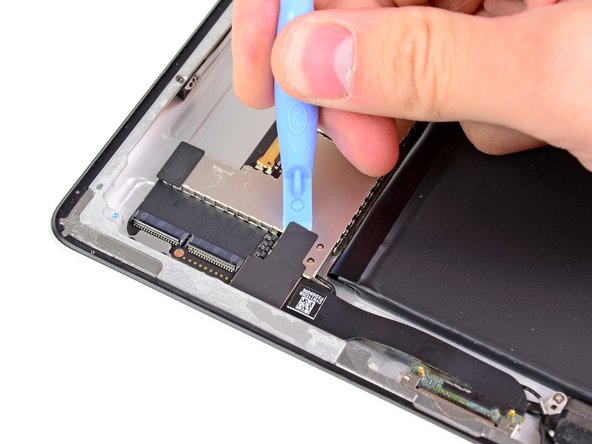
- Grab a plastic opening tool and gently slide it under the retainer holding the control board cable connector in place. Give it a little nudge to pop it up.
- Once it's free, carefully pull the connector out of its socket on the logic board. You're doing great!
Step 42
- Unscrew those two 2.1 mm Phillips screws holding the logic board bracket in place near the digitizer cable socket. Easy does it!
- Lift out the logic board bracket from the rear case, and set it aside. You're making great progress!
Step 43
- Time to tackle those last three 2.6 mm Phillips screws holding the logic board to the rear case. Grab your screwdriver and give them a twist—you're almost there!
Step 44
- Gently slide the edge of a plastic opening tool underneath the logic board and carefully lift it away from the sticky adhesive that’s holding it to the rear case. Take your time, and remember, patience is key!
Step 45
Hold up! Don't yank it off just yet—there's still an antenna cable keeping it connected.
- Gently lift the logic board up from the rear case and give it a little tilt toward the battery—like you're peeking under the hood. Keep it smooth and steady!
Step 46
- Gently pop the Wi-Fi antenna connector out of its socket on the logic board with the edge of your plastic opening tool. Treat it like the delicate little snap it is!
- Lift out the logic board from your iPad 2—give it a smooth exit, no wrestling required.
Step 47
Hey there! Just a friendly reminder to keep the iOpener cool as a cucumber during your repair adventure. Give it a breather for at least two minutes before reheating, and remember, no more than a minute in the microwave. Let's keep things safe and sound!
If your iOpener starts to lose its magic touch, just pop it back in for another minute to warm it up!
- Pop the iOpener in the microwave for a minute to get it nice and toasty.
- Lay that hot iOpener down on the back of your iPad, just right of center (opposite the rear camera). Give it a good 90 seconds to work its magic and loosen up that stubborn battery adhesive.
- Slide the iOpener over to the center of your iPad’s back and let it chill there for another 90 seconds.
- Scoot the iOpener to the left edge (where the rear camera lives) and let it hang out for one more 90-second round.
Tools Used
Step 48
If that adhesive is playing hard to get, just warm up the rear panel a bit more and give it another shot.
- Let’s get started with the battery cell closest to the dock connector! Slide a plastic opening tool under the edge nearest the logic board void—just enough space so you can sneak in the flat end of your spudger.
- Next, gently run the flat end of your spudger along the two longer sides of each battery cell, working your way to loosen them from the sticky adhesive holding them to the rear case. Slow and steady wins the battery race!
Tools Used
Step 49
Handle the battery connector board with care, folks! When you're gently prying around the screw post of that aluminum rear case, just remember – no acrobatics!
- Before you start prying up that middle battery cell, grab a plastic opening tool and gently lift the battery connector board away from the rear panel. You've got this!
Step 50
- Grab your spudger and gently slide it along the long edges of the middle battery cell to loosen that stubborn adhesive.
- Do the same for the last battery cell, warming up the case again if it feels a bit too snug.
Tools Used
Step 51
- To put your device back together, just retrace your steps in reverse order and check out our guide on using the iPad 2 Wi-Fi Front Panel Adhesive strips to get that front panel snugly back in place. If you hit a snag, remember, you can always schedule a repair for some extra help!


