iPad 3G Ambient Light Sensor Replacement
Duration: 45 minutes
Steps: 13 Steps
Got a busted ambient light sensor? No worries, we've got you covered! Follow this simple guide to swap out that broken sensor and get your device back to its glowing best. If you need help, you can always schedule a repair.
Step 1


Pop on those safety glasses to keep your peepers safe, and remember to treat that LCD screen with care—it's delicate, just like your favorite snack!
Taping the glass keeps those sneaky shards in check and gives you some solid support while you pry and lift the display.
- Got a cracked screen? No worries—let’s keep all those tiny shards in check and protect those fingers! Grab some clear packing tape and lay it out in overlapping strips until your iPad's front is fully covered.
- Try to follow the rest of the guide as usual. Heads up: once glass starts breaking, it tends to keep cracking, so take your time and use a metal prying tool if you need to gently scoop out any stubborn pieces.
- Stay sharp, but if things get gnarly, you can always schedule a repair for a hand from the pros.
Step 2


The iPad you see in the pictures might look a bit different from yours, but don’t worry—the steps you’ll follow are exactly the same.
- Gently slide a metal spudger along the right edge between the display and the back panel—think of it as giving your device a tiny massage.
- Twist the spudger away from you to pop the tabs along the top edge of the screen—smooth and steady wins the race!
Tools Used

Step 3


- Slide a second metal spudger between the top edge of the display assembly and the rear panel assembly to ensure those pesky tabs don't snap back into place.
- Gently pry the display assembly away from the rear panel.
Tools Used
Step 4


Heads up! As you get close to the top edge of your iPad, take it slow—there's a digitizer ribbon cable chillin' near the rear panel edge, and it's pretty easy to accidentally damage.
- Keep gently prying the display assembly away from the back panel along the bottom and left edges of the iPad. You’re doing great—just a little more to go!
Step 5

Careful now! Don’t yank the display up too high—there’s a super delicate antenna cable still holding things together, and it doesn’t have much wiggle room.
- Gently peel the display assembly off the rear panel by lifting from the bottom edge.
Step 6

- Gently slide the flat end of a spudger under the antenna connector near the bottom of the iPad and lift it off its socket on the communications board.
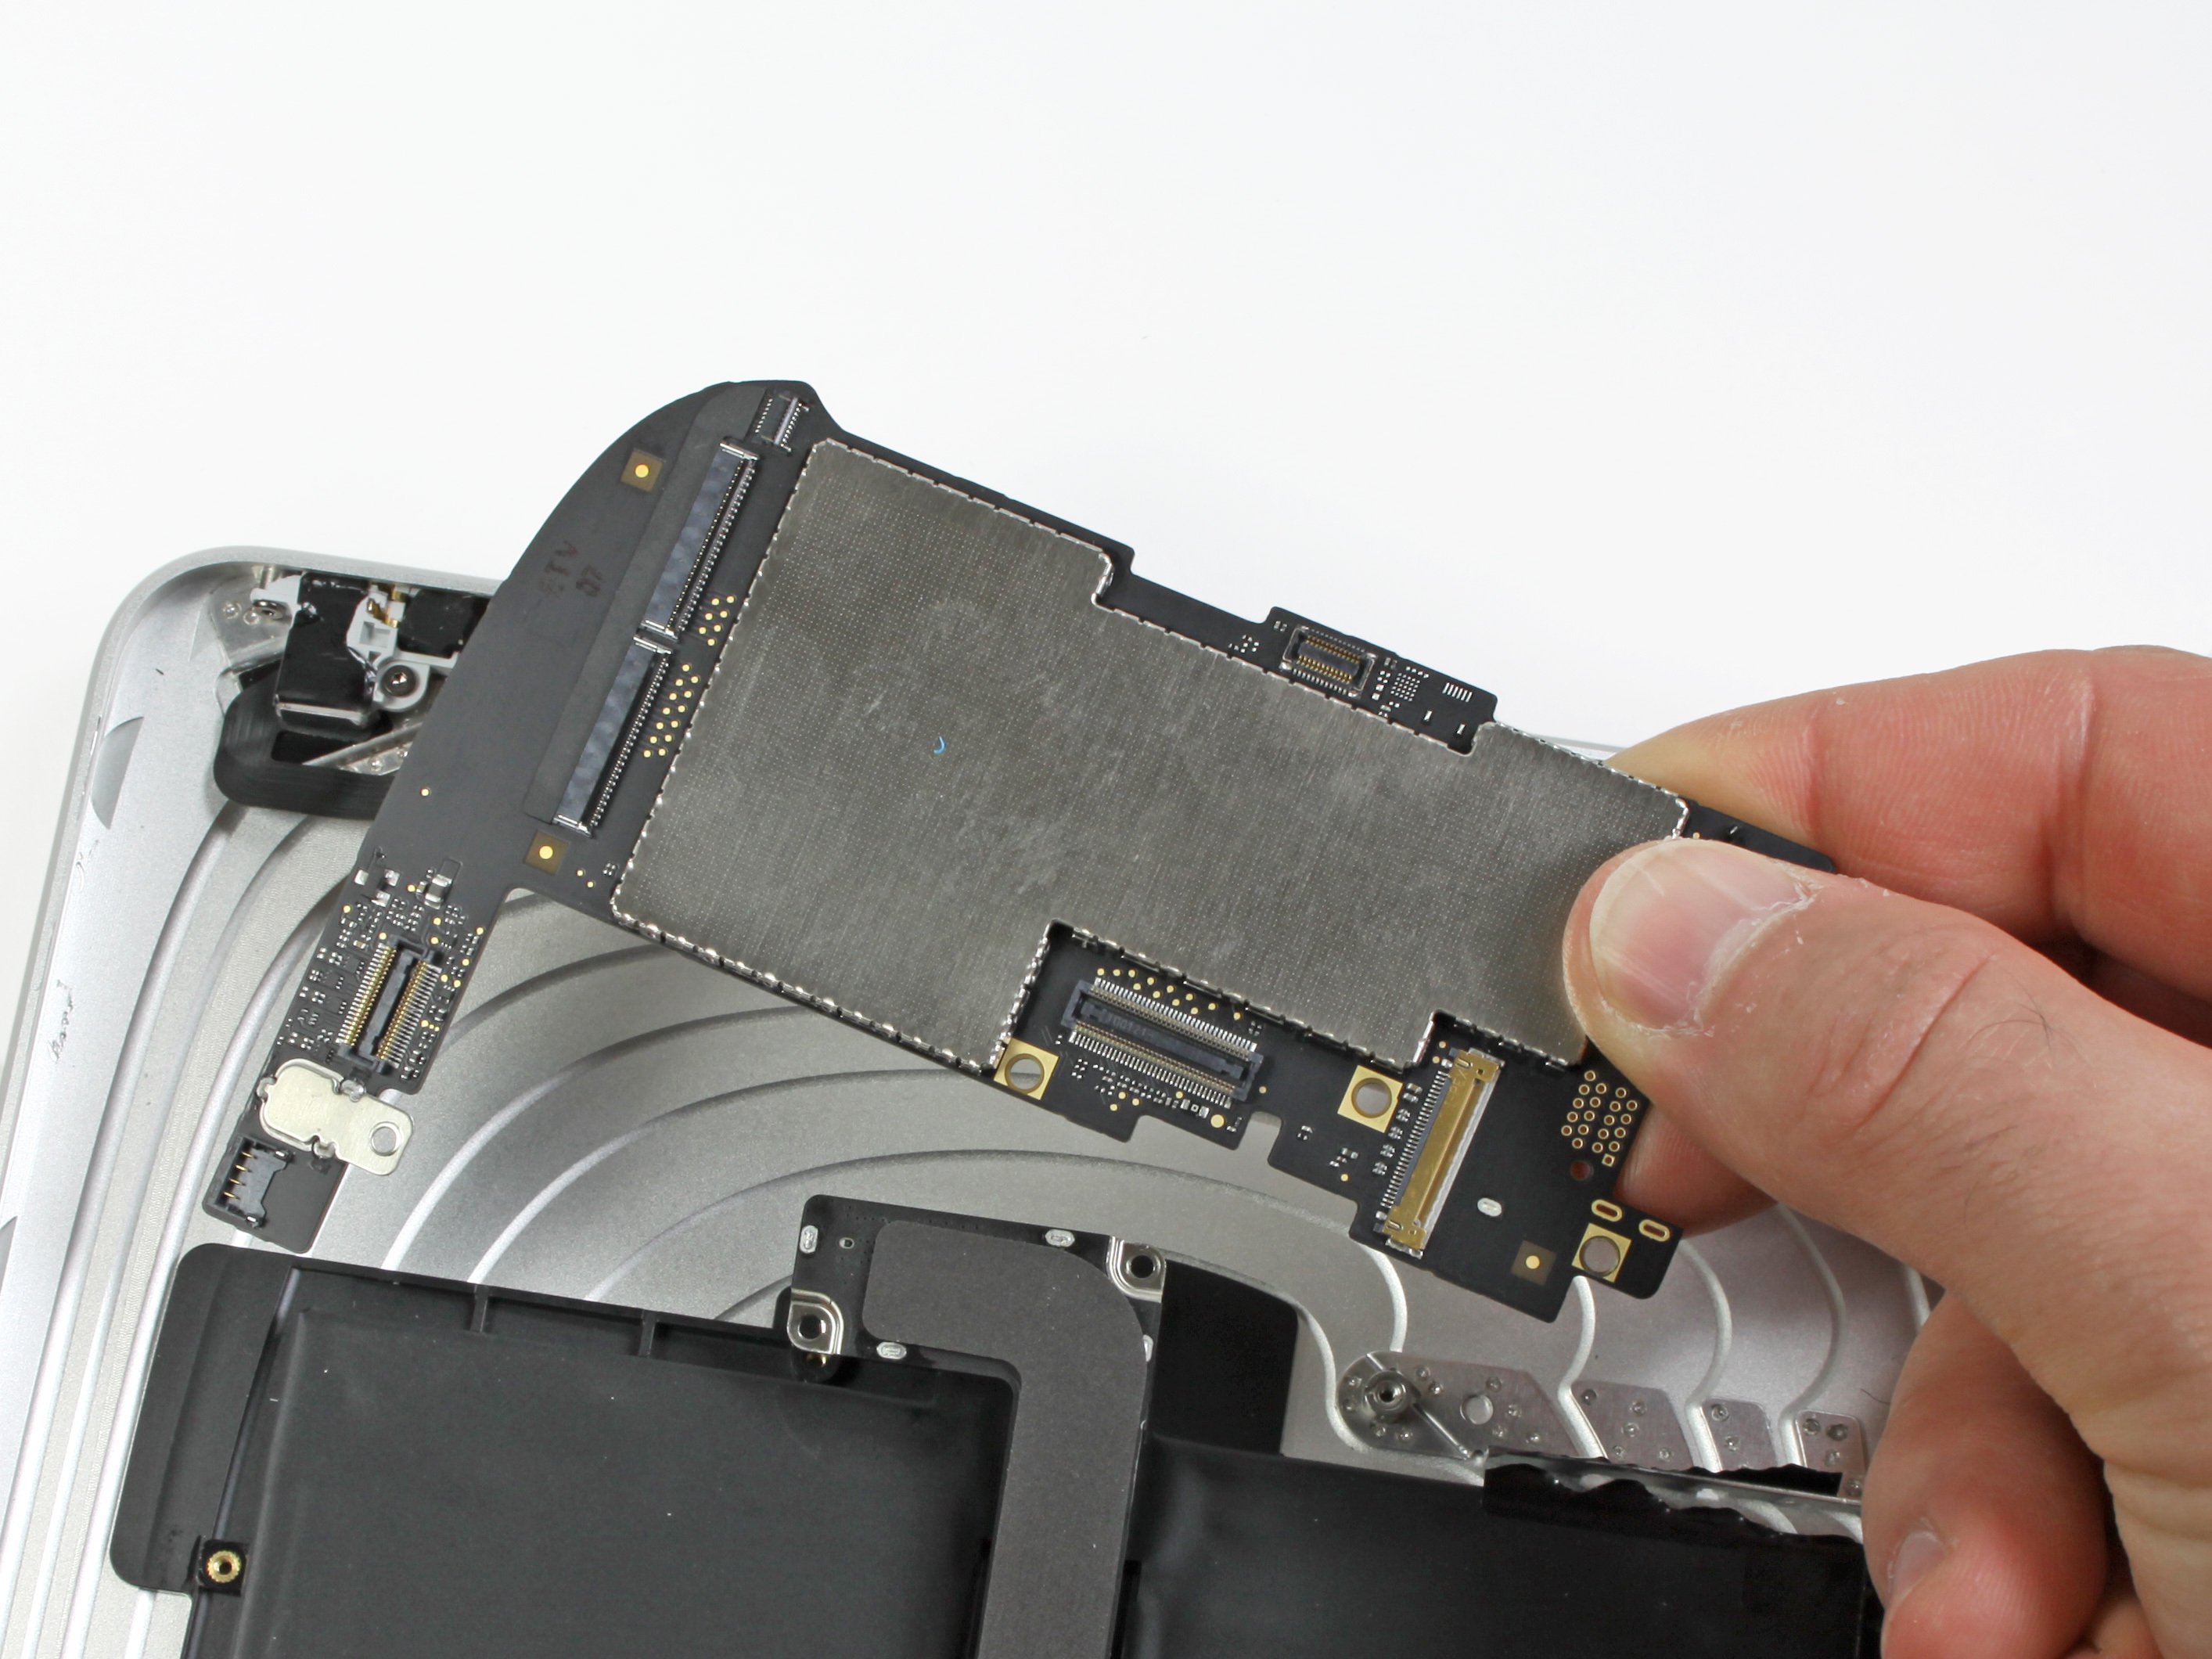
Step 7

- Alright, let's get this show on the road! In the coming steps, we're going to gently disconnect the three cables that link the display assembly to the logic board. These cables are responsible for some pretty important components:
- Digitizer
- Ambient Light Sensor
- Display Data Cable
Step 8


Make sure you’re lifting the tiny retaining flap—not the whole socket. Trust us, your device will thank you for the extra precision!
- Grab the edge of your trusty iPod opening tool and gently lift up the little retaining flaps that are keeping those digitizer ribbon cables snug in their spots on the logic board.
- Now, carefully pull the digitizer ribbon cables out of their sockets, making sure to keep everything nice and straight.
Step 9

- Grab your trusty iPod opening tool and gently work it under the ambient light sensor connector. A little upward pry, and it should pop right out of its socket.
Step 10


Slide that connector straight out, keeping it level with the logic board. No need for acrobatics—just a smooth move!
- Gently lift the metal retainer using the black plastic pull tab to disconnect the display data cable from the main board.
- Carefully pull the cable connector out of its socket.
Step 11

- Carefully detach the display assembly from the rear panel assembly.
Step 12

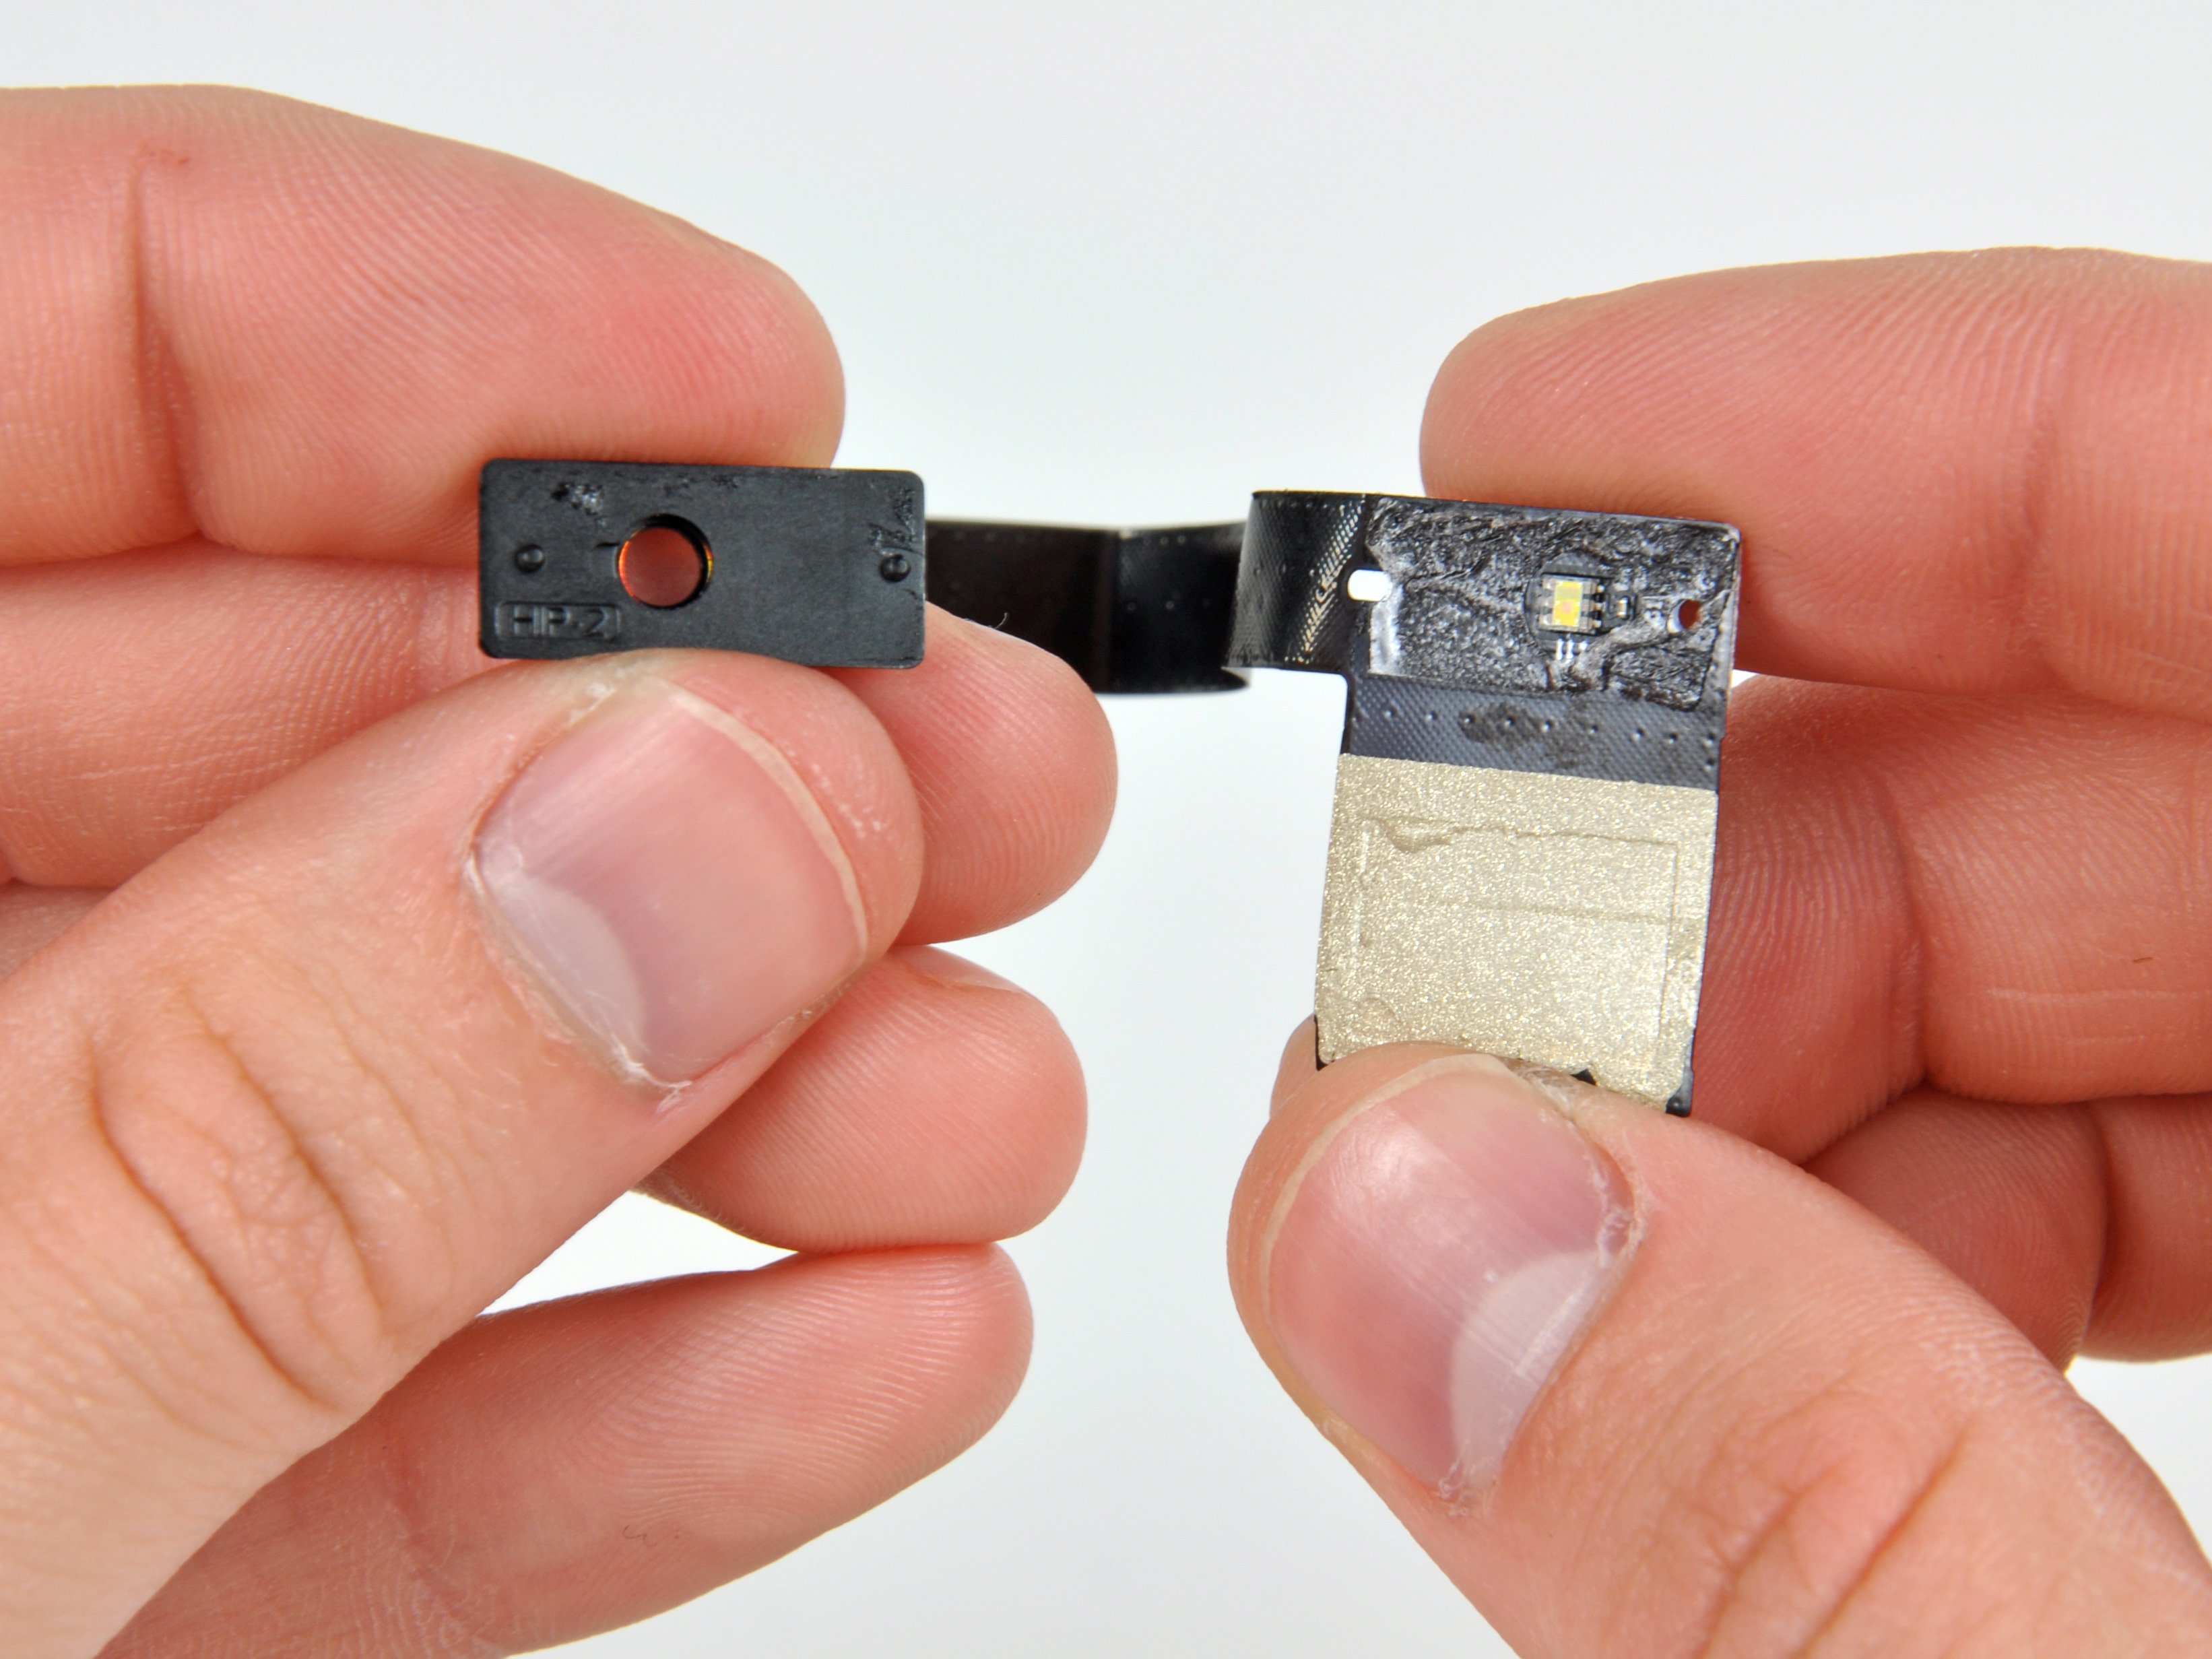
If needed, gently remove the foam tape from the ambient light sensor. Be sure to take your time, it's a small step but important!
- You don't have to go all out and take off the foam tape that's stuck to the antenna. Just leave it be and keep on moving!
Step 13


Pop that plastic view window onto your shiny new ambient light sensor if needed, and you’re all set for installation!
- To put your device back together, just follow these steps in reverse—easy peasy! If you hit a snag, don’t hesitate to schedule a repair with us.