iPad 4 GSM SIM Board Replacement
Duration: 45 minutes
Steps: 39 Steps
Get ready to swap out that SIM Board like a pro! Follow this guide to make it happen with ease and confidence. If you hit a snag, remember, you can always schedule a repair!
Step 1
For carousel microwaves: Ensure that the plate has a smooth spin. If your iOpener gets a little too cozy and gets stuck, it might start to overheat and cause a burn. Keep it moving for safe microwaving!
Before you get started, it’s a good idea to give your microwave a quick clean. Any gunk left on the bottom could end up sticking to the iOpener, and nobody wants that.
- Pop the iOpener right in the middle of the microwave, like it's getting ready for a spa day.
Tools Used
Step 2
Keep an eye on your iOpener’s temperature—overheating it could cause it to pop! Don’t crank the heat past 100˚C (212˚F).
If your iOpener looks puffed up or swollen, hands off—it’s time to give it a break.
If the middle of the iOpener is still too hot to handle, keep using it gently while it cools down a bit before reheating. When heated just right, it should stay toasty for about 10 minutes.
Depending on how powerful your microwave is, you might need to heat it for a bit more or less time. The iOpener is ready when it's just warm enough to give you a gentle reminder to be careful with it!
- Pop the iOpener in the microwave for about thirty seconds to get it nice and toasty.
- As you work, if the iOpener starts to cool down, just give it another quick 30-second zap in the microwave to keep the heat going.
Tools Used
Step 3
The iOpener gets pretty hot, so handle with care. If you're feeling extra cautious, grab an oven mitt to keep things cool.
- Carefully take the iOpener out of the microwave by grabbing one of the two flat ends—steer clear of the hot middle part!
Tools Used
Step 4
Heads up! The iOpener's gonna be pretty toasty, so make sure to grab it by the end tabs. Safety first, always!
No microwave? No problem! Just pop your iOpener into a pot of boiling water and let the magic happen.
- Grab a pot or pan and fill it up with enough water to fully immerse your iOpener.
- Bring the water to a boil, then turn off the heat. Easy, right?
- Now, gently place your iOpener into the hot water. Make sure it gets completely submerged for a solid 2-3 minutes.
- Use tongs to carefully lift the iOpener out of the water once it's nice and heated up.
- Give the iOpener a good dry with a towel so it’s ready to rock.
- All set! Your iOpener is good to go! If you ever need to heat it up again, just repeat the process: boil the water, turn off the heat, and dunk the iOpener in for 2-3 minutes.
Tools Used
Step 5
- Grab a SIM eject tool or a paperclip that's been straightened out and gently pop the SIM tray out. Easy peasy!
Step 6
- Gently slide the SIM tray out of its cozy little home and set it aside for now.
- If you're swapping out the SIM card, give it a little nudge to pop it out of the tray, and then slide the new one in like a pro!
Step 7
Put on those safety glasses to keep your eyes safe, and watch out for that fragile LCD screen—it's not a fan of rough handling!
This will help keep those pesky glass shards in check and maintain the strength of your device while you carefully pry and lift the display.
- If your screen is sporting some cracks, let's keep things safe and sound! Grab some tape and cover that glass to avoid any further shattering or potential mishaps during your repair journey.
- Layer on some clear packing tape over the iPad's display, making sure every inch is covered like a cozy blanket. No glass left behind!
- Now, let’s tackle the rest of the guide step by step! Just a heads-up: once the glass starts to crack, it might just want to keep going. You might find yourself reaching for a metal prying tool to help scoop out those stubborn glass pieces. And remember, if you need any support along the way, don’t hesitate to schedule a repair.
Step 8
Just a friendly reminder: while you're diving into this repair, you might encounter some broken glass. To keep your peepers safe from any flying bits, we highly recommend rocking a pair of safety glasses. Better safe than sorry, right?
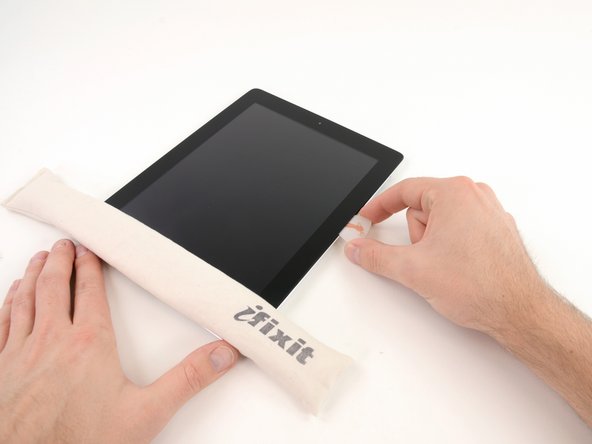
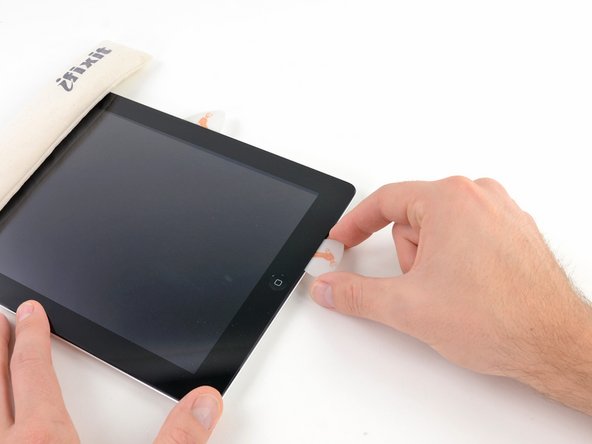
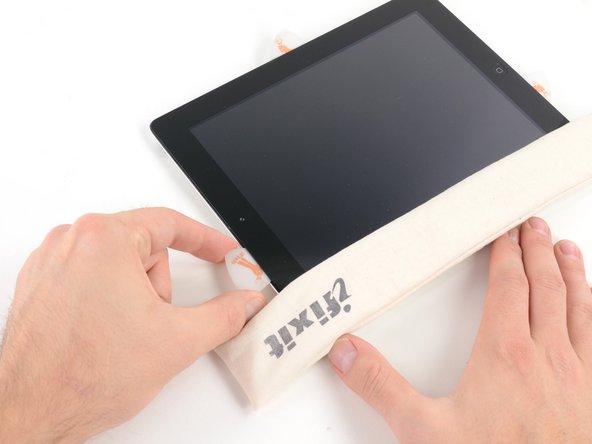
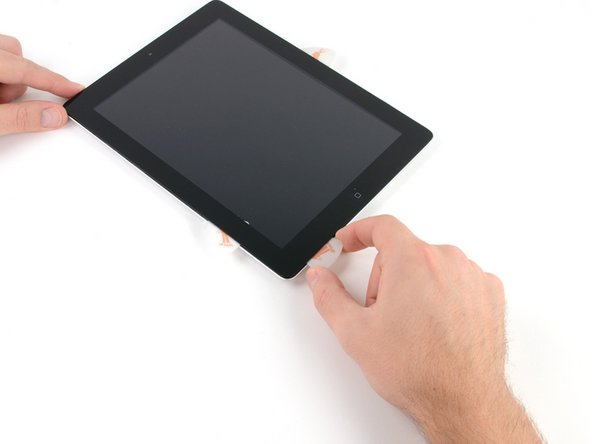
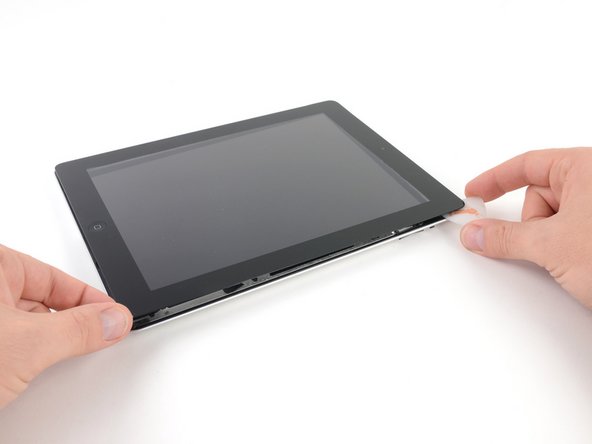
- Position the iOpener flat against the right edge of the iPad, making sure it’s snug and cozy for the best contact. We want that warmth to work its magic!
- Give it about 90 seconds to chill on the iPad before you dive in and open the front panel. Patience is key, my friend!
Tools Used
Step 9
It might take a little bit of elbow grease to slide that trusty opening tool between the glass and plastic. Just take your time and be gentle, giving it a little wiggle as you go along. You've got this!
- Hey there! So, there's this tiny little gap in the adhesive ring of your iPad, nestled in the upper right corner. It's about 2.0 inches (~5 cm) from the top, and guess what? We're going to take advantage of that little quirk. Let's get to it!
- Next up, align your tool with the mute button. Gently slide the tip of a plastic opening tool into that gap between the front glass and the plastic bezel. Just the tip, mind you—enough to give that crack a little nudge to widen it. You're doing great!
Step 10
- Carefully slide your tool right between the plastic display bezel and the front glass panel—precision placement is key here!
Step 11
- Gently wedge the tip of your plastic opening tool between the front glass and plastic bezel, then slide a plastic opening pick into the gap right next to it to carefully pry things open.
Step 12
- Gently slide the plastic opening tool away from the iPad, then carefully nudge the opening pick a bit deeper under the front glass—about half an inch should do the trick.
Step 13
- As you carefully loosen the adhesive on the right side of the iPad, go ahead and give that iOpener another warm-up before popping it back on the bottom edge to keep things nice and toasty.
Tools Used
Step 14
The adhesive is super tough, so you might need to put in some elbow grease. Just take your time and be gentle with it!
If you spot the tip of the opening pick sneaking out from under the front glass, just pull it out a smidge. While having the pick this deep won’t cause any damage, it might spread some adhesive gunk onto the LCD, so heads up!
- While the bottom edge is warming up with the iOpener, start loosening the adhesive from the right side of the iPad.
- Gently slide the opening pick down along the edge, easing the adhesive away as you move.
Tools Used
Step 15
You might need to scoot that heated iOpener back over to the right edge of your iPad as you peel away the adhesive. This little dance depends on how long your iPad has cooled off while you’ve been working your magic.
- If the opening pick gets stuck in the adhesive, gently roll it along the edge of the iPad to keep loosening the glue without any fuss.
Tools Used
Step 16
- Before you go for the first opening pick, slide a second pick under the right edge of the front glass. This will prevent the adhesive from sticking back on you.
- Give the iOpener a quick reheat and move it up to the top edge of the iPad for a smoother process.
Tools Used
Step 17
The Wi-Fi antenna is securely fastened to the bottom right corner of the iPad’s rear case with screws and a cable. Since the antenna’s position is pretty particular, take it slow and steady when working on it. One wrong move and you could risk damaging the Wi-Fi antenna beyond repair!
- Alright, folks! Time to tread carefully in the next few steps.
- You'll need to gently peel back the adhesive that's holding the antenna to the front panel. Be super cautious not to mess with the delicate bits that connect the antenna to the bottom of your iPad. Just follow these steps with care, and you'll be golden!
Step 18
Don't push the pick past the bottom right corner! You might accidentally mess with the Wi-Fi antenna, and we definitely don't want that!
- Gently slide the opening pick around the bottom right corner of your iPad, carefully lifting the adhesive away from the surface.
Step 19
- Gently slide the tip of your opening pick along the bottom edge of the iPad to loosen the adhesive around the Wi-Fi antenna. Keep it smooth and steady!
Be cautious as you slide the opening pick along the bottom right edge of the front panel. The Wi-Fi antenna is close to the corner and can be easily damaged if the adhesive isn’t released carefully. Take it slow and steady, and if you're unsure, don’t hesitate to schedule a repair for extra help.
Don't fully pull the pick out from under the front glass, just give it a gentle tug so that around 1/8" (3 mm) of the tip stays tucked under the glass. Patience, you've got this!
Step 20
- After you pass the Wi-Fi antenna area (about 3" or 75 mm from the right edge, right by the home button), slide the opening pick all the way in.
- Gently slide the pick to the right to loosen the adhesive holding the Wi-Fi antenna to the front glass.
- The antenna is screwed and connected by a cable at the bottom of the iPad. This step separates the antenna from the front panel so you don’t accidentally damage it when removing the panel.
Step 21
Keep it cool—heat up the iOpener for no more than a minute at a time, and always chill out for at least two minutes before giving it another round!
If the adhesive has cooled down too much along the bottom edge, give that iOpener a little reheat to cozy up the adhesive where you're working your magic.
- Keep working your way around the bottom edge by easing up the adhesive. Slide your opening pick out just enough to get past the home button, then pop it back in about 1/2 inch (10 mm) deeper to keep things moving smoothly.
Tools Used
Step 22
On iPad 4 models, gently slide the pick in up to 1/2 inch (10 mm) in this area. Be careful not to press too deep – we don't want to mess with that home button ribbon cable!
- Keep working your way across the bottom edge, gently peeling off the adhesive until you've got it all free.
- Now, slide the opening pick under the front glass near the home button and leave it there for a little extra help holding things apart.
Step 23
- Warm up the iOpener in the microwave and gently place it on the left edge of the iPad to start loosening the adhesive there.
Tools Used
Step 24
If the adhesive has cooled down too much, pop the iOpener back along the top edge and keep going. If the iOpener itself has lost its heat mojo, give it a quick reheat and you’re good to roll.
- Gently slide the opening pick along the top edge of your iPad, easing it out just enough to get around the front-facing camera bracket.
- Heads up: the adhesive here is a tough cookie and might need a bit of muscle. Take your time and keep it steady to avoid any slips or scrapes.
- If your pick feels like it’s getting stuck in the adhesive, try "rolling" it as shown in step 9 to keep things moving smoothly.
Tools Used
Step 25
Once the adhesive feels nice and warm, go ahead and take the iOpener off the iPad to make things easier. If it’s still sticking around like a clingy friend, just heat the iOpener back up and rest it on the left edge while you keep working your magic.
- Keep loosening the adhesive along the iPad’s top edge, then smoothly slide your opening pick around the top left corner like a pro.
Tools Used
Step 26
The digitizer cable is nestled about 2" (50 mm) from the bottom of your iPad. Take a pause from sliding that pick when you reach around 2.25" (60 mm) from the bottom. You've got this!
- Gently glide the opening pick along the left edge of your iPad, peeling away the adhesive as you go. The adhesive is pretty thin here, thanks to the digitizer running along the entire left side. Just be careful not to go too deep (keep it to a max of 1/2 inch or 10 mm) to avoid any accidental damage to that digitizer!
Step 27
The digitizer cable is pretty close to the bottom of the iPad, only about an inch (25 mm) away. Go slow and steady here—be extra careful not to cut this cable!
- Carefully slide the opening pick, still tucked under the bottom edge of the iPad, and gently loosen the adhesive near the bottom left corner.
Step 28
It looks like some of that sticky adhesive around the edge of your iPad might have reattached itself. No worries! Just slide a pick gently under the part where the front glass is still holding on tight and give that adhesive a little 'snip' to free it up.
- Grab one of your opening picks and gently pry up the bottom right corner of the iPad, then snag it with your fingers like a pro.
Step 29
Watch out for any stubborn adhesive lurking around, and carefully use an opening pick to gently slice through any glue still holding the front panel in place.
- Grip your iPad gently by the top and bottom right corners and give that front glass a little twist away from the device.
- When putting everything back together, grab a microfiber cloth and some compressed air to give the LCD a nice clean-up, removing any pesky dust or fingerprints before sealing it with the glass.
Step 30
The bottom left screw is hiding behind the home button ribbon cable connector. Gently nudge that ribbon cable out of the way so you can get to that elusive screw and remove it.
- Unscrew the four 2 mm Phillips #00 screws holding the LCD to the aluminum frame. Time to break out the screwdriver and get that screen loose!
Step 31
Handle that LCD with care! The ribbon cable is super delicate and could snap if you bend it too much. Keep it safe and sound!
- Grab your plastic opening tool or spudger and gently pry up the right edge of the LCD from the iPad. Easy does it!
- Once you've got the right edge free, carefully rotate the LCD along its left edge and lay it flat on top of the front glass. You're almost there!
Tools Used
Step 32
- Gently lift the tape covering the LCD ribbon cable connector using the tip of your trusty spudger.
Tools Used
Step 33
- Lift up the little flap holding down the LCD ribbon cable on the ZIF connector.
- Gently wiggle the LCD ribbon cable free from its socket on the logic board using your fingers or tweezers.
- If the LCD screen doesn’t light up after reconnecting the ZIF cable, try a force restart by holding the power and home buttons together for about ten seconds until the Apple logo appears.
Step 34
- Carefully lift the LCD away from the front panel without making contact with the screen itself. You're doing great!
Step 35
- Gently peel away the electrical tape that's been keeping the headphone jack assembly cable connector cozy. It's time for it to make its grand exit!
- With the tip of your trusty spudger, give a little flip to the retaining flap on both ZIF connectors that are holding the headphone jack cable snug against the logic board. You've got this!
Tools Used
Step 36
- Gently slide the flat end of your trusty spudger beneath the headphone jack assembly cable, freeing it from the sticky grip of the adhesive holding it to the rear aluminum frame.
- Carefully pull the headphone jack assembly cable straight out of its cozy socket on the logic board.
Tools Used
Step 37
- Peel back the tape and free the SIM board cable ZIF connector like you're opening a little surprise gift!
- Lift up the retaining flap on the SIM board cable ZIF connector – it’s like popping the lid off a snack container.
- Grab your trusty spudger and gently pull the SIM board cable out of its cozy socket on the logic board. Nice and easy, like untying a shoe.
Tools Used
Step 38
- Unscrew the three 1.75 mm Phillips #00 screws holding the SIM board tight to the aluminum frame. Keep them safe—you’ll need them again!
Step 39
As you gently move the headphone jack assembly cable aside, take care not to tug too hard on the headphone jack – we wouldn't want it to take an unexpected vacation!
- Put your device back together by reversing these steps, and use our iPad 4 GSM Front Panel Adhesive strip guide to stick the front panel back on snugly.
-


