iPad 5 Wi-Fi Logic Board Replacement
Duration: 45 minutes
Steps: 94 Steps
Follow this guide to swap out a busted logic board in your iPad 5 Wi-Fi. Heads up: the logic board is linked to your iPad's home button, so swapping it means your Touch ID will wave goodbye.
Step 1
- Warm up an iOpener and stick it on the left side of your device for a solid two minutes to loosen things up.
Tools Used
Step 2
- While you're letting that adhesive take its time to relax, keep an eye out for these delicate spots that are a bit touchy when it comes to prying:
- Front camera
- Antennas
- Display cables
Step 3
In the next three steps, we're showcasing the Anti-Clamp! It's a nifty little tool we've created to make opening your device a breeze. If you're not using the Anti-Clamp, no worries—just skip ahead three steps for a different approach.
Want to master the Anti-Clamp? Check out this helpful guide for all the details!
If your iPad's surface is a bit too slick for the Anti-Clamp to grip, a little tape can work wonders to give it a better hold.
- Slide the blue handle back to release the Anti-Clamp’s arms.
- Set your iPad on something so it sits nice and level between the suction cups.
- Place the suction cups near the center of the left side—one up top and one down low.
- Keep the bottom of the Anti-Clamp steady while pressing down firmly on the top cup to create suction.
Step 4
- Slide the blue handle forward until the arms click into place.
- Rotate the handle clockwise a full 360 degrees, or until you notice the suction cups starting to stretch.
- Keep an eye on the suction cups to ensure they stay lined up. If they start to drift, just loosen them a bit and realign the arms.
Step 5
Turn no more than half a twist at a time, then give it a minute to chill. Let the Anti-Clamp and patience do their magic!
Want to know how to use a hair dryer for this? We’ve got you covered. Check out this guide for the full breakdown.
If the Anti-Clamp isn’t giving you the gap you need, no worries. Just heat up the area a bit more and twist that handle clockwise about half a turn.
- Take a moment and hang tight for a minute to let that adhesive do its thing and create a little opening for you.
- If your screen seems to be playing hard to get and isn't warming up enough, a hairdryer can be your best friend—just gently warm up the left edge of the iPad.
- When the Anti-Clamp has worked its magic and made a nice gap, slide in an opening pick under the digitizer to keep that opening going.
- Feel free to skip the next step!
Step 6
Got a cracked screen? No worries! If it’s really bad, try covering it with some clear packing tape to help the suction cup stick. If that doesn't work, super strong tape could do the trick in place of the suction cup. And if you're feeling a bit wild, you can even glue that suction cup right onto the broken screen. You’ve got this!
- When the screen feels warm to the touch, grab your suction handle and stick it right on the left edge of the screen, as close to the edge as you can get.
- Use the suction handle to gently lift the screen, just enough to create a tiny gap between the digitizer and the frame.
- Slip an opening pick into that gap between the digitizer and the frame to keep things moving.
Tools Used
Step 7
No need to stress if the opening pick is peeking through the digitizer — just gently wiggle it out. The LCD screen should be just fine, but be careful; you might leave behind some sticky adhesive that's a bit of a pain to clean up.
- Pop in a second opening pick into that fresh gap you've just made.
- Gently slide the pick down towards the bottom-left corner of your device to break free the sticky stuff holding it together.
- Keep that pick tucked in the bottom-left corner to make sure the adhesive doesn't decide to play hide-and-seek again.
Step 8
- If the opening pick gets stuck in the adhesive, just give it a little 'roll' along the side of the iPad to keep peeling away that sticky stuff!
Step 9
- Gently glide the first opening pick up to the top-left corner of your device to break that adhesive seal like a pro.
- Keep that pick snugly in the top-left corner to stop the adhesive from playing tricks and sealing back up.
Step 10
- Warm up an iOpener and place it gently on the top edge of your device for a cozy two minutes.
Tools Used
Step 11
- Gently twist the pick around the top-left corner of your device to break that pesky adhesive seal.
Step 12
Steer clear of sliding that pick over the front camera; you wouldn't want to accidentally put a scratch on that lens! Stick with us as we share the best tips to keep it safe and sound.
- Gently slide the opening pick along the top edge of your device, making sure to pause right before you reach the front camera.
Step 13
- Gently pull the pick out so that only the tip is nestled between the digitizer and the frame.
- Slide the pick smoothly above the front camera to break the adhesive seal.
- Keep the pick close to the right side of the front camera, ready to continue the separation.
Step 14
- Slide the pick back in and shimmy it towards the top-right corner of your device to fully break free that pesky top adhesive.
- Keep that pick in the top-right corner to ensure the adhesive doesn’t decide to stick around again.
Step 15
- Grab your trusty iOpener and give it a little heat! Place it on the right edge of your device for a cozy two-minute warm-up. You'll be all set to move on to the next step!
Tools Used
Step 16
- Gently twirl the pick around the top-right corner of your device to break free that stubborn adhesive.
Step 17
The display cables hang out about halfway up from the bottom of your iPad. Slide carefully and stop when you’re about three inches from the bottom — no need to go any further!
- Grab a fresh opening pick and gently slide it along the iPad's right edge, making your way to the middle. Take it slow and steady, you'll be there in no time.
Step 18
- Warm up your iOpener and give it a cozy spot on the bottom edge of your device for a solid two minutes. Let's get that adhesive nice and toasty!
Tools Used
Step 19
Avoid spinning the pick all the way around the corner — we don’t want any antenna casualties!
- Gently slide your trusty bottom-left pick into the corner to break that adhesive seal like a pro.
- Keep that pick in place at the bottom-left corner before you move on to the next exciting step!
Step 20
Be sure to slide the pick gently toward the home button—steering away from it could mess with the antenna. Take it slow and steady!
If you need to slide the pick over this section again, just pull it out and carefully insert it back in at the bottom-left corner. No stress, you've got this!
- Pop a new opening pick into that little gap you just made at the bottom edge of your iPad.
- Gently slide the pick over the antenna, but hold up just before you hit the home button.
- Keep that pick chilling to the left of the home button before moving on.
Step 21
Be careful to only insert the pick up to 1 mm—just enough to get the job done without messing with that right antenna!
- Slide an opening pick into the little gap you just made.
- Gently glide the pick under the home button, aiming towards the bottom-right corner, making sure just the tip sneaks between the digitizer and frame.
Step 22
Keep the pick sliding only towards the home button—going the other way might mess up the antenna, and nobody wants that!
If you find yourself needing to glide that pick over this section again, just slide it out and reinsert it at the bottom-right corner. You've got this!
- Pop the pick back in and gently slide it toward the home button to fully separate the bottom adhesive.
- Leave the pick just to the right of the home button before moving on.
Step 23
- Warm up an iOpener and press it against the right edge of your device for two minutes. This should soften things up just enough to make your next move a breeze.
Tools Used
Step 24
Take it slow with this step. Be sure to give the adhesive enough time to heat up and soften, and make sure you're using the pick to separate every bit of it. It's totally fine to stop and reheat if you need to – patience is key.
If you're feeling some serious resistance, give those edges a little heat and gently glide an opening pick along them. You've got this!
- Give those two opening picks a little twist at the left corners of your iPad. This will help you lift the digitizer just enough to break free the last bits of adhesive. You're doing great!
Step 25
- Gently lift the left edge of the digitizer to help peel away the adhesive from the right side of your iPad. You're doing great!
Step 26
- While gently holding the digitizer in place, carefully slide an opening pick between the two display cables to break free the last bit of stubborn adhesive.
Step 27
- Once all the sticky stuff is out of the way, gently flip the digitizer open like a book and lay it down next to the iPad, just chillin'.
- When it's time to put everything back together, give the leftover adhesive a nice clean-up with some isopropyl alcohol—don't forget the digitizer if you're bringing it back to the party! Swap in some fresh adhesive strips or those nifty pre-cut adhesive cards.
- Keep an eye on those delicate display cables while you're reassembling. Make sure they're tucked in neatly beneath the LCD screen so they don’t get into any mischief.
Step 28
- Peel away any tape hiding those pesky LCD screws. We don’t want anything getting in the way of your progress!
Step 29
- Let's get to work! First up, we need to take off the screws that are holding the LCD in place. Grab your trusty Phillips screwdriver and locate the following screws:
- Three little 4.0 mm screws that are just waiting to be unscrewed.
- And don't forget that one sneaky 4.8 mm screw hiding out there!
Step 30
Don't try to yank the LCD all the way off just yet—it's still hooked up to the iPad by a few cables near the home button. Lift carefully from the front-facing camera side instead.
Be gentle as you flip the display over, and keep an eye on those LCD cables. They'll thank you later.
Gently place the LCD down on a soft, clean surface that won't leave any pesky lint behind.
- Gently wedge the flat end of your spudger under the LCD just enough to lift it out of its slot so you can get a good grip with your fingers.
- Carefully flip the iPad LCD over like turning a page in a book, lifting near the camera and folding it back over the home button side of the rear case.
- Rest the LCD face down to give yourself clear access to the display cables.
Tools Used
Step 31
Handle the battery blocker with care! Those battery contacts are a bit fragile and can get damaged pretty easily, which could lead to some not-so-fun irreversible issues. Let's keep everything in one piece, shall we?
To avoid any short-circuiting surprises, slip a battery blocker or a trusty modified opening pick under the battery to disconnect it.
Having trouble sliding that battery blocker under the logic board? No worries, grab a playing card and gently ease it in there to disconnect the battery.
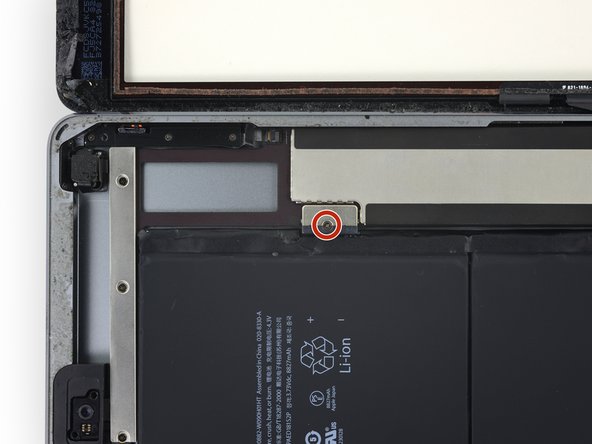
- First things first, let's get that battery connector free! Grab your trusty 2.3 mm Phillips screwdriver and remove the single screw that’s securing the battery connector to the logic board.
- Next, slide the battery blocker under the battery connector area on the logic board. Keep it there while you tackle the next steps—it's your little helper!
Tools Used
Step 32
- Unscrew the three 1.4 mm Phillips screws holding the display cable bracket in place. A little twist, a little pop—off they go!
Step 33
The display cable connector is snugly attached to the underside of the bracket, so be careful not to push the spudger too far underneath. You might end up damaging the connector—nobody wants that! Take it slow and steady.
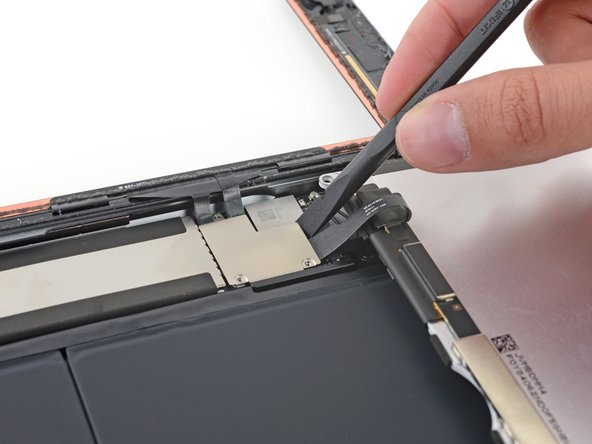
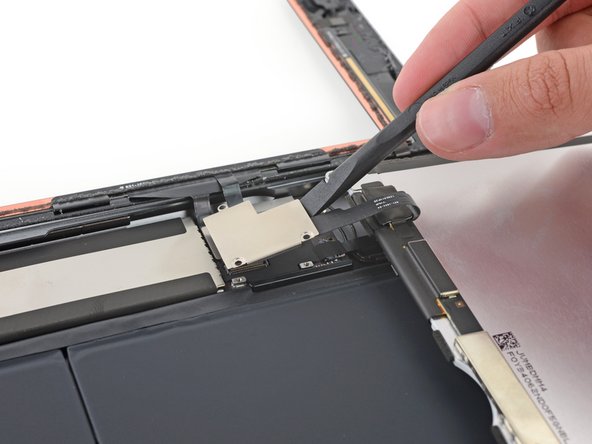
- Gently use the flat end of a spudger to lift the display cable bracket straight up from the logic board. You're doing great!
Tools Used
Step 34
- Carefully detach the LCD screen.
Step 35
- Peel away any tape that's hiding the home button ribbon cable connector. It's like unwrapping a gift, but this one's all about getting your device back in action!
Step 36
- Grab the flat end of your spudger and gently flip the tab on the home button ribbon cable ZIF connector upwards.
- Now, carefully slide the home button ribbon cable out of the ZIF connector—think of it like a smooth, horizontal slide.
Tools Used
Step 37
To keep your iPad in tip-top shape, remember to gently pry on the connectors themselves—those little guys deserve your attention! Avoid getting too close to the socket on the logic board; it's a no-go zone.
- Grab the flat end of a spudger or your fingernail and gently lift the two digitizer cable connectors straight up from their sockets. Take it slow and steady, you've got this!
Tools Used
Step 38
- Gently lift the home button ribbon cable away from the sticky adhesive holding it down to the back case—take it slow and steady!
Step 39
The insulation is a sneaky little thing that you can't see with the naked eye, and it’s a whole different ball game compared to the foam dust barrier strips that are commonly found on many iPads.
- Take off the front panel assembly carefully.
- When putting it back together, give the inside of the front panel assembly a good wipe to clear away any dust or fingerprints—your display will thank you.
- If you notice any weird ‘ghost’ or ‘phantom’ touches on your new display, try adding a super thin layer of insulating tape like Kapton (polyimide) tape to the highlighted spots on the back of the panel. Panels that come properly insulated shouldn’t need this step.
- Without this insulation, parts of the digitizer might short out against other components, causing those pesky touch issues.
Step 40
- Carefully slide a spudger under the antenna cable near the iPad’s edge and gently pop it up to unplug the antenna cable connector.
Tools Used
Step 41
- Two big strips of tape are holding the right antenna cable in place, keeping it snug against the rear case.
- Gently peel the tape off from the rear case.
- As you peel away the tape, leave it attached to the antenna cable so it's easy to put everything back together later.
Step 42
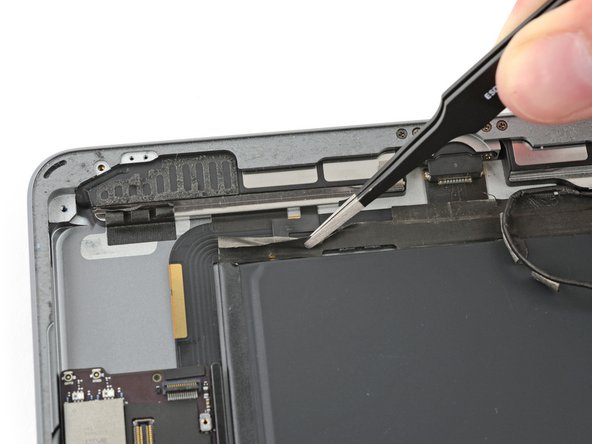
The antenna cable is secured to the speaker using a tiny metal bracket. This little guy is crimped onto the antenna and stuck to the speaker enclosure for good. Got it?
- Gently slip an opening pick between the speaker casing and the antenna cable bracket. Take your time here!
- Now, slide that pick down towards the home button to break through the adhesive. Smooth and steady!
- Give the bracket a gentle push away from the speaker, letting it clear the tape below. A little nudge and you're done!
Step 43
- Grab your Phillips #000 screwdriver and get ready to remove these right antenna screws:
- One 2.3 mm screw
- Two 1.4 mm screws
Step 44
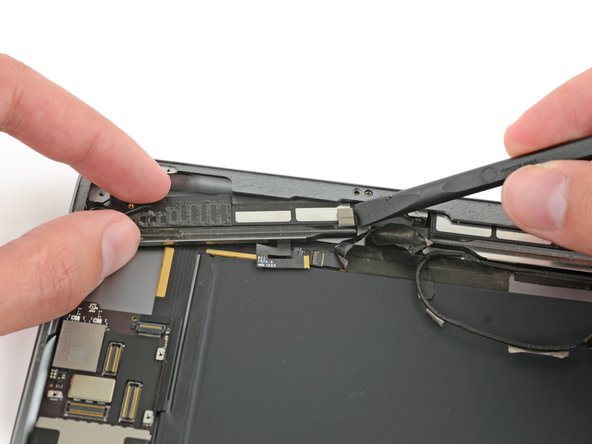
- Gently slide the flat end of your spudger between the antenna and the speaker assembly. We're getting in there!
- Now, give that spudger a little slide toward the home button to break the foam adhesive that's holding the antenna in place. You've totally got this!
Tools Used
Step 45
- Detach the right antenna from your iPad with care.
Step 46
- Slide a spudger gently beneath the left antenna cable and give it a little lift to pop that connection loose. You're doing great!
Tools Used
Step 47
- You've got five pieces of tape holding down that left antenna cable, and they're cozied up with the right speaker cable connector. Let's break that bond!
- Gently peel the tape up from the rear case—nice and easy does it.
- Now, fold that antenna cable out of the way so we can get to the good stuff!
Step 48
A kink in the speaker cable can make lifting the tape at the end a bit tricky.
Use your tweezers like a pro—grab just the tape, not the cable underneath.
- Grab the tape just below the speaker and gently peel it downward, away from the edge of the case. You've got this!
Tools Used
Step 49
- Gently peel back the tape towards the home button to reveal the connector for the speaker cable.
Step 50
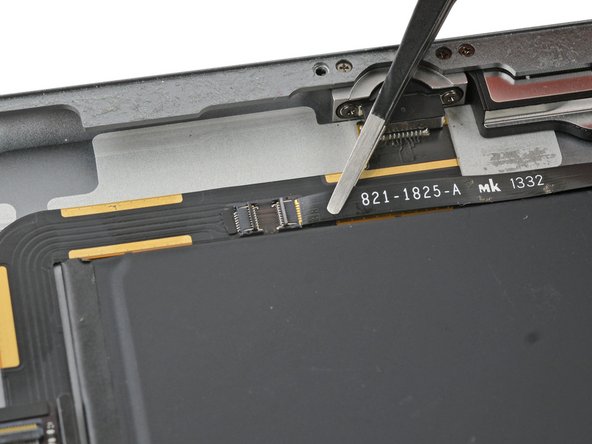
- Grab your trusty spudger and use its pointed end to gently lift the retaining flap on the right speaker cable connector.
- Now, give that speaker cable a straight pull to slide it right out of its ZIF connector. Easy peasy!
Tools Used
Step 51
- Peel off the tape that’s keeping the speaker stuck to the back case.
Step 52
- Gently lift the LCD buffer tape away from the back cover like you're peeling the most delicate banana.
Step 53
- Unscrew the 2.2 mm Phillips #000 screw that’s holding the speaker in place on the back casing. Keep it safe—you’ll need it later!
Step 54
- Gently slide your fingernail or the flat end of a spudger into the groove of the speaker housing, right near the corner of the rear case.
- Now, give that speaker a little tug downwards, away from the corner of the case. You're doing great!
Tools Used
Step 55
- Grab your trusty spudger and gently pry the speaker out from beneath the edge of the rear case.
- Carefully lift the right speaker off the iPad and set it aside.
Tools Used
Step 56
- Unscrew those three 1.4 mm Phillips #000 screws that are holding down the upper component cable bracket. You've got this!
Step 57
If you’re working on the Wi-Fi/Cellular version, your iPad will have a slightly different look and you’ll need to remove two extra screws to get past this bracket. Keep that screwdriver handy!
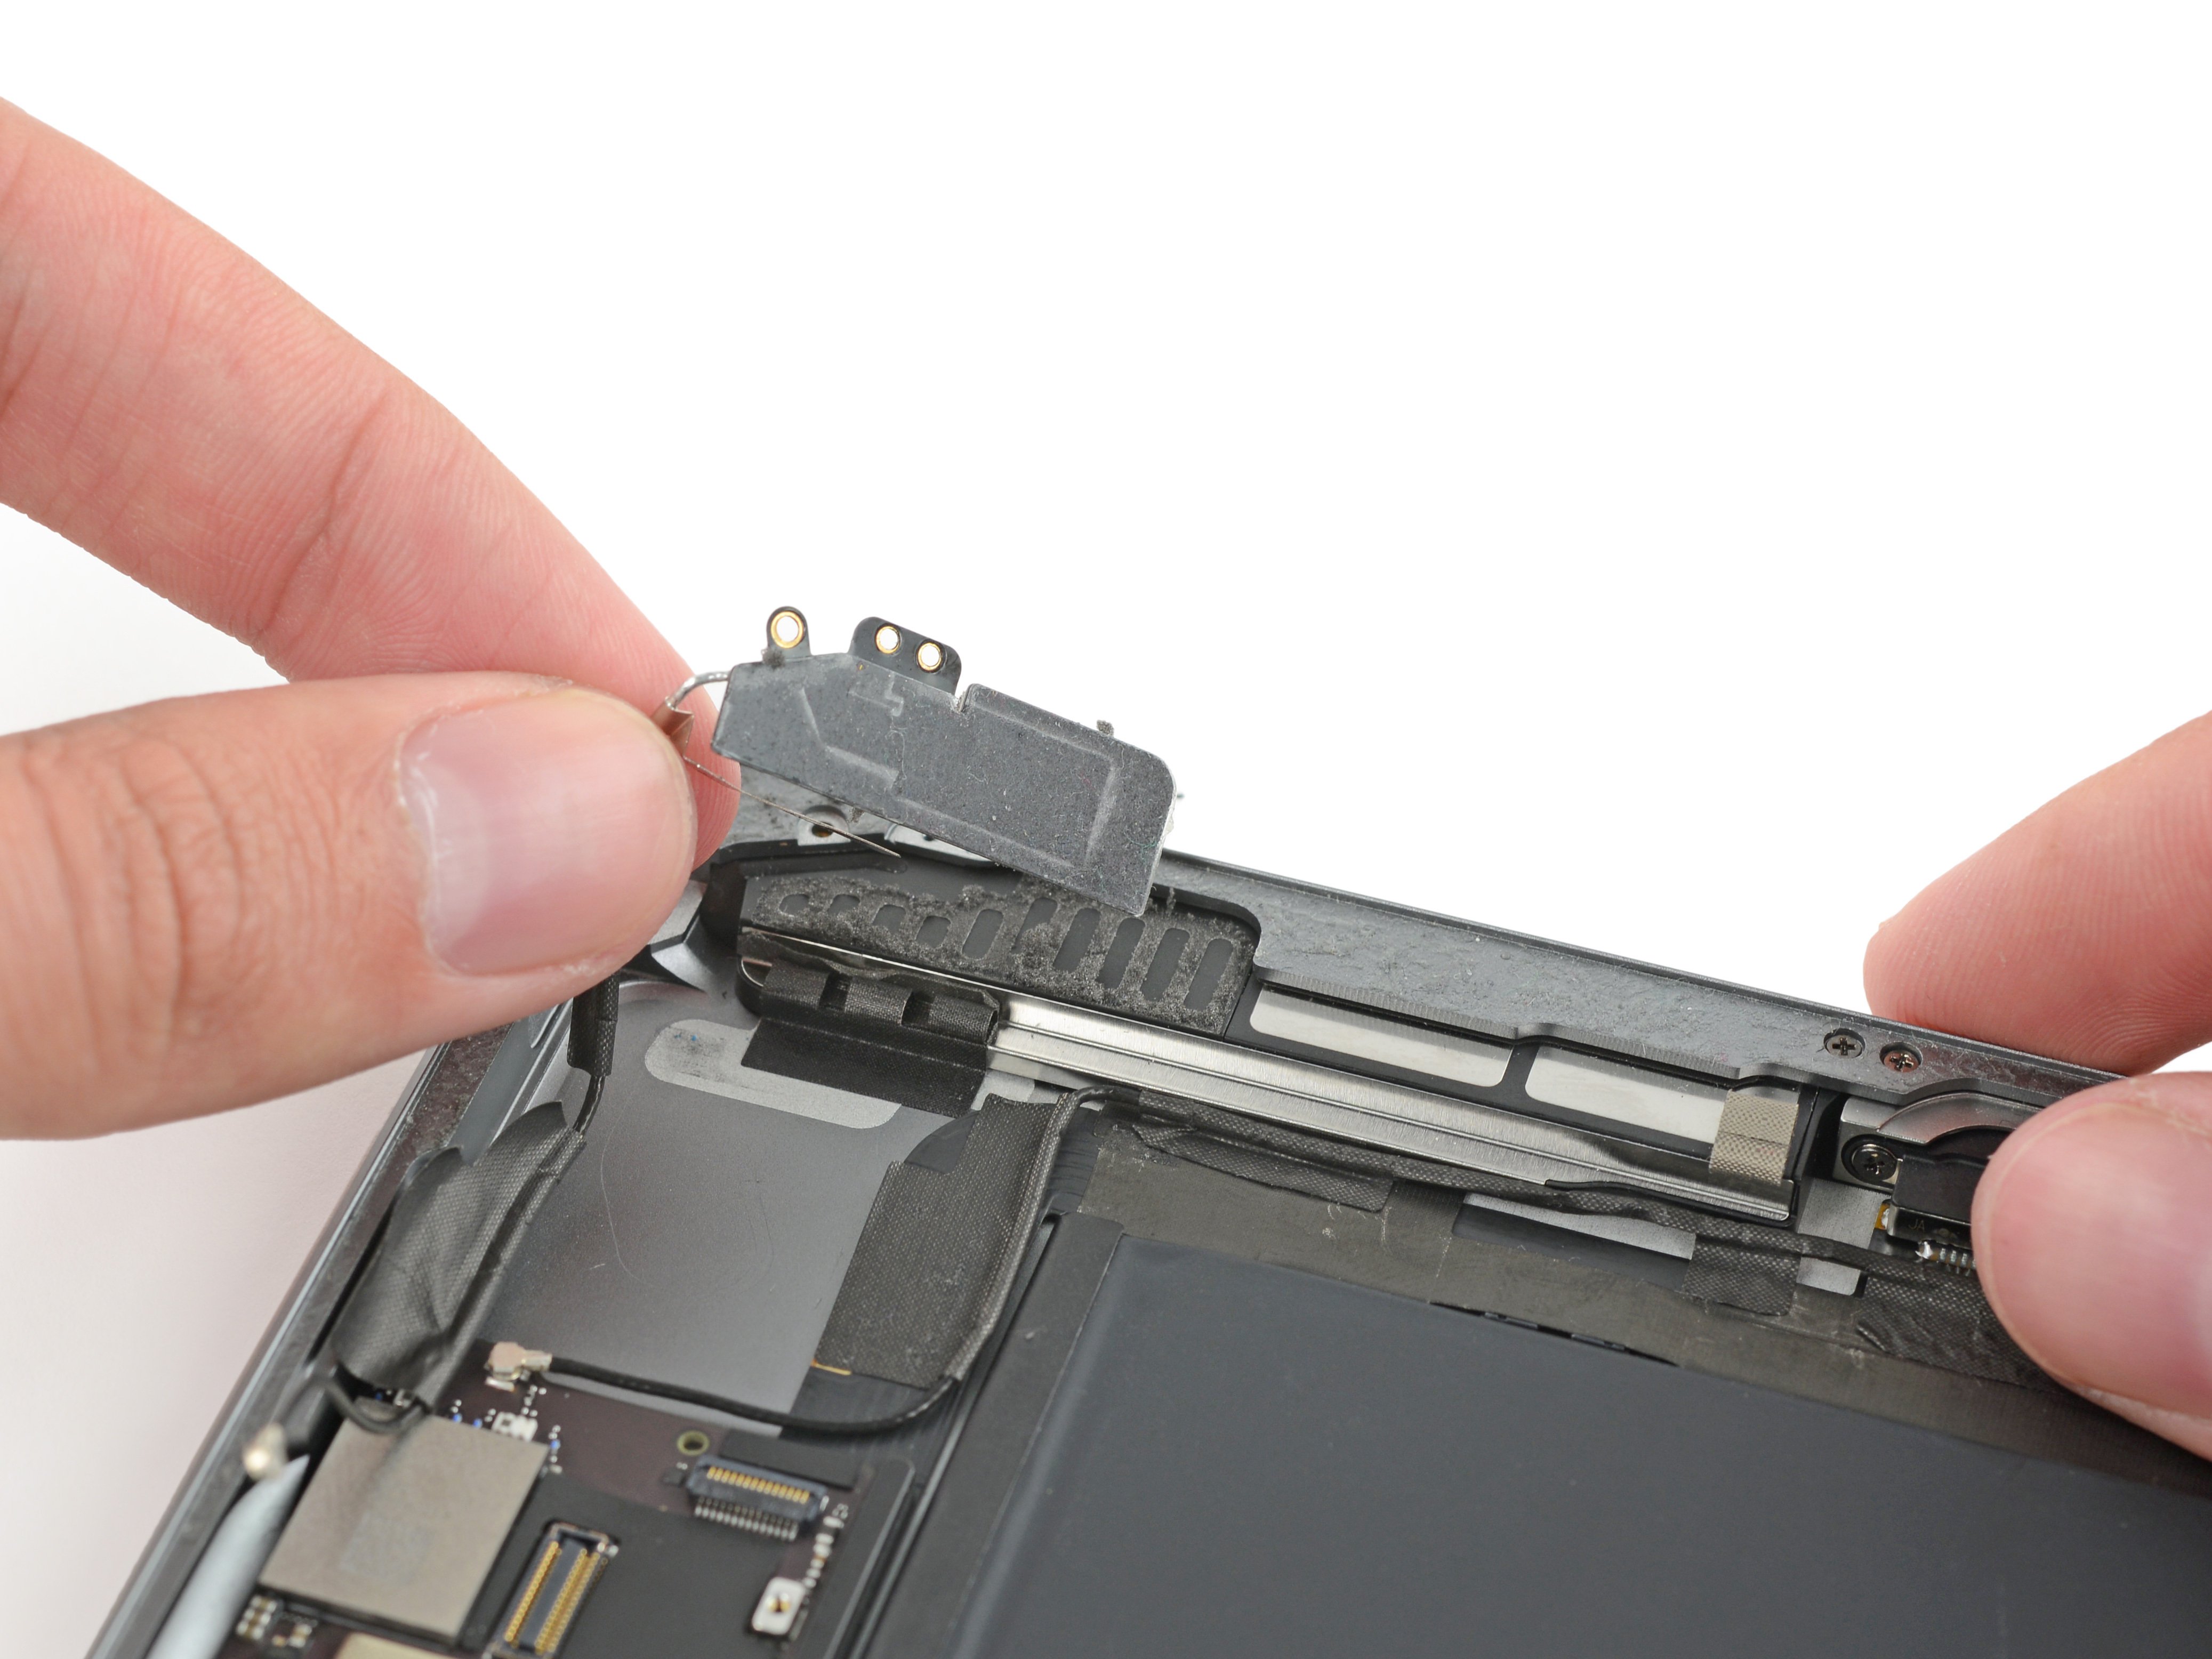
- Gently pop off the upper component cable bracket. You've got this!
Step 58
- There are still two pieces of tape holding the left antenna cable down to the rear case.
- Gently peel the tape off the rear case to free the cable.
Step 59
- Gently slide an opening pick between the speaker enclosure and the antenna cable bracket like a smooth operator.
- Move the pick toward the home button to carefully slice through the adhesive.
- Nudge the bracket away from the speaker until it’s free from the tape underneath.
Step 60
- Grab your Phillips #000 screwdriver and loosen these screws:
- Two tiny 1.4 mm screws
- One slightly bigger 2.3 mm screw
Step 61
- Gently slide the flat end of your spudger between the antenna and the speaker assembly.
- Carefully glide the spudger toward the home button to slice through the foam adhesive holding the antenna in place.
Tools Used
Step 62
- Gently detach the left antenna from the iPad.
Step 63
- Peel away the tape that's holding down the left speaker cable connector. You've got this!
Step 64
- Grab the pointy end of your spudger and gently flip up the little flap holding the left speaker cable connector in place.
Tools Used
Step 65
- Gently slide the speaker cable straight out from its ZIF connector—easy does it!
Step 66
- Gently peel off the tape that's keeping the speaker snug on the back case. Take your time—no need to rush, just let it come off smoothly.
Step 67
- Unscrew the 2.2 mm Phillips #000 screw that’s holding the speaker in place on the rear case. It’s a small one, but don’t worry—you’ve got this!
Step 68
- Carefully lift the left speaker ribbon cable to ensure it stays out of the way as you slide the speaker enclosure out. You've got this!
Step 69
- Gently slide a fingernail or the flat end of a spudger into the groove of the speaker housing, right by the corner of the rear case.
- Carefully pull the speaker downward, away from the corner of the case.
Tools Used
Step 70
- Grab your trusty spudger to gently pry the speaker out from underneath the edge of the rear case.
- Carefully lift and remove the left speaker from the iPad.
Tools Used
Step 71
Gently lift only the connector— steer clear of the socket itself!
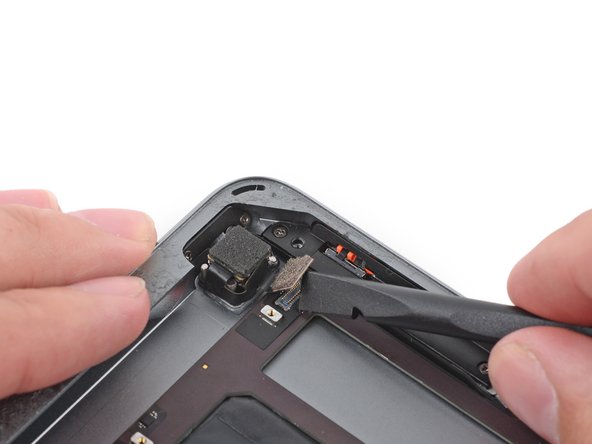
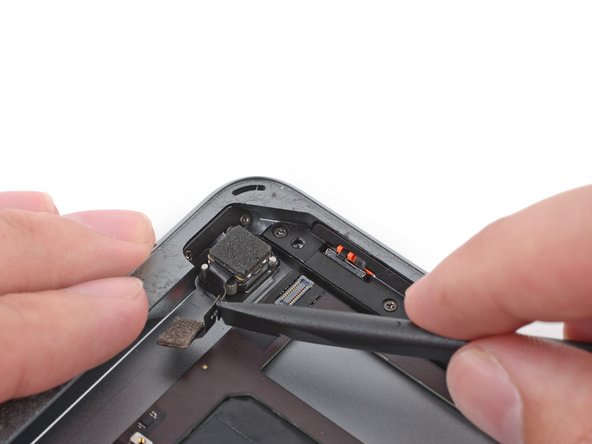
- Grab that trusty spudger and gently use the flat end to unplug the front-facing camera connector from the logic board. You're doing great!
- Now, let's fold the front-facing camera cable out of the way. Nice and easy!
- Heads up! There's a little bit of conductive adhesive hanging out between the gold-colored cable contacts. Make sure to apply some pressure to stick those contacts back in place when you're putting everything back together.
Tools Used
Step 72
Gently lift from the connector, not the socket. We want to avoid any unnecessary damage, so treat it like you're lifting a delicate piece of art!
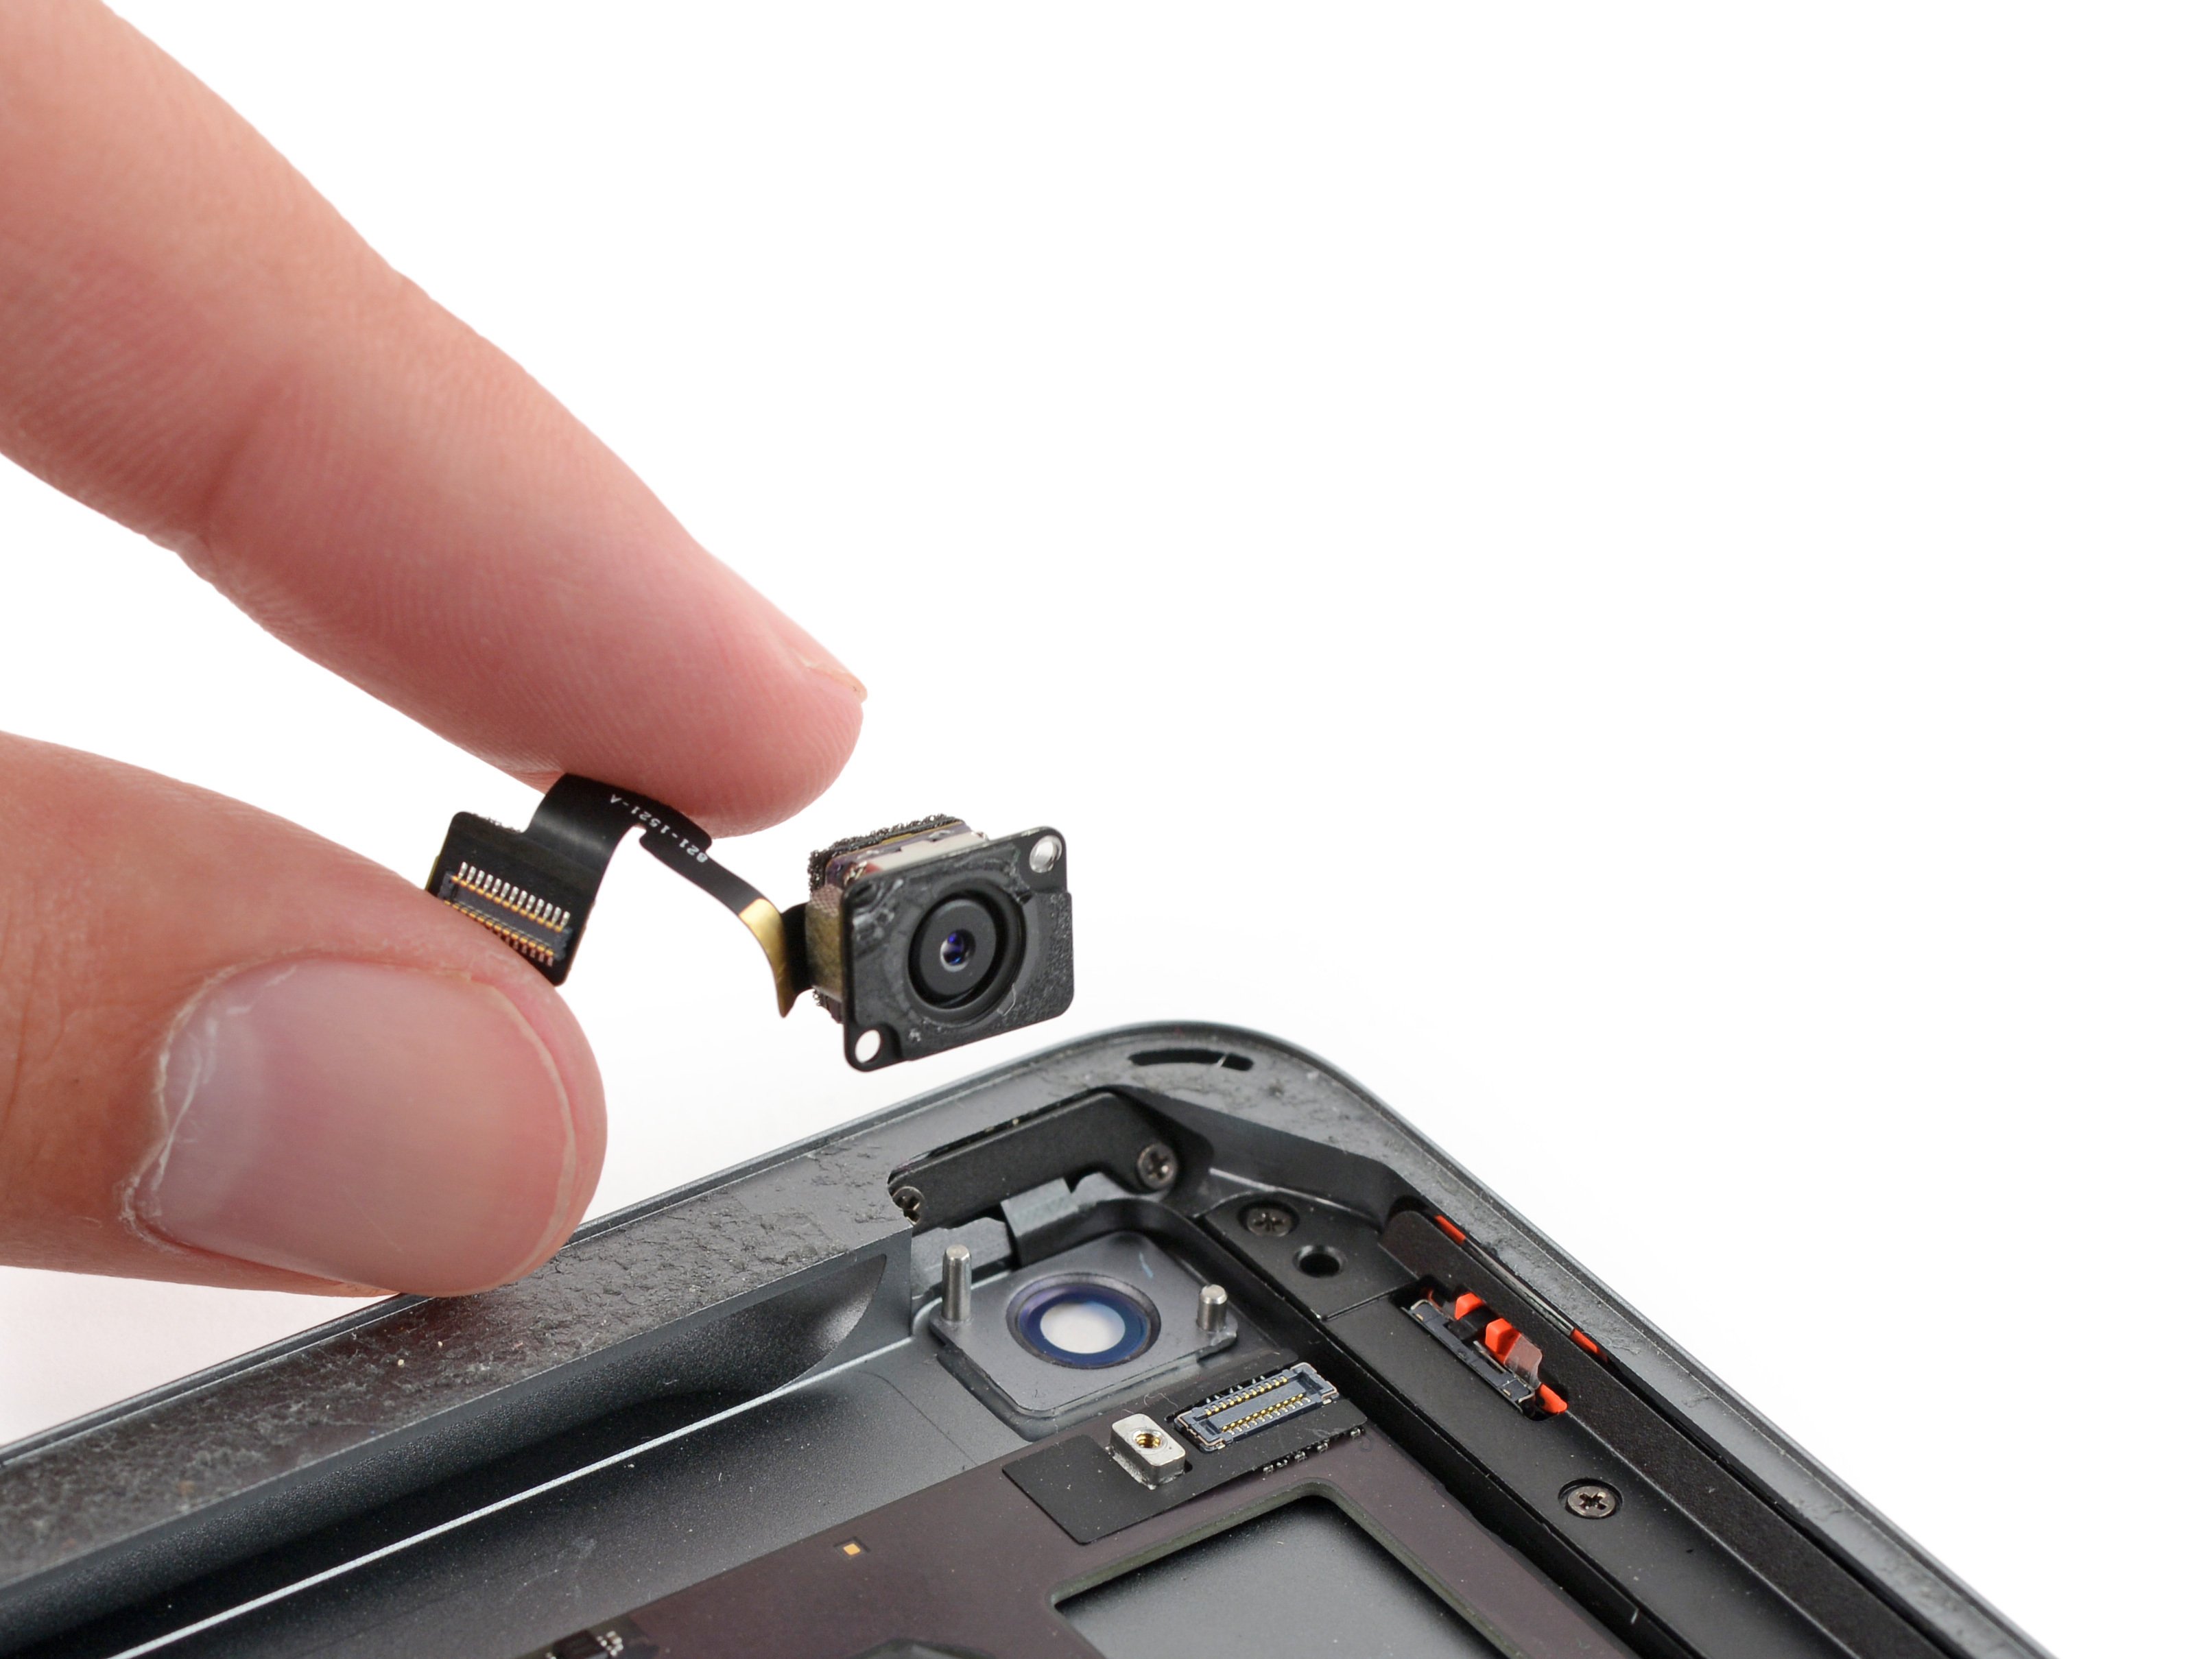
- Gently use the flat end of a spudger to unplug the rear-facing camera connector from the logic board.
- Carefully fold the rear-facing camera cable out of the way to keep it safe.
Tools Used
Step 73
Lift gently on the connector— avoid prying on the socket itself!
On newer iPads, there’s a little tape loop hooking this connector to its spot on the logic board. You’ll need to carefully snip that tape to free up the headphone jack.
- Grab your trusty flat end of a spudger and gently pry that headphone jack connector away from the logic board. You've got this!
- Now, just fold that headphone jack cable to the side like it's taking a little break. Easy peasy!
Tools Used
Step 74
Gently lift from the connector, not from the socket itself. You got this!
- Grab your trusty spudger and use the flat end to carefully unplug the microphone cable from the logic board. It’s a simple step, just take your time and make sure everything is fully disconnected!
Tools Used
Step 75
- Peel off any tape that’s covering the upper button assembly cable connector. You’ll want that connector exposed and ready to go!
Step 76
- Gently use the pointy end of your spudger to lift up the little flap holding the upper button assembly cable connector in place.
Tools Used
Step 77
- Gently slide the upper button assembly cable right out of its ZIF connector, like you're giving it a little high-five!
Step 78
To spot those sneaky screws, hold your iPad upright and take a peek down at the Lightning port. You got this!
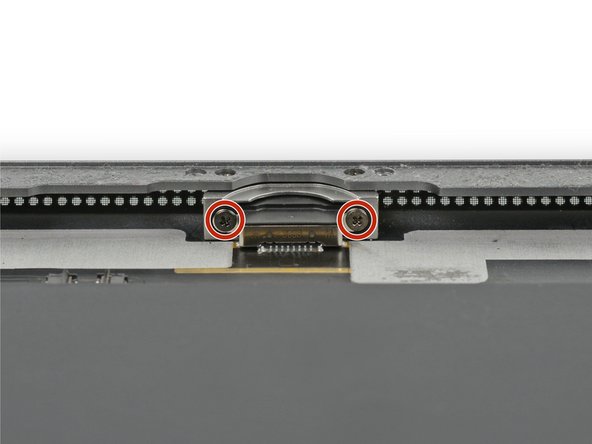
- Take out the two 3.3 mm Phillips #000 screws holding down the Lightning port—easy does it!
Step 79
Next up, you'll use an iOpener to gently warm the back case of the iPad, softening the adhesive that’s holding the logic board snugly in place.
When you place the iOpener on each marked spot, keep it there for at least a minute so the heat can do its magic and loosen that adhesive through the rear case.
- The adhesive comes in six pieces of black foam tape—keep an eye on where each one goes as you heat and pry. It'll make it easier to stay on track as you work through the process.
Tools Used
Step 80
Leaving the iOpener on the back case for a bit longer won’t hurt, but if it sits too long, you might need to warm it up again and pop it back on to keep things nice and toasty.
- Set a warm iOpener on the back end of the iPad where the rear camera lives, and let it chill there for at least a minute to loosen up the adhesive under the back cover.
Tools Used
Step 81
As you dive into the next steps, remember to give a gentle tug on the adhesive holding the logic board in place. Start off easy and see if it’s feeling a bit soft. If it’s still stubborn, just reheat that trusty iOpener and give it another cozy hug on the back of the rear case.
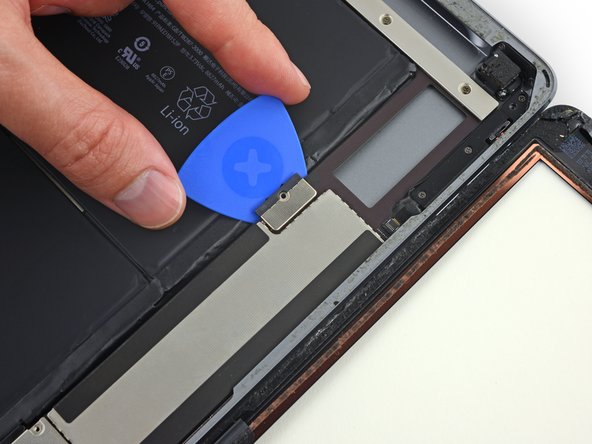
- Gently slide an opening pick under the logic board, positioning it between the front-facing camera and the battery.
- Carefully move the pick towards the front-facing camera connector, stopping at the bend in the logic board.
Tools Used
Step 82
- Gently slide an opening pick under the logic board, starting from the front-facing camera all the way to the rear-facing camera. You've got this!
Step 83
Take a breather and let that iOpener chill on the rear case for about a minute to melt away the adhesive. You'll be on your way to a smooth repair in no time!
- Place a warm iOpener on the bottom edge of your iPad. Let it do its thing for a bit to loosen things up before you move on to the next step.
Tools Used
Step 84
The Lightning connector cable is glued down to the case. To free it, carefully slide an opening pick between the cable and the case. Take your time and watch out—you definitely don’t want to nick the Lightning cable itself!
- Gently slide an opening pick under the Lightning cable right where it connects to the logic board.
- Carefully guide the pick down and follow the cable’s curve around the bend.
Step 85
Take it slow and steady. If the opening pick isn’t sliding in smoothly, warm things up a bit more and give it another go. Pushing too hard might make you slip and accidentally cut the Lightning connector cable, so keep it chill!
- Keep on sliding that opening pick under the cable, but stop just shy of where the cable curves towards the Lightning connector. You're doing great!
Step 86
- Slide the opening pick carefully between the battery and the Lightning connector to gently loosen the last bit of adhesive holding the cable down.
Step 87
- Gently pull the Lightning connector straight out from its spot in the rear case—easy does it!
Step 88
Give the iOpener a minute to work its magic and loosen up that adhesive from the rear case. You're almost there!
- Carefully set a warm iOpener on the left side of the back case, right where the logic board is stuck down.
Tools Used
Step 89
- Slide a plastic opening tool into the rectangular gap near the top of the logic board, then gently lift the logic board away from the rear case.
- Keep the opening tool tucked under the logic board as you glide it down the length of the gap to loosen the upper end from the sticky adhesive.
Step 90
Gently lift the end of the logic board. If it feels like it's putting up a fight, pause and give the iOpener another go before you continue.
- Gently lift the logic board from the bottom edge of the rectangular opening, right by the EMI shield. Keep it smooth and steady!
Tools Used
Step 91
Be cautious when using the opening pick around the battery; a punctured battery can lead to some serious trouble. If you feel any resistance, just warm it up a bit more and give the iOpener another go!
- Carefully slide an opening pick under the logic board, right between it and the battery.
- Gently work the pick from the base toward the center of the logic board to slice through the adhesive.
Tools Used
Step 92
- Gently slide the pick along the length of the logic board, like you're spreading some butter on toast.
- Once you've sliced through the adhesive, carefully lift the battery side of the logic board away from the rear case. It's like giving your device a little wiggle to set it free!
Step 93
- Gently lift the logic board from the edge closest to the battery, and slide an opening pick in at the far end of the logic board.
- Snip any adhesive that’s holding the outer edge of the logic board to the rear case.
Step 94
- To put your device back together, simply reverse the steps we just took. You've got this! If you find yourself in a bind, don't hesitate to schedule a repair for some expert help.


