iPad Air Wi-Fi Right Antenna Replacement
Duration: 45 minutes
Steps: 53 Steps
Handle the battery blocker with care when isolating the battery—it's a delicate step, so give it the attention it deserves!
Follow this guide to swap out the right-hand antenna in your iPad Air. When disconnecting the battery with a battery blocker, take extra care—those battery contacts are delicate and can cause permanent logic board damage if mishandled. If you decide to skip isolating the battery, steer clear of metal tools unless absolutely necessary (like for screws) to avoid short circuits and protect those sensitive circuit parts.
Step 1
For carousel microwaves: Double-check that the plate can spin without any hiccups. If your iOpener gets stuck, it might heat up too much and cause a burn, so keep it moving!
Before you dive in, it's a good idea to give your microwave a quick clean-up. A little mess left behind could end up sticking to the iOpener, and trust us, you don't want that.
- Pop the iOpener right in the middle of the microwave. It's like giving it a cozy spot to warm up!
Tools Used
Step 2
Watch out for overheating your iOpener during the repair. Getting it too hot can make it burst. Keep the temperature under 100˚C (212˚F), please.
If your iOpener starts to look a little puffed up, don’t touch it. Just leave it alone.
If the iOpener is still too hot to touch in the middle, keep using it while it cools down a bit more before you reheat it. A properly heated iOpener should stay warm for up to 10 minutes.
Depending on the power of your microwave, the heating time might need a little adjustment. You’ll know the iOpener is good to go when it’s just about too hot to handle comfortably.
- Warm up the iOpener in the microwave for 30 seconds to get it ready.
- As you work through the repair, if the iOpener cools down, just pop it back in the microwave for another 30 seconds to keep things nice and warm.
Tools Used
Step 3
Heads up: The iOpener gets super hot, so handle with care! If it feels like it's getting a little too toasty, throw on an oven mitt or two.
- Take the iOpener out of the microwave, grabbing it by one of the flat ends so you don’t burn your hands on the hot middle.
Tools Used
Step 4
Heads up! The iOpener gets super hot, so make sure to grab it only by the end tabs to keep your fingers safe.
If you don't have a microwave handy, no worries! Just follow this step to warm up your iOpener in some boiling water. You've got this!
- Start by filling a pot or pan with enough water to completely cover an iOpener.
- Turn up the heat and bring that water to a rolling boil. Once it's bubbling away, turn off the heat.
- Gently place your iOpener in the hot water for 2-3 minutes. Make sure it’s fully submerged in the water – no half measures!
- Use tongs to carefully pull out the iOpener from the hot water. Be cautious, it’s toasty!
- Dry off the iOpener with a towel to get rid of any moisture.
- And there you have it, your iOpener is good to go! Need to reheat it? Just bring the water back to a boil, switch off the heat, and give it another 2-3 minutes in the water.
Tools Used
Step 5
Put on those safety glasses to keep your eyes safe, and make sure to handle the LCD screen with care—no cracks allowed!
This step will help keep those pesky glass shards in check while also giving the display some solid structural support as you work your magic prying and lifting it. You've got this!
- Got a cracked display glass? Keep those shards in check and avoid any ouch moments by taping the glass down first.
- Cover the iPad’s screen with overlapping strips of clear packing tape until the entire front is sealed up.
- Follow the rest of the guide as usual, but heads up: once the glass is cracked, it might keep cracking as you go. You may need to carefully use a metal prying tool to scoop out the glass pieces.
Step 6
- Grab the iOpener by its tag and gently place it on the left side of the iPad, right next to the home button assembly.
- Let it chill there for at least a minute so the adhesive under the glass gets nice and soft.
Tools Used
Step 7
The iPad may seem like one solid piece, but underneath that sleek front glass, there are some fragile parts. Stick to the areas outlined in each step when applying heat or prying to keep everything in one piece.
- While you're following these steps, be extra careful around these areas to avoid any accidental damage:
- Front-facing camera
- Antennas
- Display cables
Step 8
The next three steps walk you through the Anti-Clamp, a handy tool we crafted to make opening your device a breeze. If you’re not using the Anti-Clamp, just skip ahead three steps for another way to get it done.
For the full scoop on how to work the Anti-Clamp, check out this guide.
If your iPad’s surface is feeling too slick for the Anti-Clamp to grip, slap on some tape to give it a better hold.
- Grab the blue handle and give it a little pull back to release the Anti-Clamp's arms. Easy peasy.
- Set your iPad on something soft and level to keep it steady between the suction cups. Make sure it’s comfy.
- Position the suction cups near the middle of the left edge, one on top and one on the bottom, like they’re giving your device a nice little hug.
- Now, hold the bottom of the Anti-Clamp in place and give the top suction cup a firm press. Let the suction do its magic!
Step 9
- Grab the blue handle and pull it forward to lock those arms in place.
- Give the handle a full 360-degree spin clockwise, or keep turning until the suction cups start to stretch a bit.
- Keep an eye on those suction cups—they need to stay perfectly aligned. If they start to drift, just loosen them slightly and realign the arms before moving on.
Step 10
Take it easy! Don't twist more than half a turn at a time, and give it a minute between each turn. Let the Anti-Clamp and a little patience work their magic.
For a full guide on how to use a hair dryer like a pro, check out this step-by-step breakdown. You’ve got this!
If the Anti-Clamp isn’t creating enough space, give the area some extra heat and twist the handle clockwise about half a turn. Keep going—you’re almost there!
- Give it a minute to let the adhesive loosen up and create a little gap to work with.
- If the screen isn’t warming up enough, grab a hair dryer and gently heat along the left edge of the iPad.
- When the Anti-Clamp opens a big enough gap, slide an opening pick underneath the screen.
- Go ahead and skip the next two steps.
Step 11
If your iPad’s screen is smashed to smithereens, try sticking a smooth layer of clear packing tape over it to help the suction cup stick better. Or, grab a strong tape like duct tape, fold it into a handy little handle, and get ready to lift!
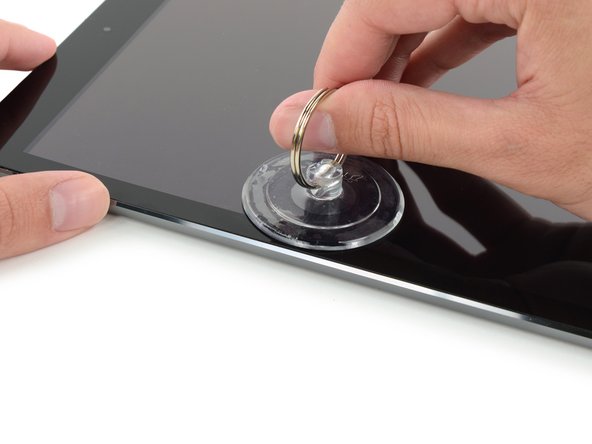
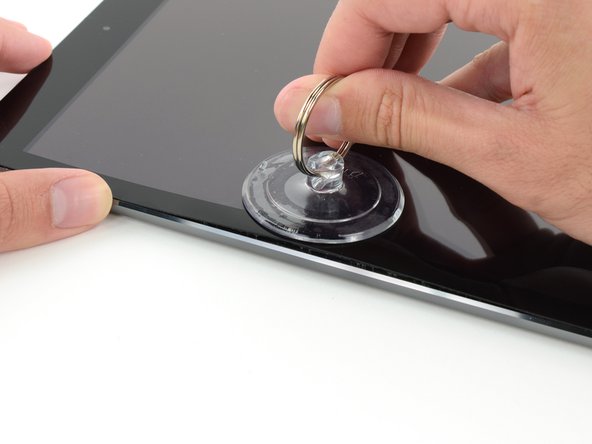
- Place a suction cup about halfway up on the heated side—make sure it’s sitting nice and flat.
- Hold the iPad steady with one hand, then gently pull up on the suction cup to nudge the front glass away from the back case just a bit.
- Double-check that the suction cup is fully flat against the screen to get the best grip.
Step 12
Keep the opening pick shallow—no deeper than the black bezel along the side of the display. Going too deep might poke the LCD, and that’s a no-go!
- Slide an opening pick into the gap created by the suction cup.
- Give the suction cup's plastic nub a gentle pull to break the vacuum seal, then carefully lift it away from the display assembly.
Step 13
Heads up: don’t let the iOpener get too hot while you’re working. Give it a solid ten minutes to cool down before heating it up again!
- Warm up the iOpener again and pop it back in place.
Tools Used
Step 14
- Grab a second opening pick and slide it in next to the first one, then gently work it down the edge of the iPad to loosen the adhesive bit by bit.
Step 15
- Now, gently slide your opening pick down the side of the display to loosen up that stubborn adhesive.
- If the pick gets caught up in the sticky stuff, just roll it along the edge of your device and keep easing that adhesive off.
Step 16
- Grab the first pick you slid in and gently slide it up toward the top corner of the iPad.
- If you spot the tip of the opening pick peeking through the front glass, don’t stress—just pull it out a bit. Usually, it’s no big deal, but try to avoid this since it might leave some adhesive on the front of the LCD that’s a pain to clean.
Step 17
Heads up! Don’t let the iOpener get too toasty—give it at least ten minutes to cool down before heating it up again.
Got a flexible iOpener? Bend it to heat up both the top left corner and the top edge at the same time—double the heat, double the efficiency!
- Warm up the iOpener again and chill it right on the top edge of the iPad, hovering over the front-facing camera.
Tools Used
Step 18
- Gently slide the opening pick around the top left corner of your iPad to loosen that sticky adhesive. It’s like peeling off a stubborn sticker—no rush, just a little patience!
Step 19
- Gently slide the opening pick along the top edge of your iPad, but make sure to stop just shy of the camera. You don’t want to mess with that sweet lens!
Be careful when using the opening pick near the front-facing camera. You don’t want to accidentally get adhesive on the lens or mess up the camera. We’ll walk you through the steps to make sure that doesn’t happen. Stay steady and keep the camera safe!
Take a look at the third image, where you'll spot the front-facing camera and its housing on the iPad. It's right there, waiting for you to work your magic!
Step 20
- Gently pull the pick out a bit, then carefully slide its tip along the top edge near the front-facing camera—smooth and steady wins the race!
Step 21
- Keep the opening pick wedged in the iPad just past the front-facing camera.
- Grab a second pick, slide it in just to the left of the camera, then glide it along to the corner of the iPad to finish slicing through the adhesive on that side.
Step 22
- Slide the pick further into the iPad, moving it from the camera area towards the corner. Keep the motion steady and gentle as you go.
Step 23
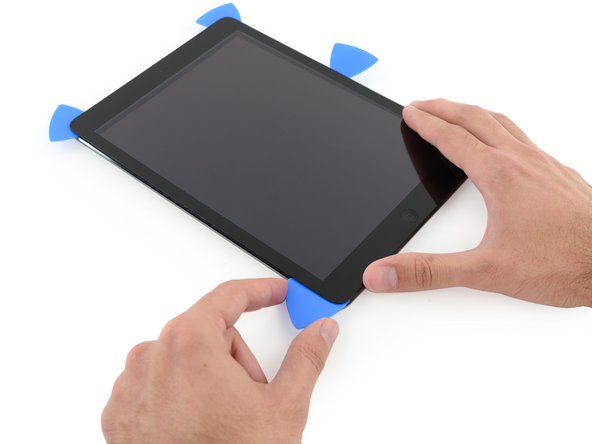
- Keep those three picks chilling in the iPad's corners to stop the front panel adhesive from sticking back together.
- Warm up the iOpener again and set it along the side with the volume and lock buttons to loosen things up.
Tools Used
Step 24
Keep this pick wedged in to stop the adhesive from snapping back together, then grab a fresh pick to tackle the next step.
- Gently slide the opening pick around the top right corner of the iPad to loosen the adhesive holding it in place.
Step 25
The display cables are about halfway up from the bottom of the iPad. When you're about 4.5 inches from the bottom, stop sliding the pick. Easy does it!
- Pop in a fresh opening pick and gently slide it toward the middle of the iPad’s right edge, easing through the adhesive like a pro.
Step 26
- Keep those opening picks right where they are, and place the reheated iOpener on the home button side of the iPad.
Tools Used
Step 27
Check out the third image to see the two antennas and the home button slot nestled in the lower case of the iPad.
- Gently slide the pick down to the lower left corner to slice through the adhesive there.
- Keep the pick in place at the corner—no prying further and definitely don’t pull it out of the iPad yet.
- Next up, we’ll guide you exactly where to pry so you don’t accidentally mess with any sensitive bits. Only heat and pry where we say, and you'll be golden.
Step 28
Slide the pick smoothly from the outer edge toward the center of the iPad. Avoid moving it back toward the edge to keep the antenna safe and sound.
Keep the pick from the last step right where it is to stop the adhesive from sticking back together.
If you have to slide the pick over the bottom part more than once, pull it out and start again from the outer edge, then slide inward.
- Grab a fresh pick and carefully slide it along the left antenna, making sure to stop just before you reach the home button.
- Keep that pick in place before moving on to the next step.
Step 29
- Grab a fresh pick and gently slide it to the right of the one you just placed.
- Use the very tip of the pick to glide across the home button and the right-hand antenna, carefully peeling away the adhesive.
Step 30
Just like the left antenna, slide it from the outer edge toward the center—going the other way might mess things up!
- Now that the adhesive is loosened, gently slide your pick in near the right corner. Glide it leftward, stopping just before you reach the Home button. Easy does it!
Step 31
- Warm up the iOpener again and place it back on the volume control side of the iPad to keep things nice and toasty.
Tools Used
Step 32
Take it slow and steady with this step. Make sure the adhesive is nice and warm, soft enough to work with, and that you’ve carefully slid your opening pick all around. Don’t hesitate to pause and warm it up again if needed.
If you're facing a lot of resistance, don't stress—just leave the picks where they are, give them a little extra heat, and apply the iOpener again to the tricky spots. It'll loosen up in no time!
- On the side of the iPad opposite the volume buttons, you’ll find a pick tucked into each corner. Give those picks a little twist to gently lift the glass, loosening the last bit of adhesive along the edge where the display cable hangs out.
Tools Used
Step 33
- Lift up slowly and carefully to loosen the adhesive along the edge of the display cable. Keep it chill and steady!
Step 34
Take extra care to avoid nicking or messing up any of the display cables — they're delicate little things!
- Hold the front panel glass steady and carefully use an opening pick to slice through the last bits of adhesive. Take your time here, it's almost there!
Step 35
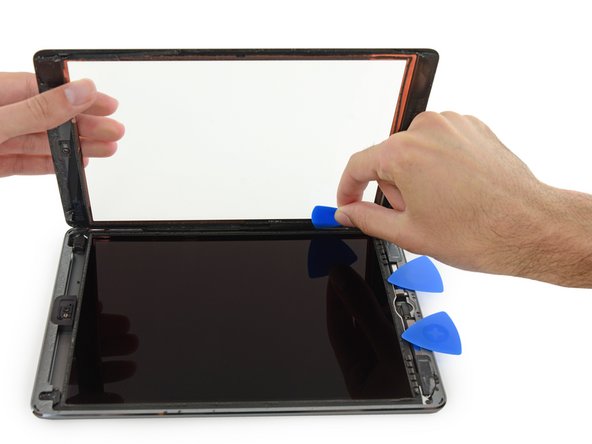
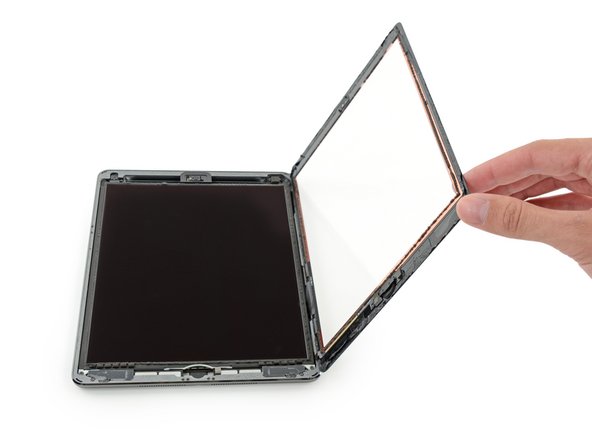
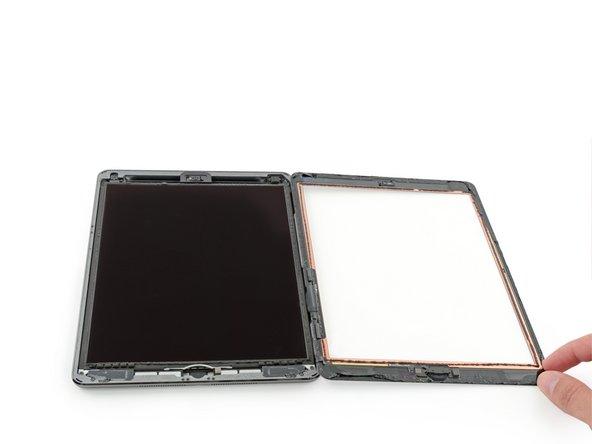
- Once all the sticky stuff is taken care of, gently open the glass panel like you’re flipping through a book and set it down on your workspace, nice and easy.
- When it’s time to put everything back together, don’t forget to tidy up! Use some isopropyl alcohol to clean up any leftover adhesive from the case (and the front glass if you’re reusing it) and follow our display adhesive application guide with those handy pre-cut adhesive strips.
- Watch out for those flex cables during reassembly—they can easily get pinched between the front glass and the iPad’s frame. Be sure to handle them with care, letting them fold and tuck nicely under the frame. If you squish those folds flat, they might just throw in the towel and stop working!
Step 36
- Peel back any tape that's playing hide-and-seek over the LCD screws.
Step 37
- Let's get these Phillips screws out so we can free up the LCD!
- Three screws, 4.0 mm each
- One screw, 4.8 mm
Step 38
Don't try to yank the LCD off completely just yet. It's still hanging on by a few cables near the home button, so lift it carefully from the front-facing camera side only.
Take it slow and watch those LCD cables closely as you flip the display over.
Place the LCD gently on a soft, clean surface that’s free of any lint. Treat it like the precious screen it is!
- Gently wedge the flat end of a spudger under the LCD just enough to loosen it so you can grab it with your fingers.
- Carefully flip the iPad LCD like turning a page in a book, lifting near the camera and rotating it over the home button side of the back case.
- Set the LCD face down to get a clear shot at the display cables.
Tools Used
Step 39
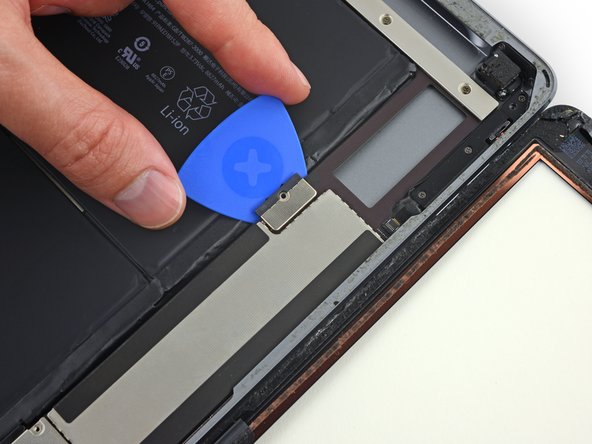
Handle the battery blocker with care—those battery contacts are delicate and a little mishap can cause permanent damage. Keep it cool and steady!
To keep things smooth and avoid a short, try using a battery blocker or a carefully tweaked opening pick to disconnect the battery.
If the battery blocker isn't fitting snugly under the logic board, grab a playing card to slide in there and disconnect the battery with a little extra finesse.
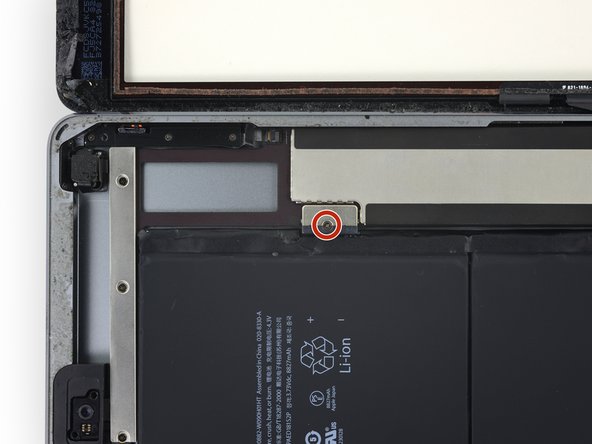
- Unscrew that single 2.3 mm Phillips screw holding the battery connector to the logic board. Easy does it!
- Now, gently slide the battery blocker under the battery connector area on the logic board. Leave it there while you work, and you’re golden.
Tools Used
Step 40
- Unscrew the three 1.4 mm Phillips screws holding down the display cable bracket—time to loosen those little guys and keep the repair rolling!
Step 41
The display cable connector is stuck to the bottom of the bracket, so be careful not to shove the spudger too far underneath. Pushing too hard might cause some damage to the connector. Take it easy and go slow here!
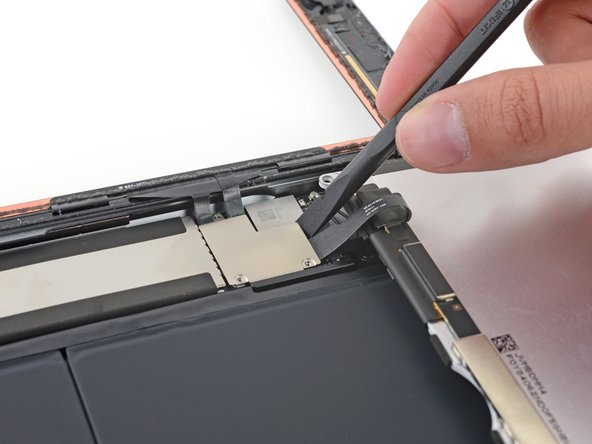
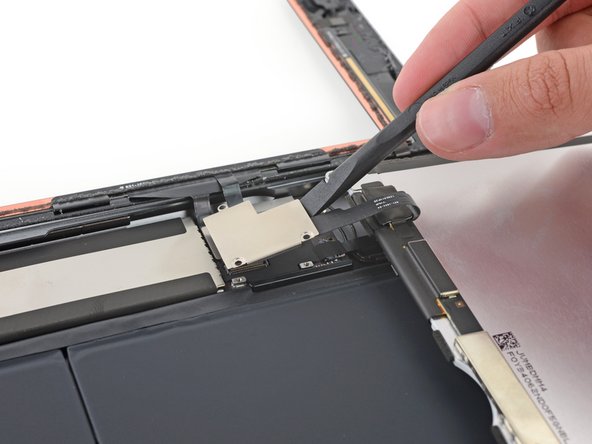
- Grab your trusty spudger and use the flat end to carefully lift the display cable bracket off the logic board. Take it slow and steady—you've got this!
Tools Used
Step 42
- Carefully take out the LCD screen.
Step 43
- Carefully peel away any tape that's hiding the home button ribbon cable connector.
Step 44
- Gently use the flat end of a spudger to lift up the little tab on the home button ribbon cable's ZIF connector.
- Slowly slide the home button ribbon cable straight out from the ZIF connector, taking care not to tug or bend it.
Tools Used
Step 45
Be gentle and only pry on the connectors themselves—giving the logic board’s socket a hard time is a no-go if you want your iPad to stay happy!
- Grab the flat end of a spudger or your trusty fingernail and gently pop the two digitizer cable connectors straight up out of their sockets. Easy does it!
Tools Used
Step 46
- Gently lift the home button ribbon cable off the adhesive that's sticking it to the rear case. A little wiggle and you'll be free!
Step 47
The insulation is super subtle, so it's invisible to the naked eye. It’s not like the foam dust barrier strips you might see on some iPads, which are a bit more obvious.
- Take off the front panel assembly carefully.
- When putting it back together, give the inside of the front panel assembly a good wipe to clear away any dust or fingerprints for a crisp, clean display.
- If your new display starts acting up with weird "ghost" or "phantom" touches, don't worry! This usually means it needs a tiny layer of thin insulating tape, like Kapton (polyimide) tape, applied to the highlighted spots on the back of the panel. The panels here come properly insulated, so you probably won’t need to add tape.
- Without this insulation, parts of the digitizer might accidentally touch other components and cause touch glitches, so keep an eye out for that.
Step 48
- Slide a spudger gently under the antenna cable near the iPad’s edge and give it a little lift to unplug the antenna cable connector.
Tools Used
Step 49
- There are two big pieces of tape keeping the right antenna cable securely attached to the back case. It's doing its job, but time to get it off.
- Carefully peel the tape off the rear case. Take it easy, this part is a bit sticky.
- As you peel the tape off, try to leave it on the antenna cable. This will make reassembly a breeze later.
Step 50
The antenna cable is attached to the speaker using a small metal bracket. This bracket is securely crimped onto the antenna and firmly stuck to the speaker enclosure, so it's not going anywhere!
- Gently slide an opening pick between the speaker enclosure and the antenna cable bracket.
- Carefully glide the pick toward the home button to slice through the adhesive.
- Nudge the bracket away from the speaker until it lifts clear of the tape underneath.
Step 51
- First up, let's get those screws off the right antenna. Grab your Phillips #000 screwdriver and let's do this!
- Unscrew the single 2.3 mm screw, nice and easy.
- Then, remove the two 1.4 mm screws—don't forget, there's two of 'em!
Step 52
- Gently slide the flat end of your spudger between the antenna and the speaker assembly like a pro.
- Carefully glide the spudger toward the home button to slice through the foam adhesive holding the antenna in place.
Tools Used
Step 53
- To put your device back together, just follow these steps backward. Easy peasy! If you hit a snag, remember you can always schedule a repair with us.


