
iPad Pro 12.9″ 3rd Gen Screen Replacement
Duration: 45 minutes
Steps: 48 Steps
Neglecting to transfer the top sensor assembly means saying goodbye to Face ID and True Tone. Let's keep those features intact!
Get ready to give your iPad Pro 12.9" 3rd Gen a brand-new look! This guide will walk you through the process of swapping out the screen, which includes both the display and the top sensor assembly. Just a heads-up: if you don’t move over that top sensor assembly, you’ll be waving goodbye to Face ID and True Tone. We crafted this guide using the WiFi + Cellular version (Model A2014), so if your model is a bit different, don’t sweat it! There might be some minor visual differences, but rest assured, they won't mess with the steps. If you find yourself in a pickle, feel free to schedule a repair!
Step 1

Make sure to let your iPad's battery run down completely before diving into this repair adventure. A charged battery can be a bit feisty and might spark up if it gets damaged during the process. Safety first, friends!
- Disconnect all cables and power down your iPad completely.
Step 2

You can use a hair dryer, heat gun, or hot plate to warm things up, but take it easy—overheating the iPad can damage the screen and battery, so keep it cool while you heat!


Step 3

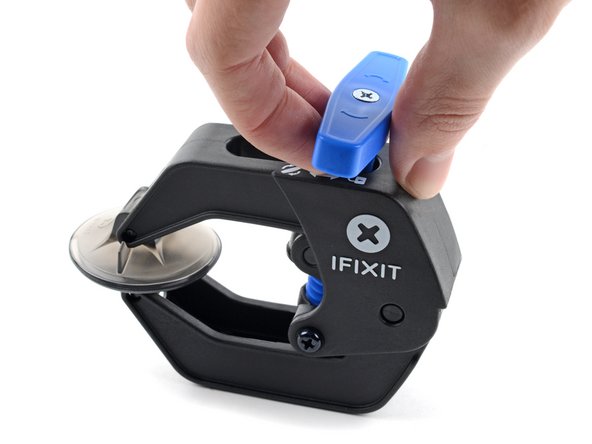

The following three steps will introduce you to the Anti-Clamp, a nifty little tool we created to simplify the opening process. If you’re not using the Anti-Clamp, feel free to skip ahead three steps for an alternative approach.
For detailed tips on how to make the most of the Anti-Clamp, check out this guide.
If your iPad's surface is feeling a bit too slick for the Anti-Clamp to grip, a little tape can do wonders to create a stickier surface.
- Slide the blue handle backward to set the Anti-Clamp's arms free.
- Prop up your iPad with something sturdy so it sits evenly between the suction cups.
- Place the suction cups close to the center of the right edge—one near the top, the other near the bottom.
- Keep the bottom of the Anti-Clamp steady and give the top cup a firm press to get a good suction grip.
Step 4


- Give that blue handle a gentle tug forward to lock those arms in place!
- Now, twist the handle a full 360 degrees, or keep turning until you see those suction cups start to stretch out.
- Keep an eye on those suction cups to make sure they're still lined up perfectly. If they start to wander off course, just loosen them a tad and guide those arms back into alignment.
Step 5


Take it easy! Turn just half a twist at a time and give it a minute to chill between turns. Let the Anti-Clamp and patience do their magic for you.
For a thorough walkthrough on how to wield a hair dryer like a pro, check out this guide.
If the Anti-Clamp isn't doing its magic and you still don't have enough space, crank up the heat a bit more and give that handle a half-turn to the right.
- Take a breather for about a minute to let that adhesive loosen up and create a little opening for you.
- If your screen isn’t warming up enough, feel free to gently use a hair dryer along the right edge of the iPad for some extra heat.
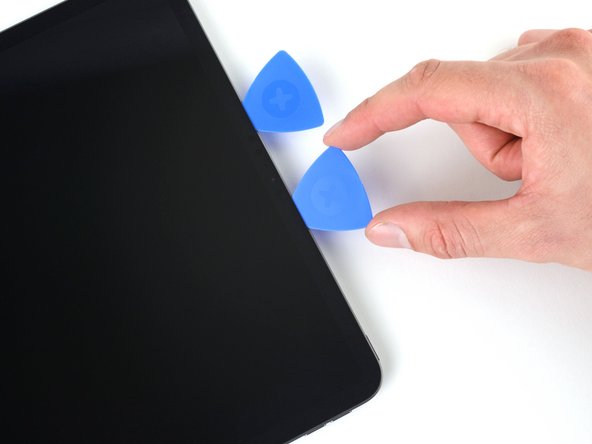
- Once the Anti-Clamp has opened a nice little gap, slide an opening pick underneath the screen.
- Go ahead and skip the next step.
Step 6


The screen is delicate, so be careful! Just create a small gap big enough to slide in your opening pick.
Don't push the pick deeper than 5mm to keep the screen safe and sound.
If your screen is looking like a spider web, a quick fix is to pop some clear packing tape over it. This should help the suction cup stick better. If you're feeling adventurous, you can swap the suction cup for some extra strong tape. And if you're really in a pinch, a little superglue can go a long way in securing that suction cup to the cracked screen.
Having a tough time creating a gap? No worries! Just reheat that iOpener and give the right edge another two-minute spa treatment.
- Stick a suction handle onto the screen, aiming for the center of the right edge—think of it as your starting line.
- Give the suction handle a firm, steady tug upwards to gently pop open a little gap between the frame and screen.
- Slide an opening pick into that gap to keep things moving.
Tools Used

Step 7


Heads up! There are two magnets, each about 2 cm long, chilling along the right edge of the screen. Don’t slide your opening pick more than 2 mm here—those magnets are not fans of poking!
Elsewhere, keep your opening pick within 5 mm to avoid any screen drama.
- The first magnet kicks off about 3 cm down from the top edge of your iPad.
- The second magnet starts its gig roughly 3 cm up from the bottom edge of the iPad.
Step 8


Tilt your pick downward and slide it in about 2 mm deep near the magnet cutouts, and up to 5 mm deep everywhere else. Keep it smooth and steady!
- Gently slide your opening pick along the right side of the screen to break the adhesive free.
- Keep the pick inserted in the bottom right corner so you’re ready to move on.
Step 9


- Gently slide your opening pick around the bottom right corner of the screen to carefully loosen the adhesive.
- Keep your pick wedged in the bottom right corner to stop the adhesive from snapping back together.
Step 10

- Gently place a warm iOpener on the bottom edge of the screen and let it work its magic for two minutes.
Tools Used
Step 11


Keep your opening pick tip within 5 mm — no need to go deeper and risk a surprise!
- Slide a second opening pick under the bottom right corner of the screen.
- Gently glide your pick over to the bottom left corner to loosen the adhesive holding the bottom in place.
Step 12


- Gently spin your opening pick around the bottom left corner of the screen.
- Keep your pick wedged in that corner to stop the adhesive from snapping shut again.
Step 13

- Give the left edge of the screen a warm hug with a heated iOpener for a cozy two minutes.
Tools Used
Step 14


Heads up! Along the left edge of the screen, there are three spots where the adhesive is super thin. Keep your opening pick shallow—no deeper than 2 mm—to avoid any screen mishaps at these tricky cutouts:
Elsewhere, feel free to go a bit deeper, but don’t exceed 5 mm to keep everything safe and sound.
- Start with the upper cutout, which kicks off about 4 cm from the top of the frame and stretches 3 cm long. Easy peasy!
- Next up, let’s tackle the middle cutout that begins 12 cm from the top of the frame and also measures 3 cm in length. You've got this!
- Finally, don’t forget the bottom cutout, positioned 4 cm from the bottom of the frame and extending 3 cm long. Almost there!
Step 15


- Pop a third opening pick right under the bottom left corner of the screen.
- Gently slide that pick up to the top left corner to cut through the left adhesive, but steer clear of those little cutouts we talked about earlier.
- Keep the pick in place at the top left corner while you move on to the next step.
Step 16


- Gently slide your opening pick around the upper left corner of the screen.
- Keep your pick in that corner to stop the adhesive from making a comeback.
Step 17

- Place a warm iOpener on the top edge of the screen and let it work its magic for two minutes.
Tools Used
Step 18


Elsewhere, keep your pick shallow—no more than 5 mm—to keep the screen safe and sound.
- While the adhesive along the top edge is getting all nice and cozy, keep these little nuggets in mind:
- Watch out for those two sneaky ambient light sensors hiding near the corners. Make sure your pick doesn’t go deeper than 1 mm here.
- The front-facing camera and some other sensors are chilling right in the center of the top edge. So, steer clear of inserting your pick here — there’s less than 1 mm of adhesive, and we definitely don’t want to mess with those delicate components!
Step 19


Be careful not to slide too far! Going beyond this point could mess with the camera's sensors. Take it easy, you're doing great!
- Gently slide your opening pick about 9 cm towards the top right corner, stopping just shy of the camera assembly. You're almost there!
- Keep your pick in place before moving on to the next step. You've got this!
Step 20

- Pop a new opening pick on the opposite side of the camera assembly, about 4 cm away from your last pick.
- Slide that pick up to the top right corner to carefully cut through the rest of the adhesive.
Step 21


Be careful not to remove the screen completely—it’s still connected to the frame by a few cables. Gently lift it, and take it easy.
If your screen seems a bit stubborn, gently glide your opening picks around the edges to break free any leftover adhesive. Keep an eye out for those delicate spots we've highlighted earlier!
- Hold two corners of the screen that are opposite each other and gently lift to pop it away from the frame.
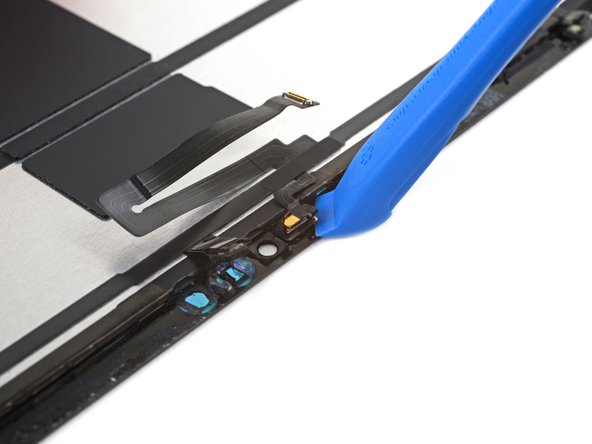
- Slide the screen down and to the right corner of the frame until the ribbon cable near the top edge is visible.
Step 22

As you go along, make sure to keep each screw in check and pop it back exactly where it came from—your device will thank you!
- Grab your Phillips screwdriver and take out the two screws that are keeping the upper cable shield in place. Easy peasy!
- Before you get too far into putting everything back together, power up your iPad and make sure everything's working. Don’t forget to turn it off again before moving forward with the rest of the repair!
- One screw, 2.0mm long
- One screw, 1.8mm long
Step 23


- Grab the upper cable shield with tweezers or your fingers and carefully lift it away.
Tools Used

Step 24


To reattach those connectors, take a moment to line them up just right. Start by pressing down on one side until you hear that satisfying click, then do the same on the other side. Remember, avoid pressing in the middle! If things get a bit askew, the pins might bend, and we definitely don’t want that kind of drama. Stay focused and you’ve got this!
- Gently slide the spudger tip under the upper sensors press connector and pop it loose.
Tools Used

Step 25


Hey there! Just a gentle reminder—don't yank on that screen; those display cables are still hanging on tight.
Watch out for those display cables—they're a bit sensitive, so let's keep them safe and sound!
- Grab the right edge of the screen and swing it open like you're flipping through a book.
- Gently lay the screen down over the left side of the iPad.
Step 26

- Grab your Phillips screwdriver and take out the five screws holding down the display cable bracket:
- Four screws measuring 1.1 mm in length
- One screw that's 2.0 mm long
Step 27


- Gently use tweezers or just your fingers to lift off the display cable bracket without breaking a sweat.
Tools Used
Step 28


- Grab your trusty spudger and gently pry up to disconnect those pesky top display cable press connectors. You've got this!
Tools Used
Step 29


- Grab your trusty spudger and gently nudge up those two bottom display cable press connectors to disconnect them. You've got this!
Tools Used
Step 30


- Time to say goodbye to that screen! Carefully detach it from the device to get started on your repair journey.
Step 31


- Gently lift the tape off the display cable bracket found at the bottom right corner of the screen.
Step 32


- Keep peeling the tape gently along its outer edge until the bracket is completely uncovered and ready for the next step.
Step 33

- Peel off that tape like a pro!
- Set it aside for now; you'll need it when putting everything back together.
Step 34

- Grab your trusty Phillips screwdriver and say goodbye to those two 1.3 mm-long screws holding the display cable bracket in place. Time to set that screen free!
Step 35

- Detach the display cable bracket.
Step 36


- Carefully peel away the tape that’s holding the display and digitizer cables together. Take your time and be gentle, you’ve got this!
Step 37


- Grab your trusty spudger and gently pry up the bottom display cable press connector on the screen—it's time to disconnect!
- Now, take those tweezers and carefully bend the bottom press connector away from the screen. This will reveal the top press connector, making it easier for you to continue your repair adventure.
Step 38


- Grab a spudger and gently work your magic to lift and disconnect the top display cable press connector on the screen. You've got this!
Tools Used
Step 39


The display cable has a gentle bond with the screen.
- Gently use your fingers to wiggle the display cable free from the screen. Just a little finesse goes a long way!
- Carefully detach the display cable and set it aside. You'll need this little guy later when putting everything back together.
- Remember, patience is key! You've got this!
Step 40


First things first, make sure to detach each sensor from the screen before you go ahead and remove the whole assembly. You've got this!
- The top sensor assembly packs in four cool components:
- A couple of ambient light sensors to keep things bright just right
- A proximity sensor that knows when you're close
- And a microphone to catch all the sounds
Step 41

- Warm up an iOpener and place it on the top of the screen for two minutes. Let it work its magic!
Tools Used
Step 42


Be prepared to apply some serious elbow grease!
- Slide one arm of your trusty angled tweezers between the ambient light sensor and the screen. Go on, give it a gentle nudge!
- Now, pry it up a bit to set that sensor free from its screen buddy.
- Don't forget to repeat this fun little dance for the other ambient light sensor too!
Tools Used
Step 43


Take it easy during this step; that sensor cable is a bit delicate and could give way if you're not careful. Go slow, and if you feel any resistance, don’t hesitate to warm things up a bit more.
Get ready to put in some elbow grease! You'll probably need to apply a good amount of force and go through a few rounds of iOpener heating to get things just right.
Step 44


- Gently lift off any tape that’s hiding the microphone.
- Keep that tape handy—you’ll need it when putting things back together.
Step 45


- Gently slide an opening tool beneath the microphone to break up that stubborn adhesive.
- Carefully pry upwards to detach the microphone from the screen.
Step 46


- Carefully slide an opening pick under the top sensor assembly cable to gently separate it from the screen.
Step 47


- Keep that opening pick gliding along the top sensor assembly until it's fully detached from the screen!
- Now, go ahead and take off the top sensor assembly.
Step 48

- Put your device back together by reversing the steps you took apart.
- Make sure to check your new part against the old one—you might need to move some bits over or peel off any sticky backing before popping it in.
- Don’t toss your old parts in the trash—take them to an R2 or e-Stewards certified recycler to keep things green.
- If things didn’t go quite right, try some basic troubleshooting or schedule a repair with us for a hand.
