iPad Wi-Fi Display Frame Replacement
Duration: 45 minutes
Steps: 33 Steps
Follow this guide to swap out a cracked display frame with ease. If it’s the glass panel that’s giving you trouble, check out our front panel assembly guide instead.
Step 1
Put on those safety glasses to keep your peepers safe, and watch out for that delicate LCD screen—it's more fragile than it looks!
This will help keep glass shards in check and make sure the display stays solid while you work your magic on prying and lifting.
- Oops, cracked screen? Let's keep that glass from causing any drama! Slap on some clear packing tape over the entire display—layer it up so every bit is covered.
- This will help hold things together and save your fingers from surprise glass confetti.
- Follow the rest of the steps like a pro, but heads up—broken glass likes to keep cracking. If you run into stubborn shards, grab a metal prying tool and gently scoop them out.
Step 2
- There are 14 metal clips keeping the display assembly snug and secure, as illustrated at the left. As you get ready to pry in the next steps, remember to maneuver around these little clips like a pro—avoid slicing through them with your opening tool. You've got this!
Alright, time to carefully detach the iPad's display from the aluminum body. Take it slow and follow the steps closely—this is the part where the fragile clips and the display can get a bit tricky. A little patience goes a long way! If you run into any trouble, don't hesitate to schedule a repair.
If a few clips decide to take a vacation, don't sweat it—you can grab some replacements here.
Step 3
- Slide a metal spudger gently between the top edge of the display assembly and the rear panel assembly.
- Twist the spudger away from you to pop loose those stubborn tabs along the top edge of the display.
- Wedge a second metal spudger in there to hold the tabs open so they don’t snap back on you.
Tools Used
Step 4
Pry gently and with care—if you hit any resistance, don't force it! Try a different spot and keep going!
- Grab your trusty spudger and carefully glide it along the right edge of the iPad.
- The front panel is snugly held to the aluminum back by metal clips on the top, bottom, and left sides, while the right side features plastic tabs that slide into slots in the backplate.
- Once those clips are popped free, gently lift the left side of the front panel and slide it left to free the tabs from the aluminum backplate.
Tools Used
Step 5
Hold up! The display is still connected to the rear panel, so don't try to lift it off just yet.
- Gently peel the display assembly off the rear panel assembly by lifting from the bottom edge—easy does it!
Step 6
- Alright, let's get started! In the next steps, we're going to gently unplug the three cables that connect the display assembly to the logic board. These cables are linked to the following components:
- Digitizer
- Ambient Light Sensor
- Display Data Cable
Step 7
Make sure you’re lifting the little retaining flap, not the whole socket—gotta be gentle with that part!
- Grab your trusty plastic opening tool and gently pop up the little flaps that are holding the digitizer ribbon cables in place on the logic board—think of it as unlocking their tiny seatbelts.
- Carefully slide those digitizer ribbon cables straight out of their sockets, letting them stretch their legs a bit.
Step 8
- Grab your trusty plastic opening tool and gently nudge the ambient light sensor connector out of its cozy socket by prying it upward with care. You've got this!
Step 9
Gently pull the connector straight out, making sure to keep it parallel to the face of the logic board. Take your time, there's no rush!
- Gently flip up the metal retainer using the black plastic pull tab to release the display data cable from the main board.
- Carefully pull the cable connector straight out from its socket.
Step 10
- Gently separate the display assembly from the rear panel assembly and set it aside.
Step 11
Watch out for that ambient light sensor! Keep it safe and sound by avoiding any creases below its top section, as the adhesive part could just decide to take a vacation and break off.
If you're keeping the LCD, there's no need to remove the ambient light sensor from the back of it. Simple as that!
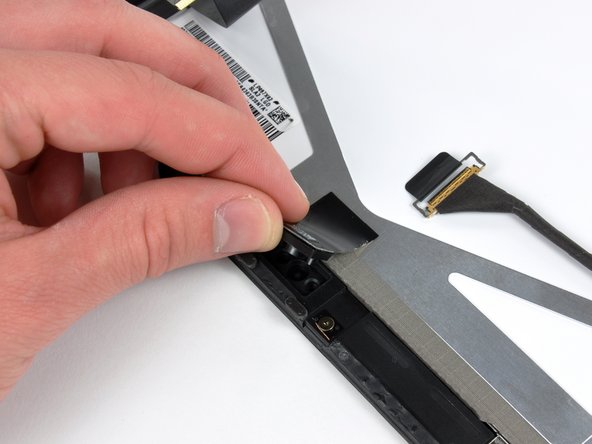
- Gently use the edge of a plastic opening tool to lift the ambient light sensor board away from the adhesive holding it to the display frame.
- Once you have enough room, carefully peel the ambient light sensor off the LCD.
- If needed, attach the plastic view window to your new ambient light sensor before you install it.
Step 12
- Keep the digitizer cable nice and secure with one hand while you gently peel back the tape that’s holding it to the display frame. Easy does it!
Step 13
- First things first, let's get those three T5 Torx screws out of the way! They’re holding the clips and LCD brackets snugly in place, right near the home button switch, so grab your tool and let’s do this.
- Now, gently peel back the display clip and its trusty tape from the black plastic display frame. Take your time—it's like unwrapping a present!
- If you’re swapping in a shiny new LCD, don’t forget to transfer those little pieces of EMI tape and their clips over to the new screen. You want everything to fit just right!
Step 14
- Take out the remaining T5 Torx screws holding the LCD onto the black plastic display frame. Keep those screws somewhere safe—no scavenger hunts later!
Step 15
Handle the LCD with care, my friend! It's glass, so let's avoid giving it any unnecessary bends.
- Slip the edge of your trusty plastic opening tool under one of the little tabs on the steel LCD frame.
- Give the tool a gentle twist to coax the LCD up and away from the sticky adhesive holding it to the front glass panel.
Step 16
- Go ahead and do the same prying routine from the last step to gently lift the display along the three sides opposite the digitizer cable. Keep it cool and steady!
Step 17
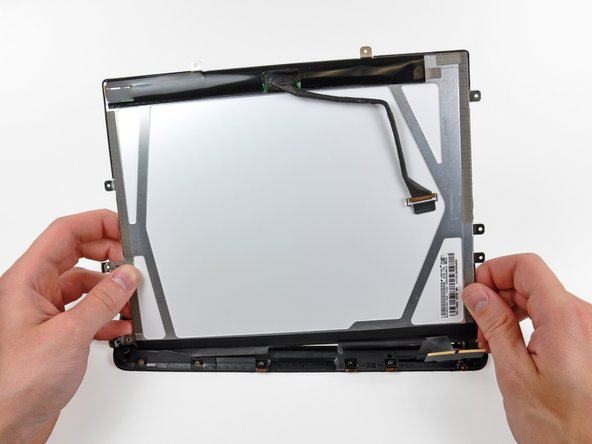
- Gently lift the LCD from one end and carefully free it from the display frame.
- Peel back the adhesive holding the long edge of the LCD to the frame, and slowly remove the LCD from its place.
Step 18
- If the EMI tape strip is still hanging out on the front panel near the ambient light sensor socket, gently peel it off.
- Need a fresh start? Move this tape to your brand-new LCD.
- If the tape is already vibing with your old LCD and you're keeping it, skip this step. But if you're swapping in a new LCD, make sure to invite the tape to join the party on your new screen!
Step 19
- If those clips and EMI tape down at the bottom of your LCD are still looking sharp, go ahead and move them over to your new screen—give them a fresh start!
Step 20
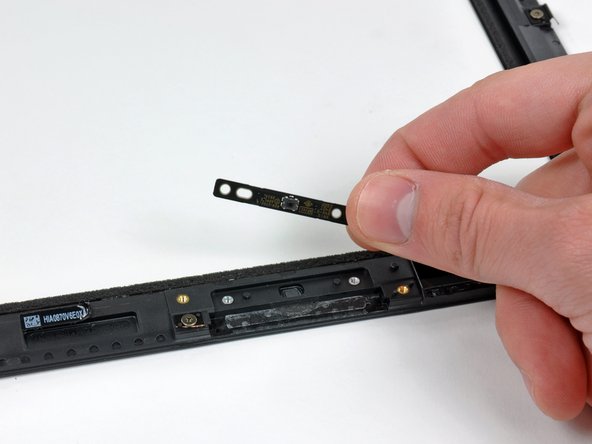
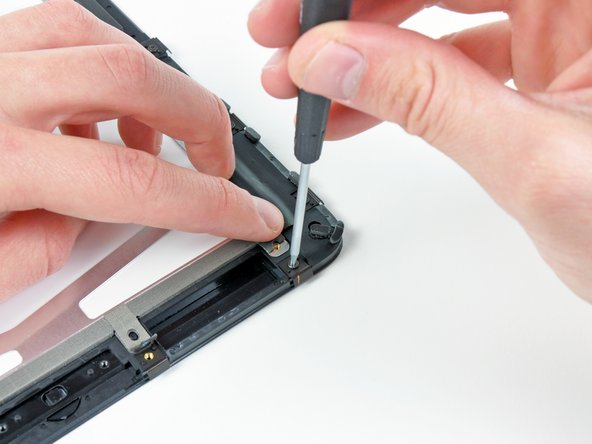
- Let's kick things off by unscrewing those two T5 Torx screws that are keeping the home button switch snugly attached to the plastic display frame.
- Once those screws are out of the way, gently lift the home button switch board from the front panel assembly. You're doing great!
Step 21
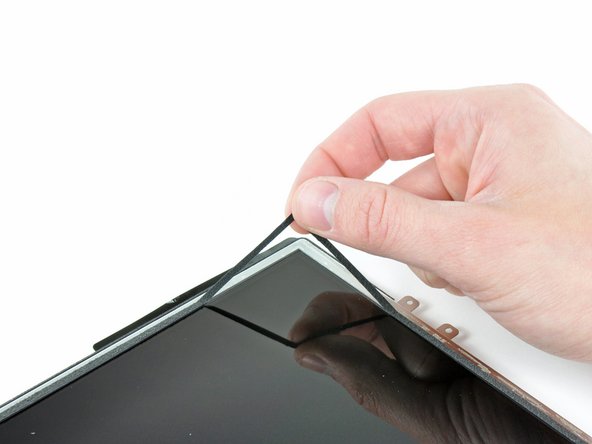
- If you're reusing your LCD, grab a plastic opening tool and gently lift one corner of the foam tape stuck to the LCD.
- Peel off the tape that’s hugging the edges of the LCD glass.
Step 22
Watch out for sneaky fingerprints or dust on the inside of the front panel—they’ll stand out like a sore thumb once your device is powered up!
- Gently peel away the yellow tape that's holding the digitizer cable snug against the inner side of the front panel assembly. Just take your time and be cautious not to tear that cable while you’re at it!
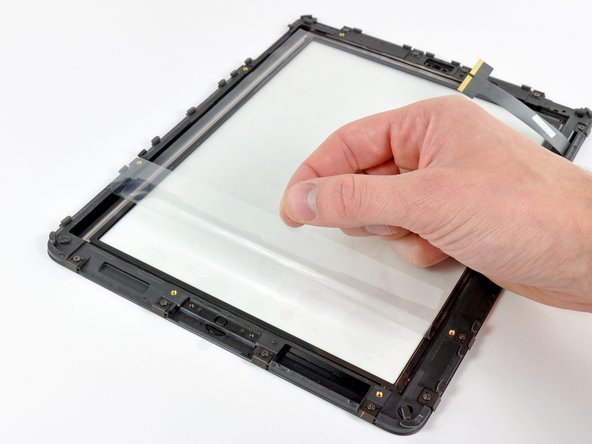
- Carefully remove the protective film from the inner face of the front panel assembly. It’s like unveiling a shiny new toy!
Step 23
Give the LCD face a good wipe-down to make sure it's spotless before moving on!
- Place the tape along the long edge of the LCD, sticking it securely to the frame of the front panel assembly. Keep it neat, and you’re on the right track!
- Gently lower the LCD into its snug spot in the front panel frame, making sure it's aligned perfectly. A little patience here goes a long way!
Step 24
If you're putting in a shiny new panel, just a heads up—there might be a protective film stuck on the outside or inside of the frame. Make sure to peel it off before you get going!
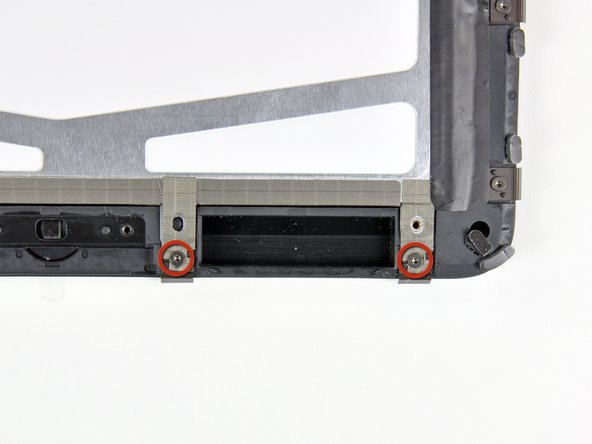
- Carefully peel back the strips of EMI tape along the bottom edge of the LCD while you remove the two T5 Torx screws holding the retaining clips in place.
- Press the tape down onto the new clips and pop those two T5 Torx screws back in to secure everything.
Step 25
In these next steps, you'll be heating things up to loosen the adhesive holding the black plastic frame to the front glass. Just a heads-up: keep that hot air away from the skinny rubber strip around the edge—it doesn't like heat and might end up looking wobbly or feeling weird if it melts.
- Grab your heat gun and carefully warm up the plastic display frame around the home button from the inside of the front glass panel. Take it easy—just enough to loosen things up without causing any trouble!
Tools Used
Step 26
If the panel isn’t budging from the frame, just warm up the spot again and give it another go. The adhesive needs to hit the right temperature to loosen up, and sometimes that means reheating a few times. Once it’s nice and warm, sliding a plastic opening tool under the frame to separate it from the front glass panel should be a smooth move.
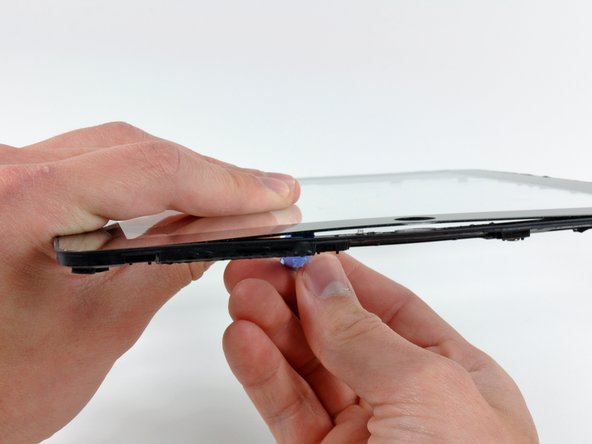
- Once the adhesive is nice and toasty, grab a plastic opening tool and gently wiggle it along the edge of the plastic display frame to pop it away from the front glass panel. Take your time, it's not a race!
- Slide your tool beneath the plastic display frame near the home button area to help separate it from the front glass. A little patience goes a long way here!
Step 27
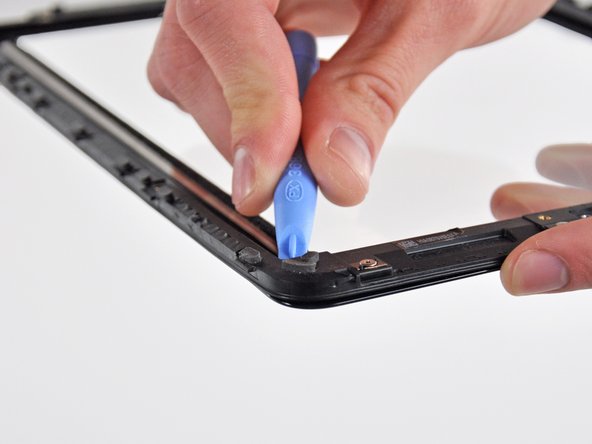
- Warm up that lower right corner of the plastic display frame (as you face the front of your iPad) to loosen the sticky adhesive holding it tight against the front glass panel. You're doing great!
- Grab your trusty plastic opening tool and gently pry the plastic frame away from the glass panel. Just a heads up—be extra careful not to mess up that rubber strip around the glass edge. You've got this!
Step 28
At the top right corner of the panel (as you look at it from the front of your iPad), the frame is held in place by a layer of rubber between the two parts. Here's how to gently work through this section and separate them.
- Keep that heat flowing and gently pry the plastic display bracket along the bottom right edge until it pops free from the front glass panel. You're doing great!
Step 29
Be careful with that razor blade! It might accidentally scrape off the black paint along the inside of the glass panel. If you’re planning to reuse your front glass, try to keep it scratch-free while cutting. And just a heads-up—avoid slicing through the outer rubber strip to keep things looking sharp.
- Gently warm up the rubber connection area. Use a plastic opening tool to carefully pry the plastic display frame away from the front glass panel just enough to reach the rubber section.
- While keeping the display frame lifted, use a razor blade to cautiously slice through the rubber 'dots' securing the frame to the front panel.
Step 30
Since the top edge of the display frame is built pretty tough, grabbing the flat end of a regular spudger to gently pry it away from the front glass panel usually does the trick.
- Keep heating and gently prying along the top edge of the frame until it finally comes off from the glass panel. You’ve got this!
Tools Used
Step 31
Take it easy on this side — there’s a delicate ribbon hiding just under the frame, so gentle hands are the way to go!
- Start by gently heating up the lower left corner of the panel (from the front view) to help loosen the ribbon cable side of the display bracket.
- Take it slow and carefully separate the lower edge of the ribbon cable side, moving towards the rubber connection that links the frame to the glass panel.
- Keep going with the same technique from earlier to cut through the rubber 'dots' that are holding the two parts together.
Step 32
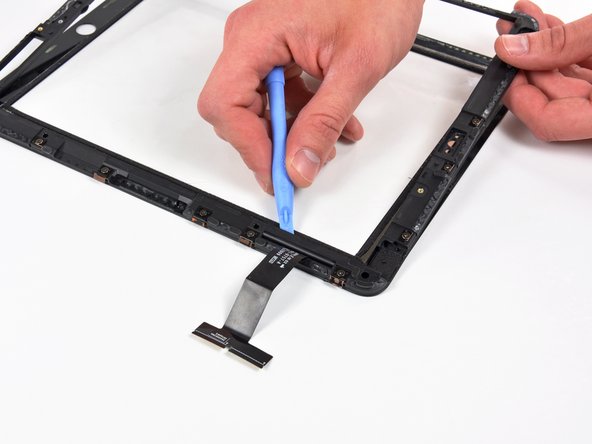
Here, you'll warm up and peel off the plastic frame close to the digitizer cable. Heads up: don’t heat the ribbon cable itself — it’s super thin and doesn’t like heat one bit!
- Grab that heat gun and gently warm up the adhesive on both sides of the digitizer cable. Just be sure to keep your cool and avoid melting the cable itself!
- Now, it's time to pry off the last bit of the plastic display frame from the front glass. You've got this!
Tools Used
Step 33
- When putting your device back together, just reverse the steps you followed earlier. Pro tip: start by snapping in the right side first – it has those sturdy fixed lugs instead of clips. Skip this, and you might find yourself hunting down new retaining clips! If things get tricky, don’t hesitate to schedule a repair with us.


